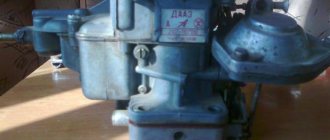
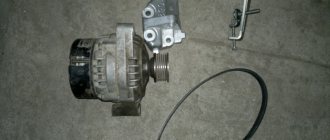
Structurally, all carburetors of the Solex family are equipped with a heating unit. It is attached to the rear of the carburetor body. The heating unit is part of a small circle of the engine cooling system, which warms up immediately after the engine starts.
Purpose of the Solex carburetor heating unit
The heating unit is necessary to ensure the operation of the carburetor at low air temperatures. Due to the rapid increase in carburetor temperature after starting the engine, the formation of ice plugs in the HDS diffusers, idle channels and transition systems, and icing of the throttle valves during warm-up mode are prevented.
Operating principle of the Solex carburetor heating unit
The heating unit is connected by two pipes to the engine cooling system (pump supply pipe and intake manifold). After starting the engine, coolant begins to circulate through it, passing in a small circle and accordingly quickly heating up. This increases the temperature of the carburetor, preventing the formation of ice plugs in it, and the evaporation of the fuel improves, which improves mixture formation.
Malfunctions of the carburetor heating unit
If the heating unit is clogged or disconnected from the carburetor, proper heating does not occur after starting the engine (so-called carburetor icing). In winter conditions, this is fraught with a narrowing of the clearance of the carburetor diffusers and the subsequent over-enrichment of the fuel mixture (the carburetor is overfilled, the spark plugs are flooded). Also, condensate may freeze and ice plugs may form in the idle and transition systems channels. This leads to interruptions and stopping of the car engine when idling. Possible black smoke from the muffler. The malfunction can appear either immediately after starting the engine or after a short period of time after it starts working. In some cases, restarting the engine helps.
— A faulty or incorrectly set engine air filter housing thermostat (does not supply hot air to the carburetor) and the use of low-quality gasoline (water admixture) can aggravate the problem of engine warming up at low temperatures, even with a working carburetor heating unit.
More articles on the design of the Solex carburetor
Heaters without pump
These are heating units Start-M, Severs, Alliance and others. They do not have a pump and work on the basis of convection. That is, the cold liquid goes down into the heating, while the already heated liquid rises up, as a rule, into the head.
Well, let's begin. Errors when installing a heater without a pump
1. The engine heater housing is level or higher than the block drain plug. The whole point is that liquid flows into it almost by gravity, or is displaced by heated liquid from above. If it is above the plug level, there will be no circulation, the heating will turn off after the pipe warms up, because the temperature in it will quickly reach 80 degrees.
2.The thermostat cuts off the upper radiator hose. In this case, the same thing will happen as in the first option. The maximum that is possible is to warm up the upper radiator tank, but the cylinder block will remain cold. This is a common problem with Grant and Kalina cars.
In this case, it is necessary to draw liquid from the drain plug, and push the heated liquid into the stove supply pipe. The heater will not flow through the radiator, because the liquid frees up space in the block.
This option is only suitable for installing heating with a check valve. If it is not there, then you need to install a tap at the outlet of the heating and close it when starting the engine.
Basic faults
Any malfunctions of the 2109 carburetor affect the performance of the engine: the engine may stall when the speed is reduced, run intermittently, not develop power, and consume gasoline beyond the norm. There are many reasons for problems with this unit, but the most typical of them are:
- clogging of the HDS and idle jets, both air and fuel, and in the solenoid valve (EMV);
- rupture (defect) of the accelerator pump diaphragm;
- failure of the EMG itself;
- loose fit of the locking mechanism needle to the seat;
- air leakage through the junction of the body and the cover;
- leakage of the float in the float chamber;
- clogging of the accelerator pump nozzle with dirt;
- misadjustment of screws XX.
Of course, various types of malfunctions can occur not only due to the carburetor, the engine itself is often faulty, and the ignition may also be set incorrectly, especially if the installation was carried out by an inexperienced technician without a strobe light. Problems with idle speed can occur due to a lack of power to the solenoid valve, so before disassembling the HRV, you should first check for voltage on this wiring.
Flow-through heater with pump - installation
In principle, with a pump, everything is simpler, because you don’t need to go into the laws of physics - the pump does its job, and very well, most often the pump costs about 700 liters per hour.
Errors when installing a flow-through heater
1. Parallel with the stove. Not a single flow-through heater has a check valve, so it is absolutely impossible to install it in parallel with the stove, because the liquid will circulate not through the radiator, but through the heater. If there are no other options, you need to install at least one tap either at the inlet or outlet of the heating.
2.The outlet pipe must be strictly at the top. That is, it must be unfolded so that the pipes are aligned along a vertical axis. This is necessary so that the pump can expel air, otherwise the heating element will burn out.
3. This point is rather advisory in nature. Do not turn the heater pump against the fluid circulation in the engine. This means that the heater installed in the return of the stove should push water into the pump, and not into the radiator. This is necessary so as not to accidentally start the engine with the heating running.
Can you imagine what will happen to the stove radiator or just the pipe if two pumps start pumping into it at the same time?
That's right, both of them will most likely be torn apart.
These are the simplest things that every car enthusiast should know. Subscribe to the channel to know. Well, give me a thumbs up, I will be pleased.
How to install engine heating on a VAZ 2109
In this manual we will talk specifically about heating the engine from a 220 volt network. It is worth immediately warning that installing this device yourself without the appropriate skills is not recommended, since an incorrectly installed heater can cause a fire. If you are not versed in electrical engineering and have never dealt with the cooling system of these cars, it is recommended that you entrust this task to car service employees, who will perform it much faster and with better quality.
- It is necessary to carefully study the cooling system and purchase the appropriate components. Since the “nine” pump is located under the timing case, it is impossible to install such a heater, so we will consider the option with a remote element. It is worth immediately taking into account that the preheater must be included in a small circle that passes through the car engine. This means that you shouldn’t install it anywhere.
- Then drain the antifreeze and disconnect the pipe that leads from the thermostat to the cylinder block at the front of the engine.
- Further, at the request of the car enthusiast, you can buy a special set of pipes or connect old elements to the heating. First, secure the heating element to the bottom of the cylinder block (for this, the manufacturer has provided a whole system of technological holes on the bracket).
- After this, the pipes of the appropriate sizes are adjusted. Thus, you must turn on the heater through the cut of this pipe.
- Once all the dimensions have been selected, you can lubricate the pipes with sealant and secure them with clamps. Next, unwind the wire with the “plug” and pull it out to the front of the engine compartment. Here the choice will be yours: leave it under the hood or take it outside so as not to open the hood again. In the first case, you will achieve its protection from hooligans and other external factors, and in the second, you will achieve convenience.
Attention! The wire must be routed in such a way that it does not touch various hot and rotating parts of the engine to avoid accidental damage. If necessary, the wire can be lengthened or shortened.
Now fill the antifreeze back in and enjoy a pleasant start and shortest engine warm-up in winter.
Quality screw removal method
With Solex carburetors, the XX channel in the body itself often becomes clogged, and in order to clear it thoroughly, it is necessary to remove the quality screw. But this screw, as mentioned above, has a very tight fit and is not easy to get out. There are several methods for dismantling a part; we will consider only one option.
We take a piece of an old antenna from any radio receiver, select the outer diameter so that the tube fits into the channel of the carburetor body, usually the outer thickness of the “puller” is about 4 mm. We cut off a small piece, make a cut at one end (about 1 cm deep), use another quality screw (a spare one, or you can buy it specially in a store), and check how tightly the tube fits onto the head of the screw.
Now you can unscrew the screw and use a homemade puller to remove it from the KU body.
Source
Antifreeze heater - what is it and how does it work?
Starting the engine in the cold season is the most difficult test for a power plant. The fact is that cold parts have a high coefficient of friction, which also occurs when the viscosity of the oil increases. Starting the engine this way instantly increases the engine life by about 10 kilometers. To make starting easier and safer for the engine, automobile designers came up with a simple device - an antifreeze heater. In this article you will learn what it is, what it is used for, its types, as well as installation instructions.
Purpose of the preheater and its operating principle
Such a heater is a device that is designed to preheat the engine without starting it in order to facilitate its start. This device is a heating element powered by an electrical network, which quickly heats up the coolant and many other engine systems.
These heaters are usually considered non-autonomous. Such a device was first invented and used in 1949 by Andrew Freeman. To do this, this unit was screwed to the cylinder block instead of the coolant drain bolt. These devices are most widely used in countries where low temperatures are almost the permanent climate of the region: the northern latitudes of Russia, Canada, as well as many states of America located in the northern part, and many others. Typically, in such regions there are special parking lots with an outlet that serves to connect pre-heaters.
Any modern preheater consists of the following elements:
- A heating element rated at 500-4000 W, which is screwed into any of the existing technological holes in the cylinder block, through which free access to the coolant is provided. Another connection option is to turn on the heating element through the pipes, but in this case, you will have to pour more antifreeze than usual. . This device controls the heating process and in many cases has a special timer that disconnects the device from the network if the temperature of the antifreeze reaches 90 degrees.
- A special unit that charges batteries (if we are talking about autonomous heaters). The fact is that such devices consume quite a lot of energy, which will then be needed for the initial start of the engine. If the heater “sucks out” all the energy, then it will not be enough to start and then the meaning of such a heater simply disappears.
The operation of the antifreeze heater is based on the high resistance of the heating element. When you connect it to a network, no matter what, current begins to flow along the entire length of the thick spiral. Since it has a high resistance, current leakage occurs, which is accompanied by increased heating of the conductor. Thus, the spiral heats up and transfers its heat to the engine coolant, which, in turn, heats up all engine systems.
Types of antifreeze heaters
There are two types of antifreeze heaters:
- Pre-heater, powered by the vehicle battery. This is the very first type of heaters, which is distinguished by its autonomy from external power sources. Most often, it is used by drivers who do not have their own garage or who do not have the opportunity to use another type of heating.
The main disadvantage of such a heater is that it can completely discharge the battery if used improperly.
- Electric heating of the engine, which is powered by an industrial network of 220 Volts. This heater has increased power and allows you to heat up the car quite quickly. It does not affect the condition of the battery, but is dependent on external sources. It is advisable to use it only for those drivers who have easy access to a regular home outlet.
All heaters that are powered from an industrial network can have different installation methods, which gives them their own classification. The most common is a pump heater, which acts as a separate water pump of increased volume and includes a heating element. Another type of such heater can be presented in the form of a remote element connected to a pipe system.
How to install engine heating on a VAZ 2109
In this manual we will talk specifically about heating the engine from a 220 volt network. It is worth immediately warning that installing this device yourself without the appropriate skills is not recommended, since an incorrectly installed heater can cause a fire. If you are not versed in electrical engineering and have never dealt with the cooling system of these cars, it is recommended that you entrust this task to car service employees, who will perform it much faster and with better quality.
- It is necessary to carefully study the cooling system and purchase the appropriate components. Since the “nine” pump is located under the timing case, it is impossible to install such a heater, so we will consider the option with a remote element. It is worth immediately taking into account that the preheater must be included in a small circle that passes through the car engine. This means that you shouldn’t install it anywhere.
- Then drain the antifreeze and disconnect the pipe that leads from the thermostat to the cylinder block at the front of the engine.
- Further, at the request of the car enthusiast, you can buy a special set of pipes or connect old elements to the heating. First, secure the heating element to the bottom of the cylinder block (for this, the manufacturer has provided a whole system of technological holes on the bracket).
- After this, the pipes of the appropriate sizes are adjusted. Thus, you must turn on the heater through the cut of this pipe.
- Once all the dimensions have been selected, you can lubricate the pipes with sealant and secure them with clamps. Next, unwind the wire with the “plug” and pull it out to the front of the engine compartment. Here the choice will be yours: leave it under the hood or take it outside so as not to open the hood again. In the first case, you will achieve its protection from hooligans and other external factors, and in the second, you will achieve convenience.
Attention! The wire must be routed in such a way that it does not touch various hot and rotating parts of the engine to avoid accidental damage. If necessary, the wire can be lengthened or shortened.
Now fill the antifreeze back in and enjoy a pleasant start and shortest engine warm-up in winter.
How the antifreeze heater works - installation on a VAZ 2109.
What is and how does an antifreeze heater work? How to install an engine pre-heater on a VAZ 2109 yourself? antifreeze heater 12 volt antifreeze heater 220 volt do-it-yourself antifreeze heater 220v installation of an antifreeze heater pre-heater for a VAZ 2114 engine installation of an electric heater on a VAZ 2109
13) How much water should be added to antifreeze concentrate to prevent freezing?
There are many different concentrated coolants on our market that need to be diluted with water yourself. Remember that, as a rule, concentrated antifreeze is not intended to be poured into the cooling system in its pure form, since the concentrate contains almost pure ethylene glycol and propylene glycol.
Therefore, if you bought antifreeze concentrate, before pouring it into the cooling system, you must dilute it with water. To avoid possible sedimentation, it is better to use distilled water to dilute antifreeze concentrate.
The mixing proportions of antifreeze concentrate and water depend on the brand of coolant. As a rule, in order for antifreeze to withstand -42 degrees, it is necessary to dilute its concentrate in a ratio of 1 to 1 (1:1).
In order to independently prepare antifreeze that can withstand temperatures from -30 to -35 degrees, you need to mix the coolant concentrate with water in a ratio of 2 to 3 (2:3).
If you mix antifreeze concentrate in a ratio of 1 to 2 (1:2), then you will get a coolant that can withstand only -20 degrees.
Installation of equipment on a car
Installing a heater on a VAZ-2106 or any other model does not require any modifications to the power unit. Such equipment is external, and all that is needed is to correctly insert it into the power system.
The heater kit consists of:
- Block with heater;
- Fastening elements;
- Adapters, tees and clamps for insertion into the cooling system;
- Cable with plug.
Additionally, for installation you will also need sections of pipelines of the required length to make an insert.
There are several installation schemes for such a device, the simplest of which is shown below.
To ensure uniform heating, antifreeze must be supplied to the device from the lowest point of the engine, which is the drain plug of the cylinder block. But the exit of the already heated liquid is the opposite - to the top point.
To connect the equipment to the VAZ-2106 engine, you must:
- Install the fitting from the kit into the engine block and connect it with a pipeline to the input terminal on the heater block;
- Insert the tee from the kit into the upper pipeline of the cooling system coming from the radiator. Connect a pipeline leading to the output from the heater block to this tee;
- Attach the block with the heating element to the engine or subframe;
- Route the cable to ensure easy access to the plug.
When installing a heater, it is not even necessary to drain the antifreeze from the system. If you pre-assemble the heater (connect the pipelines to the block, tee and fitting) and quickly carry out installation work, then during operation 1-1.5 liters of coolant will leak out, which will then have to be replenished.
After installation, be sure to check all connections for leaks and, if necessary, fix them by tightening the clamps.
Installing the heater on a VAZ-2107 injector does not differ from that described above.
Carburetor calibration data
| Options | 2108-1107010 | 21081-1107010 | 21083-1107010 | |||
| First camera | Second camera | First camera | Second camera | First camera | Second camera | |
| Mixing chamber diameter, mm | 32 | 32 | 32 | 32 | 32 | 32 |
| Diffuser diameter, mm | 21 | 23 | 21 | 23 | 21 | 23 |
| Main dosing system: | ||||||
| fuel jet marking | 97,5 | 97,5 | 95 | 97,5 | 95 | 97,5 |
| air jet marking | 165 | 125 | 165 | 135 | 155 | 125 |
| Emulsion tube type | 23 | ZC | 23 | ZC | 23 | ZC |
| Idle system and transition system | ||||||
| first chamber: fuel jet marking | 42* | – | 40* | – | 40* | – |
| air jet marking | 170 | – | 170 | – | 170 | – |
| Second chamber transition system: | ||||||
| fuel jet marking | – | 50 | – | 50 | – | 50 |
| air jet marking | – | 120 | – | 120 | – | 120 |
| Econostat: | ||||||
| conditional fuel jet flow rate | – | 60 | – | 70 | – | 70 |
| Power mode economizer: | ||||||
| fuel jet marking | 40 | – | 40 | – | 40 | – |
| spring compression force at a length of 9.5 mm, N | 1,5±10 % | – | 1,5±10 % | – | 1,5±10 % | – |
| Accelerator pump: | ||||||
| sprayer marking | 35 | 40 | 35 | 40 | 35 | 40 |
| fuel supply for 10 cycles (total for both chambers), cm3 | 11,5 | 11,5 | 11,5 | |||
| cam marking | 7 | – | 4 | – | 7 | – |
| Starting clearances: | ||||||
| air damper (gap B), mm | 3±0,2 | – | 2,7±0,2 | – | 2,5±0,2 | – |
| throttle valve (gap C), mm | 0,85 | – | 1,0 | – | 1,1 | – |
| Hole diameter for vacuum corrector, mm | 1,2 | – | 1,2 | – | 1,2 | – |
| Needle valve hole diameter, mm | 1,8 | 1,8 | 1,8 | |||
| Diameter of the fuel bypass hole into the tank, mm | 0,70 | 0,70 | 0,70 | |||
| Engine crankcase ventilation hole diameter, mm | 1,5 | – | 1,5 | – | 1,5 | – |
* Selected at the factory when setting up the carburetor.
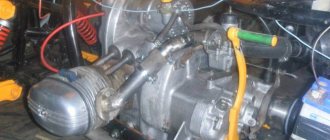
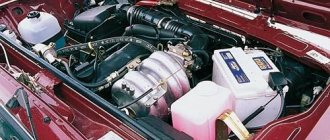
Modification of the cooling/heating system of the VAZ 2106
In the summer, I don’t like driving with an electric fan because of its constant switching on and high temperatures. And for about four years I played with transferring an ordinary impeller to a pump pulley for the summer. In summer it cools much better. I got tired of this and decided to install both at once. There is no point in installing twin Niv fans on a stock engine, and the hood hinges need to be moved. The space in front of the radiator allows you to move the electric fan to the other side. I had all the signal horns located in front, so I had to temporarily remove them. After trying it on, it became clear that it was a little too much and did not allow the electric fan to stand up as needed. First, the mount on the right side of the fan was cut off, strips of the housing were bent in different directions, and new holes were drilled for the fasteners.
Secondly, part of the apron was cut out, which prevented the fan from sitting deeper.
I painted the cut area with paint from a can on top and smeared it with graphite inside. After that, the fan returned to its place, as it was.
I replaced the four-blade impeller with an eight-blade one from 08. I slightly increased the wiring to the motor with a wire of the appropriate cross-section. There was still enough room for three signal pipes.
I'll put the long one behind the bumper from the inside so as not to block the engine space. Installed a new radiator Luzar turbo
. I immediately replaced the drain plug on it with a faucet, a lid and a temperature sensor. Then he installed a new pump with increased flow, also by Luzar.
I installed the pulley, impeller and air intake.
Impeller on a pulley, from a cornfield, six-bladed. I’m not installing pipes with a thermostat yet; I’ll change the generator. Well, half the job is done. The heater radiator and heater motor still need to be replaced.
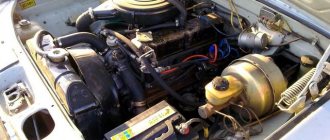
After remaking the stove and installing it, I checked its operation on the car. I am more than 100% satisfied with the result. The 4-speed switch is very convenient to use, and the airflow is something! The air flow in the 4th position is so strong that it blows away everything in its path. The rear window will thaw in a couple of minutes if you point both deflectors at the rear. This modification is not complicated and should definitely be undertaken; it cannot be compared to stock. The air flow is now large and for a higher temperature of the stove I decided to install a pump from a gazelle. According to numerous reviews, it adds a lot of temperature. Startvolt chose the pump.
It has inlet and outlet tubes reinforced inside, a ceramic seal, and an 8-bladed impeller. It looks well made. Time will tell how it will show itself. The entrance to it was taken directly from the block.
Before the pump, I installed an electric valve in the gap, also from a gazelle.
The output from the pump goes to the inlet of the stove.
Those who installed the pump after the stove said that there was an effect, but less than before it. The pump control has three modes: always on, off, and on simultaneously with the stove control. This required five 4-pin relays. One directly to the pump, the rest to turn it on from the stove regulator. The relay was installed on the motor bulkhead.
At the same time I put all the relays in order. I moved everything installed in one row. I replaced the old rusty (but working) light relays with new ones and also moved them to one place.
The pipes of the entire system were also replaced with new ones; it’s better to do it once than to go through it later.
I ordered the radiator pipes for an aluminum radiator, but they sent me for a copper one. The top one is shorter, I had to look for a suitable aluminum tube for extension.
Nowadays it turned out to be not easy, everything was sold for scrap.)) Well, it looks like the installation is finished. I decided to fill it with Sintek G11 silicate antifreeze. On the manufacturer's website they recommend using G11 on Vases produced before 2001. Since 2001, both G12+carboxylate and G12++ lobrid of the new generation are available. Since they recommended it, I filled it with Sintek G11 Ultra in red.
All that remains is to start the car and check how it all works now.
Do-it-yourself 220V engine heating installation
Engine preheaters can be autonomous (devices for heating the engine that can work independently) and dependent (devices that cannot heat the engine without outside help)
The principle of operation of the heating element for heating the engine
After connecting the boiler to 220V, the liquid inside the housing (3) is heated, and due to the increase in the temperature of the liquid inside the housing, the pressure increases. The valve (4) closes the inlet pipe and when the temperature rises, the liquid rushes through the outlet pipe. Due to the decrease in pressure inside the housing, the valve (4) opens and liquid begins to flow into it through the inlet pipe. As a result, a directed thermosiphon circulation of liquid is formed through the electric heater and the engine cooling system.
Using a thermostat (6), the liquid temperature is automatically maintained in the SOD and prevents overheating of the electric heater.
You can find a large number of 220V boilers on the market, but which boiler to choose for heating the engine? For heaters from 220V, special heating elements must be used, which have a special coating and do not have boiling points on their surface, and therefore do not form deposits. Cheap engine heaters use ordinary heating elements from household electric kettles, which are not designed to work in aggressive environments, and especially not in antifreeze (antifreeze). They are also not designed to operate continuously. As a result of using cheap heating elements, high temperatures “kill” antifreeze, or rather its additives (anti-corrosion, anti-foaming, etc.). As a result, scale and deposits form, which gradually clog the entire system. Below in the photo are heating elements that have corrosion and deposits - these are ordinary household heating elements.
What power heating element should I buy? 0.5 kW is the power of the heating element, which can be used when parked to maintain a constant engine temperature. This power is not enough to warm up the engine in severe frost. 1kW is the power of the heating element, which is recommended to be selected for 8kl VAZ 2110 engines. 1.5kW is the power of the heating element, which is recommended to be selected for 16kl VAZ 2110 engines.
How long does it take to warm up the engine to start a car in cold weather? The time is selected experimentally and depends on many factors (type of engine, power of the electric heater, air temperature, etc.). Approximately: in order to easily start the engine of a VAZ 2110 16kl in cold weather -30C using a 1.5 kW electric heater, you need to count on a warm-up time of 30-60 minutes. Of course, you can turn on the engine heater for a longer time, then the engine will already be hot, but there will be no boiling.
Installing a boiler for heating the engine from a 220V outlet
The kit includes instructions that make it easy to install the pre-heater yourself. The installation procedure for the heating element is not complicated and all you need is a pit and 1-1.5 hours of free time (everything you need is included in the kit, you just need to buy antifreeze). Depending on the manufacturer, the instructions may be slightly different, or several options for installing the heating element may be offered at once.
An example of installing a heating element for heating an engine:
- We fix the electric heater to the cylinder block using the bracket included in the kit.
- We unscrew the temperature sensor and screw in the tee fitting in its place.
- We screw the temperature sensor into the tee fitting, and at the end there is an outlet for the hose that goes to the outlet of the heated antifreeze from the heater.
- We unscrew the drain plug on the cylinder block, and in its place we screw in the outlet for the hose supplying cold antifreeze to the heater.
- We put clamps on both hoses.
The output of their heater can be made into a tee, which is inserted into the cut upper radiator pipe, or through a sensor tee (in this option, the engine temperature is shown incorrectly).
If the outlet from the heater is installed in the upper radiator pipe, then the heated Coolant flows through the head into the block from the block to the inlet of the heater, the circle is closed. And if you connect exactly the opposite (the outlet from the heater to the block), then the coolant will be hot, that is, its density will be less and it will be easier for it to pass into the small section of the adapter in the block. In addition, hot coolant at the inlet to the block warms up the engine faster, and the oil in the sump begins to warm up almost immediately.
After comparing the standard diagram from the instructions and the diagram “on the contrary” it turned out:
- In the standard circuit, the head gets very hot, and the block is slightly warm. After starting the engine, its temperature drops.
- In the “vice versa” scheme, the block is noticeably hotter than the head, and if the engine has warmed up to 60C, then after starting the engine the temperature does not drop, but begins to rise.
There are some nuances to using engine preheating: It is best to start the engine with the clutch depressed.
- You should not throw a 220V cable through poles above the road in the yard - you can get a fine from the fire department.
- You should not turn on the engine heating from the outlet all night (if the power of the heating element is 1 kW or higher)
- To turn on the engine heating on a schedule, it makes sense to use a socket with a timer and an LED.
Product added to bookmarks!
- Description
- Reviews
APPLICABILITY: VAZ 2108, 2109, 21099, VAZ 2115 with carburetor engine.
Reinforced silicone heater and cooling system hoses, blue.
Three-layer hoses, wall thickness 4.5 mm.
Advantages:
— the silicone used in production makes the product resistant to wear and prevents the appearance of microcracks;
— thanks to the reinforcement of the Dacron cord (3-layer reinforcement), they can withstand operating pressures of up to 0.2 MPa;
— tensile strength and other impacts are 5 times higher compared to rubber pipes;
— silicone pipes retain elasticity at low temperatures (up to -40°C) and can be used at high temperatures (up to +180°C);
— silicone pipes fit perfectly into the seats of heating and cooling systems, without requiring modification.
Includes: 1 front heater inlet hose, 1 front heater outlet hose, 1 rear heater inlet hose, 1 rear heater outlet hose, 1 hose from the expansion tank to the thermostat, 2 thermostat connecting hoses, 1 water pump pipe hose.
Types, features of work
There are several options for such equipment, but in essence such a device is a conventional electric heating element that provides heating of one of the fluids of the power unit.
There are several types of heaters. Some of them heat antifreeze, others heat oil. In the case of coolant, by acting on antifreeze, it is possible to heat the cylinder block, as well as the elements of the power system, which is important for ensuring normal mixture formation.
But such a device has disadvantages:
- it takes more time to warm up the engine, since the cooling system is just a shell of the cylinder block;
- the oil heats up slightly, since it is located below the cooling jacket in the sump, so heat will flow to it only after the cylinder block has been well warmed up;
But when using such a device, there is practically no need to warm up the engine after starting, since it is already heated, and warm air is immediately supplied from the stove to the cabin.
As for heaters that act on oil, such a device only heats the lubricant; the cylinder block and power system remain cold.
Since the volume of oil is small and it is all in one place, it takes little time to warm up. But due to the fact that only the lubricant heats up, after starting it will take time to warm up the motor itself.
In general, the effectiveness of using one or another device is approximately the same. When heating the antifreeze, we get a heated cylinder block and power system, which ensures good mixture formation (the result is excellent flammability of the mixture), but cold oil (the load on the battery and starter will remain high). If you heat the oil, then everything is exactly the opposite - the starter will turn easily, but the unit itself and the power system will remain cold.
Heaters also differ according to the power source used:
- From the network 220 V;
- From the on-board network 12 V (autonomous);
The first option is characterized by high power, and therefore the speed of heating of the working fluid. But to use it, the car must be close to the outlet.
As for autonomous devices, the heating element is powered by a battery, which means you can warm up the liquid anywhere, even in the field. But they are not very powerful, and during operation they drain the battery, and if it is already on the verge of exhausting its life or is simply discharged, then there will simply be no energy left for the starter after warming up.
Antifreeze heaters operating from a 220 V network have become widespread among car owners. In general, this is one of the most optimal options - the battery does not run out, the power of the heating element is high, and after using it, the driver also receives hot air from the stove.
Now manufacturers of automotive accessories and equipment offer different models of preheaters. All of them are almost identical in operating principle, but may differ in design - some consist only of a heating element, while others may additionally have a circulation pump.
The first option is simpler in design, and therefore more reliable. The circulation of liquid in it occurs due to temperature differences. Since the speed of fluid movement in such a device is low, less energy is required to heat the antifreeze passing through the heater.
In a pre-heater with a pump, the heating of the power plant is more uniform due to forced circulation, but in order to heat the liquid well, the power of the heating element must be high. In addition, due to the pump, the likelihood of equipment failure is higher.
Adjusting the fuel level in the float chamber
Maintaining a normal level of gasoline in the float chamber is an important condition; if it is not met, malfunctions in the operation of the car occur:
- if the level is below normal, the engine does not have enough speed, power decreases, and gasoline consumption increases;
- if it is higher than required, fuel consumption also increases, and even more.
Setting the fuel level for the VAZ-2108-09-099 is quite simple, and in this case it is not at all necessary to remove the carburetor. The procedure for adjusting the position of the floats is as follows:
- remove the KVF assembly with the filter element;
- disconnect the choke cable, fuel hoses, EMG power cable;
- unscrew the five screws securing the carburetor cover;
- turn the lid over, take a drill with a thickness of 1 to 2 mm and take a measurement between the gasket and the lower surface of the floats - this distance should be exactly within these limits, and the same.
You can also measure the fuel level, but before carrying out such a procedure, it is necessary for the engine to idle for several minutes. The distance from the upper edge of the housing to the surface of the gasoline is measured; according to factory conditions, it should be 25-26 mm. Another way is to measure the distance from the gasket to the top edge of the floats with a caliper; it is 34 mm (with the cover upside down).
Another measurement method is using a specially made template.
Important conditions when setting the level:
- the floats must be located parallel to each other, along the lid;
- they are installed strictly vertically, without distortions;
- when lifting the float pair all the way up, the distance from their lower corners to the gasket should be within 15 mm;
- the adjustment of the extreme positions during adjustment is carried out by bending the tabs on both sides;
If the floats inside the chamber are installed skewed or not strictly vertical, they may rub against the walls of the housing, causing gasoline to overflow as a result of sticking.
Purpose of the preheater and its operating principle
Such a heater is a device that is designed to preheat the engine without starting it in order to facilitate its start. This device is a heating element powered by an electrical network, which quickly heats up the coolant and many other engine systems.
These heaters are usually considered non-autonomous. Such a device was first invented and used in 1949 by Andrew Freeman. To do this, this unit was screwed to the cylinder block instead of the coolant drain bolt. These devices are most widely used in countries where low temperatures are almost the permanent climate of the region: the northern latitudes of Russia, Canada, as well as many states of America located in the northern part, and many others. Typically, in such regions there are special parking lots with an outlet that serves to connect pre-heaters.
Any modern preheater consists of the following elements:
- A heating element rated at 500-4000 W, which is screwed into any of the existing technological holes in the cylinder block, through which free access to the coolant is provided. Another connection option is to turn on the heating element through the pipes, but in this case, you will have to pour more antifreeze than usual.
- Electronic control unit. This device controls the heating process and in many cases has a special timer that disconnects the device from the network if the temperature of the antifreeze reaches 90 degrees.
- A special unit that charges batteries (if we are talking about autonomous heaters). The fact is that such devices consume quite a lot of energy, which will then be needed for the initial start of the engine. If the heater “sucks out” all the energy, then it will not be enough to start and then the meaning of such a heater simply disappears.
The operation of the antifreeze heater is based on the high resistance of the heating element. When you connect it to a network, no matter what, current begins to flow along the entire length of the thick spiral. Since it has a high resistance, current leakage occurs, which is accompanied by increased heating of the conductor. Thus, the spiral heats up and transfers its heat to the engine coolant, which, in turn, heats up all engine systems.
Sources
- https://avtonomnaya-gazifikaciya.ru/kalina/podogrevatel-dvigatelya-vaz.html
- https://andresanda.ru/kalina/podogrevatel-dvigatelya-220v-na-vaz.html
- https://avto-mekhanik.ru/sovety/kak-pravilno-ustanovit-podogrev-na-vaz-21099.html
- https://remont-avtovaz.ru/ustanovka-podogrevatelya-na-avtomobil-vaz/
- https://pocomp.ru/kak-postavit-obogrev-dvigatelya-na-vaz-2109/
- https://avtika.ru/kak-postavit-obogrev-dvigatelya-na-vaz-2109/
- https://litezona.ru/kak-postavit-podogrev-dvigatelja-na-vaz-2109/
[collapse]