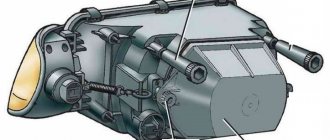
On VAZ-2112 model vehicles, left and right headlights are mounted on the front. This design combines both low and high beam. Manufacturers can be Bosch or Avtosvet, respectively, and the products have minor differences. However, the mounts are always located in the same places, which allows you to easily install headlights made in different factories. The light bulbs used are also absolutely identical. Their characteristic feature is the presence of only one filament coil.
General information
Modern models of the Volzhsky Automobile Plant are equipped with many devices, including many lighting ones. All of them are connected to a single electrical circuit of the car, but they perform different functions.
So external lights and signals serve for:
- road lighting at night;
- determining dimensions;
- demonstrating to other road users the car enthusiast’s intentions.
In addition, there are also light bulbs in:
- salon;
- trunk;
- engine compartment.
External devices include:
- side and signal lights;
- block headlights;
- rear lights;
- fog lights;
- number plate illumination.
The headlights have a special adjustment device - a corrector. With its help, the driver, without leaving the cabin, can direct the light up or down depending on the need.
The principle of operation of the fog lamp
Before grabbing the tools and adjusting the position of the PTF on the car with your own hands, every car owner must understand the features of their operation.
And for this you need to remember that fog:
- These are the smallest particles of moisture that are in the air;
- The emanating heat from the ground (road surface) does not allow them to sink, causing them to literally hang, which leads to the formation of a milky veil;
- The stream of light, reflected from them like a mirror, returns back and blinds the driver.
Narrow work space
All drivers know that turning on regular headlights in fog leads to poor visibility. This happens because droplets of moisture are located exactly at the level of the headlight of a modern car. After all, their location was determined for better illumination of the road situation - as close as possible to the driver’s organs of vision.
But PTF has another task - to make movement in fog possible. That’s why they are installed on cars as low as possible to the road surface, so that they, as they say, “shine under the fog.”
The fact is that moist air close to the ground is drier and, accordingly, does not have glare properties.
Warning! Under no circumstances should fog lights be installed lower than 25 cm from the road surface. This is prohibited by current GOST 8769-75. But what is not prohibited is making stickers for headlights that will protect them from stones. Since the price of PTFs does not allow their safety to be neglected.
Technical feature of the luminous flux
The second point that should be emphasized is that:
- The beam of the fog lights along the top edge has a clear boundary:
- This is done so that when it hits drops of moisture, it does not refract upward and blind drivers.
For reference: due to the special shape of the lens or marks applied to the glass of a classic headlight, the luminous flux of fog lights has a clear horizontal cut.
Roadside lighting
There is another feature of fog lights that is often forgotten.
After all, it is the same lighting device as the head light, i.e. must:
- Create sufficient visibility of the road situation for movement;
- And illuminate the side of the road to the right of the car in the direction of travel.
The most common lighting problems in the VAZ-2112
All faults that arise are divided into two categories:
- mechanical;
- electric.
During vehicle operation, external lighting devices are exposed to various negative influences. They are often rendered unusable:
- stones flying out from under the wheels of cars driving in front;
- sand;
- branches of bushes, etc.
Thus, the first thing to do if you were unable to turn on the headlights is to check their integrity. The simplest option in this case is to replace the entire unit that has become unusable. Removing it is not difficult. In addition, the headlight can be repaired. It is important to pay attention to restoring its tightness - ignoring this requirement leads to rapid failure of the entire unit, since moisture that gets inside contributes to:
- constant fogging of lenses;
- oxidation of contacts;
- rapid wear of fasteners.
The most common electrical failure is a light bulb burnout - this is usually indicated by the failure of only one of the headlights. There are no special options here - you will have to change it to a working one.
If the lamps are good, then you should suspect the following faults:
- the fuse link has burned out;
- the electromagnetic switching relay has deteriorated;
- one of the circuit contacts has come off (or oxidized);
- there is a break in the wires;
- there is no mass.
Adjustment
Once a year, the low beam on the VAZ 2110 should be adjusted. This procedure is necessary in order to increase the lighting efficiency and also to prevent dazzling oncoming drivers.
Below we will take a closer look at how to adjust the low beam headlights:
- You need to find a flat area with a wall that will serve as a screen.
- The car should be placed at a distance of five meters from the screen. A passenger must sit in front. You can also put a load weighing 75 kilograms in the car.
- On the screen you need to draw a horizontal line at 600 mm, as well as a second line 75 mm below the first.
- Then you need to draw three vertical lines - the two outer lines should correspond to the centers of the headlights, and the middle one should be located in the middle between them.
- The headlight hydraulic adjustment handle should be moved to the position corresponding to the minimum load.
- One of the headlights must be covered with cardboard or a sheet of plywood.
Adjustment screws
- Then the light beam is adjusted according to the diagram. Adjustment is carried out with screws with plastic heads, which are located on the back side of the headlights. They rotate the optical element around the horizontal and vertical axis.
- Next, you need to adjust the second headlight in the same way.
Here, in fact, is all the information on how to adjust the low beam headlights.
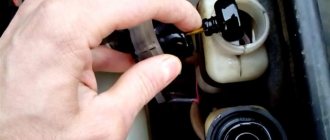
How to replace a broken lamp
For an experienced car owner, installing a new lamp will not be difficult, but a beginner will have to suffer a lot.
The order of work is as follows:
- first of all, you should remove the wire from the negative terminal of the battery - this will de-energize the on-board electrical network;
- to get to the lamp, you need to remove the rubber gasket from the hood side;
- after this, disconnect the terminals from the headlight;
- then pull out the latch by pressing the springs holding it;
- remove the burnt out light bulb and install a working one;
- reassemble.
Unexpected reasons for non-working PTFs on the VAZ-2110
First of all, we check the bulbs themselves; you can get to the left one through the hood.
On some versions of the VAZ-2110, a PTF from the Avtosvet plant (Kirzhach) was installed with a socket for the H1 lamp. Stock lamps are not the best quality and they do not like sudden changes in temperature. It is quite difficult to get to the right fog lamp through the hood; it is easier to remove the headlight itself by unscrewing the screws.
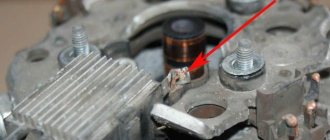
During sudden cooling, when leaving the garage in winter, for example, or after turning off the headlights, the contact leg of the lamp bulb simply fell off the conductor. At the same time, visually the halogen lamp looked absolutely intact. It was enough to apply a plus directly to the leg itself, and the lamp would light up. The fault was due to poor-quality resistance welding, and it is almost impossible to detect the cause without a detailed examination of the lamp itself and its dismantling.
Of course, it is impossible to provide for all failure options, but we will consider the most common ones.
Both headlights do not work
In the case when two headlights fail at once (and both the high and low beams do not work), the switch responsible for the external lighting is first inspected. It is easy to test the circuit using a test light or a regular tester. One wire is applied to ground, and the other to the 30th terminal. If this is not the problem, then there will be 12 volts on it (even with the ignition off). After turning the key, voltage will also flow to terminal 10. Such diagnostic results allow us to say with complete confidence that the light does not come on precisely because of the switch.
If there is no voltage at the terminals mentioned above, then most likely the wires have broken or the contact has been lost.
What should you know about car optics?
A modern car has a large number of lighting fixtures.
All of them are combined into a single lighting system that performs the following functions:
- illuminates the road and side of the road;
- signals the driver's intentions;
- informs about the dimensions of the car;
- illuminates the interior, engine compartment, luggage compartment, etc.
All devices are divided into external and internal lighting. The external ones include front headlights, turn signals, dimensions, license plate lights, fog lights on the VAZ 2112. The headlights on the VAZ 2112 are a block that contains several lighting devices: low and high beam lamps, DRLs.
Turning and side lights are signaling lights. The former warn about the driver’s intentions to perform a particular maneuver, the latter inform about the vehicle’s dimensions. They are built into the front headlight and rear lights. A special feature of signaling devices is that they shine yellow and synchronously.
Requirements for installing daytime running lights on cars have appeared recently. They have an intense light, their function is to improve the visibility of the car when driving in the daytime. In their absence, this function is performed by low beam or PTF. Fog lights on the VAZ 2112 are designed for driving during bad weather when visibility is poor. They are installed in pairs at the front. The back may be missing.
The rear lights of the VAZ 2112, like the headlights, are block headlights. These include the exterior light, turn lights and side lights.
Tail lights VAZ 2111
The rear optics include a brake light, a luggage compartment light and a license plate light.
Interior lighting consists of: interior lights, engine compartment lights, door lights, trunk lights, glove compartment lights, and dashboard lights.
Features of choice
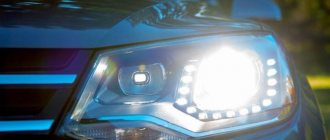
Automotive optics is constantly evolving and at this stage the following types can be named:
- halogen;
- xenon;
- LED;
- laser
Halogen lamps resemble conventional incandescent lamps in their design: a glass bulb contains electrodes with a tungsten filament. Due to the high heating temperature, halogen lamps quickly fail as the tungsten filament burns out. The main advantage of these lamps is their low cost.
Xenon lamps shine much brighter than halogen lamps. At the same time, they do not have a filament, so they are not afraid of shocks and vibrations. Xenon is durable and economical. The disadvantage is that both bulbs have to be changed, since during operation the brightness decreases, so the light of the lamps will be different. In addition, xenon optics require the installation of an ignition unit.
LED optics have bright light, economical energy consumption, long service life, and do not heat up. Another advantage is the ability to install LEDs of different colors. The disadvantage is low efficiency. For high-quality lighting you need a large number of LEDs (video author - Pro Sport).
Laser optics uses laser LEDs, which are characterized by high power and small size; their light is very bright. The disadvantage of laser lighting elements is the complexity of control.
When choosing optics, you should be guided by the following factors:
When choosing lamps, you need to take into account the parameters (base type, markings, etc.) that are indicated in the instruction manual. You cannot install xenon on a VAZ 2112 in halogen optics
When installing xenon, it is necessary to change the optics to the appropriate lens. You should pay attention to the manufacturer and buy lighting fixtures from well-known companies. The seller should ask for a certificate stating that the product can be used in European countries.
High or low beam does not turn on
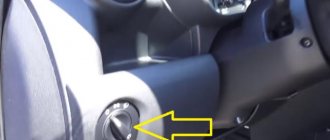
The inability to turn on two high beam headlights requires a mandatory check of relay K5. It is located in the mounting block located in the cabin (to the left of the steering wheel).
How to find out if this relay is working. Pull it out and place a jumper between the 87 and 30 connectors of the block. After this, try to turn on the light. The activation of the headlights indicates a breakdown of the above-mentioned unit. It cannot be repaired in principle, so it will have to be replaced.
The reason for the failure of both low beam lamps is diagnosed in the same way, only you will have to close contacts 87 and 30 on the K4 relay block - it is the relay that is responsible for this electrical circuit.
The main reasons for replacing bulbs in the side lights of a Honda CR–V
With the development of new technologies, old incandescent lamps are becoming a thing of the past, and LEDs are taking their place. The desire to replace side lights can be caused by many reasons:
- Improving the appearance of the car and making the light bulbs brighter. In combination with cold xenon, LED lamps look great.
- Increased service life of side lights. LEDs last much longer than classic incandescent lamps.
- Reduced energy consumption and, as a result, savings on fuel.
- Desire to keep up with technological progress.
Whatever the reason for replacing the side lights on your CR-V, we recommend that you use our step-by-step instructions.
Only one headlight is off
So, you saw that one of the high beam (or low beam) headlights did not turn on, and you found out that the bulbs are working, and the voltage is supplied by the battery or generator. In this situation, checking the circuit begins with the fuse. So, if the problem occurs in:
- right headlight (low beam), then inspect F12;
- left – F2.
Both of these fuses have the same rating - 7.5 amperes. At the same time, for the right high beam, voltage is supplied through F3, and the left one feeds F13.
All the fuses mentioned above are located in the same block where relays K5 and K4 are located. If you don’t have any new ones in stock, install a temporary jumper. For this, a copper wire with a thickness of at least 0.3 millimeters is suitable - this cross-section will withstand a current of 10 amperes. As an alternative, aluminum foil rolled into a flagellum will also work. In any case, remember that this is a temporary measure, and replace the fuse with a new one as soon as possible.
Instructions for connecting fog lights on a VAZ 2110
In order to correctly install the PTF on the VAZ 2110, we have compiled a diagram that will help you understand the intricacies of the installation.
Tools you will need:
- fog lights with H1 socket;
- PTF installation kit;
Check the kit for a light operation indicator. Useful during installation.
- rim (frame) of lights (2 pieces, right and left);
- emitters (2 pcs);
- M6x45 bolts - 4 pcs;
- M6 nuts - 4 pcs.
Preparation, what we do:
- If the bumper has sockets for PTF stamped in it, then you need to focus on their shape and size.
- If there is no such stamping, then we first mark the location.
- Next, use a drill or jigsaw to make a hole. Moreover, you need to take into account the shape of the bumper (its curves) and the material from which it is made (fragile, hard).
Installing fog lights on a VAZ 2110, what we do:
- We install emitters in the headlights. If the lights are white, the lens can be covered with yellow film.
- We protect the base at the place where the lamp is mounted with auto sealant. This will prevent moisture and dust from entering the headlight.
- If plugs are installed at the PTF locations in the bumper, remove them. They are secured with bolts from the inside. Therefore, you will have to unscrew them through the hood of the car.
If older models do not have holes for mounting lights. Therefore, you will have to do them yourself.
- We fix the lights on the rims (frames) with bolts.
- We mount the headlights into the sockets and secure them with bolts.
Connecting PTF, What we do:
- The cables (+) are additionally insulated with corrugated tubes. If they are too long, cut them off.
- We bring them out through the socket for the hydraulic corrector. You can route them through the clutch cable outlet, but this may cause damage to the wires and, as a result, a short circuit.
- We connect the wires to the mounting block according to the diagram attached to it.
- Disconnect the (+) terminal and release the mounting relay block.
- We find fuses F4 (for the right lamp) and F14 (for the left).
- We put copper connectors on the wires and insert them into the input according to the attached diagram.
- We bring out the switch. European-style panels have standard factory cables for PTF installation.
- We supply power to the switch on the dashboard from the fuse for the right side lights.
If you remove power from the ignition or main light, the fog lights will turn on when you start the car.
- We connect the plugs to the emitters.
- We check the performance of the fog lights.
- We calibrate the beam direction by the position of the adjusting screw.
Useful video on the topic:
https://youtube.com/watch?v=1blkkgGJwZg
Replacing the rear light and its elements
Tail lamps for VAZ 2110
Replacement of the rear light occurs according to the following scheme:
- disconnect the wire from the negative terminal of the battery;
- Having opened the trunk lid, unscrew the screws that secure the rear trunk trim (2 pcs);
- having pressed the rear upholstery, bend the side upholstery, which will allow access to the rear light connection parts;
- disconnect the flashlight and the block with wires;
- loosen the nuts that hold the rear light and remove the washers;
- remove the lamp from the car;
- release the flashlight body from the holder and lamps by squeezing the claws of the clamp;
- install a new lamp, performing the steps in reverse order;
- tuck the side trim under the seal.
Replacing parking lamps and tail lights
Rear fog lamps in VAZ 2110
When changing a vehicle's headlight bulb, you must perform the following steps:
- remove the lamp together with the socket from the optical element;
- remove the lamp from the socket.
Replacement of light bulbs in the rear lights is carried out according to the following algorithm:
- lamps need to be changed from the luggage compartment side;
- remove the contact part along with the lamps (it is held in the lamp body using latches).
Side turn signals
If the side turn signal lighting malfunctions, do the following:
- move the side turn signal forward, pulling its rear part;
- remove the above part;
- disconnect the lamp socket;
- replace the lamp by sliding the cover;
- If you need to replace the cartridge, you must disconnect the wires.
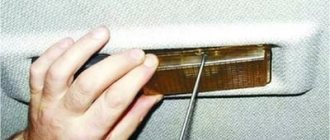
Car license plate light
License plate light bulb VAZ 2110
If the lights that illuminate the car number do not light, the actions should be as follows:
- Unscrew the two self-tapping screws with a Phillips screwdriver and remove the lampshade;
- replace the lamp, first removing the transparent cover from above.
Stop light and reverse
You can remove and install the brake light and reverse light according to the following scheme:
- remove the flashlight board by squeezing the protrusions;
- remove the lamp by pressing down and turning counterclockwise;
- disconnect the wiring connector;
- unscrew the nuts (two outermost and two middle) of the decorative trim using a tool of the appropriate size;
- remove the cover;
- Unscrew the two nuts that secure the lamp and remove it.
Fog lamp
To properly replace the light source in the fog lamp, you do not need to remove it.
So:
- disconnect the negative wire (its terminal) from the battery terminal;
- remove the rubber protective cap from the rim on the back side of the reflector;
- remove the tip of the “negative” wire from the reflector output;
- remove the lamp mounting bracket in the form of a spring, squeezing it with your fingers;
- remove the lamp from the hole located in the reflector;
- disconnect the tip of the “positive” wire from the lamp wire.
You can assemble the lamp by following the reverse procedure.
Replacing the entire fog light
If you need to replace the entire fog light, the steps are as follows:
The cooling fan on the injection VAZ-2114 does not work: it does not turn on and does not work, what should I do?
- disconnect the block of its wires from the harness;
- unscrew the two self-tapping screws securing the cladding using a Phillips screwdriver;
- remove the lining;
- remove the headlight;
- Install the new headlight in reverse order.
Problems and their solutions
There are several common problems typical for the dashboard of the domestically produced VAZ 2110 model.
- The instrument panel lights on the VAZ 2110 do not light up. Check the contacts and the condition of the wiring that is responsible for the suspension. The fuses could simply have blown, or the light bulbs themselves could have burned out as a result of wear and tear or a short circuit. In fact, there can be many reasons, so it is not always possible to resolve the issue in a couple of minutes.
- The most serious failure for the instrument panel is a complete failure of the unit. In such a situation, all indicators stop working, the arrows fall down, and the warning lamps do not light up. To fix the problem, first check fuse 15, which is designated F6. You will find it on the mounting block. If this element is blown, simply replacing the fuse will not solve the problem. Look for the reason why it burned out. Usually this is a simple short circuit in the electrical network.
- The arrows jump up and down. This is also a common phenomenon, the cause of which in most cases is poor ground contact: This ground wire goes to the partition that separates the interior and engine compartment, from the instrument panel. To get to it, remove the radio from its seat. Check the quality of its fastening;
- Often, when installing an alarm system, the ground wire is moved to another location for more convenient access. Therefore, if you have an alarm system, but there is no wire under the radio, then look for it behind the interior trim near the driver’s left foot;
- The ground wire may be damaged when installing a new audio system. When the minus is connected, the mass is unscrewed and then often mounted back, only not as reliably as it was originally. Due to vibrations, collisions with bumps and holes, the fastening weakens and contact disappears. Hence the non-functional panel. Do not be lazy to properly wrap the bulk wire, since poor fastening is often explained by the inconvenience of performing this activity.
Problem with the instrument panel. To check if everything is fine with it, remove it as much as possible from the seat, but do not disconnect the wiring going to the pads. The white wire (X1) that goes to the first contact is checked. It would be a good idea to check the voltage on pins 10.9 and 6. During normal operation of the system, the device should give a reading of about 12 volts. Be sure to look at the back of the shield and make sure the conductive paths are intact. Cigarette lighter. It is not uncommon for the instrument panel on a VAZ 2110 to fail due to the cigarette lighter. You are probably no exception among drivers who connect all sorts of additional devices and devices through this socket. This is how many people charge their phones, connect tablets, video recorders and other equipment. By consuming a large amount of current, the devices damage the cigarette lighter or cause fuse F19 to blow. Because of this, the instrument panel turns off or does not work correctly. If the fuse is intact, simply disconnect the cigarette lighter connector. If such measures do not produce results, simply replace the fuse with a new one.
As practice shows, most problems associated with the failure of the dashboard can be solved independently. Especially when it comes to a car like the VAZ 2110.
But there is an important BUT. If you do not have minimal experience working with electronics and do not understand anything about electrics, we strongly do not recommend that you approach the dashboard wires
In this case, contact a service station, deal only with experienced auto mechanics and people who are well versed in automotive electricals
If you do not have minimal experience working with electronics and do not understand anything about electrics, we strongly do not recommend that you approach the dashboard wires. In this case, contact a service station, deal only with experienced auto mechanics and people who are well versed in automotive electrics.
Improve yourself
. Perhaps soon you will be able to change to a more expensive, modern car. Then solving the electronics problem will be much more difficult
The VAZ 2110 is an excellent simulator that allows you to carry out repairs yourself, understand the structure of the car, and experience all the delights of self-repair. It is important for any man to be able not only to drive, but also, if necessary, to repair his car.
Tips for motorists
According to these Rules of the Road, on any moving vehicle, including the VAZ-2114, the headlights must be turned on, along with which the side lights must also be turned on. In addition, they must be turned on when the car is stopped or parked on the road in the dark and in conditions of insufficient visibility. Therefore, they must always be in good working order.
The electrical circuit of the side lights of the VAZ-2114 is not so complicated and, if desired, any self-respecting driver will be able to find a malfunction associated with the failure of its operation. To do this, you need to know that terminal No. 1 of the side light switch is always supplied with positive voltage from the battery, bypassing the ignition switch. If the side light switch key is in the on position, then electric current flows to two fuses F10 (7.5A) and F11 (7.5A), which respectively protect the electrical circuits of the left (F10) and right (F11) side lights. The further path of the current lies to relay K4 (lamp health monitoring relay), and then to the front and rear side lamps.
When only one of the side light bulbs does not light, then we check whether it has burnt out. If it burns out, then we replace it with a new one of similar power, but if it is intact, then we will have to look at the condition of the contacts of the cartridge in which it is inserted. In the rear lights, due to moisture getting into them, oxidation is possible, both of the tracks and the pads through which voltage is transmitted to the terminals of the side light lamp.
Another reason why the headlight lamp does not light up may be the lack of voltage at the corresponding terminals of the rear light blocks or headlight blocks. Then, using a tester, you will have to ring the corresponding wires:
- The right front marker does not light up (check the yellow wire from terminal No. 4 of the headlight to terminal No. 8, block X6 of the mounting block);
- The right rear light does not light up (check the yellow wire from the right rear light block to terminal No. 9, block X9 of the mounting block);
- the left front marker does not light up (check the yellow-black wire from terminal No. 4 of the headlight to terminal No. 10, block X6 of the mounting block);
- the left rear light does not light up (check the yellow-black wire from the right rear light block to terminal No. 17, block X9 of the mounting block);
If both lamps on the right or left side of the car stop working, then troubleshooting should begin by checking the corresponding fuses located in the mounting block under the hood of the VAZ-2114 car, since the simultaneous burnout of two dimensional lamps at once is unlikely. The blowing of fuse F10 is very easy to determine, since it will lead to the cessation of combustion of the backlight lamps of the instrument switches. Also, the reason for turning off the side lamps may be the failure of relay K4.
3 comments
When you press the brake pedal, the rear turn signals turn on. When you turn on the turn signals, the rear lights begin to switch and shine like garlands?
When connecting to the board in the chip (connector), the wires were not connected correctly. And the chip itself is apparently not original, but was attached by someone illiterately, despite the diagrams. You have the wire that is responsible for the turns - in place of the dimensions. It is easy to treat. You need to transfer the wires from the wiring to the chip. You need to find the ground on the rear stopper board (there is a green stripe on the board that runs under each light bulb socket); see which wire is connected through the chip and connect to the black wire from the rear wiring. Then we take the wire on the chip below and connect it in the following sequence: 1 wire in the chip with black (ground), 2 - blue (turn signal), 3 - red (stopak), 4 - yellow (marker)
On the right side, the dimensions do not light up, the fuses are intact, and the light bulbs are intact. Could it be K4?
instructions with photos and videos
Tuning the headlights on your VAZ-2110 with your own hands will not be difficult if you approach this procedure wisely. In this case, the result will please the owner, and his previously unattractive car will look much more modern. The main thing in this matter is to strictly follow the instructions in order to avoid mistakes.
This brand, as a rule, has optics of such types as “Kirzhach” and “Bosch”. The procedure for dismantling old headlights consists of the following steps:
- First you need to disconnect the blocks with wires and remove the upper part from the radiator grille. To do this, take a key of 10.
- After this, you need to remove the boxes with the wires connected to the direction indicators. Immediately after this, the headlight hydraulic corrector is pulled out using a special latch.
- Next, you need to unscrew the headlight mounting bolts and remove the edge from the place where it engages with the wing.
- After completing this work, the headlight of the car is carefully pulled out.
We looked at the procedure for removing a Bosch headlight. Now let’s find out how to remove the Kirzhach optics. This work consists of the following stages:
A flat screwdriver is inserted into the corner of the headlight, as well as a utility knife, which is used to cut off the sealant. If you can’t cut with this tool, you can use a hair dryer;
then we proceed to remove the reflector
This is done like this: unscrew 3 bolts around the perimeter and unfasten 4 latches; then the headlights are carefully removed
As we can see, removing the headlights on a VAZ-2110 car is absolutely easy.
The situation is different with the modernization of optics
It is very important to understand what is suitable in a particular case and what is not. Let's try to understand this issue
Do-it-yourself headlight tuning on a VAZ-2110: tinting
After dismantling the old headlights, it is necessary to remove the spring in the hydraulic corrector hole. Next, the adjusting screw is unscrewed, after which the optics module with reflector is removed. Before you start painting the part, you need to clean it thoroughly. A degreasing primer is suitable for this. It is not advisable to paint with enamel, since the temperature inside the headlight is always very high. In this case, heat-resistant paint is perfect.
It is advisable to carry out the painting procedure itself in a dry room, very carefully, keeping this part at a distance from you