A malfunction of the lambda probe is accompanied by diagnostics and, in some cases, replacement of the part. This component of the car system protects the ecology of the planet. Its main function is to control the level of harmful substances in exhaust gases.
The automotive market offers two main types of lambda probe:
- With two-channel layout. It was installed on cars manufactured more than 30 years ago. This probe is also used for economy class cars.
- Broadband device. Used for most mid- and premium-class cars. The device more accurately detects excess levels of harmful substances and reports this to the driver.
The part is installed inside a special manifold where hoses and pipes are connected. Installation in this location allows for high performance and diagnostic accuracy. The main function of the lambda probe is to increase the vehicle's operating resources, reduce fuel consumption and maintain stable engine operation. If a discrepancy occurs, the device sends a signal to the ECU, which changes the proportions of fuel and air.
The importance of this device is underestimated by many, but if it fails, the machine may become unstable. For this reason, it is important to know the main problems of the probe and how to deal with them.
Symptoms of a malfunctioning lambda probe
Signs of malfunction of this device can be different, and the most important signal for the driver will be a violation of the normal operation of the engine. If the device does not work well, the quality of the fuel supplied to the combustion chamber is significantly reduced.
Why does the lambda probe break? The reasons may be as follows:
- The car body was depressurized.
- Air or exhaust gases have entered the fuel system.
- The sensor has overheated due to problems with the ignition system or improper painting of the engine.
- Normal wear and tear on components.
- Power supply failure - signals are not sent to the ECU.
- Breakage due to impact or other mechanical impact.
In the latter case, the lambda probe breaks in an instant. Other symptoms indicate that the device is failing gradually. If you do not know how to diagnose this component and have no idea where it is located, then a faulty lambda probe will not be able to be determined.
How to understand that this part will soon come to an end? At first, the sensor starts working every other time. Sometimes the signal is simply not transmitted to the electronic control unit. This leads to a correction of the idle speed. This indicator begins to change and its fluctuations expand in the range. The quality of gasoline or diesel fuel decreases, and the car itself twitches.
The driver hears popping noises inside the engine, and the corresponding icon lights up on the dashboard. Then the sensor simply does not work on an engine that has just been started. The dashboard will inform you about this in all available ways. The power of the car is greatly reduced, and when you press the acceleration pedal, popping noises will be heard from the engine.
But the biggest danger for the driver is engine overheating, which causes a total breakdown of the system. If you ignore a broken sensor, its condition will worsen.
This directly affects the operation of the machine. The quality of movement will decrease, gasoline consumption will increase and the inside of the car will begin to smell of exhaust gases with a characteristic odor. Some modern cars are equipped with an engine locking system if the sensor does not work. You will have to call a tow truck and go to a car service center.
The worst alternative for the development of the event is depressurization of the device. If such an incident occurs in a VAZ car, then it is better to stop driving if you do not want to completely break the engine. When a spare part breaks down completely, exhaust gases begin to enter the atmospheric air tank. When the brake pads are applied, the device begins to detect a large number of air molecules and sends an excessive number of signals to the ECU. As a result, the VAZ injection control system does not work correctly or stops functioning altogether.
How do you know if the probe has depressurized? When driving at high speed, there is a lot of knocking inside the engine. The car begins to move jerkily, and an unpleasant smell of exhaust gases is heard. This failure can also be determined by visually analyzing the housing of the exhaust valves and spark plugs - soot deposits appear on them.
How to troubleshoot P0134?
Before attempting to electrically diagnose the P0134 code, ensure that the engine is running and that there are no air leaks or serious exhaust leaks that could affect the operation of the oxygen sensors.
Also, make sure there are no rich or lean conditions and that the engine oil is not contaminated with antifreeze. If any other codes are present along with P0134, troubleshoot those issues first before attempting to diagnose P0134.
In a properly functioning oxygen sensor, any change in throttle will result in an almost immediate change in signal voltage. However, the speed at which changes occur (depending on the efficiency of the sensor) is best assessed using an oscilloscope.
Keep in mind that while an oscilloscope can identify emerging problems, interpreting the resulting waveforms requires expert knowledge and verified reference data for each vehicle being tested.
Therefore, in order to identify a faulty DC (if there is no oscilloscope), it should be enough that there are no changes in the signal voltage during a discernible period.
Step 1
Take a diagnostic scanner or adapter and read the information from the car. Record all stored trouble codes and available freeze frame data. This data can be useful if an intermittent error is later diagnosed.
How is the lambda probe diagnosed and replaced?
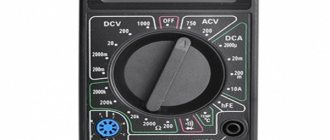
For a VAZ car or any other vehicle, you can use professional equipment. Use auto repair services that have an oscilloscope. The condition of the oxygen sensor can also be determined using a multimeter. This device can be used for VAZ cars.
The verification procedure is carried out with the engine running, since if the sensor is in a calm state, it is impossible to determine its functionality. If the lambda probe does not work correctly, it is recommended to replace the part.
In most cases, the VAZ probe cannot be restored - it is much easier to install a new part. If several errors appear on the dashboard, then you need to conduct a full diagnosis of the car. If you already go to a car service center, then it is worth checking as many car systems as possible.
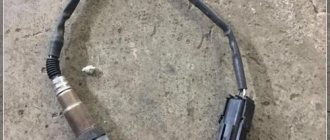
Visual inspection
The check should always begin with a visual examination of the condition of the oxygen sensor.
- Inspect the wires. They must be intact, without traces of damage or defects. Check all connectors for tight connections.
- Soot on the lambda probe indicates a malfunction of the device heater. Also, such deposits are caused by an excessively rich air-fuel mixture.
- If you notice shiny deposits on the surface of the element, this indicates an excess of lead in the fuel you are filling the tank with. This situation requires mandatory replacement of the oxygen sensor, since lead could damage the internal device.
- Gray or white deposits are the result of various types of fuel additives affecting the sensor. They often cause the probe to break and have to be replaced.
Try our service station selection service
Creating an application is absolutely free and will take you no more than 5 minutes
The operation of internal combustion engines of modern cars is controlled using special electronic devices (controllers). One of the main tasks of the controller is to regulate the composition of the fuel mixture supplied to the cylinders of the power unit. It is on this that the fuel consumption, the stability of the engine, as well as its power and traction properties depend. To do this, the electronic control unit collects and analyzes information coming from various sensors. Based on the received data, the ECU sends the necessary commands to the appropriate devices.
In this article we will talk about what the VAZ-2110 oxygen sensor is and what it is intended for. We will also look at its design, possible malfunctions and diagnostic methods.
GENERAL INFORMATION AND OPERATING PRINCIPLE
As can be understood from the name of the part, an oxygen sensor (OS) is a device through which the ECU receives information about the amount of oxygen remaining in the exhaust gases.
The DC is a rather complex device in terms of design. It consists of a ceramic electrolyte that can withstand extremely high temperatures, up to four hundred degrees. The electrolyte is made of zirconium dioxide, the surface of which is treated with yttrium oxide. The surface of the oxide is coated with platinum. The use of platinum is due to the fact that it is a material with maximum thermal conductivity.
In addition to the main electrolyte, the design of the lambda umbrella consists of the following parts:
- Protective shielded tips on both sides of the electrolyte, on which there are holes for air intake and exhaust gas. The tips, paired with an electrolyte, are the main functional part of the oxygen sensor, by which the analyzing device determines the potential difference;
- The tips are a kind of housing, inside of which there is an element with high current conductivity (collector);
- Between the tips there is a device that reads the resulting electrical signal;
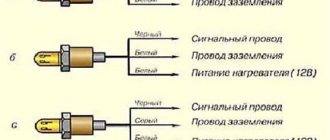
- All structural elements of the oxygen sensor are located inside a metal housing. The lambda probe is connected to a wiring of four wires: 2 white wires, which are responsible for powering the device, and two black wires - the first transmits the received data to the ECU, the second is grounding.
The principle of operation of a lambda umbrella is as follows: the electrolyte, located in the exhaust gas flow of the car, is heated to a temperature of 300 to 400 degrees thanks to the built-in heating element. This temperature is necessary for the zirconium to reach its maximum conductivity and for the system to start working. The DC is installed in such a way that the tip on one part of it is in contact exclusively with exhaust gases, and the second tip is in contact with clean atmospheric air.
When a sufficient amount of oxygen accumulates inside the manifold located inside the tip, the potential difference changes on the electrolyte, data about which is transmitted to the ECU, and the electronic systems of the fourteenth change the amount of fuel supplied to the cylinders.
What is an oxygen sensor
The VAZ-211 0 oxygen sensor is an electronic device designed to determine the amount of pure oxygen in exhaust gases. What is it for? First of all, in order to reduce the amount of harmful impurities contained in exhaust gases. It is possible to reduce their concentration as much as possible only by creating a so-called stoichiometric combustible mixture (14.7 kg of air per 1 kg of fuel). To achieve this proportion, it is necessary to ensure the actual supply of air in the specified amount. This does not always work out, and for a variety of reasons. The ideal ratio of the amount of actual incoming air to the theoretical indicator is usually denoted by the Greek letter λ (lambda). That is why the oxygen sensor is also called a lambda probe.
Briefly about the lambda probe
I can assume that the oxygen sensor is perhaps the most popular among all other car sensors that auto repair shop diagnosticians have to deal with. As you can see in the photo, the lambda probe (also known as an oxygen sensor) is made of a ceramic element (zirconium based) and coated with platinum. This galvanic element, depending on the presence of oxygen and temperature in the environment, changes its voltage and transmits data to the electronic control unit. Since the zirconium tip more accurately reads the presence of oxygen at a temperature of at least 360 degrees Celsius, a heating element is built into the lambda probe, which turns on when the engine starts and helps to quickly warm it up.
Oxygen sensor device
To accurately read the data, the lambda is installed in the exhaust pipe so that its working surface is “washed” by as much exhaust gas as possible.
Pads for VAZ 21103
There are also several types of oxygen sensors, which differ in operating principle and connection method:
Types of connections LZ
Attention! It is possible to replace a heated oxygen sensor instead of a non-heated oxygen sensor. In this case, it will be necessary to connect the LZ heating circuit to the car’s electrical circuit, which is “powered” when the ignition is turned on, for example, the fuel pump circuit. Reverse replacement is not acceptable; this creation will definitely not work. And, of course, it is necessary that the threads of the sensors coincide with the cut threads in the seat.
Principle of operation
Depending on how much oxygen is in the exhaust gases, the sensor signal going to the electronic control unit also changes. The ECU, in turn, compares the received signal with the standard of this state “stitched” in its memory, and depending on the difference with the optimal value, adjusts the duration injection phases of the injectors, thereby regulating the air-fuel mixture of the engine. With an increased oxygen value, the LZ voltage signal drops to 0.1 volts (which is much lower than the required 0.45); if there is a shortage, its voltage increases to 0.8-0.9 volts. This is a two-way connection with the controller and subsequent adjustment to a specific mode engine operation ensures minimization of atmospheric emissions and maximum fuel economy.
How does a lambda probe work?
Structurally, the VAZ-2110 oxygen sensor, like, in principle, other injection cars, consists of two electrodes: external (platinum) and internal (zirconium). The first is in contact with the surrounding air, and the second is in contact with the exhaust gases of the car. The sensor readings are based on the potential difference between the electrodes: the greater it is, the less oxygen in the exhaust.
For normal operation of the lambda probe, it requires heating to 300-400 degrees Celsius. This temperature is achieved by a special electric heating element built into the sensor.
Immediately after starting the engine, the electronic control unit regulates the mixture composition based on the readings of other sensors (mass air flow, damper opening, coolant temperature, etc.). When the lambda probe warms up and starts working, the controller begins to refer to its data.
Debugg
Wiring repair
In case of mechanical damage or violation of the integrity of the wiring, the damaged area is repaired or the electrical wiring of the oxygen sensor is replaced.
If the connection of the wires to the sensor is broken or it is oxidized, you should clean and recheck the operation. However, if the electrical wiring connector is damaged, replacement of the wires is also necessary.
Cleaning the sensor
A malfunction of the lambda probe is sometimes associated with an accumulated layer of soot on the protective casing and the internal electrode. In order to clean the oxygen sensor on a VAZ 2110 in an effective way, you need to soak it in orthophosphoric acid (or in a rust converter).
The VAZ oxygen sensor is turned off and dismantled in advance. The protective casing of the outer electrode is removed or sawed off. The device is then immersed in the cleaning agent for 20 minutes. In this case, the accumulated layer should independently detach from the sensor surface. Cleaning with a brush made of soft material is allowed.
The protective cover must then be reinstalled using spot welding or soldering.
After cleaning, the 2110 oxygen sensor must be washed, allowed to dry, installed in the exhaust manifold and the test repeated.
Replacement
If during diagnostics a faulty VAZ 2110 oxygen sensor was identified and its replacement is required, you must:
- turn off the car and turn off the ignition;
- cool the engine to an acceptable temperature that will allow contact with its exhaust manifold;
- disconnect the lambda probe wiring;
- remove the oxygen sensor using a suitable wrench;
- install a working VAZ oxygen sensor that has the appropriate markings for a specific engine model;
- connecting contact wires;
- starting the engine and rechecking its operation.
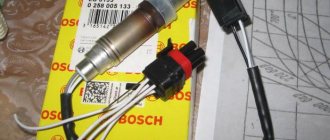
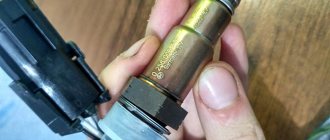
Types of oxygen sensors for VAZ-2110
The first injection modifications of the VAZ-2110 used a standard oxygen sensor marked 0 258 005 133. After 2004, when “tens” began to be equipped with new injection systems “January 7.2” and “Bosch M7.9.7”, manufacturers began to install a modernized lambda probe VAZ - 0 258 006 537. Its main difference from the previous modification was a ceramic heater, which consumed much less electricity, but warmed up the device much faster.
Today it produces seven different modifications of lambda probes with a power of 12 and 18 W. Apart from the energy consumption indicators, these sensors are practically no different, except perhaps in the number of contacts.
Where is the oxygen sensor located?
In VAZ-2110 cars, the lambda probe can be located in different ways. In older “ten” modifications, it is attached to the top of the exhaust pipe (next to the resonator). In the new 1.6-liter engines, the VAZ-2110 oxygen sensor is located directly on the exhaust manifold.
The latest modifications of the “ten” are equipped with two lambda probes. The first VAZ-2110 oxygen sensor (16 valves) is installed before the catalyst, and the second is installed behind it.
Device
The design of the lambda probe includes the following elements:
- Body made of metal;
- An insulator made from ceramics;
- O-ring with cuffs and wiring;
- Protective cover with ventilation holes;
- A circuit contact through which current is conducted;
- Ceramic tip;
- Filament coil;
- Protective shield with holes that allow gases to escape.
As you may have noticed, the design involves the use of heat-resistant materials. Not surprising, since the oxygen sensor has to operate under extreme temperature loads.
In this case, devices range from single-wire to four-wire.
Signs of a malfunctioning lambda probe
Be that as it may, but if the VAZ lambda probe fails, it will either have to be repaired or replaced. But before you begin this work, you should make sure that it was the oxygen sensor that caused the engine malfunction. First, let's look at the main symptoms of its breakdown. These include:
- unstable operation of the power unit (speeds fluctuate, engine stalls after start);
- reduction in the dynamics and traction properties of the car;
- increased fuel consumption;
- characteristic crackling sound coming from the sensor;
- the appearance on the instrument panel of a corresponding signal indicating an error in engine operation (when scanning the ECU, an error with code P0131 is detected).
On which cars is this problem most common?
The problem with code P0134 can occur on different machines, but there are always statistics on which brands this error occurs more often. Here is a list of some of them:
- Acura (Acura mdx)
- Audi (Audi a6)
- BMW
- Chery (Chery Amulet, Tiggo, Fora)
- Chevrolet (Chevrolet Aveo, Cavalier, Captiva, Cruz, Lanos, Lacetti)
- Chrysler (Chrysler Voyager)
- Citroen (Citroen Berlingo)
- Daewoo (Daewoo Nexia)
- Dodge (Dodge Durango, Caravan, Neon, Stratus)
- Ford
- Geely
- Honda (Honda Accord, SRV, Stream, Civic)
- Hover
- Hyundai (Hyundai Accent, Getz, Santa Fe, Solaris, Tucson, Elantra)
- Kia (Kia Rio, Sid, Sportage, Cerato)
- Lifan
- Mazda (Mazda 3, Mazda 323, Mazda 6, Mazda cx7, Demio)
- Mercedes (Mercedes w204)
- Mitsubishi (Mitsubishi Outlander, Galant, Lancer, Pajero)
- Nissan (Nissan Almera, Qashqai, Maxima, Note, Pathfinder, Primera, Teana, Tiida)
- Opel (Opel Antara, Astra, Corsa)
- Peugeot (Peugeot 206, 307, Partner)
- Saab 9-5
- Skoda (Skoda Octavia, Fabia)
- Subaru (Subaru Outback, Forester)
- Suzuki (Suzuki Grand Vitara, Liana, Swift)
- Toyota (Toyota Avensis, Corolla)
- Volkswagen (Volkswagen Golf, Passat)
- Volvo (Volvo xc90)
- VAZ 2104, 2107, 2110, 2112, 2114, 2115
- Gazelle Business, umz 4216
- Zaz Chance
- Lada Vesta, Granta, Kalina, Niva, Priora
- UAZ Patriot
With fault code P0134, you can sometimes encounter other errors. The most common ones are: P0030, P0053, P0112, P0130, P0131, P0132, P0135, P0137, P0138, P0154, P0155, P0171, P0172, P0301, P1135, P1496, P2243.
How to check a lambda probe
It is best to diagnose the lambda probe using specialized equipment at a service center. This is the only way to accurately determine its malfunction, as well as find out the reasons why it failed.
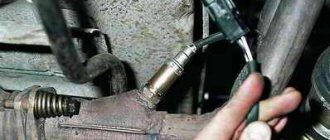
Only rough diagnostics can be carried out at home. And a regular multimeter turned on in voltmeter mode will help you do it. Before checking the oxygen sensor, you will need to warm up the car engine to operating temperature. Next, you need to turn off the motor and disconnect the probe connector. We connect the signal wire of the sensor to the positive probe of the multimeter. We connect the negative contact of the device to the ground of the car. We start the engine, load it to 2500 rpm and look at the instrument readings. If the voltage value is close to 0.9 V, the VAZ lambda probe is working and the cause should be looked for elsewhere. But if the voltmeter readings are below 0.8 V, most likely the sensor has failed.
Device diagram
Let's look at the probe diagram, which gives an idea of the placement of nodes. Knowledge of the design allows you to understand the locations of parts that are prone to failure.
Probe design example
The design includes:
- 1 - metal fitting intended for installing a probe, there are turnkey edges on the outer surface, a thread is located below;
- 2 - ceramic insulator;
- 3 — sealing element for inserting the wiring harness;
- 4 - signal wires;
- 5 - metal protective cap, equipped with ventilation vents, designed to protect the measuring element from damage;
- 6 — spring contact part;
- 7 - sensitive element made of ceramic;
- 8 - heating rod;
- 9 - ventilation duct;
- 10 - outer metal casing.
We recommend: How to determine that a valve in a car engine has burned out: signs and symptoms
Is repair possible?
In some cases, you can try to restore a failed sensor. But this option is applicable only in cases where the cause of its breakdown is carbon deposits on the working elements of the device. Combustion products disrupt the normal operation of the lambda probe, distorting the output signal. In order to independently get rid of carbon deposits on the working surfaces of the sensor, we will need:
- hacksaw for metal;
- vice;
- gas burner (you can use a burner from a household gas stove);
- clean glass container;
- orthophosphoric acid;
- soldering iron, flux and solder.
First of all, disconnect the sensor connector and unscrew it from its seat. Now it needs to be sawed, because the probe cannot be disassembled. Carefully clamp it in a vice and saw off both protective caps to get to the ceramic rod. When this is done, heat the sensor over the burner. This is necessary to burn off carbon deposits. Under no circumstances should you attempt to remove combustion products mechanically. This will only damage the device.
After heating procedures, you can continue to restore the working elements of the sensor by placing it in phosphoric acid. It dissolves carbon deposits perfectly. But don't overdo it. It is not recommended to keep the probe in acid for more than 30 minutes.
Upon completion of work, the sensor must be assembled. To do this, you will need to solder the sawed-off caps to the body using a soldering iron, flux and solder.
Dummy - an alternative version of the lambda probe
There is another way to avoid purchasing a new oxygen sensor. And it is used by the majority of car owners who are faced with the problem of a broken lambda probe. The essence of this method is to deceive the electronic control unit by slipping it an emulator (decoy) instead of a working sensor.
There are three ways to implement such a simple plan:
- install the sensor in such a way that its working elements have minimal contact with the exhaust gases;
- make changes to the software of the electronic engine control unit;
- change the voltage on the signal wire of the oxygen sensor.
In the first case, a special bushing (spacer) is installed between the lambda probe and the exhaust pipe or manifold. This is done in order to distance the sensor contacts from the exhaust gases. At the same time, the potential difference at the probe electrodes decreases, which the electronic control unit notifies about.
You can also reflash the ECU by installing modified software on it, which will not respond to the failure of the oxygen sensor. In order not to harm the car’s electronics, it is recommended to carry out such procedures with the involvement of specialized specialists.
You can also deceive the controller by changing the voltage on the signal wire of the sensor. For this purpose, various homemade electronic devices are used, installed in the conductor gap.
Lambda probe models are special samples of an oxygen sensor, which is necessary for the correct operation of the electronic system in fuel combustion chambers. Thanks to this element, the system manages to balance and constantly control the percentage ratio between oxygen and gasoline. Using a probe, the electronic system constantly corrects the structure of the fuel mixture supplied to the engine, and also warns of destabilization in the engine’s operating process.
When operating this fragile device in very aggressive environments, it gradually wears out and requires replacement after two years of use. By replacing the lambda probe you can avoid engine damage. By periodically checking the lambda probe, you will have a real guarantee of the stable operation of your car.
Types of sensors and operating principle
The lambda probe is installed in the exhaust system. Sensors are divided into two types: two-point and broadband.
The two-point sensor consists of ceramics, the elements of which are coated with zirconium dioxide on both sides. Installed in front of or behind the catalytic converter.
The principle of operation is to measure the level of oxygen concentration in the environment and exhaust gases. If the level changes and becomes different, a voltage is created at the ends of the sensor elements, from low to high. Low voltage is created if there is excess oxygen in the system.
Otherwise, if the system does not have the required level of oxygen, high voltage will be created. These signals are sent to the engine control unit, which distinguishes them by current strength.
The wideband sensor is a more modern design. It also has two ceramic elements. One of them can be called “pumping”. It is responsible for activating the process of pumping or removing air from the system.
The second element can be conventionally called “two-point”. The principle of operation is based on the fact that as long as there is the required amount of oxygen in the mixture, the current strength on the “pumping” element does not change and is transferred to the “two-point” element.
It, in turn, receiving a constant current from the “pumping” element, maintains a constant voltage between its elements and is inactive.
As soon as the oxygen level changes, the "pumping" element supplies the changed voltage to the "two-point". This, in turn, ensures either pumping air into the system or pumping it back.
Types of lambda probes
Nowadays on the automotive equipment market you can increasingly find only 2 variations of the device:
- Probe based on a two-channel type of arrangement. This type of sensor was mainly used in cars of the 1980s, and is also used in modern economy class cars.
- Lambda sensor of broadband type. This type of probe is standardly used in 70% of medium and high class cars. This type of sensor not only accurately detects any deviations from the norm between elements, but also promptly reports this to the system for instant stabilization of the position.
All samples of modern lambda probes are mounted in a special exhaust manifold, where the hoses and pipes are directly connected. This sensor arrangement allows for maximum performance and accuracy of this device.
The main task of any lambda probe is to significantly increase the vehicle’s operating resources by reducing fuel consumption and increasing stability in maintaining speed during idle. As a result, this sensor does not provide specific values of the fuel mixture parameters, but reacts only when the obtained values are destabilized. After detecting a discrepancy with the specified parameters, the sensor transmits information to the central unit, which corrects the fuel-air ratio.
Advice: if you have replaced the fuel filter on a Priora or another car, be sure to check the correct operation of the probe. If this spare part is replaced, the correct operation of the device may be impaired.
What are the symptoms of code P0134?
In some cases, there may be no symptoms other than a stored DTC and CHECK ENGINE light. On the other hand, some consequences may be so severe in other cases that the vehicle becomes undriveable.
Also keep in mind that the severity of one or more symptoms may vary from vehicle to vehicle.
- Serious problems while driving: severe loss of power, unstable acceleration, the car may even stall unexpectedly.
- Increased fuel consumption, which can range from slight and barely noticeable to significant.
- Black smoke from the muffler.
- Difficult start.
- Reduced spark plug life.
- In extreme cases, reduced engine longevity is caused by an excessively rich fuel mixture, which washes away the protective lubricant film from the cylinder walls.
The main symptoms of a malfunctioning lambda probe
Among the signs that allow you to determine in advance whether the probe is working or not are the following:
- The appearance of instability during engine operation (the engine begins to rapidly gain speed and also stalls sharply);
- Deterioration in the quality of the fuel mixture pumped by air into the cylinder system (this leads to excessive consumption of fuel);
- Uncontrolled and ineffective fuel supply (malfunctions in the operation of the engine and electronic system of the machine);
- Gradual appearance of intermittency in engine operation at idle speed;
- Reduced engine efficiency at maximum speed;
- Problems in the operation of electronic systems (faults in the sensor lead to unstable operation of the engine compartments, since the fault signal is transmitted with a delay);
- The presence of periodic “twitching” of the car;
- The appearance of strange pops when the engine is running;
- Untimely (slow) response of vehicle engine systems to pressing the accelerator pedal;
- The appearance of a constantly flashing light indicating a sensor malfunction on the central instrument panel.
If you find one or more of these reasons in your vehicle, you should consider replacing this device.
Advice: one of the main indicators that the lambda probe has completely failed is a constant sharp drop in engine power as the engine speed increases.
P0134: No oxygen sensor signal activity. Causes and resolution of the error
Almost every car owner who has some problems during the operation of his car, throughout the entire time, independently eliminates minor breakdowns, or makes the necessary replacements of any parts.
But, unfortunately, sometimes the help of a specialist from a car service is necessary, since car enthusiasts do not have enough skills, experience or knowledge in any of the areas regarding the repair of their vehicle. But don’t worry, because our instructions will help you figure it out and do everything yourself. P0134 Oxygen reader circuit error, the one that goes up to the neutralization element - there is no signal energy. It turns out that lambda probe No. 1 does not function because the 02 B1S1 sensor circuit is in a passive state.
P0134: stands for error code O2 Sensor Circuit No Activity Detected (Bank 1 Sensor 1). This indicates that there are no changes in the information of the oxygen reader.
When diagnosing with a car scanner, the program shows the error: “P0134 Oxygen O2 Sensor Circuit No Activity Detected (Bank 1 Sensor 1).”
Differences from error p0135, which indicates a failure of the heating of the oxygen reading device and affects the driving style of the car, the designation of error p0134 is determined only when the error is read by the program, since it does not have a special effect on the ride quality of the car, the dynamics remain the same, there is no tripping, consumption fuel mixture at the same level, it can only behave poorly during a sharp increase in speed.
What causes the P0134 code to appear?
Coding P0134, a small oxygen sensor ringing value, remains in memory when the engine is running for a little more than a minute, and the information coming from lambda No. 1 to the controlled unit has not been changed over time.
In two words, the tension begins to freeze. And the “CHECK ENGINE” lamp on the socket will light up after five to eight seconds, as a continuous breakdown appears.
What causes the error?
There are not many reasons why this error occurs and fault code p0134 is displayed.
- The insulating elements of the oxygen sensor contacts break or delaminate.
- Small short circuit.
- Break in the chain.
Usually, if a breakdown of this property is associated with an open or short circuit, the diagnosis will indicate not only the error of the inactive oxygen sensor circuit, but will also give another error P0171 - lean mixture. Since the lambda sensor No. 1 controls the supply of the mixture, if the signal from the oxygen sensor is completely absent, the controller will reduce the supply of the fuel mixture to prevent failure of the catalyst device. Therefore, if diagnosing a car produces only one error, you do not have a broken sensor chain, or soured connector contacts, then in 99 percent of cases, p0134 comes out through internal problematic issues in the reading device.
Troubleshooting
In any case, you need to look for a fault in the wires of the oxygen sensor and its connector, then check the sensor bell voltage value. And depending on the technical properties of the lambda, the parameters must be transformed within certain limits. If possible, check the activity with a diagnostic device, warming up the engine to operating degrees, observe the voltage transformations, if there are none, take a multimeter and, after connecting the probe to the required contacts of the reading device, check the functionality of the input signal circuit (measure the positive contact of the sensor and the ground between them). After we disconnect the power supply and check the voltage for about a minute, jumps should be observed within specific limits, depending on the activity of the engine. If this is not observed, or the value is out of range, the oxygen sensor is broken and needs to be replaced.
Repair or replace the lambda probe?
Just like replacing a fuel pump on a VAZ-2110, repairing a lambda sensor should be carried out at a car service center. However, in most cases, this spare part is completely replaced, since it simply cannot be repaired further. The problem is the high cost of original sensors from an official dealer.
As a result, most motorists decide to switch to using a universal sensor, which is suitable for almost any make of car and costs much less than its original counterparts. In addition, if you want to save money, you can purchase a lambda probe from disassembly. These are used sensors, but they may have a long warranty period. You can also immediately purchase a full-fledged model of the exhaust manifold, in which a lambda probe is already installed.
If the problem is only a small error in the operation of the sensor, you can quickly fix it yourself. The main symptoms of a malfunction are associated with its severe contamination when fuel combustion products settle. In order to understand whether the tightening of the cylinder head bolts affected the operation of the probe or not, you just need to show it to specialists at an auto center. After the experts confirm that the lambda probe you removed is working, all you have to do is carefully clean it from dust and carbon deposits, and then put it back.
DIY lambda sensor repair steps
To dismantle the lambda probe, you will need to first warm up its surface to a maximum of 60 degrees. Then carefully remove it and additionally take out the protective cap. After this, you can begin cleaning with orthophosphoric acid, which helps to easily deal with any (even the most persistent) flammable deposits.
Warming up the surface of the lambda probe
At the end of cleaning the sensor, it is necessary to soak the spare part. To do this, you can use products for flushing the engine cooling system or just clean water. At the end of the work, be sure to dry the sensor and install it in its proper place.
Tip: upon completion of work, before installation, do not forget to pre-lubricate the threads with a special sealant to ensure complete tightness of the product.
Restoring the performance of the lambda probe by cleaning
In some cases, the oxygen sensor stops working only because the holes in the protective screen and the ceramic tip itself are covered with soot. To restore the functionality of the part, it is necessary to clean the soot from the lubricating zone, but when performing such work, you must follow certain rules
It is important not to use for cleaning:
- metal brushes;
- sandpaper;
- files;
- other objects that can damage the ceramic element.
The best method to get rid of contaminants is to soak the ceramics of the lambda probe in a solution of orthophosphoric acid, but to do this, you must first carefully saw off the protective cap. If acid cannot be found, you can use a rust converter, which is sold in stores selling auto chemicals. Of course, to clean the part from soot deposits, the sensor must be removed.
To soak a ceramic tip, it must be placed in liquid for 15-20 minutes; the soot should disappear from the surface on its own. If the deposits are not completely removed, they can be cleaned with a soft toothbrush. After the procedure, you need to secure the protective screen using camp welding. When it is not possible to restore the lambda's functionality, there is only one option left - to buy a new oxygen sensor.