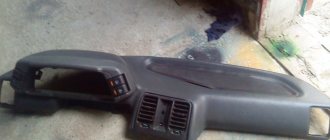
Replacing the entire torpedo or its lining may be necessary not only because you don’t like it, and that’s that. Although this option is not the last one on the list of reasons, since the designers did not show too much imagination when developing the instrument panel.
Panel trim for old VAZ 2110
But not all car owners know how to do the replacement themselves, and also how to make the dashboard on a VAZ 2110 look cooler and more modern, and not squeak like an old cart, although they would certainly like to learn this. Let's start with the question: why might this be needed at all?
Panel trim VAZ 2110 Kashtan
New overlay in the instrument panel
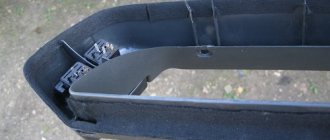
In the VAZ 2110, the instrument panel looks unattractive and can quickly get boring, and you don’t want to buy an alternative one with a built-in on-board computer, because you will need to spend a lot of money on it. The process of upgrading the dashboard is a hot topic. The easiest way to transform the instrument panel is to install a special trim, which can be easily purchased at automotive stores.
In order to install the trim, you need to remove the entire instrument panel. The next step is to carefully remove the arrows from the panel. When assembling the panel and installing the arrows back, you need to make sure that nothing will distract the driver when the vehicle is moving, otherwise you will have to disassemble the panel again and redo it. A well-chosen instrument panel trim for the VAZ 2110 will give it a better look and will blend harmoniously with the car’s interior.
Instructions for replacing the tidy yourself
Instructions for replacing the shield yourself:
- First, you need to turn off the ignition and turn off the power to the Tens electrical network; to do this, open the hood and disconnect the terminal from the battery.
- The switches located on the sides of the tidy are removed.
- Then use a Phillips head screwdriver to unscrew the bolts that secure the device.
- Next, you need to dismantle the mountings of the tidy to the trim. After this, the shield can be easily removed from its seat, and the glass can also be removed.
- The next step is to disconnect all the connectors and connectors connected to the dashboard.
- When the connectors are disconnected, the panel is dismantled. It is repaired or replaced with a new one, the assembly steps are performed in the reverse order (the video was filmed by the channel In the Garage).
Tuning the instrument panel of VAZ 2110
Today there are many options on how to do tuning a VAZ 2110 with your own hands. One of the simplest and not very expensive ways is to tune the instrument panel. To do this you will need to purchase material and be patient. You can transform your dashboard in several steps. Before upgrading, you need to remove it. The next step is to change the conventional instrument panel lamps of the VAZ 2110 to LED ones. It is advisable to install the LEDs in the same places, but if necessary, additional holes can be made. There are several ways to change the dashboard light:
— You can change the odometer backlight. Using a blade, you need to clean the odometer from glue, then unfold it and put it back. After this, the dial backlight will change from green to blue.
— The instrument panel lamps of the VAZ 2110 can be replaced with an LED strip. To change the color, you need to erase the color filter layer with a blade. Residues can be removed with a solvent. The next step is to secure the LED strip inside the dashboard. You can connect the tape to the board where the light bulb sockets are connected. If you erase the red color from the arrows, and then apply white varnish, which is used for manicure, on them, you can actually get the color as on the selected tape.
— You can implement automatic backlight changes. To do this, you need to purchase an LED strip with multi-colored diodes and connect it to the dashboard.
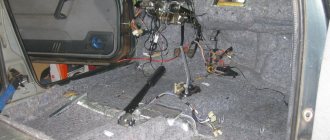
We remove the torpedo
Removing and installing a new torpedo on a VAZ 2110 takes a lot of time, we also advise you to be patient, since there are dozens of connections and wires in this part of the interior. Each action must be careful, since the VAZ 2110 mounts are very fragile and can be easily broken. After this, the panel will no longer fit properly, and the car will noticeably increase in squeaking while driving.
In some cases, it is not necessary to completely dismantle the standard panel. Our article provides a description of a complete analysis.
Necessary tool
To remove the case, you should have in your arsenal:
- Labels with adhesive backing.
- Marker or pencil.
- Set of screwdrivers and keys.
The main assistants in this work will be a 10 mm wrench and a Phillips screwdriver. We need a pencil or a washable marker in order to mark the removed elements. This also applies to self-adhesive labels. There are too many wires and parts, after disassembling you will already forget where each component is located. Markings and stickers will remind you of the location of wires and parts.
Preparatory work
Some people prefer to disassemble without dismantling other components of the interior, but this significantly complicates and prolongs the work. We recommend preparing the interior as you will need room to maneuver. Remove the seats and steering wheel - follow this sequence. It is also worth dismantling the floor tunnel.
Electrical diagram of the instrument display unit
The display unit of the VAZ 2110 car includes a detailed electronic control circuit containing an audio signal and ten LED indicators. The VAZ 2110 instrument panel indicators show the motorist the following faults or warnings:
- insufficient amount of coolant;
- insufficient oil level;
- insufficient amount of washer fluid;
- malfunction of external lighting lamps;
- unfastened seat belts;
- erasing the brake pads of the front wheels;
- open door on a car.
Improved sound insulation of the VAZ 2110 panel
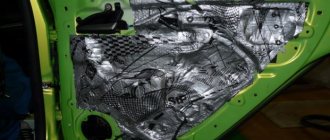
Many owners of a VAZ 2110 car are faced with such a problem as the squeaking of the panel when the vehicle is moving. One way out in this situation is to improve the sound insulation. To do this, you need to disassemble the panel into three parts, which are held together using fastening bolts. To “anti-creak”, modelin can be used, and to absorb noise, you can use bitoplast or other materials with similar properties. In those places where the plastic elements come into contact with each other, it is necessary to use modelin; they need to plug all the holes from the fasteners to reduce losses in the air flow of the stove. The reverse side of the torpedo needs to be covered with bitoplast. In most cars, the fuse compartment and glove compartment are susceptible to squeaks. To reduce squeaking in the area where the box is adjacent to the panel, you need to use modelin, and you need to attach bitoplast to the bottom of the glove compartment. One of the main advantages of bitoplast is that it compacts well. In this regard, there should be no problems when assembling the panel back. Such simple actions will help to easily ensure silence and eliminate noises and squeaks inside the car.
Instrument panel VAZ 2110. Price
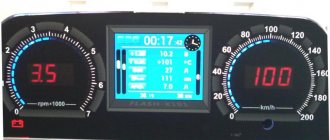
The standard appearance of the VAZ 2110 dashboard looks rather pale, but in order to add originality to it, you can do a few simple operations. One of the simplest is replacing the backlight and inserting new devices. This can be done in the following ways:
- Change the backlighting of the instrument panel and buttons yourself. To do this, you can use special luminescent paint: change the color of the numbers, arrows, notches. You can also replace conventional light bulbs with LED ones or install an LED strip.
- Purchase ready-made instrument panel covers (a large selection can be found at automotive markets). The instrument panel overlay for the VAZ 2110 will give it a more stylish look.
- Purchase and install a new instrument panel (there are various modifications: digital and pointer) with a built-in on-board computer.
- Replace the entire dashboard or entire dashboard (this will require more time and financial costs).
Well, I never liked the old tenth panel... Some kind of squalor (a matter of taste). Some kind of angular, irregular shape...
