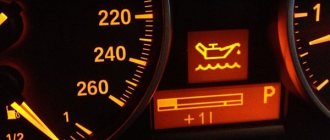
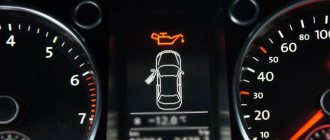
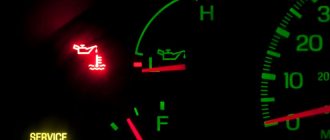
The lubrication system of an internal combustion engine performs four main functions: it reduces the friction force between the mating elements of the power unit, cools them, protects them from corrosion and cleans them of fuel combustion products and wear. To perform these functions, a certain oil pressure is maintained in the engine. Insufficient or excessive pressure will lead to rapid wear and destruction of rubbing parts. Pressure control is carried out using a special sensor and indicator (control lamp on the dashboard). We will tell you when this indicator lights up and what actions the car owner should take.
Operating principle of the lubrication system
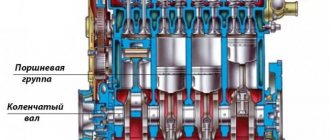
Lubrication of moving engine components occurs according to the following principle: oil gradually flows into a recess located in the sump, after which it is sucked in by an oil pump, passed through an oil filter and again supplied to the loaded components.
The latter include:
- crankshaft plain bearings;
- cylinder walls;
- cylinder head;
- all gear mechanisms.
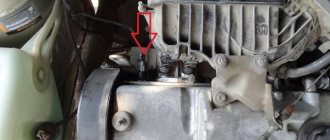
A sensor that monitors oil pressure is installed at the top of the cylinder head, at the point where the lubricant passages end. Thanks to this, the sensor monitors the oil at all stages of its movement, starting from the oil pump and ending with the camshaft.
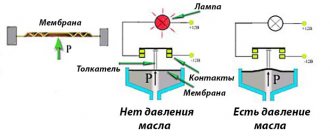
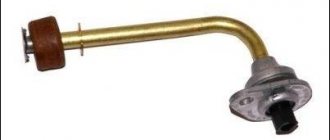
The design of the ODM itself (oil pressure sensor) includes only three main parts - its housing, electronic contacts for signal transmission and a sensitive membrane. Depending on the oil pressure, it either closes the electrical circuit or opens it. If the pressure is less than the permissible threshold (0.65 Bar), then the sensor is triggered and the oil light for VAZ 2114 lights up on the panel.
As soon as the light comes on, you should stop driving as quickly as possible and search for possible faults. Operating a vehicle with an inoperative oil supply system can lead to rapid wear of moving parts and even engine failure.
A little about the consequences
Consider yourself very lucky if the red light is on and you continue to drive without knocking or jamming. This means that only the VAZ 2114 oil sensor has failed. But it is not always possible to get by with little damage. 10-20 seconds of operation of the power unit without lubrication is enough for the crankshaft to rotate the Babbitt liners and jam. In this situation, you will face expensive repairs, which involve replacing the plain bearings and grinding the crankshaft bearings and connecting rod journals.
Reasons why the indicator light may come on
The indicator light can light up both while driving and at idle speed. Before making assumptions about the causes of possible malfunctions, you should observe the behavior of the light bulb. If it lights up periodically and only while driving, the problem should be looked for in the sensor wiring. If the lamp lights up when the engine is idling and does not go out, this may be due to:
- faulty pressure sensor;
- low oil level;
- too liquid (not corresponding to the class or expired) oil;
- oil pump malfunction;
- oil filter wear;
- contamination of the oil receiver mesh;
- wear of the crankshaft liners.
Let's consider each of these situations in more detail.
Sensor Wiring
Flashing of the indicator light while driving may be due to damaged insulation of the sensor wire. The wire, under the influence of vibration, shorts to the ground of the car, which causes the sensor to operate. This problem can be eliminated by thoroughly inspecting the wiring and replacing the damaged section.
One of the reasons for the light to come on may be damage to the pressure sensor wiring.
Sensor
In VAZ 2114/15 cars, the oil pressure sensor often fails. Most often, it is this that causes the indicator lamp to constantly burn. It is impossible to check its serviceability yourself. Usually a new sensor is purchased and installed.
A faulty VAZ 2114/15 pressure sensor often causes the oil pressure lamp to light up
Lubricant level and quality
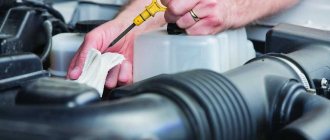
If the indicator light is constantly on, you should check the oil level in the oil pan. This is done with a special probe on a cold engine. If the level is below the minimum allowable, you should add the substances and observe the behavior of the light bulb. If it went out, the problem was precisely the lack of lubrication.
Another reason for the indicator light to come on may be that the oil consistency is too thin. The fact is that the viscosity of the oil decreases with each kilometer traveled. If the car has traveled more than 10 thousand km without changing the oil, the oil pump, designed for a certain lubricant viscosity, will not be able to create the necessary pressure. In such cases, the light comes on only when the engine warms up to operating temperature. This is due to a decrease in oil viscosity due to heat.
Oil viscosity decreases over time, causing system pressure to drop.
This problem can be solved by simply changing the oil. If the indicator continues to light, troubleshooting should be continued.
Pressure measurement
To measure the oil pressure in the system, a liquid pressure gauge is used. The nozzle of its hose is screwed in instead of the pressure sensor. First, measure the pressure at idle speed of a warm engine. A pressure of 1.5 to 2 bar is considered normal. Then the measurements are repeated at high speeds (5000–5500 rpm). In this case it must be at least 4.5 bar.
If the pressure gauge shows values below those specified, you should check the oil pump, since it is the one that creates pressure in the system. It is not recommended to continue operating the vehicle in this case.
The main malfunctions of the oil pump are wear of its elements and “sticking” of the pressure relief valve in the open position. In this case, the easiest way is to replace the pump as a set. You can do this either yourself or at a car service center.
Replacement
Replacement is quite simple, you just need to prepare a 21 mm wrench and you can start replacing.
- Remove the connector from the sensor and unscrew it using a key.
- There is no need to be afraid that the oil will leak; this will not happen, since the engine is without pressure.
- We install the new sensor in the reverse order, having first cleaned the seat from dirt.
The pressure relief valve on the pump may be stuck. Then the pump pumps perfectly, but the oil flows back into the sump, since this valve must be closed and does not open for long to relieve excess pressure.
This malfunction is caused by a broken spring; it either stretches if it is made of insufficiently hard material or bursts if it is overheated.
The second reason why the valve does not close is that the lumen is clogged; the valve simply cannot return to its place. Clogging occurs when the oil is heavily contaminated, the filter is of poor quality, allows dirt to pass through, or has expired.
Clogged screen on the oil pump, from the same area as the clogged filter. The same reason, debris, the same consequence - a decrease in pressure in the lubrication system and increased wear on the pump itself and other engine parts.
If the oil pump stops working, there will be no pressure either. Pump designs are different and the reasons may also be different. It makes no sense to list everything. If the pump is not working well, the light may flash periodically.
Why does the alarm sound?
The reasons why the VAZ 2114 oil pressure is on may be:
- Damage to the oil pressure sensor.
- A break in the wires connecting the pressure sensor to the electronic unit.
- Low oil level in the system.
- Oil pump failure.
- Oil filter clogged.
Of all the above reasons, the last two pose the greatest danger to the moving parts of the vehicle. If the DDM itself breaks down, the cause can be eliminated literally in a matter of minutes. In addition to the above malfunctions, in which the signal in the form of an oil can on the dashboard lights up constantly, there are situations when it lights up periodically, either lighting up or going out.
The reasons for this behavior of the indicator may be:
- clogged filter mesh on the oil intake of the pump, which leads to improper operation of the latter;
- oil filter clogged;
- low oil viscosity due to its wear (it was not replaced for a long time);
- low oil viscosity due to gasoline entering the crankcase;
- short circuit of the wires connecting the DDM with the indicator on the dashboard;
- wear of crankshaft bearings.
Eliminating these causes will help completely get rid of the blinking pressure sensor on the panel.
Checking the product
If you notice that the light is on continuously, then you should check the fluid level in the system. When no problems are found during the check, you need to diagnose the condition of a device such as the oil pressure sensor on the VAZ 2114. If you don’t have special equipment at hand, you won’t be able to check it fully, but you can always carry out a visual inspection. But even in this case, you may notice oil leaks, which will be a sign of a faulty part.
The optimal solution in this situation would be to use a pressure gauge or a new sensor. If it is only slightly noticeable at the connection point, then perhaps the problem can be eliminated by replacing the O-ring. But if there are smudges where the terminal is attached, then replacing the product cannot be avoided.
Useful tips
To prevent problems associated with a drop in oil pressure, the following recommendations should be followed:
- Fill the engine with oil recommended by the car manufacturer, paying attention to the viscosity grade.
- Change the oil and oil filter in a timely manner.
- Do not use non-original spare parts for repairs.
- At least once a quarter, carry out diagnostics of the lubrication system with mandatory pressure measurement.
- If the pressure indicator light comes on, do not operate the vehicle until a complete diagnosis has been carried out.
Ignoring the oil pressure indicator signals can have serious consequences for the car engine. Any malfunction of the lubrication system can lead to a major overhaul of the power unit. Try to keep it in working condition and pay attention to all signals given by the indicator light.
Higher technical education
Home →
Maintenance and Repair →
Engine →
This is interesting: Types of car engines - what do our cars run on nowadays?
How and with what to measure compression in a VAZ 2114 engine
Compression in a VAZ engine is the pressure that occurs at maximum compression when the piston is at its lowest point. The stronger this pressure, the higher the ignition temperature of the mixture will be, accordingly, the less fuel is spent on this process, and the higher the performance and efficiency of the engine.
Compression measurement
Compression depends on the following factors:
- On the amount of gas supplied, which depends on the position of the throttle valve and the capacity of the air filter;
- From the temperature of the internal combustion engine;
- From the gaps between the inner walls of the cylinder and the valves.
The gaps between the piston group units in the cylinder depend on a variety of factors:
- Incorrect adjustment of clearances between valves and cylinder walls;
- The degree of burnout and wear of the piston and cylinder walls;
- Oil on the cylinder walls helps seal and increase compression, but if gasoline is injected into the cylinder for some reason, it washes the oil off the walls, which increases the clearance between the piston and the cylinder.
Using these parameters, the driver or car mechanic makes a preliminary assessment of the condition of the engine - its performance, power, efficiency.
Oil level sensor
Electric -2114 allows you to control the amount of lubricating fluid in real time during vehicle operation. The signal from it is sent to the corresponding dashboard indicator, notifying the driver about the lack of oil level in the engine sump. Insufficient oil level in the car crankcase leads to engine failure and, as a consequence, to expensive and time-consuming repairs.
Therefore, it is necessary to ensure that there is always a sufficient amount of suitable engine oil in the engine. The volume is approximately 4 liters. When replacing it, the volume of newly filled engine oil is not less than the volume of drained fluid. Reaching the required level is determined using a measuring probe.
Operating principle of DUM
The oil level is based on the use of the properties of a reed switch (a reed switch is a sealed magnetically controlled contact) with make-break contacts. When the sensor is immersed in engine oil, its contacts are open and the indicator is . If the level is insufficient (there is no oil between the contacts of the reed switch), the contacts close, thereby turning on the electrical circuit of the control light on the car’s dashboard.
Helpful advice. While trusting the electrical readings, it is still recommended to check the engine oil level daily using a dipstick.
If the indicator of its insufficiency lights up, it is necessary to verify the reliability of the DUM readings. A measuring probe is used for this.
How to use the test probe
Checking the oil level using a dipstick is carried out as follows (the car must be horizontal):
- remove the dipstick from the tube located under the hood in the front part of the engine compartment, wipe it and find the marked max and min marks;
- install the probe back into the tube;
- After 2-3 minutes, we take out the dipstick again and see where the upper edge of the oil mark is located on it. If the mark is between the min/max marks, then the amount of lubricant in the engine is normal, but the performance of the sensor is in doubt and must be checked.
Why does the DUM indicator light up?
If during a trip the oil level indicator suddenly lights up on the dashboard, you should immediately stop and find out the cause of this phenomenon. Of course, you shouldn’t panic because of this, as the reasons can be different:
- There is not enough fluid in the car crankcase - you need to add oil to the oil filler neck to the required level. The oil to be added must be of the same type as that previously added. Otherwise the engine will fail.
- The level sensor is faulty.
Attention: DUM cannot be repaired. If it breaks, it must be replaced with a new one.
The causes of failure of the DUM are classified as follows:
- Oxidation of contacts;
- Short circuit or break in the power supply circuits of the sensor and/or liquid level indicator;
- Reed switch burnt out.
Replacement
Replacement is quite simple, you just need to prepare a 21 mm wrench and you can start replacing.
- Remove the connector from the sensor and unscrew it using a key.
- There is no need to be afraid that the oil will leak; this will not happen, since the engine is without pressure.
- We install the new sensor in the reverse order, having first cleaned the seat from dirt.
oil pressure warning light
- Thank you
- I do not like
Dimbasik 04 Dec 2009 Hello everyone! Tell me what the trick might be?
I turn on the ignition - 3 lamps light up as expected - check engine, battery and oil pressure. I start, drive, stop, turn off, turn on the ignition again - check-in, battery are on, oil pressure light is off. I noticed that it burns mainly when the engine is cold. Poor contact in the instrument panel or what is it? Tell me?
- Thank you
- I do not like
alekssmol 04 Dec 2009 Hello everyone! Tell me what the trick might be?
I turn on the ignition - 3 lamps light up as expected - check engine, battery and oil pressure. I start, drive, stop, turn off, turn on the ignition again - check-in, battery are on, oil pressure light is off. I noticed that it burns mainly when the engine is cold. Poor contact in the instrument panel or what is it? Tell me?
Have you checked the oil level? and of course the contact on the sensor itself. try tapping it lightly
- Thank you
- I do not like
kirill.evs 04 Dec 2009
- Thank you
- I do not like
Dimbasik 04 Dec 2009
- Thank you
- I do not like
anry Dec 04, 2009
- Thank you
- I do not like
Compass 04 Dec 2009 10 seconds did not light up, which means the CPG is working.
First, try installing a sensor that is known to be good.
- Thank you
- I do not like
Dimbasik 04 Dec 2009
- Thank you
- I do not like
KOCTA 04 Dec 2009 also a thought! I understand you are talking about the oil pressure sensor at the oil filter? need to try.
There was such a malfunction, I replaced the oil pressure sensor, it seemed to disappear, but soon the lamp on the tidy came on again, then it didn’t. I found a burnt corrugation with wires, the pressure sensor wire was touching the exhaust manifold pipe (ground), the wire was insulated, and the corrugation pulled it off with zip ties.
WHAT THE COMPRESSION SHOULD NOT BE IN AN ENGINE
At first glance, it may seem that the higher the compression parameters of the air-combustible mixture, the better. But actually it is not. Compression has an upper threshold that cannot be crossed, as this will lead to overheating of the engine, and, as a result, deposits of carbon deposits, excessive load on the pistons and rings, as a result of which engine parts may fail.
Low pressure in the engine leads to excessive consumption of fuel and oil. It is not permissible that in individual cylinders it differs sharply from neighboring ones. Different compression in the cylinders indicates serious problems in the engine - wear and defects that have appeared that require replacement or repair of parts.
Thus, bad compression is:
All of these signs of poor compression are a sign that the heart of the car needs repair.
Diagnostic features
Before replacing the old device, it must be removed and checked. The easiest way to check is to plug in a known-good device into the network.
Another way is to screw a pressure gauge in place of the sensor. If the tester shows a pressure of 0.65 kgf/cm2 or more, this indicates that the system has normal pressure and the cause is a faulty device.
If you don’t have a pressure gauge at hand, you can check the sensor in the following way:
- unscrew the regulator;
- crank the starter without starting the engine;
- If oil flows from the socket, then the sensor is faulty and needs to be replaced.
Replacing the sensor
In a Priora car, replacing the oil pressure sensor is not very difficult even for novice car enthusiasts who do not have practical experience in plumbing. It is performed if the causes of the defect are determined, if the oil pressure sensor in the power plant lubrication system is on. The procedure for replacing the oil pressure sensor is as follows:
- Turn off the power plant.
- Remove the plastic motor cover.
- We remove the car wiring block from the product.
- We unscrew the device using a socket wrench and remove it from the technological hole in the body of the cylinder head.
- When installing an updated product, it is necessary to install a metal sealing ring.
- We are installing a new device. This completes the installation.
If the oil pressure sensor lights up even with the updated device, it is necessary to test the pressure value in the vehicle’s lubrication complex. For this purpose, instead of the removed device installed in the cylinder head of the engine unit, we screw in an adapter on which the pressure measuring device is installed.
When monitoring the pressure parameter in the lubrication system of the power plant, you should know that the indicator of this physical quantity on the engine at idle speed should be at least 0.5 bar.
Is it possible to drive with error 12?
It is not advisable to drive, especially on long trips, only if there is a suspicion of a malfunction of the generator or the behavior of the car is very different from usual. The car may stall and not start again. And delivering it to your home or to the place of repair may be associated with certain difficulties. But using a car with such a problem does not threaten anything more serious.
Despite the fact that this code in most cases does not pose any danger to the vehicle and its owner, you should not drive with it for too long. You should solve this problem yourself or with the help of a specialist as quickly as possible. Moreover, many reasons do not require significant financial costs.
We fix problems ourselves
The oil can icon may not light up for various reasons:
- wiring problems;
- malfunction of the sensor itself;
- the indicator light has burned out;
- The fluidity of the oil is temporarily impaired due to low temperatures and prolonged storage.
The first three reasons can be considered a signal to action, since they must be eliminated as soon as possible for safe operation of the machine. The fourth reason has only one way out - start the engine and wait for the oil to spread throughout all components and parts.
The first indicator on the left shows malfunctions in the engine lubrication system
Preparing tools for repair
To troubleshoot the oil pressure light, you may need the following tools and devices:
- screwdriver with a flat thin blade;
- pressure gauge;
- new indicator light;
- wires;
- sensor.
Operating procedure
First of all, car enthusiasts are advised to start by inspecting the sensor and its connector, and only then move on to solving other issues.
If the sensor has a whole body and the connector is connected correctly, then it is recommended to check other elements of the system
To make it easier to find a fault, it is better to adhere to the following operating scheme:
- Check the connector that connects to the oil pressure sensor. As a rule, the sensor is located on the engine cylinder block, usually on the rear side. You can find out the exact location of this element in your car's manual. It is recommended to remove the connector, make sure that it is clean and free of dirt, and then connect it back. If this simple procedure does not help, move on to the second point.
- Measure the oil pressure with a pressure gauge. It should be within the range specified in your vehicle's owner's manual. If this is not the case, change the oil pressure sensor.
- After this, you can remove the wiring from the sensor and connect it to the engine ground. If the oil can in the passenger compartment does not start to burn, then you will have to check the entire wiring or change the indicator light.
- It is easier to replace the light bulb on the indicator - it is quite possible that it has simply burned out, and therefore does not light up at those moments when it is necessary. It is enough to remove the protective strip from the instrument panel, unscrew the old lamp and insert a new one.
- If this does not help, then the last chance to fix the problem is to replace the wires. You can usually visually notice abrasions or breaks. It is recommended to immediately replace the entire wire rather than trying to rewind it with electrical tape.
Functionality check
Checking the device is a fairly easy procedure. Although not everyone, even an experienced car owner, knows how it is done.
Well, let's share this secret. To work, you will need a certain set of tools, which includes:
- A set of keys;
- Dry rags;
- Voltmeter;
- Inspection hole.
The sensor you are looking for is located directly next to the oil filter.
Location
There should be no problems finding it, but you will still need to get to our oil level sensor.
- Place the car on the inspection hole;
- Be sure to remove the engine protection. Without this, alas, there is no way;
- Find the sensor you need;
- Clean its body from adhering dirt and accumulated dust;
- Start the car engine;
- Disconnect the wires that connect to the block;
- Using a voltmeter prepared in advance, measure the voltage on the block and ground;
- If the sensor is working properly, the voltmeter will show you a voltage of about 12 V.
But voltage does not always appear on the device. In this case, you should carry out a couple more manipulations:
- Check if the display unit works. It may turn out to be faulty, and you will place all the blame on the sensor;
- Check the status of the contacts. This device is not the most reliable, plus operation in harsh conditions often leads to network breaks.
If even after this the sensor still does not show signs of life, then there is nothing else left but to replace it with a new one. This is the only way to fix the problem. A broken DUM cannot be repaired.
WHAT TO DO IF YOU DO NOT HAVE A COMPRESSOMETER AT HAND?
Is it possible to measure compression without a device? Practice shows that yes, it is possible. But this method will give relative and approximate readings. To measure the compression indicator without instruments, remove the spark plugs from all cylinders except the one being tested. Manually rotate the crankshaft until the compression stroke ends (watch the marks - they should match). Perform this operation on all cylinders one by one. Where the pressure is low, it will take less effort to turn the crankshaft. In this way, of course, you will not get accurate compression readings in the engine. But it is possible to understand the presence of problems.
It is recommended to measure compression every 20-30 thousand kilometers, so every car enthusiast is recommended to have his own compression gauge. Its price is not so high that it is worth saving on it.
The approximate price of a device for measuring engine compression in online stores in the capital is from 600 rubles to 2 thousand. Branded models from Western manufacturers are more expensive – up to 8 thousand. In the regions, a device for measuring compression costs no more than in the capital. Its price varies depending on the manufacturer.
Source
COMPRESSION MEASUREMENTS IN THE ENGINE. COMPRESSOMETER
A device consisting of a pressure gauge and a rubberized tube that measures compression in the engine is called a compression gauge. The following devices are used:
Experts believe that of all types of compression gauges, it is better to use threaded ones. They provide more accurate information. It is necessary to measure the compression in the engine in each cylinder separately. The measuring instrument hose is inserted into the spark plug socket.
Now that everything is ready for measurements, start the engine and squeeze the gas all the way, let the engine run for a while. Check the pressure gauge readings and record them. Move the compression tester hose to the next spark plug hole, and take measurements in the second and subsequent cylinders in the same way. Write down all the results and compare them.
PREPARATION FOR MEASUREMENTS
Engine compression is measured with a fully charged battery. After charging and installing the power source in place, check the starter. It shouldn't create any problems either. Then warm up the engine. Its temperature during measurements should be 70-90 O C.
It is necessary to unscrew all spark plugs from all holes. Also unscrew the fuel hose to stop the fuel supply. Prepare the compression gauge for use.
Compressometer
