Preparatory operations
Changing the pump and roller is a prerequisite so that after a thousand kilometers you don’t have to disassemble everything again. But it’s up to you to decide for the pulley, the price is 150 rubles per pair. There were cars where a slightly bent pulley caused the belt to slip and gradually wear out, reducing its service life. On this car the belt was worn down in half.
Replacement interval
We recommend that you periodically check the condition of the belt to avoid annoying consequences and not have to look for someone to take it to a repair shop. Replace every 40,000 kilometers.
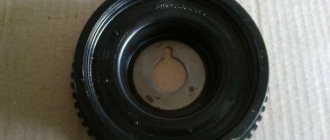
And here is the patient himself.
We unscrew the three ten bolts securing the protective timing cover and remove it.
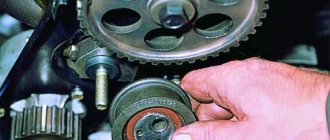
Next, loosen the nut thirteen that secure the generator and unscrew the tension bolt ten.
We take the generator to the engine and remove the belt.
Set the top dead center
Remove the engine protection and drain the antifreeze. We set the camshaft mark by turning the crankshaft clockwise. The ebb on the pulley should be opposite the bend of the protective cover fastening.
Unscrew the crankshaft pulley mounting bolt. We put the assistant in the cabin and force him to engage fifth gear and press the brake. And at this time we easily and naturally unscrew the bolt using a 19 meter head and a pipe of one and a half meters. It must be screwed properly, and some craftsmen lubricate it with sealants and then wait for kind words addressed to them.
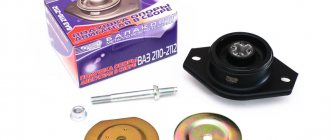
Replacing the pump
Unscrew the nut on the tension roller 17 and remove it along with the belt. Then unscrew the camshaft pulley bolt and remove the last one.
We unscrew everything that secures the protective metal shield, namely one ten-point nut and a bolt securing the cover, three bolts securing the pump.
Remove the protective cover and pump. Antifreeze remaining in the block may leak out if you have not drained it. Carefully, it's sweet.
We clean all the parts from oil and belt residues, as well as the pump seat from the old gasket and sealant.
Lubricate the gasket of the new pump with sealant and put it in place. We install the metal protection and tighten all the bolts and nuts securing it.
We tighten the pump bolts evenly in a circle, then check whether the pump is spinning.
Recently a client brought in an original pump, which turned out to have slightly larger petals and after installation it began to bite. I had to modify it with a grinder and take measurements several times. These are the spare parts we have.
We check if the key is lost on the camshaft and install the pulley. We tighten its bolt to seventeen.
Timing device VAZ 2109
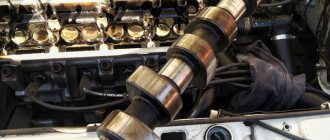
The mechanism consists of a camshaft or, more simply, a camshaft. Its job is to control the valve mechanism using pushrods that move the valve cams to open and close. In the socket of each pusher there is one or more adjusting washers, with the help of which the required thermal gap is set.
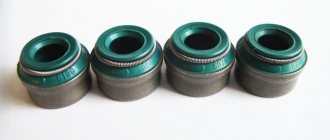
The valve group is located directly in the cylinder head. Intake and exhaust valves differ from each other in the material from which they are made. The intake valve is made of a steel alloy with the addition of chromium and silicon. The exhaust valve combines metals such as steel, chromium, molybdenum, nickel and manganese. Each valve has a special overlay made of heat-resistant material, which prevents its destruction under the influence of high temperatures inside the combustion chamber. The guide bushings are made of cast iron alloy, and oil seals with a steel ring are located on top. The purpose of the caps is to limit the possible entry of oil into the combustion chambers through the gaps between the guide sleeve and the valve.
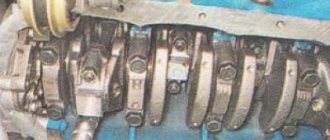
With the help of springs resting on support washers, the valves are pressed against the seats. This fastening does not allow excessive wear and is considered quite reliable. Pushers in the form of cylindrical cups transmit the action from the camshaft to the valves via cams. When the engine is running, the tappets rotate around their axis, so wear occurs evenly. The coolant pump, or simply pump, is also involved in the timing system on the VAZ 2109 and is driven by the same toothed belt, which is tensioned using a tensioner roller rotating on the cylinder head axis.
Determining the correct location of the drive pulleys occurs by rotating the crankshaft.
It is necessary to turn it so that both valves are in the closed position. If the marks on the back cover and the camshaft pulley match, the belt is not tensioned correctly. You need to loosen it with a roller, tighten it properly and check the marks again. The camshaft is made of cast iron alloy and consists of a shaft on which there are five journals for support. An eccentric is also fixed on it, which drives the fuel pump. A groove is attached to the rear end of the camshaft for mounting the power plant ignition sensor.
Installing a new timing belt
We check that all marks match.
We first place the belt on the crankshaft and pump. Then we tighten the right descending branch of the belt and put it on the camshaft pulley and tension roller. We check all the marks again and tighten the belt with a roller. The tension is considered sufficient if, with the force of two fingers, you can twist the longest branch of the belt by a maximum of 90 degrees. It’s easier to take the right branch of the belt with two fingers and twist it, if more than 90 is not very bad, but less is very bad. An overtightened belt will wear out quickly and will also reduce the life of the pump.
We place the bottom protective plastic cover. And on the crankshaft pulley we mark the twentieth tooth after skipping two teeth. We count counterclockwise.
This mark corresponds to the top dead center of the first cylinder. We put the pulley in place and the mark should be against the crankshaft position sensor. More precisely, against the small iron core of the sensor. Sometimes it gets into the gap between the teeth, this is considered acceptable. We tighten the pulley in the same way as we unscrewed it, with the help of a partner.
We turn the crankshaft two turns and check the marks; this is where our mark on the pulley comes in handy.
If everything is in trouble, we collect everything that we took apart. As they say in smart books, install the parts in the reverse order of removal. Don't forget to add antifreeze.
We start the car, accept congratulations from family and friends and head off to adventure.
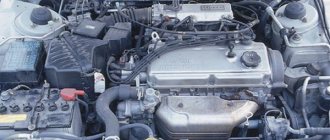
Timing belt for VAZ 2109 engine
Previously, the gear device was quite rare and caused some mistrust among car enthusiasts. In modern cars, such a drive is no longer uncommon. And there are a number of objective reasons for this:
- toothed belt drive is less noisy;
- simplicity of design and light weight;
- service costs less.
But, as it turned out, the belt has many disadvantages. Firstly, it is fragile (it often breaks). Secondly, with prolonged use, sagging is observed, associated with squealing. Thirdly, if you tighten the belt, its teeth will “stick together” over time, which will lead to the need for replacement and unstable operation of the power unit.
Purpose of the timing belt
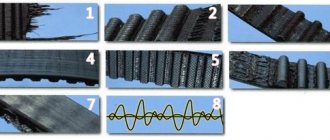
The timing belt is made of rubber and has teeth with serrations on the inside. Its main task is to ensure synchronous rotation of the crankshaft and camshaft drives. Thanks to the belt, a lower camshaft speed is achieved: it is two times lower than the crankshaft speed. Unfortunately, the part does not last as long as the chain, and wears out before 60 thousand kilometers. It is recommended to replace the belt, even if there is visually no visible damage or signs of wear.
A broken belt completely disables the engine, making it impossible to move the car. On 8-valve engines with a volume of 1.5 liters (the injector and carburetor have the same systems), a broken belt does not lead to the valves being deformed; in common parlance, the valves are bent on the valve cover.
There may be several reasons why the drive breaks.
- Natural wear of the belt or manufacturing defects (poor quality material).
- The ingress of oil and dirt, as a result, peeling of the rubber and breakage.
- The coolant pump is jammed and antifreeze is leaking.
- Tensioner pulley problem.
- Seized camshaft or crankshaft.
In order to avoid the financial costs of eliminating problems when the timing belt breaks, it is necessary, if possible, to monitor the operation of the timing belt:
- do not neglect the established regulations and promptly change consumables (belt, roller, pump, etc.);
- listen to the sound of the engine and if suspicious noises occur, immediately look for the cause;
- Check the belt tension regularly and tighten if necessary;
- monitor the warning lights on the dashboard (the oil pressure warning light indicates a malfunction);
- Avoid oil leaks; if there are any, look for the cause of the leak.
However, monitoring the condition of the belt and other drive elements is problematic due to the protective casing. To solve this problem, it is recommended to make a small inspection slot in the casing cover.
This way you can monitor the condition of the belt. And if there are cracks, scuffs and other damage, replace the drive in a timely manner, without waiting for it to break at the most inopportune moment.
How to tension the timing belt correctly
The optimal tension of the timing belt is very easy to check. Using a little force, you need to unscrew the belt. If the angle at which it is twisted is 90 degrees, then tension is not required.
After replacing any timing element, you will need to tighten the belt. To do this, you need to put it on the toothed pulleys of the crankshaft and camshaft drive and use a tensioner roller to make the tension optimal. After this, you need to crank the engine several times. This can be done with a wrench by turning the camshaft pulley mounting nut. Next, you need to look at the location of the alignment marks on the flywheel and gear - they must match exactly. If there is no match, the belt is removed again. And the pulleys are installed according to the marks, after which the tensioning procedure is repeated.
It happens that even a correctly tensioned belt begins to slip after starting the engine. The reason for this is deformation of the roller pin. It needs to be replaced.