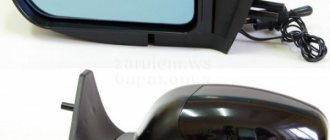
A rearview mirror is an integral element of a safe car ride. The interior mirror allows you to control the situation both behind the car and inside the cabin. Side – increases visibility to the sides and rear of the car. They are standard equipment in any modern car. However, external ones are very susceptible to damage and, accordingly, require replacement. And sometimes the driver just wants to change them to more modern ones, equipped with additional electrical appliances and tuning elements. And for this you need to understand the structure, learn how to remove and install it correctly.
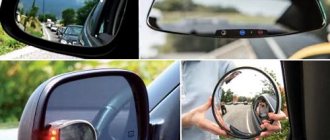
Using rear-view mirrors, the driver can correctly assess the situation on the road
Removing the outer and inner rear view mirrors
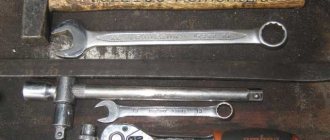
Rear view mirrors are an integral part of the car. Even those drivers who have equipped their “swallow” with a monitor or camera cannot do without mirrors. Therefore, keeping them in good condition is the primary task of every car owner. Before moving on to the procedure for dismantling the mirrors, we will list the tools that we will need for the job.
Tools required for dismantling
- Phillips screwdriver;
- flat blade screwdriver.
How to disassemble an external mirror
It is advisable to dismantle the exterior mirrors in a certain sequence.
- Using a screwdriver, remove the locking bracket to which the mirror angle adjuster is attached.
The side mirror retaining bracket is removed using a Phillips screwdriver. - Use the same screwdriver to remove the fastening screws. There are only three of them. Be sure to hold the mirror while removing these screws.
The screws holding the side mirror are unscrewed with a Phillips screwdriver - After removing the screws, the mirror is removed. To do this, you need to slightly pull it towards you.
After removing the screws, the mirror is removed manually
How to properly remove the interior mirror
Changing the rear view mirror in the cabin is a little more difficult. Work must be carried out in the following sequence:
- The plastic plugs above the interior mirror mounting screws are carefully pryed off with a flat screwdriver and removed.
- The mounting screws are unscrewed with a Phillips screwdriver.
The mounting screws for the interior mirror are unscrewed with a Phillips screwdriver. - The mirror is carefully removed.
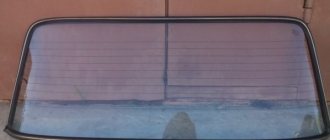
How to remove a mirror from a windshield
Dismantling a glued mirror does not require any special skills. Proceed as follows:
- In some modern cars, the bracket with the interior rear view mirror is glued directly to the windshield. To remove it, you must remove all plastic plugs from the bracket (if any).
- After this, the mirror is turned counterclockwise with both hands and removed from the socket.
The glued mirror rotates 90 degrees and is removed manually
Reasons for removing film
Peeling off the tint film is a very labor-intensive process that needs to be approached no less seriously than gluing it. So the removal methods will largely depend on the reason why you need to remove the old tint. Because a relatively freshly applied film is much easier to remove than an old one. And so let’s get acquainted with the most common reasons for its removal.
Reasons for removing the film:
- If you notice that the film has begun to fade, peel off, or some defects have formed, for example, air bubbles, or it has simply changed its color, then it is clear that there is no point in leaving it on the glass, because it has already lost its functions anyway and the appearance too. Basically, a change in color can occur when using non-metallic dyes in tinting, and the appearance of bubbles, in turn, is due to poor adhesion of the tinting to the window or poor-quality glue.
Disassembling rear view mirrors
The procedure below applies to both exterior and interior mirrors.
- The mirror is removed from its regular place.
- Use your hand to gently press the top edge of the mirror glass until it unrolls.
Side mirror mirror element rotates manually - A piece of rag or napkin is placed in the gap that appears between the mirror body and the glass.
- Then a flat-head screwdriver, pre-wrapped with electrical tape, is inserted into this gap.
The latches holding the mirror element are bent with a flat screwdriver - The latches holding the mirror are pryed with a screwdriver and removed from the protrusions.
- The mirror glass is carefully removed.
The left mirror is dismantled in the same way as the right one.
Replacing the mirror element.
Replacing mirror elements may be required for the following reasons:
1. The mirror element cracked due to impact or temperature changes
2. Replacing a regular mirror element with a heated mirror element
3. Mirror elements from the car were stolen.
The question arises: How to replace the mirror element? What is the technology and how to remove the mirror element yourself, without being a car service specialist. With little skills this is not difficult.
It should be remembered that when dismantling and installing the mirror element, care must be taken not to allow large loads on the mirror sheet, since it is not rubber and will burst after a critical load threshold. That is, patience and tenderness. Of course, if the mirror element has already burst or cracked, then you can safely pull it out of the mirror housing, the main thing is not to break off the side mirror of the car itself and not to turn the car over
So, let's begin
Of course, if the mirror element has already burst or cracked, then you can safely pull it out of the mirror housing, the main thing is not to break off the side mirror of the car itself and not to turn the car over. So, let's begin.
1. When removing the mirror element, it is necessary to turn it out as much as possible so that a gap is formed at the top between the element and the mirror body
Be careful when using electrical adjustment to avoid damaging the mirror motors.
2. The mirror element is usually attached in the center to a round seat with latches that disengage with the seat when dismantled
3. It is necessary to apply force to the mirror element from within the mirror itself, distributing this force as much as possible over the area of the mirror element to avoid distortion. This is achieved in several ways:
• Those whose fingers are not very spread out with their rings can insert them into the gap formed between the mirror body and the mirror element and press from the inside onto the backing of the element until it falls out of the body; with the other hand, of course, you need to catch it.
• Take 2 screwdrivers and hold them in your hand in the form of an inverted V; the ends of the screwdrivers press the element from inside the mirror and dismantle it.
• A rope or twine, folded in half, is inserted into the gap between the element and the mirror, distributed in the center of the mirror, the ends of the twine are clamped in the left hand, the right hand holds the mirror body so as not to damage it. By smoothly pulling the twine, the mirror element is removed from the mounts and falls out. In this case, the right hand holds the mirror body, so you need to find a third hand somewhere that will catch the falling mirror element.
4. The installation of mirror elements is carried out, as they say, in the reverse order - the latches are inserted into the mounting grooves on the mirror itself and the element is fixed by pressing evenly with the entire palm. It is not recommended to hammer the element with a hammer, press on the edge, or rest with your feet.
If the mirror element is heated, then it is necessary to provide for the presence of wiring for it in advance.
And this is a separate replacement for the glass of the mirror element:
How to glue a car mirror to the windshield
First we need to decide on the glue that we are going to use.
What glue should I use?
The main rule: the glue holding the interior mirror to the windshield must be two-component. Yes, there are many varieties of all-purpose glue. But in this case, universal glue will not work. The fact is that two-component glue perfectly withstands sudden temperature changes, high humidity, and most importantly, vibration. Conclusion: the mirror element should not be glued with universal glue.
There is a second option: use light-curing glue. This is a substance that quickly “sets” when exposed to sunlight. This glue can be purchased at specialized auto stores. But it has a serious drawback: to work with it, a powerful ultraviolet lamp is required, without which reliable bonding cannot be achieved. Some car enthusiasts claim that you can do without it, just sticking the mirror on a sunny summer day is enough. But such gluing cannot be called reliable.
The conclusion is simple: the best and least troublesome option for gluing a mirror is two-component glue. For example, Loctite 37438, which has become incredibly popular recently. By the way, it is sometimes used to glue DVRs that have a loose fastening device.
How to attach a mirror element
To keep the mirror securely on the windshield, you must follow the following algorithm:
- Select the location for installing the mirror. It should be glued in the center of the glass, at the same distance from both the passenger and the driver.
- The windshield is cleaned of dirt. First, this is done with a rag, then the surface of the glass is wiped with alcohol.
- The mirror is disassembled as indicated above (after all, in fact, only the bracket on which the mirror will be installed needs to be glued to the glass).
- A thin layer of glue is applied to the bracket and to the windshield. After this, you must wait at least 15 seconds.
Glue is applied to the interior mirror bracket - Then the bracket is installed on the windshield and lightly pressed down manually (and if you decide to install the mirror entirely, without disassembling, then after installation it must be additionally secured with tape, which will support the mirror until the glue sets).
The interior mirror is glued to the windshield - The glue must dry properly, so you cannot drive the car for 24 hours.
How to install and secure heated side mirrors
To assemble and connect the side mirrors yourself, you will need minimal electrical knowledge and dexterity. You must act in the following sequence:
- A set of mirrors equipped with an internal heating system is purchased.
Heated mirrors for Lada Granta - The standard side mirrors are removed from the car in the manner described above.
- After installation, the top cover on the side mirror housing opens. This gives access to the wiring socket (it is supplied with the mirrors).
The side mirror housing is opened and the electrical wiring is connected. - The wires are connected to the socket and inserted into the door through the mirror housing.
- Use a Phillips screwdriver to remove the plastic trim from the door.
Plastic trim removed from car door - The wiring runs through the door and dashboard to the fuse box, next to which there is a relay with a plug for turning on the heated mirrors.
Mirror wiring is connected to the heating relay - The wiring plug is connected to the socket shown in the photo, after which the car door trim is reassembled.
Common device problems
Let's look at a few troubles that every car enthusiast may encounter.
Peeling off the mirror surface
Sometimes this kind of trouble happens even on new cars. The reasons can be very different.
- the manufacturer decided to save money and used a low-quality adhesive;
- during the work, the master did not allow the glue to set properly;
- the mirror came unstuck due to too sudden temperature changes (and this is the most common reason, especially in frosty winter).
In all these cases, the car owner will have to use two-component glue, as shown above.
Glass replacement procedure
The mirror element of both the exterior and interior mirrors may be damaged. Below is the sequence for replacing it:
- The glass is removed from the mirror body.
- The new mirror element has several plastic hooks (in our example there are 4). These hooks are inserted into the mounting holes in the mirror body, after which you need to press very carefully on the mirror element.
The new mirror element is installed into the mirror housing manually - A characteristic click will be heard, indicating that the plastic hooks have engaged and the glass has “settled” into place.
The procedure for replacing mirror elements in interior mirrors is similar to that given above (the only difference is that there are usually 2 plastic latches in the interior mirror, not 4).
Video: how to assemble and change the mirror element
Rear view mirrors can cause car owners a lot of trouble. But fortunately, most of these problems can be solved on their own. Removing and securing the mirror element can be done on your own. The main thing is to act as carefully as possible and do not forget that glass is an extremely fragile material.
The circumstances in which you will need to remove your rear view mirrors can vary. For example, repairing or replacing cracked glass, purchasing new modified models, and even regular window tinting. In addition, you can install a heater in your car, as well as a monitor and a rear view camera. Removing a damaged mirror, disassembling it and gluing a new one with your own hands is not so difficult, as is installing devices more convenient than a regular reflector. To do this, arm yourself with your machine's operating manual and our instructions.
Tuning and installation of structures with pre-installed electronics
The installation methods described above are only applicable when replacing structures with similar ones. But for those who decided to slightly improve their car and, instead of the usual one, install a rear-view mirror with a camera, a video recorder, or additionally with a parking sensor monitor, it will not be possible to make do with improvised methods and replace the structure of the house. The same applies to installing heating on the side mirrors and additional lighting. Here you will need the help of a specialist, because you will have to deal with the wiring. Since this electrical device was not in the car before, the wiring will need to be correctly installed, secured, and then the operation of the device itself will need to be adjusted.
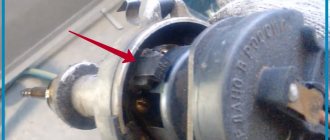
From the moment I bought the car, I almost had a problem with the rear view mirror. At first it appeared extremely rarely, and then it completely deteriorated. Perhaps the problem is familiar to some, but I don’t think I’ve seen anyone write about it. Over time, the mirror mount on the hinge becomes loose and it does not lock. For me it turned into the “I can’t hold on at all and look blankly down” stage. It needs to be corrected for the sake of appearance.
A long time ago I called the showdown. To which the answer was “Oh, yes! Standard problem, easier to replace." Well, I didn’t bother picking at anything, and then you know, I didn’t have time. So I recently came across a mirror and bought it. Moreover, his problem was just beginning, but compared to mine it was completely problem-free. Well, I installed it, and for the 5th day nothing has moved. I examined the mirror and it was clear that the hinge itself was coated with varnish, i.e. They also tried to repair it, but didn’t take it apart (I once poured instant glue into mine: it just doesn’t dry out and in the winter it worked just fine, but in the summer the glue apparently melted =)).
Read also: Car scanner for diagnostics
And so I took apart my mirror. And before I could figure it out, I came across a loose fastening of the platform, which was tightening the hinge. I tightened it right away and lo and behold! The fastening became absolutely unshakable!
In the photo, the black rectangle is the same mount that presses the ball. On two bolts that weaken over time. That's all about them actually.
But the mirror itself is essentially non-separable. The frame is soldered with dots. You might be able to see it in the photo. But in general, if you are careful, you can remove it. I removed it with a metal spatula. You can really shred everything with a screwdriver.
All that remains is to somehow glue the frame and return it to its place. I’m thinking about what to plant, because someday I’ll have to open it again. Apparently there is no way to do this without sealant =)
The circumstances in which you will need to remove your rear view mirrors can vary. For example, repairing or replacing cracked glass, purchasing new modified models, and even regular window tinting. In addition, you can install a heater in your car, as well as a monitor and a rear view camera. Removing a damaged mirror, disassembling it and gluing a new one with your own hands is not so difficult, as is installing devices more convenient than a regular reflector. To do this, arm yourself with your machine's operating manual and our instructions.
How to remove a rear view mirror
Mirrors of this type are designed to study the situation on the road behind the car. They can be divided into two categories:
- salon - installed inside the car;
- side - located on both sides on the front door pillars.
The interior mirror is located inside the car
side mirrors are located on both sides of the car
It seems that it could be easier than dismantling the mirror? In fact, this is not so easy to do, and the principle of dismantling can vary significantly between different brands and models. We will tell you about the most universal methods of removing, disassembling and installing internal and external ones. However, if any of the methods described here do not work for you, check your machine's owner's manual. Today, many automobile companies make all such processes much easier: perhaps, instead of unscrewing bolts and bending terminals, you only need to press a small button or pedal.
Required Tools
In order to remove the mirror, you do not need any specific or hard-to-reach tools. As a rule, everything you need can be found in any motorist’s garage.
- a set of screwdrivers (most likely, only figured and flat ones will be useful);
- wrench depending on the size of the bolts;
- household hair dryer for removing the mirror element.
Add to this set skillful hands and the desire to do everything efficiently, and you can get down to business.
Mirror removal process
Salon
Interior mirrors can be installed in a variety of ways depending on the make, model, and year of your vehicle. There are two methods that are used most often.
- Installation into the car ceiling using bolts or self-tapping screws.
- On the windshield using glue or suction cups.
Thus, on many domestic cars the assistant device is installed using ordinary bolts, which greatly simplifies the dismantling process. To do this, you just need to unscrew the bolts after removing the plug.
in order to remove such a mirror, you just need to unscrew the bolts
The situation can become more complicated if the mirror is mounted on a bracket glued to the glass. First of all, check whether it is possible to separate the bracket itself and the platform glued to the glass. On most cars, they are separated by moving the clamps or turning in a certain direction.
If this is not possible, you will have to resort to a radical method and remove the bracket along with the windshield. The fact is that the glue holds the elements very firmly, so when you try to separate the mirror, you may accidentally damage the glass.
Before you begin this process, take a look at your vehicle's manual: it should detail the process of removing certain components. Remember that buying a new windshield will cost you a lot.
You most likely will not be able to separate the bracket platform from the mirror on your own, so it is better not to risk it and contact a special salon. Especially if you are dismantling it for future tinting. However, if you decide to do it yourself, be prepared that a trace of glue will remain on the glass.
Selecting and replacing mirrors on a VAZ 2114
:
- Price issue
- Internal
- Lateral
To control the situation on the road, each car is necessarily equipped with rear-view mirrors. Two are located outside on the sides or one more is located inside the cabin. As a result, the driver receives a 360-degree view.
But it happens that the integrity of these mirrors is violated. This can happen as a result of an accident, banal looting, or some kind of accidental blow to them caused by the driver himself.
In any case, it is advisable for you to know how they are removed, disassembled, installed in place, adjusted and even insulated. Today our article will be devoted to these issues.
Price issue
First of all, we will orient you a little on the price tags that are presented on the market today.
The cost may vary depending on the manufacturer, technical features of the product and the region of its sales. Therefore, prices are average.
| content .. 229 230 231 232 233 234 235 236 237 238 .. Removing the mirror assembly 1. Remove the front door triangular trim (see Section 21). 2. Disconnect the mirror wiring connector (see accompanying illustration). Holding the mirror from the outside, remove the 3 mounting screws and remove the mirror from the door. |
1 Plastic wedge 3 Contact lugs for heating cables
3. If equipped accordingly, disconnect the 2 wires of the glass heating system from the reverse side (see illustration 23.2), while holding the riveted tabs of the contacts so as not to damage them.
4. Installation is carried out in the reverse order of removal. Do not forget to adjust the position of the mirror (see Chapter “Controls and operating techniques”).
Replacement of the electric motor of the side rear view mirror
1. Remove the door mirror glass (see Section 23).
2. Remove 3 screws (see accompanying illustration) and remove the electric motor from the mirror housing.
24.2 Screws (indicated by arrows) securing the door mirror drive motor
3. Disconnect the electrical wiring connector on the back side of the electric motor (see accompanying illustration).
| 24.3 Connector (2) of the electric motor (1) of the door mirror drive |
4. Installation is carried out in reverse order.
Removing and installing the side rear view mirror cover
1. Remove the door mirror glass (see Section 23).
2. Using a plastic wedge, separate the trim from the door mirror cover (see accompanying illustration). Remove the locking pin from the mounting socket.
25.2 Trim (1) of the door rear view mirror cover (2) - the arrow indicates the locking pin
3 Plastic wedge
3. Press out the 4 latches in the direction indicated on the contact. illustrations in order and remove the cover.
| 25.3 Retainers (1,2,3 and 4) of the door mirror cover |
4. Installation is carried out in the reverse order of removal. The locking pin is installed using a plastic wedge.
content .. 229 230 231 232 233 234 235 236 237 238 ..
Mirror typeapproximate costIndoor regular650 rublesIndoor panoramic800 rublesOutdoor regular500-600 rublesExternal heated700-900 rublesObviously, the characteristics of the panoramic interior mirror provide a better view, and the presence of heated exterior mirrors provides comfort and does not require constant wiping. It is better to pay more, but buy new functional products.
Internal
Let's start with the rearview mirror installed inside your car.
Interior rear view element
There are several reasons why the driver will want or have to dismantle this element:
- The desire to replace with a more advanced, new model;
- Installation of electronics, parking sensors;
- The glass or plastic case is damaged, broken and does not allow further use of the component;
- There is a need to install sensors that are not included in the standard equipment of your car.
THIS IS INTERESTING: When does an administrative fine come into force?
Replacement
Do not rush to remove the old mirror if you have not yet purchased a new product. Sometimes you have to wait for weeks because of the speed of delivery, and sometimes it’s enough to go to the market or store, where you will immediately find the desired product.
VAZ 2114 were produced until 2009, which requires the use of a standard type of fastening consisting of two bolts. This method of fixation has been used since 1976.
The downside of bolt-on mounting is the impossibility of installing an interior mirror from a foreign car. It’s good that there are many domestic products on the market that perfectly match the VAZ 2114.
You can start working.
- Remove the plug from the bolts. Although it is not always present.
- Holding the mirror body with one hand, begin to unscrew the mounting bolts with the other.
- Remove the old mirror.
- Check the condition of the seat and clean it.
- If the old bolts are covered with rust, it is better to replace them with similar new ones.
- Screw in the new mirror using the bolts.
- Insert decorative plugs so that the bolt heads do not spoil the appearance of the interior.
The simplest fastener
The bolts should be fixed as tightly as possible to avoid damage to the glass as a result of shaking and vibration.
Adjustment
The interior rear view mirror is tilt adjustable.
- The ideal setting is when, when you look into it, you can see everything that is happening behind your car;
- Some cars have high seats, which means you can see part of your ear and headrest in the reflection. This is a normal phenomenon, so there is no need to change the settings;
- A panoramic product with backlighting is best suited for the role of a rear mirror, since the glass used is flat and there is no image distortion, which has a positive effect on safety.
Lateral
There can also be many reasons for removing side mirrors. But mainly this is replacement, painting or installing a heating system.
Regardless of the situation specifically with your VAZ 2114, the first thing you will have to do is remove the elements. How to do it?
Side mirrors
Dismantling
Removing side mirrors is not a difficult task. Here you only need a screwdriver to work. Perhaps not alone.
- Pry off the plug located on the side mirror control knob.
- Behind the plug there is a screw that needs to be unscrewed with a Phillips screwdriver.
- Remove the triangular plug. In the case of the VAZ 2114, it is held in place by special clamps. So to remove it you need to carefully unscrew the latches. Use a flathead screwdriver to pry the plug and remove it without too much trouble.
- Next, three mounting screws appear in front of you.
- By unscrewing them, you will thereby remove the side mirror.
- Do the same procedure with the second rear view element.
As you can see, removing the components is quite simple; simple fastening is provided. This is largely why they love domestic cars, since even a person without much experience can disassemble and assemble most components.
Dismantling process
Disassembly
It is not a fact that you will need to completely change the rear view element assembly. Therefore, it is necessary to figure out how to properly and accurately disassemble the side mirror.
There are several ways to do this, each of which has its own characteristics.
- Press the inside of the plastic case and snap off the holders with a flat-head screwdriver. This method cannot be called reliable, since the probability of breaking the mirror itself is quite high.
- The second method is even more risky because it involves quickly striking the glass onto the surface. Choose a soft surface, such as rubber. This will allow you to quickly and easily remove and disassemble the element. Strike lightly but quickly.
- To replace the plastic housing or main fastener, you need to remove the adjusting rod and pin. Assembly is carried out in exactly the reverse order.
Heating
If you have driven foreign cars, especially in winter, you could appreciate all the delights of having heated exterior mirrors.
The VAZ 2114 does not have such an option, but this did not stop third-party manufacturers from producing a whole range of products equipped with heating.
Frankly speaking, it is much easier to spend about 800-900 rubles on buying a ready-made heated side mirror than to try to make the heating yourself. This is better in terms of reliability and safety.
The only peculiarity of the installation is that, unlike a conventional rear view element, you will need to not only install the housing on the seat, but also additionally connect the wiring to the power system of your car. That's all.
Heated mirror
For reference, we add that today there are kits for self-insulation on the market. It consists of three components:
- Wiring;
- A light bulb (it is this that creates the effect of heating the mirror);
- Insulating material (prevents the heat from the lamp from being wasted and leaving the housing).
Disassembling the rear view mirror
Salon
In order to disassemble the internal, you will need special picks and push-ups. The case is divided according to the same principle as a mobile phone or control panel to replace the battery.
- Find the junction of the body and the mirror part.
- Insert the wringer into this area and press firmly. A gap should form on the housing.
- Carefully walk the pick along the entire gap and divide the body into two parts.
- Remove the mirror. All the elements you need will be located under it.
Disassembly process on video
Lateral
Once you have separated the side mirror housing from the car body, it should be disassembled. First of all, you need to remove the mirror element. This process may not be the same for different brands, however, the following procedure is most often used.
- Use a regular household hairdryer to thoroughly heat the junction of the reflective element with the body. The temperature of the air flow should not be too high, so a technical hair dryer will not work here.
- Using a flat-blade screwdriver or a small spatula, pry the mirror away from the housing. On some models, at this stage you need to bend the terminals. To avoid damaging the glass, you can wrap a screwdriver or spatula with electrical tape or a soft cloth.
- In some designs, to separate it, you need to lightly press it in the center and, as it were, push it to the side. After this, the reflective element can be removed with careful movements.
- Then remove the center screw from the plastic frame (if equipped).
- All side mirror mechanisms are located under the frame. Using a screwdriver, you can unscrew any of them and put them in place. You can independently divide the structure into all its component parts, including adjustment and folding motors.
Video: process of disassembling the side mirror
The mirror is assembled in the same way, but in reverse order.
How to change the side glass yourself
To successfully replace your side glass without the help of a specialist, first make sure you have not only the new part, but also the following items:
- different screwdrivers, preferably a set, with the obligatory presence of a Phillips and a flat blade (“spatula”);
- new clasp clips;
- a broom or brush to sweep away debris and debris.
You should also think about how to replace the broken side glass without getting hurt by pieces of it while working. Even if it is Stalinite, it is better to wear durable rubber gloves, or rubberized fabric gloves of sufficient density so that your fingers are definitely safe.
1st step: remove the door trim
You need to unpin the following parts one by one:
- Armrest. It is usually held in place by three screws hidden by plugs. To remove the latter, just pry off their edges with a thin screwdriver. The Phillips will help you unscrew the screws themselves.
- Handle for driving the lifting mechanism. It is located on a splined shaft, from which it is easy to remove. Before this, you only need to remove the small plastic retainer in the same way as you removed the plugs in the previous paragraph, that is, using a thin screwdriver.
- Door handle. Remove the special trim, which not only serves a decorative function, but also serves as a fastener.
Now all the obstacles to removing the casing are behind you. All that remains is to remove its latches using a flat-head screwdriver, after which you can remove it from the door frame.
If your car has side airbags, the necessary steps will be to disconnect the electrical wiring and remove the airbag sensor. If you have electric windows, they will also have to be temporarily removed.
2nd step: remove the decorative trim at the top of the door
Here the already familiar process is repeated with latches that are convenient to pry off with a “spatula”. Then the plastic cap screwed into the door lock is removed.
The trim can also be pryed off with a screwdriver (from the outside), slightly lifted above the hooks on which it sits, and carefully separated from the door, being careful not to damage the upholstery.
Step 3: Remove shards from broken glass
Return the window drive handle to its place and lower the glass (its remains) as much as possible. If you took off your gloves, be sure to put them back on. Pull out large pieces and fragments first. Small ones can be removed with a vacuum cleaner. It happens that some particularly tiny particles of glass get stuck in hard-to-reach areas of the seat. The following life hack will help in this situation: wrap the shaft of a thin screwdriver with electrical tape, but only so that the sticky side is on the outside. This way you can remove any remaining glass chips.
Try to collect the fragments as much as possible. When some of them remain, there may be a specific unpleasant sound when using the door and a risk of injury for passengers in the driver’s car.
4th step: change glass
It is advisable that you find an assistant at this stage. When you directly install the part into the door frame, it is better not to hold it alone. Without some skill, this is risky.
Let's tell you more about how to change the side glass yourself. First you need to lift the window regulator so that you can see all the screws that hold the cable pressure plate. It is recommended to unscrew one of them completely and loosen the others, after which you can move the cable to the side.
Then you need to slightly tilt the new part inward and slowly place its lower edge into the pressure plate
This is the most crucial moment, act carefully and focused. The help of a second person is needed to ensure that the glass does not break or slip out of your hands.
Now secure the part by tightening the clamping screws.
It is very easy to check whether you succeeded in changing the side glass correctly. Use the lifting mechanism to lower and raise it several times. This should be done smoothly and effortlessly.
Assemble the car door, proceeding exactly in the reverse order (use our instructions as a cheat sheet if you don’t remember the order of all your actions).
That's all, the procedure doesn't look that complicated. But before you take it on, evaluate your capabilities sensibly, because not every car enthusiast will be able to competently and safely change the side glass themselves. Sometimes turning to professionals is the right step.
How to change the rear side window on a classic video:
How to secure and how to glue a new one
If you have successfully dismantled the mirror yourself, then returning it back will not be difficult. As a rule, all actions are performed in reverse order.
But you should pay special attention to the selection of glue, since not everyone is suitable for this process.
it is necessary to choose the right adhesive for attaching the mirror to the windshield
Glue selection
There are three types of compositions for gluing mirrors:
- chemically cured;
- light-curing;
- compositions based on epoxy resin.
A composition with resins will work well only if it is allowed to dry properly. This usually takes from 10 hours to a day. In this case, the part must be pressed tightly at all times. This approach is not very convenient, so such products are not used in everyday life.
Light-curing mixtures operate when exposed to special ultraviolet lamps. This is one of the most common methods in production. However, if you are not the happy owner of a lamp, you should not purchase such a composition. Sunlight, especially diffused light, is not able to have a sufficient effect.
For these reasons, chemically cured compounds are the most popular. A special hardener starts the polymerization process. As a rule, they consist of the glue itself and an aerosol activator, although one-component compositions are also found.
Please note that some materials cannot be used to glue the mirror.
- household superglue;
- double-sided adhesive tape.
The adhesive component of both materials has such a composition that when used on glass or metal, it will not be able to harden completely. High air temperature inside the cabin or heating of the glass from sunlight will soften it and the mirror will fall off. You can use household adhesives only if the mirror fell completely unexpectedly, and now you need to urgently get to a car service center.
I tried it with superglue three times. I confirm: it doesn’t last more than a week.
Max
https://homo-habilis.ru/v-garazhe/223-chem-prikleit-zerkalo-zadnego-vida-v-avtomobile
How to stick to windshield
Having selected the appropriate glue, you can begin returning the rear view mirror to its rightful place. Choose a warm day for this or install a heater in the garage: the air temperature should be between 20 and 25 ° C.
process of applying glue to the holder platform
- Clean the holder platform of any old adhesive residue.
- Lightly sand the surface of the holder to improve the adhesion effect.
- In the same way, sand the area of the windshield where it is glued.
- Degrease the holder and glass area.
- Apply a thin layer of glue to the holder.
- Spray a special activator onto the place where the part is attached.
- Place the adhesive side of the part onto the glass. Try to follow the trail left from the previous time.
- Press the mirror firmly against the glass and hold for the time indicated on the package.
- After making sure that the part is firmly in place, clean the mirror from any remaining activator and glue around the holder.
- Reinstall the windshield (if you removed it) according to the owner's manual.
Ready! If you followed all the instructions carefully, the mirror looks like it was installed at the factory or at least in a car repair shop.
Be extremely careful and attentive! A crookedly glued mirror cannot be moved, so you will have to start the whole process all over again.
How to install on bracket
If during dismantling you did not separate the bracket platform from the glass, it will be even easier to assemble it. To do this, find a fixing element: it may be a screw or a latch. After this, connect the bracket leg to the platform.
There are also special brackets that are not glued to the glass, but are installed on the ceiling or other elements of the car, for example, on sun visors.
Reassembly
I will say right away that the assembly is carried out simply in the reverse order of the previously carried out dismantling work. Therefore, I see no point in talking about this separately.
With mirrors on special mounting brackets, everything is also extremely simple. All that remains is to tighten the fasteners and fix the mirror on the ceiling or side of the car.
But what’s really more difficult is gluing a car mirror. To begin, choose the appropriate composition. Household superglue or double-sided adhesive tape will not work. Tested by many car owners. It's better to ask for the appropriate adhesive at an auto parts store. If found, for gluing you need:
- choose a warm and sunny day without high humidity;
- create a temperature in the garage of 25-27 degrees;
- remove all dirt and traces of old glue from the body;
- walk a little along the joint with sandpaper;
- sand the gluing area on the mirror;
- degrease all surfaces;
- Apply the required thin layer of glue to the holder;
- spray the purchased activator on the fastening area;
- attach the glass to the surface;
- press the mirror to the glass;
- keep as long as the glue manufacturer said;
- remove the remnants of the used activator and glue from your mirror and also the holder itself;
- put the entire structure in its rightful place;
- use as intended.
(No ratings yet)
Did you like the article?
Subscribe to updates and receive articles by email!
We guarantee: no spam, only new articles once a week!
Installation of mirrors with additional functions
Modern devices not only reflect, but also have a number of additional functions. You can equip them with heating, or even install a camera with a monitor.
Heated
The heating function is very convenient for external side mirrors, since thanks to it they will not fog up in high humidity and will not become covered with a crust of ice in frosty weather.
The heating element in the mirrors will help prevent fogging and icing
The heating device consists of the following parts:
- a heating element;
- wiring for a 12V system;
There are both separate heaters and mirrors themselves with a built-in element on sale. Both are quite easy to install. To do this, you must perform the following steps.
- Remove the door trim.
- Remove the side mirrors according to the instructions.
- Thread the wires through the side of the door and out to the outside mirrors.
- Remove the reflective element after preheating the junction with the body.
- Remove the screw and remove the frame (if equipped).
- Pull the wires through the frame body, strip the ends and install the connectors.
- Put the frame back in place and route the wires through it.
- Connect the wires to the contacts of the heating element and install it.
- Put the mirror back in place and put the entire structure back together.
- Connect the part of the wire that is located inside the passenger compartment to the heated rear window relay.
- Check the functionality of the mechanism.
Side glass removal process
Step 1: remove the door trim
To do this, we sequentially dismantle:
- Armrest. It is usually secured to the door with three screws hidden under the plugs. Using a thin screwdriver, pry up the plug - it should come off easily. Now use a Phillips screwdriver to remove the screws.
- Window lifter drive handle. It is held in place by a small plastic element, which can be easily removed by prying it with a thin screwdriver. Next, it remains to remove the drive handle from the splined shaft.
- The handle that opens the door. To remove it, you need to remove the decorative trim.
The casing can now be removed. To do this, you need to press the latches with a flat-head screwdriver and pull the door trim out of the metal frame.
If your vehicle is equipped with side airbags, you will need to disconnect the wiring and remove the airbag sensor. If you have power windows, this will also require additional steps when replacing the glass.
Step 2: remove the decorative trim at the top of the door
To remove the decorative trim, you need to pry the latches with a flat screwdriver. Next, unscrew the plastic cap on the door lock. Now nothing holds the trim on the door; it can be removed
You must act carefully so as not to damage the upholstery. Pry the cover with a screwdriver (from the outside) and slightly lift it off the hooks
Step 3: Remove glass shards
To remove the side glass or remove its remains, you will need to put the window handle back on. The glass (or what is left of it) must be lowered to its lowest position. Be sure to wear gloves to avoid cutting yourself. Now carefully remove the fragments from the seat.
It is better to collect small fragments with a vacuum cleaner. You can pull out fragments from the most inaccessible places using one trick. Take a thin screwdriver and wrap the tape around it with the sticky side facing out. This device will help collect fragments from hard-to-reach places.
If you leave the fragments in the car, then an unpleasant sound will probably appear when opening and closing the door. In addition, the driver and passengers risk injury. Therefore, after you have removed the side rear or front glass, you need to collect the fragments as carefully as possible.
Possible malfunctions and their elimination
After independently dismantling, disassembling and installing a modified mirror, some problems may arise. Very often, incorrectly glued mirrors fall off at the most unexpected moment, which can lead to an accident.
What to do if the mirror comes off
The interior mirror may fall off due to physical impact or on its own. The main reason that the structure with the bracket does not stay in place is the wrong glue. If you chose epoxy, the platform holder was probably not locked in one position long enough. The same problem could occur if you used a light-curing product without special UV lamps. Household glue will also not give a good result: temperature changes and active vibrations of the car can lead to the mirror coming off while driving.
To fix this, the structure must be returned to its place and glue with a chemical hardener must be used.
Sometimes the platform with the bracket may fall off along with a piece of glass. This means that microcracks have already formed in it, which can spread throughout the rest of the glass. In this case, contact a car service: specialists will be able to carry out diagnostics and tell you how necessary it is to replace the windshield.
Nowadays you can find brackets with special suction cups on sale. They don't hold as tightly as the adhesive ones, but you can remove them and put them back in place repeatedly without fear of damaging your windshield.
What to do if it's cracked
A cracked mirror can cause a lot of inconvenience to a car owner. A serious crack can distort the image, and therefore make it difficult to assess the real distance to the object behind. This problem can occur in both the interior and side mirrors. Most often this happens during improper dismantling or installation. Although the reasons may be different: for example, a sharp pebble flying out from under the wheels, careless owners of neighboring cars, and even ordinary hooligans.
Be that as it may, the reflective element should be replaced. To do this, carefully remove the mirror from the housing and install a new one. Carefully follow the instructions for disassembling and reassembling the part. If you are not sure of your actions or are afraid of damaging the element again, contact a specialized workshop. The mirror replacement service does not cost very much, but it will help save you nerves and money on unsuccessful attempts.