Although this signaling model is budget, it has two-way communication and has all the necessary functions, as well as the ability to receive a signal within a radius of 1 km from the vehicle. To bind and program the key fob, you must perform the following steps.
- You need to open the door and then insert the key into the ignition; you do not need to start the car.
To enter the alarm service mode, press the corresponding button 7 times.
Read also: How to polish headlights at home
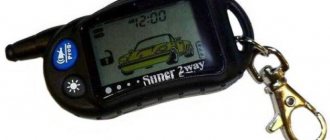
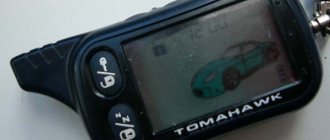
Due to the fact that the screen on the main alarm key fob was leaking and the time and temperature were no longer displayed on the right side, and the case was worn out by time, I decided to repair the key fob by ordering the screen and the case, but the price of these two items was only a little less than the key fob assembled, well, I found displays on Ali only on legs, and in the original keychain - with a cable.
Judging by the signaling box that came with the car, the model was Tomahawk TW9030. I ordered this keychain. It cost 636 rubles. I received the keychain about a month ago already, but... The car was undergoing major overhaul with the piston engine being converted to fit Gromozekovskaya (I’ll write more about this later), I only got around to the signaling system yesterday.
I downloaded the instructions from the Tomahawk website and did everything as described there:
Everything went like clockwork: the buttons were pressed, the alarm beeped. However, upon testing, only the old spare key fob worked.
I googled this problem today and found an alternative solution for programming new key fobs: everything is the same as the standard instructions, only you need to hold down not the silent mode and trunk buttons, but the open and close buttons!
Thus, we managed to register both key fobs with feedback, and the old spare one was registered with the old button combination.
Linking a new key fob (also often called programming) causes difficulties, especially if the instructions from the delivery kit are lost. In the case of Tomahawk alarms, additional problems arise due to the fact that for very similar models from the same model range, the key fob programming mode can be activated in different ways: by mixing up the alarm model, you can try for a long time to get the new key fob to work and not get any results.
How to install?
Installation Guide for Basic System Elements:
- The microprocessor is placed behind the instrument panel or in another dry and protected place in the cabin. Installation is carried out on a flat surface using self-tapping screws or plastic clamps. There should be no moving levers or mechanisms at the location of the block.
- The transceiver with antenna is installed in the upper part of the windshield. It is important that there are no metal objects or products near the device within 5 cm. The wire from the transceiver is laid under the decorative cladding.
- The siren is installed in the engine compartment of the car. It should be placed with the horn facing down to prevent moisture from accumulating inside. The wires from the device are routed into the car interior through a shield that separates it from the engine compartment. If an autonomous siren is used, then during installation it is necessary to ensure free access to the keyhole of the device.
- Limit switches are installed on the doors, trunk and hood. Their installation is not allowed on drains.
- The shock sensor is fixed in the central part of the body, in the car interior. Double-sided tape or self-tapping screws are used for fastening.
- The LED light bulb is installed on the instrument panel, in the most visible place in the cabin.
- The button to enter the service maintenance mode is located under the control combination. It must be installed so that the car owner has access to the device when he is in the driver's seat.
Connection diagram
Diagrams for connecting the main elements of the system:
General module connection map
Main connector wiring diagram
Trunk lock contact connection map
Lock control circuit
Connection procedure
The 6-pin connector and the 14-pin block must be connected in a certain sequence.
Table: order of connecting a 6-pin connector
| Wire color | Description |
| Red | The positive alarm power output must be connected directly to the battery. The electrical circuit is protected by a 30 amp fuse device. |
| Black-yellow (thick wire) | Positive contact connecting to the starter relay |
| Yellow | Connects to the ignition switch. To connect, you need to select a contact that receives 12-volt voltage when the ignition is turned on and the starter is cranked. |
| Blue | Engine auto start contact |
| Green | Connects to the ignition switch. To connect, you need to select a wire on which 12-volt voltage appears when the ignition is activated. When the lock is moved to the “Starter” position, the power on the line should disappear. |
| Black-yellow (thin) | Positive contact for locking the starter mechanism in autostart mode |
Table: connecting a 14-pin block
| Wire color | Description |
| Black-gray | The electrical circuit for monitoring the operation of the power unit, it must be connected to a controller for measuring engine fluid pressure or a tachometer |
| Black-green | Input for controlling external lighting devices |
| Black | Negative power signal. The contact is connected to any standard bolt screwed into the car body. |
| Yellow-green | Another input for controlling external lighting devices |
| Blue | Contact for controlling the courtesy light circuit or power windows |
| Red-black | Bypass circuit for standard central locking |
| Yellow-black | Negative contact for connecting the blocking relay |
| Grey | Positive signal for siren |
| Purple-orange | Connects to a sensor installed on the brake pedal or handbrake |
| Black and yellow | Negative output of an additional channel, activated from the key fob |
| Red-blue and black-blue | Positive and negative contacts for connecting triggers installed in doors |
| White-orange | Negative signal for connection to luggage compartment limit switch |
| Gray-orange | Negative input for connecting hood trigger |
Why is the remote control not programmable?
There comes a time when the car alarm stops working correctly: the car is neither armed nor disarmed. The remote control does not transmit the code over the communication channel well and, accordingly, does not perform various actions. Attempts to connect the key fob to the TZ 9030 alarm system lead to nothing. Below is the procedure if the remote control is not registered.
- Find the instructions for the model of security system installed on the car.
- Carefully study the procedure for programming remote controls. Follow all steps described in the instruction manual again.
- If you haven’t found the documentation, look for information on the Internet. There are many videos from which you can find instructions for activating the Tomahawk 9030 key fob.
- Understand the reasons. Perhaps the system does not send or receive signals due to mechanical damage. Carefully examine all components of the security system. Take the time to check the contacts on the transceiver and control module connectors. Test the electrical circuits with a tester. Replace damaged wires with new ones. Clean off any oxides on the contacts.
- Nothing works. Diagnose the control module. It may need to be re-flashed. This work should be entrusted to specialists.
We also have instructions for the Tomahawk 9030.
Linking a new key fob without the old one
The new Tomahawk TW 9030 alarm remote control is connected using the Valet button, located in a secret place, usually under the steering wheel or in the glove compartment.
- Press the Valet button seven times without turning on the ignition.
- Turn on the ignition. Seven beeps should sound indicating entry into the programming system.
- Take the main remote control and hold the “Open” and “Close doors” keys on it. Security will sound a beep. The first keychain is attached. Following the same instructions, you can program the second one. Only two CHIRPS will sound.
- Turn off the ignition and exit programming mode. The parking lights should blink five times.
- After ten seconds of inactivity, the system will automatically exit maintenance mode.
Find out how to find the Override Tomahawk button.
Video: how to enable autostart on the Tomahawk TZ-9020 alarm system
Taken by user Evgeniy Vakshin.
Do you have any questions? Specialists and readers of the AUTODVIG website will help you ask a question
Was this article helpful?
Thank you for your opinion!
The article was useful. Please share the information with your friends.
Yes (100.00%)
No
X
Please write what is wrong and leave recommendations on the article
Cancel reply
Rate this article: ( 3 votes, average: 5.00 out of 5)
Discuss the article:
Advantages and disadvantages
Advantages of the alarm:
- Great functionality at a relatively low price. Based on the set of options, the system can be classified as an anti-theft system.
- Uninterrupted alarm operation under any conditions, including extreme cold.
- Availability of a built-in system for polling the status of all elements of the anti-theft complex.
- A simple and understandable setup menu for the average user.
Disadvantages characteristic of this model:
- There may be malfunctions in the engine autostart system. This problem is usually associated with incorrect installation of the alarm system and a conflict between the system and the standard immobilizer. To eliminate this, you will need to additionally install a blocker bypass module.
- Low quality of protection of transmitted signals. A professional thief will be able to hack the system electronically and disable the alarm.
- Malfunctions of communicators. Over time, the device may not respond to user commands. To fix the problem, you need to turn off the power to the key fob.
- At low negative temperatures, the alarm may turn on the alarm mode for no reason. It is not always possible to turn it off in cold weather using the key fob, so you will need to disconnect the terminals from the battery.
- Fragile pager body. The device may fail after being dropped several times.
Need to reprogram Tomahawk 9030 key fob
It is often necessary to update the firmware of remote alarm devices when they refuse to arm. The procedure for reflashing Tomahawk key fobs is presented below.
- To flash the alarm remote control, first activate the ignition. Don't start the engine.
- Press three buttons at the same time: “Opening the luggage compartment”, “Crossed out loudspeaker”, “Service mode”.
- The siren should emit five beeps.
- Release all buttons.
- Press again on the “Trunk” and “Crossed out loudspeaker” signals. Correct completion of all points will be confirmed by the blinking of the car’s turning lights.
Find out why the Tomahawk alarm does not lock the doors with the key fob.
Tomahawk car alarms
Attention! The text in this document was automatically recognized. To view the original page, you can use the “Original” mode.
Main functions of the system.
II. LCD display indication. III. Remote control key fobs. IV. Functions performed using the key fob.
V. How to use the security system:
1. Arming.
2. Quiet arming. 3. Disabling the shock sensor. 4. Disabling the security mode. 5. Two-step disabling the security mode.
6. Security with the engine running.
7. Automatic arming.
8. Automatic re-arming.
10. Immobilizer mode. 11. Safe driving function. 12. Central locking control
13. Remote engine start/start 14. Turbo timer 15. Automatic hourly engine start 16. Preparation for remote start for vehicles with
manual transmission
17. Search for a car. 18. Panic function. 19. Anti-Hijack.
20. Remote Anti-Hijack. 21. Vaiet mode. 22. Protection against false positives. 23. Remote status polling. 24. Remote trunk release. 25. Remote siren shutdown. 26. Additional channel control. 27. Emergency arming/disarming. 28. Personal code (PiN code). 29. Programming a new PiN code. 30. Programming new key fobs. 31. Information about zalrogrammed key fobs. 32. Information about the performance of sensors. 33. LED indication. 34. Display information on the LCD key fob. 35. Functionality of the ledger keychain. 36. Procedure for replacing the battery in the LCD key fob. 37. Security functions programming mode. 38. Remote control function programming mode