The premium segment of cars has a pre-installed factory alarm system, while everyone else needs to purchase and install it themselves. The most difficult process, as a rule, is choosing a security system.
ATTENTION! A completely simple way to reduce fuel consumption has been found! Don't believe me? An auto mechanic with 15 years of experience also didn’t believe it until he tried it. And now he saves 35,000 rubles a year on gasoline! Read more"
But if you have a limited budget and don’t have time to choose a car alarm, then you should pay special attention to devices from the Jaguar line, which have managed to establish themselves as one of the best security systems on the car market. This is one of the most advanced developments at the moment!
Below we will look at the principles of working with the Jaguar alarm and provide detailed instructions for setting up autostart.
Setup and launch
Installing the alarm yourself is not recommended; it is better to do it at service stations. Otherwise, the settings may be made incorrectly, which can lead to damage to the security system. But if you want to configure the Jaguar yourself, then you will need to reprogram the alarm:
- Turning headlights on/off. When turning on the headlights, hold the handle in manual mode.
- Enable programming mode. Turn the key inserted into the ignition to position 1, but do not start the engine. Blink your taillights 4 times. Light and sound indication will indicate that programming can begin.
- Key fob programming. On each remote control, press the Open/Close button 5 times. If you have two key fobs, press one 3 times, the other 2 times.
- Disable programming mode. The sound indication of the car will serve as a signal to exit the programming mode and correctly configure the security system.
Next, you will have access to remote start of the car engine if you keep the gear shift knob in neutral and the hood is closed.
First, let's find out how to start the car with the key fob. For this purpose, there are special buttons for turning on with a lock icon with a key and “Check progress”. Press and hold the lock button, then press "Check progress". An indication will appear on the display and the engine will start.
To remotely extend engine operation, you should press these buttons regularly. The engine operating time will be increased by 5 minutes.
To turn off the engine remotely, follow the same steps. Hold the button with the lock icon and click “Check progress”. This way it is possible to turn off the car remotely if necessary.
Adding a new ez 6 pager
In order to flash the Jaguar EZ 6 alarm key fob, follow the steps.
- Press the “Jack” service key seven times.
- Turn the ignition key to the “On” position.
- The siren will sound seven times.
- On the remote control, simultaneously press the “Open lock” and “Closed doors” keys until confirmation - one siren signal and the sound of the transmitter.
- Repeat the previous steps with the remaining remote controls. No more than five seconds should pass between programming communicators.
- Pull out the key. The side lights will light up five times.
- When recording new key fobs, do not forget to reprogram the old ones to avoid deleting them from the anti-theft system's memory.
- Jaguar Fan Club - Club of Jaguar car lovers
Setting up Jaguar autostart
Jaguar autostart is very convenient. It allows you to configure automatic engine starting using a timer, as well as warm-up time, engine operation and starter cranking. First, make sure that the date and time on the key fob are set correctly. Next, you can start turning on autostart and set the starter cranking time.
- Auto start on alarm clock. Sequentially click on the buttons with the image of a lock with a key and “Check progress”. Next, place the cursor on the “Clock start” icon and set the autostart time you need. To disable autostart, place the cursor on the “Clock start” icon again and press the key fob button. An indication will follow.
- Autostart by timer. Follow the same steps as for autostart on an alarm clock, but place the cursor on the “Fixed start” icon. To turn off autorun by timer, move the cursor to “Fixed start” again and press the key fob button.
- Autostart based on temperature. The engine warm-up time is determined by a pre-programmed function. In order to set the engine to autostart based on temperature, place the cursor on “Temp Start” and turn on autostart. After switching on, an indication and temperature value will follow (for example, -10°C). To turn it off, move the cursor again and press the key fob button.
If the alarm is not set to autostart, double-check the correctness of the actions you took. Make sure that the alarm is installed correctly and maintains “program neutral”: the engine is turned off, the hood is well closed, etc.
- Jaguar Mini sewing machine: features, model overview and operation
If the autostart still does not work, contact a warranty specialist.
Bottom line
The Jaguar security system is a godsend for every car owner on a limited budget. When configured correctly, it will provide reliable protection for your car.
Tired of paying fines? There is an exit! Forget about fines from cameras! An absolutely legal new product - Traffic Police Camera Jammer, hides your license plates from the cameras that are installed in all cities. More details at the link.
- Absolutely legal (Article 12.2);
- Hides from photo and video recording;
- Suitable for all cars;
- Works through the cigarette lighter connector;
- Does not cause interference to radios and cell phones.
Find out more Subscribe so you don't miss anything important 02/23/202053 Alarms
The Jaguar security system with automatic engine start has proven itself on the positive side due to its reliability. It not only provides car security, but also allows you to control the basic functions of the car. Instructions for using the Jaguar alarm system with auto start allow the car owner to correctly install and connect, as well as configure the complex.
Installation
Characteristics of activity:
Professional installation of additional equipment in your car. Here are some of the works we do:
- Car audio installation: installation of car radio, acoustics, subwoofer, amplifier, TV, monitor, antenna.
- Installation of rear view cameras.
- Installation of security systems. Installation of car alarms of any complexity on any cars: car alarms with feedback, with auto start. Installation of a car security system, search system, GSM-GPS module. Installation of a mechanical anti-theft device.
- Installation of parking sensors.
- Installation of window regulators.
- Installing a DVR.
- Installation of xenon, bi-xenon.
- Installation of fog lights.
- Car soundproofing.
- Car window tinting. price list 12 Volt
Specifications
Jaguar signaling models EZ One, EZ Four, EZ Six, TEZ and others have the following properties:
- packet data transmission between the microprocessor unit and the pager is performed at a frequency of 433.92 MHz;
- the range of operation of the communicator in pulse transmission mode is 600 meters in open areas with a minimum of interference;
- the operating range of the main remote control in command receiving mode is 1200 meters;
- the operating range of the spare pager has been reduced to fifteen meters;
- to protect the electrical circuits of the anti-theft complex during installation, it is necessary to use safety devices with a rating of 7.5 to 30 amperes, depending on the section of the circuit;
- the current consumption when the protective mode is activated is less than 15 mA;
- activation of the protective mode can be done at intervals of five, thirty or forty-five seconds;
- to protect the car, triggers are used for the doors, trunk, hood, parking brake lever, power input of the ignition system, shock controller, auxiliary controllers and warning zone;
- the possible number of transmitters that can be connected to the system is four;
- The signaling must be powered from an electrical network with a voltage in the range from 9 to 18 volts.
Equipment
The Jaguar package includes one limit switch, the remaining switches will have to be purchased separately.
Components included in the alarm kit:
- The microprocessor module is the main device of the car alarm.
- User's Guide to the management, use and maintenance of the alarm. If you carefully read the service manual, you can learn about additional useful functions.
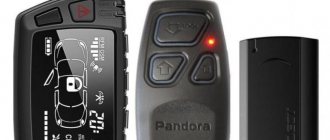
- The main console is equipped with a screen and has a two-way communication function.
- Spare remote control. It has a shorter range and is not equipped with a display.
- Transceiver equipped with a key to call the owner of the car. This device is equipped with a built-in temperature controller that allows you to measure its value inside the car. The transceiver comes with a wire and connector for connection.
- Six-tone siren.
- The impact controller belongs to the two-level class.
- A diode light bulb that functions as a status indicator.
- One limit switch for hood mounting.
- A set of connectors and wires for connecting the signaling system.
- Two batteries for installation in the main and spare transmitter. They differ in type from each other, so you won’t be able to confuse them during installation.
- Two stickers - one with the Jaguar logo, the second is used to fix the antenna module.
- Warranty card.
Key Features
Main functions of Jaguar alarms:
- Possibility of activating the protection mode with or without sound and light accompaniment.
- The ability to notify the car owner about events recorded by the security system. The key fob with feedback displays data about activated security zones.
- Protection against robbery, this function is called Anti-hijack. She is intelligent. The essence of its action is to block the motor when the car is forcibly seized. When criminals force the car owner out of the car, the alarm system can understand this by analyzing the operation of the sensors installed on the brake pedal and handbrake lever. After the car moves to a safe distance from the car owner, the engine lock will be activated.
- The consumer can independently select the signal that is played when the alarm is activated.
- Seven independent security zones provide more reliable protection.
- Disabling the protection mode is carried out in two stages.
- The ability to warn the car owner that he forgot to lock the doors before driving.
- If necessary, you can connect the steering horn to the car siren.
- Automatic start. This option will ensure the engine warms up in the cold season and will be useful for those who are constantly late. Now you don't have to waste time warming up the car.
- The memory of the microprocessor module allows you to record information about events that occurred in the operation of the security complex. Even after disconnecting the battery, information about this will remain in the memory.
- The consumer has the opportunity to additionally connect digital relays used to block the power unit.
- The consumer has the option of additionally connecting a GPS beacon to the signaling system.
Advantages and disadvantages
Advantages of Jaguar alarms:
- Rich functionality. In their reviews, consumers note that Jaguar alarms have many useful options that make it easier to control not only the system itself, but also other components of the car.
- Affordable price. You can buy an alarm system with auto start at a price of 5 thousand rubles and more. The cost will depend on additional features.
The disadvantages include the weak body of the key fob. If dropped regularly, the device quickly breaks down, and over time its buttons begin to sink. To prevent damage to the communicator, you can install it in a case. But it won’t help with buttons sticking.
- Jaguar Fan Club - Club of Jaguar car lovers
TheAAG999 channel talked about the capabilities and disadvantages of Jaguar security systems.
How to install?
In accordance with the instructions for using the Jaguar alarm system with auto start, installation is performed as follows:
- The battery turns off. Installation and installation work must be carried out with the on-board network de-energized. If your car has a car radio with a programmed code, do not disconnect the battery until you have read the manual for the audio system or car.
- A microprocessor module is mounted in a hidden place. The main unit can be installed behind the dashboard, so the length of the wires will be minimal and the device will be hidden. Disassemble the center console and remove the steering column trim. The connectors with plugs are disconnected from the device and the fastenings are disconnected. Do not fix the unit on a metal surface, as this may cause malfunction. The device is secured using self-tapping screws or double-sided tape.
- A siren is installed under the hood, and a limit switch is mounted on the hood itself. When installing these elements, please note that they must be placed in places where moisture does not accumulate. The siren cannot be installed near the cylinder block, as it will quickly break under the influence of elevated temperatures.
- Install a transceiver with a button to call the car owner inside the car. This element should be mounted on the windshield, but there should be no metal surfaces or wires near the device. Their presence will result in interference during signal transmission. The transceiver is fixed using a sticker or double-sided tape.
- The impact controller is mounted on a partition separating the interior and engine compartment. The device is fixed to a metal surface using self-tapping screws or tape. The shock sensor must be located so that if adjustment is necessary, the driver has free access to the device.
- Install a service button in one of the bundles with standard wiring. It should be placed under the dashboard. You can additionally wrap it with electrical tape.
- The wires are laid under the car's trim; to do this, you will have to disassemble part of the upholstery. It is recommended to lay electrical circuits away from power wires (ignition system, high-voltage cables, etc.), as well as electronic devices. This may lead to signal malfunctions due to interference.
The Avtozvuk channel talked about the mistakes that consumers often make when installing car alarms.
Possible faults
During operation, the following problems with car alarms are possible:
- incorrect operation due to the high sensitivity of the installed shock sensors;
- incorrectly installed alarm components;
- the batteries on the key fob have become unusable;
- key fob is broken;
- antenna is faulty;
- wiring is damaged;
- battery is low;
- system settings failure.
The safety of the vehicle depends on the serviceability of the signaling system.
User manual
You can use all the functions of the Jaguar alarm system with auto start only after binding the remote control.
Binding procedure:
- Disable security mode, get into the car. Insert the key into the ignition, but do not turn it. The binding is performed with the ignition turned off. Click on the service key seven times.
- Within five seconds after the last press, turn the key to the On position, this will turn on the ignition.
- The siren of the complex will play seven sound signals, this indicates its readiness for binding.
- Within ten seconds after the last signal, hold down the first and second keys of the pager, they show an open and locked lock. The system will emit one signal to confirm the binding.
- To program a second pager, follow the same steps. Two beeps will sound as confirmation.
Designation of buttons and indicators on the key fob
The description of the key fob buttons is shown in the photo below.
Identification of Jaguar key fob buttons Identification of Jaguar key fob buttons Identification of Jaguar key fob buttons
Designation of command and mode indicators:
- A - anti-robbery option;
- B - auxiliary communication channel, available for programming;
- C - option to start the internal combustion engine based on air temperature;
- D - daily start function;
- E - indicator for enabling or disabling the remote start of the internal combustion engine;
- F - indicates activation of silent security;
- G — protective mode with sound confirmation;
- N - remote deactivation of the sensitivity controller;
- I — service mode indicator;
- J—machine status and temperature indicator;
- K - auxiliary second channel;
- L - indicator for remote opening of the trunk door.
Schematic illustration of the display
Status indicators:
- Alligator anti-theft system with auto start: advantages and settings
- Built-in battery of the communicator. By the icon you can determine whether the battery needs to be replaced.
- Auxiliary second channel.
- Option to start the internal combustion engine based on temperature.
- The power unit of the car is started.
- The tailgate is open.
- Option to notify the car owner via vibration.
- The car doors are open.
- Service mode.
- Indicator for automatic reactivation of the protective function.
- Silent security icon.
- Protective mode indicator with sound confirmation.
- The car hood is open.
- The sensitivity controller indicator turns on when there is a blow to the car body.
- Hand brake.
- Closing door locks.
- Opening door locks.
- Remote control receiver operation indicator.
- Machine communication confirmation icon.
- Car owner call icon.
- Energy saving mode activation indicator.
- Icon of activated ignition in a car.
- Alarm indicator.
- AM - first half of the day.
- PM - afternoon time of day.
- Indicator for daily start of internal combustion engine.
- A symbol indicating the temperature in the cabin and the current time.
- Temperature scale.
- Timer.
Setting up autorun
Start the motor by command:
- Click on the button in the shape of a locked pad and hold it.
- When the remote control emits a melodic signal, release the key and click on the third button labeled Ch/Prog.
- The car's lights will blink three times, this indicates a successful start of the internal combustion engine.
- An indicator in the form of smoke from the exhaust pipe will appear on the remote control display.
Alexey Zamur showed in the video how to remotely start the engine on a Renault car.
By time
To start the internal combustion engine on time, follow these steps:
- Make sure the time on the remote control is set correctly.
- Set the alarm for the time at which the start will take place. After setup, a bell icon will appear on the remote control screen.
- Click on key 3 and hold it down until the remote control emits two beeps - one melodic and one short.
- Release the third button.
- By briefly clicking on the third key, move the remote control cursor to the screen indicator with the inscription Clock Start.
- Click on the button in the form of a key and a locked pad, this will activate the function. The lights on the car should blink once, and the remote control will emit a melodic signal.
- After it is played, an indicator with the inscription Clock Start will appear on the transmitter display next to the bell icon.
By temperature
Procedure for starting an internal combustion engine based on temperature:
- Click on the third key on the remote control and hold it down until the device plays one melodic and one short-term signal.
- Release the key. On the remote control screen in the bottom row one of the icons will begin to blink.
- With short clicks on the third key, move the cursor on the communicator screen to the icon in the form of a thermometer with the inscription Temp Start.
- To confirm that the function is enabled, click on the button with the locked lock and key. The vehicle's lights will blink once. The pager display will display an icon with a thermometer and indicate the temperature at which the engine will start.
EZ 10 activation
You can program up to four pagers in the Jaguar EZ 10 memory. Turn off the security mode and do the following.
- Turn the ignition key to the "On" position.
- Press "Jack" until the siren sounds four times.
- To program the remote control with the screen: hold down the “Trunk Opening” and “AUX” keys. The key fob will emit a short beep. To record a switch without a display: hold down the "Star" and "Trunk Open" keys at the same time. The transmitter signal will follow.
- The siren will make one sound, confirming the registration of the first communicator.
- Repeating the previous steps, write down the codes of the remaining pagers.
- Exit settings mode by turning off the ignition. There will be five flashes of the side lights.
Video “Implementing autostart on a Jaguar”
Valery Ershov demonstrated in practice how remote engine starting is performed.
This review will talk about how to use a signaling device called Jaguar TEZ B. Its other name is Jaguar EZ B or simply EZ Beta. Despite the large number of names, the EZ B alarm is simple to use. Of course, all connections and basic settings must already be completed. And here we look at how to operate the system, including if it is equipped with autostart. Enjoy reading.
Reprogramming the alarm key fob
The signaling key fob is fully responsible for controlling and enabling all kinds of functions. When buying a used car with an installed security system, a person may wonder for safety reasons: how to reprogram the alarm key fob? You can look at the example of the EZ 6 model; the method itself looks like this:
This method is suitable for many models, such as: tez b, alpha, beta, 434 mhz sst, one, no jx 2000 and other not very modern alarm systems. As for modern and more “sophisticated” security systems, in order to reprogram them, you need to contact a specialized service center. If a person has little experience in electricity, it is better to entrust this matter to professionals.
Controlling the system from a key fob
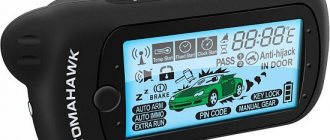
It is clear that any car alarm must receive commands that come to it from a remote control called a key fob. The main key fob is always equipped with a display, which allows you to monitor the status of the system. Square icons labeled AL will correspond to teams.
EZ-Beta key fob display
All icons that are indicated by a number correspond to one of the monitored parameters: ignition (21), engine operation (4) and so on.
Using the main key fob, you can quickly send any of the 12 commands (AL) to the alarm system. Press key 3 several times, and then, as the instructions say, move the cursor to any of the icons. You need to perform movements by pressing button 3. If the desired icon is already selected, press button 2 - the system receives the command:
- C – autostart based on temperature, turning it on and off;
- D – enable or disable daily autorun;
- E – remote start or stop;
- F – silent security (on/off);
- G – standard security mode (on/off);
- H – disable and enable the shock sensor;
- J – status indication, including temperature readings.
If, after making a selection, you press and hold key 3, then after 6 seconds the function will be “assigned” to button 1. One of the commands, accordingly, will be issued by pressing this button.
By default, button 1 is configured for command G (arming and disarming). Maybe it is more convenient for someone to use option E (immediate start by autorun) or J (status check). You can make changes to the settings at any time.
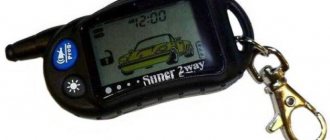
Let's say the reader has already understood how to manage autostart and security. Let's try to set the clock. This function does not apply to the car alarm itself; the key fob can simply play the role of a chronometer:
EZ-Beta signaling kit
So we need to set two numbers:
- Press button 3, holding it for several seconds - two signals will follow, the indicator will start flashing;
- Using buttons 2 and 1, set the first value (hours);
- Briefly press key 3;
- Set the second value;
- Press button 3 long or wait 30 seconds.
You can set an alarm by briefly pressing button 3 after step 1. We wish you success.
You can configure the key fob outside the coverage area of the security system. In the manual supplied with any Jaguar alarm (not just TEZ B), the sequences will be similar. It is better to replace the battery by placing the key fob close to the alarm: remove the battery, briefly press button 1, install a new element. This advice is given in the standard instructions.
Clarification for vehicles with manual transmission
You need to understand that the car needs to be prepared before starting the engine using autostart. However, we are talking only about cars with a manual transmission. And here's what the instructions say about this:
- During half-cooking, the handbrake is first engaged. The engine must be running.
- You need to remove the key from the lock - the engine should not stall;
- In half a minute you need to leave the salon and close the doors.
When the last door is closed, the security mode can be turned on. This is exactly how the TEZ B system should be used.
This is how a car is prepared for autostart
An alarm from another brand, such as Starline, may work differently: between steps 1 and 2, you press a button. Jaguar systems do not provide such a method. By the way, the sequence discussed above is also used when turning on the turbo timer: if it is not followed, the engine will stall in step 2. The turbo timer option must also be enabled in the settings.
Synchronizing the EZ-Two Switch
Linking the Jaguar EZ Tu feedback transmitter is carried out according to the instructions.
- Disable car security. Activate the ignition.
- Press the "Jack" button for five seconds. The siren will sound four times and the LED will blink the same number.
- Click the “Trunk Opening” and “Speaker Crossed Out” buttons. The key fob will beep twice.
- Following the steps above, register the remaining transmitters.
- Turn off the ignition. The direction indicators will blink five times to confirm exiting the setup mode.
What to check
Let's assume that the alarm system itself is connected to the central locking system. Then, upon command “Disarm” or “Enable security,” the lock should also be activated. In turn, you can open the trunk like this: press the middle button of the main key fob or the “Trunk” button on the remote control without a display for 3 seconds. Other options will be listed below.
Is autorun implemented correctly?
If the Jaguar system is installed on a car with a manual transmission, try immediately performing the preparation procedure. In “step 2” the following can happen:
- Let's say the engine stalls when the key is removed. This means that the car alarm was connected with errors.
- After removing the key, the speed may change dramatically. The instructions do not discuss this option, but we can say the following: the Jaguar TEZ B alarm is not compatible with the car on which it is installed.
In the second case, the problem will not be that the Jaguar brand system was installed, but the very principle implemented by this system. We are talking about enabling automatic ignition support.
Status icons: Ignition, “Smoke”
If the alarm is installed even on a car with an automatic transmission, carry out a mandatory check: activate the CHECK option (“J” icon) when the engine is running. A smoke icon should appear on the display, but should not appear when the engine is turned off. If any of the requirements are not met, then be aware that using autorun in this case is prohibited!
Three additional options
If autostart has been implemented, try arming the system when the engine is running:
- Engage the handbrake;
- Press and hold button 1 until a melodic signal appears;
- After removing the key, you need to leave the salon and close all doors within half a minute;
- It is possible to turn on the security mode.
After completing all actions, the motor will run for 5, 10 or 15 minutes (as specified in the settings table). This mode is also called “Pit Stop”. They use it when leaving the car unattended for a short time.
Let's look at how to search for a car. On the key fob with the display, press two keys – 1 and 2. The press should be short and simultaneous. The additional remote control is used differently - here you briefly press button 3. The “Call Driver” option is not provided in the TEZ Beta system. But here you can turn on the anti-robbery mode: press the button installed in the cabin, or use option “A”. Both of these steps are given in the basic instructions.
Idle training
The car alarm itself controls the operation of the motor in one of three ways: by the tachometer signal, by the TACH generator terminal, or by the level of ripple in the network. The most reliable is the first method. In this case, the gray-black cord from the 18-pin connector is connected to the tachometer terminal, and function 8 from the settings table is assigned a value of 3 or 4. Another important action will be the following - the system needs to be taught “idle speed”.
Tachometer signal at startup
You need to do the training like this:
Let’s say that at the last step the siren does not go off, but instead the “dimensions” turn on five times. This means that mistakes were made. This procedure is suitable for one signaling device – Jaguar EZ Beta. One thing can be said about the A9 system: this procedure is not given in the instructions for it. In turn, for Jaguar EZ ONE alarms, “training” does not make sense - everything is configured automatically.
If autostart is not used, engine operation control is not required. In this case, there is no need to “train” the car alarm.