Is it worth paying for something you can do yourself? This almost philosophical question often arises before home craftsmen. Take painting a car, for example. This pleasure is not cheap at all. However, for some reason many people believe that it is impossible to cope with this task on their own.
Let’s take the risk of dispelling this myth and tell you how to paint a car with your own hands. The step-by-step guide below will allow you to carry out this process yourself and avoid all possible pitfalls. Of course, this is a labor-intensive task, quite long, but not that difficult.
What you need for work
Professional body painting is carried out in closed boxes. In our case, a spacious garage is suitable for this purpose. It must meet the following requirements:
- The working area around the entire perimeter of the car is at least two meters.
- Free flow of fresh air.
- It is possible to provide good lighting, preferably natural.
The garage is first tidied up, removing dust, cobwebs and other debris so that nothing sticks to the new paintwork. Before painting, the floor is moistened with water from a spray bottle. In case of insufficient lighting, floodlights with a power of 500 or 1000 kW are installed.
Painting a car consists of several successive stages:
- Body preparation (straightening, removal of old paintwork, dismantling);
- Leveling the surface with putty;
- Sanding;
- Primer;
- Application of new paintwork;
- Grinding and polishing.
Painting work can only be done on a clean body, so the first thing you need to do before painting your car is visit the nearest car wash.
As you can see, the main process is preceded by several preparatory stages. The aesthetics and technical characteristics of the finished coating ultimately depend on how carefully all the work is done. Simply put, you will have to work hard to ensure that you get a car with shiny new paint that won’t fall off in pieces anytime soon.
When carrying out painting work you will need the following tools and materials:
- Compressor;
- Spray gun;
- A set of keys and screwdrivers for dismantling attached parts;
- Spatulas;
- Sander;
- Sandpaper;
- Masking tape, rags;
- White Spirit;
- Putty, primer;
- Auto enamel.
Watch the video - a tool for painting a car with your own hands:
Watch the video - a review of grinding machines for preparing a car before painting:
Where to paint a car
It is best to do this, according to reviews, in high-quality auto painting shops, where more than a dozen bodies have already been painted, and this will not be some kind of Uncle Vasya’s garage, but a real isolated paint booth - where no dust or dirt will fly onto the body at the time of painting and they will not then blow out bubbles and dots on it.
We recommend reading: Engine oil pan protection
If you want it cheap, then be prepared for low-quality putties, low-quality paints that fade in a couple of years, and other sorrows. I really don’t recommend saving on body painting. Then you will redo it and, as a result, you will spend a lot of nerves and money even more than if you had originally done it properly and with high-quality materials.
Preparing the body for painting
If you plan to completely renew the color of your car yourself, before starting work you need to identify all the coating defects that need to be corrected. If there are dents on the body, first of all, they are straightened out. To do this, they hit the metal several times from the inside with a rubber hammer, straightening the bend.
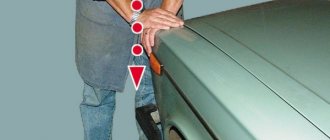
Chips, dents, cracks, and scratches on the body are outlined with chalk so as not to miss anything, and they begin to be processed. Cleaning before painting is carried out close to the boundaries of the damage, making sure that the transitions are smooth and imperceptible. You can recognize unevenness and roughness by running your palm over the surface.
You need to strip down to exposed metal. In small areas, remove the paint layer using a flat screwdriver or narrow spatula.
If you need to treat a large area with your own hands, use a 30% aqueous solution of caustic soda, which is applied for 10-12 hours.
After this, the paint is removed with a metal scraper and washed with water. If this seems too long to you, you can prepare a composition of xylene, paraffin and acetone to speed up the process. It softens old paint quite quickly.
Paraffin and xylene are taken in a ratio of 10 g per 45 ml, heated in a water bath, cooled to 50 degrees and slowly, with thorough stirring, 45 ml of acetone is introduced.
Watch the video - preparation for painting (masking for painting):
Let's sum it up
In painting, the first success factor is the correct selection of material used to restore the body. High-quality putty, good primer, expensive paint, as well as professional powerful tools for painting a car are the key to success. But the person doing the painting must also have skills. If you've never painted anything with a spray gun and a powerful compressor, try painting another metal surface. This could be, for example, a garage door. This will give you an understanding of how to hold and move the spray gun to get the desired result.
In most cases, using all the recommendations presented above will allow you to get excellent results. Your car will be painted with high quality, the place of repair will be difficult to detect visually. However, it is better to have the painting done by specialists. They have high-quality cameras and professional-grade painting equipment. This guarantees an excellent result, and the cost of such work is not so high as to neglect such an interesting opportunity. Have you ever painted a car yourself?
Dismantling and protection
Before you begin preparing the surface, remove everything from the car that cannot be painted:
- Headlights;
- Turn indicators;
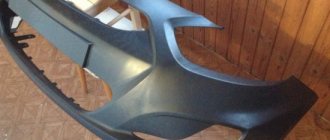
- Bumpers;
- Radiator grille;
- Wipers;
- Door handles;
- Number plates;
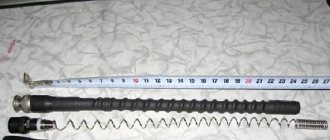
- Antenna.
The impact protection in the wheel arches, if you have one, must also be removed. If dismantling it yourself is not part of your plans, you can coat all parts with a paste of glycerin (30%), chalk (40%), dextrin (20%) and water (10%). The mixture dries quickly and prevents paint from entering. But this is not the best option, although it is the fastest.
With pieces of parchment paper, using masking tape, cover all the windows in the car, also capturing the rubber seals; the wheels are wrapped in large pieces of plastic film. Once all parts that cannot be painted are covered, you can move on to the next step.
Working with putty
Leveling with putty is the next step in preparing the car body for painting. To do this, you need to mix two components, the putty itself and the hardener. This is done as follows: two tablespoons of putty (without the top), combine with the hardener from the tube, squeezing out 3 - 4 cm, and mix thoroughly for 30 seconds. It is better not to use containers for this purpose. A piece of plywood, a wide metal scraper or a plastic kitchen board will do.
Watch the video - putty, highlights:
The putty is applied to the previously degreased surface of the car, in a layer of no more than 0.3 mm, using short movements. You will have to work quickly, because after the start of the reaction of the two components, the mass hardens within five minutes.
As soon as lumps appear in the mixture, the putty becomes unusable.
Complete hardening occurs after 30-40 minutes at an air temperature of about +20* C. If it is necessary to apply the putty repeatedly, each layer is dried before applying the next. Next, the surface is cleaned alternately with sandpaper No. 80, 120 and 180 so that “patches” do not stand out. The treatment is completed by machine grinding using No. 180 and 280. Dust is removed from the body and wiped again with white spirit.
Clean the putty “dry”; wetting it with water changes its properties not for the better. This method is often recommended solely for the purpose of avoiding dust in the room and unnecessary cleaning.
Watch the video - do-it-yourself car putty:
Cleaning up defects
Take the car outside and inspect it carefully. Mark areas that have defects with a washable felt-tip pen or acrylic paint. Regular chalk will do. It is better to repeat the procedure twice to be sure that all defects are covered.
Take sandpaper No. 60, 80, 100. Sand problem areas down to metal. At the same time, do not allow the stripping to go beyond the defective area. The edges of the transition should be as smooth as possible. Check this by running your hand from the edges to the middle of the surface being treated. Remove dust from the body, wipe with a cotton towel and wipe again with white spirit. Leave the car for a couple of hours to dry.
Important! After the work is completed, drive the car into the garage so that dust does not accumulate on it outside.
Applying primer
Applying a layer of primer improves the adhesion of paint to the surface, thereby reducing its consumption and increasing the strength of the coating. In addition, the composition provides additional protection of the body from corrosion. It is better to apply the primer from a spray bottle, after diluting it with a solvent and filtering it.
In your work, use products from one manufacturer, since often different companies produce primer and putty from components that are “not friendly” to each other, and this leads to their rejection. After drying, the coating may crack or peel off.
Watch the video - preparing the car for painting:
Properties of car paint
Any paint for painting a car necessarily includes three main components
- Pigment is a substance that determines the color and tone of a car. In addition, this component has some other functions, including corrosion inhibition.
- A binder is a component that ensures that the pigment is firmly held on the surface of the car. In addition, it forms a protective glossy layer over the pigment after the paint has dried.
- Solvent - thanks to it, the paint is initially liquid with the fluidity necessary for application.
The hardness of car paint is determined relative to the hardness of glass as a percentage. The higher this percentage, the more resistant the paint is to scratches and various mechanical damage. As a rule, the hardness values of paints from various manufacturers range from 50-55%. It should, however, be taken into account that the greater the hardness of the enamel, the less its elasticity and the greater the likelihood of cracks forming in places of bending and vibration.
Car body painting
Choosing auto enamel is a responsible process, because the final result largely depends on it. Today, store shelves are lined with all kinds of products, but not every one is suitable for painting a car with your own hands. Since the work is carried out in a normal room, there are no possibilities for thermal drying of the coating.
This means that the purchased paint should dry relatively quickly under natural conditions. Nitro paint and acrylic auto enamel correspond to these indicators. The first is used if you need to paint only a separate part of the car (fender, hood, door). The nitro enamel dries in just 30 minutes, this is a definite plus.
But if you want to cover the entire body with it, you will have to work hard, stripping off the old paint to the very base. After all, nitro enamel is incompatible with any modern paint and varnish coating; its use in production was stopped in the last century.
If you are going to update only one part: the hood or bumper, it is important that the paint shade matches the old coating perfectly. Coloring is one of the most delicate processes when painting a car and it cannot be done without the participation of a professional. To accurately “get the color”, you will have to experiment on several samples.
The final shade depends on many factors: spray speed, air pressure, distance at which the gun is positioned, brand of solvent used, paint viscosity. The color acquires the required depth when painted in 2-3 layers.
In order not to wait for drying, compare the sample with a well-polished old coating, after moistening the latter with water so that the effect of fresh painting is complete.
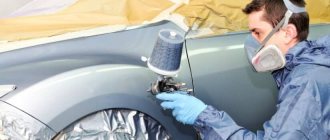
Painting work begins with the preparation of car enamel, which must be diluted with a solvent to the desired consistency. You can determine the correct dilution visually. Dip any metal rod into the paint. If the flow rate is 3-4 drops per second, the density is quite suitable for using paint in a spray bottle.
Strain the resulting paint through a fine sieve (regular women's tights with a density of 15 denier are also suitable). The enamel is poured into the tank of a spray gun with a 1.4 nozzle, and the pressure is set to about 3 atmospheres. Painting the car is done from top to bottom, with uniform, smooth movements. The second layer is applied after 20 minutes, and the paint is diluted so that its viscosity is less than the first time.
As a rule, any paint is additionally diluted with a solvent. Carefully read the manufacturer's instructions and use only recommended brands.
Preparing the workplace
Before painting work, you first need to prepare the garage. In most cases, the garage space does not meet the necessary requirements, and it is unsafe to paint the car. If you want the job done quickly and efficiently, be sure to prepare your garage.
Take care of the lighting first. You can’t paint it dark, as you won’t be able to evaluate the result. It is advisable that the garage have halogen lamps installed both on the ceiling and on the walls. This arrangement will illuminate every centimeter of the car.
Make sure the wiring in your garage can handle all the stress. Powerful lighting and other equipment will put a lot of strain on the network. Damaged or poor quality wiring can cause fires and fires. Remember, safety comes first.
An important point in painting in a confined space is high-quality ventilation. When painting, a huge amount of harmful fumes enters the air, so all of them must be removed. The garage must be equipped with both exhaust and flow ventilation. Be sure to wet clean the room before starting.
Providing temperature control is also one of the priorities. If your garage is too cold, use portable heaters with an enclosed filament element. Such devices are characterized by high performance and are completely safe during painting.
Polishing the paintwork
It is difficult to achieve absolute cleanliness in an ordinary garage, so minor defects are eliminated by sanding the body after the coating has completely dried. In this way you can eliminate:
- Dust particles, dirt, small insects stuck to the drying paint;
- Orange peel effect resulting from insufficient air pressure when applying or improperly diluting the composition;
- Lack of shine, which appears a couple of days after dyeing. The reason is increased humidity or too high pressure when applying lacquer coating.
For final polishing of a painted car, polishing paste No. 290 is used, which is a mixture of abrasive materials. It is applied to a soft flannel or a piece of tea and rubbed in in a circular motion with light pressure.
Polishing water is used to add shine to the lacquer coating. It is an abrasive paste mixed with an emulsion. The liquid is applied manually using a piece of flannel. Polishing water removes stains left from abrasive compounds and grease marks.
Repairing cars in a garage, how to make money on it
Initially, decide whether you will perform car repairs in the garage initially, then you can expand the list of services, but you need to start with the basic range:
- body work;
- painting and tuning;
- tire fitting - the most profitable time is the off-season (autumn, spring) the rest of the time there is moderate calm with clients;
- repair and adjustment of car electronics.
Important. One person is unlikely to cope with such a volume; assistants are needed
You need a good body specialist and a responsible person for painting. They must work in tandem.
A situation that often occurs is that if the body is poorly straightened, the paint technician is responsible for the “jambs”, because the client receives the car from him for repair. But he cannot paint it properly, since the straightening was done poorly.
Tips for working:
- The room in which painting work is carried out must be well ventilated.
- The compressor pumping air is located outside.
- Protect your respiratory tract with a respirator, your eyes with goggles, and your hands with gloves.
- To degrease the surface, do not use solvents or gasoline; only white spirit is suitable for this purpose.
- Dispose of used rags immediately; rags soaked in a flammable substance left in the garage can cause a fire.
- If possible, it is better to heat the diluted enamel to 50° in hot water, this will reduce the consumption of the solvent and the paint itself.
- The number of layers of paint depends solely on the desire of the owner, although experience suggests that it is better to stop at three, this is quite enough to provide a spectacular appearance to the car.
- The paintwork dries completely only after 24-36 hours. During this time, specks and midges stick to the fresh paint. Remove them carefully using tweezers.
Now you know how to paint a car yourself. Agree, there is nothing impossible here. All you need is a little free time, quality materials and your enthusiasm.
Watch the video - painting, three-layer:
How much does it cost to paint a car
This whole process will cost a considerable amount of money, hemorrhoids on your ass, and a bunch of mistakes. But the path goes on. Painting cars is difficult, but very interesting, and from all this you can later make some money: by tinting and repainting the cars of your neighbors in the garage. But be prepared for the fact that you will have to redo everything more than once, learn to select and use materials correctly, because in a “painting shop” the lion’s share of costs comes from materials and their overexpenditure. The price for such work is from 1000 USD to 3000 USD. This will include a minimum of tools, inexpensive consumables and paints. We don’t take into account the salary of our loved one!