Recently, an old friend of mine came to see me in his old Chevrolet Niva with the characteristic sound of an extended chain.
In addition to the timing kit, I had the foresight to purchase even a front cover gasket, a crankshaft oil seal and a kilo of marinated meat. I could not refuse such an offer. So, Niva Chevrolet replaced the timing chain and front crankshaft oil seal.
First, let the engine cool to an acceptable temperature. Remove the pipe by unscrewing the bolt by 10 and loosening the clamps.
Next, we unscrew the eight nuts by 10 and move aside the throttle cable and all the pipes that will interfere with us, remove the valve cover.
Valve cover fastening.
Engine without valve cover.
Remove the air conditioner belt by unscrewing the bolt 13 of the tension roller.
Air conditioner tension roller.
Then loosen three 13mm nuts and one bolt of the generator belt tension roller and remove it.
Service belt tension roller
Now comes the fun part. To unscrew the pulley nut, we need a 38mm socket. Since the elongated head does not fit under a regular wrench (the radiator is in the way, but we don’t want to remove it), we use a pry bar, carefully sawed off from the hub key of some large car.
Everything fits perfectly. Unscrew the nut and remove the crankshaft pulley.
Unscrew the deflection roller.
We dismantle the reinforcing plate.
We unscrew the six nuts securing the front timing chain cover to the block and the three bolts securing it to the pan and remove it.
Front timing chain cover.
Set the top dead center. The key on the crankshaft should align against the mark on the block.
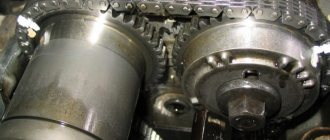
The mark for the camshaft sprockets is against the ebb of the camshaft housing.
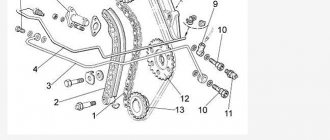
Next, unscrew the oil supply pipe and two nuts 10 of the chain tensioner.
The tube is secured with a hollow bolt and copper washers on both sides. Don't lose them.
Next, unscrew the tensioner shoe, damper and remove the timing chain.
Compare the new and old timing chain. It could be worse.
Old timing chain.
New timing kit.
New timing kit.
Reinstall the chain, guide and tensioner shoe. We tighten the chain by hand and check that the marks match.
To make it convenient for us to check the marks after installing the front timing cover, we find the factory mark on the crankshaft pulley and mark it with a white marker. This mark at TDC should be opposite the center of the crankshaft sensor.
We install the front cover, crankshaft pulley and tensioner. Let's check the marks again. We install all the removed parts in the reverse order of removal. Fill with fluids, start the engine and enjoy.
Good luck on the roads. No nail, no rod.
There are no clear recommendations regarding at what mileage you should think about replacing the timing chain, however, if the mileage is more than 100 thousand kilometers, then most likely the chain is already worn out. To replace the timing chain of a Chevrolet Niva, it is necessary to disassemble the engine; only in this case it is possible to determine its condition and draw a conclusion about the need for such actions.
However, there are also signs by which it can be determined that the timing chain has stretched. For example, this may be indicated by a sound reminiscent of a ringing rustle when a diesel engine is running, coming from under the hood. It is this characteristic noise that should alert the car owner and let him know that a replacement is coming.
Why are timing chain marks set?
The engine of any passenger car has 2 shafts: camshaft and crankshaft. In most cars they are connected by a belt drive. On a Chevrolet Niva car this is a chain transmission, and a single-row chain is used there. The advantages of such a system are obvious: the chain, unlike a belt, never slips on the pulleys and lasts much longer. However, the chain can stretch over time, and the teeth on the shaft sprockets can wear out or even break. This will lead to desynchronization of the camshaft and crankshaft. Their work will not be coordinated, so the engine may fail. Therefore, when adjusting or replacing the timing chain, it is very important to align the engine shafts in accordance with the marks on the pulleys and timing case. This is not easy to do, since, firstly, the marks are located in hard-to-reach places, and secondly, they need to be set very accurately, since the chain, unlike a traditional belt, cannot be slightly tensioned if necessary.
Installing new parts
First we change the crankshaft front seal. We remove the old one and clear the space for the new one. Lubricate the new oil seal with engine oil and install it using a mandrel. You can use an old oil seal as a mandrel.
The fastening bolt on the shoe is hammered with light blows of a hammer. It is not recommended to adjust it so that it is inserted by hand - there will be a slight backlash, which will cause the shoe to move on the axis. Place the bolt in place and tighten.
Install the new crankshaft, camshaft and oil pump gears in place so that the marks match.
The hydraulic tensioner is designed to adjust the chain tension in the Niva Chevrolet. Since this part plays an important role, the engine cannot operate without it.
Over time, any part can wear out, especially for those parts that constantly rub against each other or rotate, and the timing chain can stretch during operation. Chain stretching, experts say, is normal. That is why a hydraulic tensioner is installed on the car.
When is it time to change?
As you know, the timing chain is a more reliable element of the gas distribution mechanism than the belt. Unlike a belt, it does not wear out so quickly and the likelihood of it breaking is quite low. However, sooner or later, every owner of a Niva Chevrolet faces the question of the need to replace the chain and set the marks according to the standard.
Niva Chevrolet car
As for the timing, the manufacturer does not regulate the frequency of replacing the mechanism chain on a given car model. As a rule, this happens no earlier than after 100 thousand km. But if, during operation of the internal combustion engine, a sound appears that was not there before, this may cause the chain to stretch. If the chain cannot be tensioned using the usual method, this may indicate the need to replace it.
Phase diagnostics may also indicate the need to change the chain. If the mark on the camshaft sprocket does not match the one on the bearing housing, the element should be replaced. Likewise, if chips have formed on the bushings.
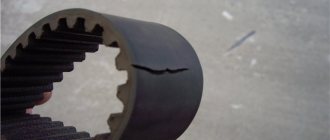
In addition, if you find cracks directly on the chain itself, then this, of course, also indicates the need to replace the component.
conclusions
As you can see, to carry out this work you do not need to have any special knowledge or tools. Therefore, you can handle this kind of work yourself if necessary . If you follow these recommendations, it is impossible to carry out such repairs incorrectly.
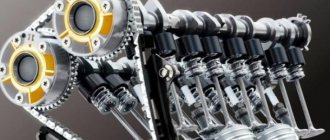
The gas distribution system of any engine must work correctly. If problems occur in its operation, this leads to premature wear of the motor and numerous breakdowns. To accurately adjust the timing, special marks are used, according to which the shafts in the engine are aligned. We will tell you about the correct placement of marks on a Chevrolet Niva car in this article.
When to change?
The factory instructions for the Niva chain drive with the VAZ-2123 injector engine do not indicate the frequency of replacement. A sign of an impending change is the increased noise of the drive and the impossibility of further tensioning the chain. Typically, this picture begins to appear closer to 100 thousand mileage. The majority of Chevy Niva owners try to overhaul the valve drive of their cars at exactly this mileage.
For the belt drive of the Opel Ecotec Z18XE injection engine, the plant has set a replacement period of once every six years. Or every 120 thousand km.
How to install an injector on a Chevrolet Niva (with photo)
- The car is installed on the inspection hole. Wheel chocks are placed under the rear wheels and the hand brake is applied.
- The car hood is opened, unscrewed and the fan is removed. The radiator is also unscrewed and carefully moved to the side (it is not necessary to drain the coolant from there).
- Access to the engine valve cover is provided. Its fastenings are unscrewed with an open-end wrench, then it is carefully removed. There is access to the timing chain and the upper camshaft sprocket. The shaft pulley is rotated with a special wrench until the mark on the camshaft sprocket aligns with the protrusion on the timing case.
The mark on the timing case is aligned with the mark on the camshaft sprocket
- If the chain adjustment has not been disturbed, then after the previous step the lower mark located on the crankshaft pulley also coincides with the oblong mark on the timing case. If this does not happen, there is desynchronization of the tags, and regulation continues.
- The lock washer holding the camshaft sprocket unbends. After this, the car is put in 1st gear (this will not allow the shafts to rotate when the fastening bolts on the sprockets are unscrewed). The 13 bolt holding the camshaft sprocket is unscrewed and removed along with the lock washer.
- After removing the camshaft gear, the chain is loosened so that it becomes possible to remove the tension roller.
The tension roller is removed, the chain can be removed
- The crankshaft sprocket is removed along with the lock washer and chain. To do this, the fastening bolt is loosened by 13, the antennae of the lock washer are unbent, after which the sprocket is carefully pulled off the shaft.
- If it was planned to replace the timing chain, it is replaced. If you planned to adjust the old chain, then its position on the teeth changes (in most cases it is recommended to move the chain on the sprockets in increments of one tooth).
- After displacement, the upper sprocket, together with the chain, is reinstalled on the camshaft, and the lower sprocket is installed on the crankshaft. The crankshaft is turned with a special key until the oblong mark on the sprocket is opposite the core of the crankshaft position sensor as shown in the photo.
The mark on the crankshaft sprocket is precisely aligned with the DPKV core
- Now a lock washer and a fastening bolt are installed on the crankshaft sprocket, which is not fully tightened. Using a key, the crankshaft is turned 3-4 full turns, while the coincidence of both the upper and lower marks is carefully monitored. If after several revolutions there are no discrepancies, the fastening bolts on both sprockets are tightened, and the lock washers are installed in their original places. The adjustment of the timing marks ends here and all engine components are reassembled.
Preparatory work
In order to create the necessary space to carry out work, you will have to perform a number of actions.
- Remove the air filter and close the carburetor neck with a plug.
- Disconnect the choke cable, electrical wire, and hoses. We move them to the side.
- Remove the fan, pump pulley and generator belt.
- We remove the sump protection and the engine boot, and clean the front engine cover.
- Now you need to put the Chevrolet Niva on the parking brake and place wheel chocks under the wheels. Then engage fourth gear. Now let's start the analysis.
- Loosen the ratchet nut by striking the wrench sharply with a hammer.
- Remove the valve cover, bend the lock washer of the camshaft gear bolt, loosening it by hitting the wrench with a hammer. Turn off transmission.
- Rotate the crankshaft pulley, align the marks on it and the front engine cover, and then align the marks on the camshaft gear and bearing housing.
How to set timing marks Niva Chevrolet
Timing for Chevrolet Niva
The Chevrolet Niva from the Jeep family is equipped with a chain drive in the gas distribution mechanism. The performance of a chain is even greater than that of a belt drive. The chain also has the best characteristics that affect transmission torque. While a loose belt causes the pulley teeth to slip, a weakened chain prevents this from happening. But as the machine operates, the gas distribution vehicle also tends to wear out, stretch, explode and become unusable, requiring replacement. At the stage of replacing the circuit, it is important to configure, observing the labels. This article will tell you what stickers are, their purpose and how to place them on a VAZ-2123.
Timing marks on a Niva Chevrolet, including the injector, how to set it correctly + photo
Part 2. Valve + piston = repair Niva Chevrolet NIVA Chevrolet 4+4
Then, together with the lock washer, the fastening bolt is unscrewed.
1 Why timing chain marks are set. 2 How to set the injector on a Chevrolet Niva (with...
The DPKV crankshaft position sensor is installed against the th gear tooth. When a match is achieved, the bolts securing the crankshaft and camshaft sprockets are tightened.
But in practice, service specialists for domestic brands recommend changing the belt after thousands of kilometers. The chain should be tensioned from sprocket to sprocket, while observing the position of the pulleys according to the marks. So, one of the significant advantages is the quietness of operation.
To do this, first of all, disconnect the negative terminal from the battery. Next, remove the alternator belt.
Comments and reviews
Then the piston of the first cylinder is set to the top dead center position. Using a 15mm wrench or another, depending on the car model, unscrew the bolt holding the roller.
Timing marks VAZ(LADA) 21214 NIVA
The latter is turned to reduce the belt tension. The belt is then removed from the pulleys. After these operations, it is recommended to fix the crankshaft with a screwdriver.
Next, use another wrench to unscrew the bolt on the crankshaft pulley and remove it. Then the pulley on the generator drive is dismantled. Carefully remove the washer from the belt drive. Next, remove the mechanism from the crankshaft pulley. How to install a new belt? Before installing a new drive belt on a car, be sure to clean the pulleys and tension roller from oil and dirt.
If the contamination is severe, it is recommended to wash the parts in gasoline or white spirit. Install the belt in the reverse order.
In this case, you need to know several important rules. The generator pulley must be installed in a special seat. When installing the belt, it is important to ensure optimal tension. For tension, it is better to use a special tool - it is inserted into the grooves in the roller and turned.
Consequences of incorrect installation and adjustment
- Characteristic extraneous clicks appear in the engine, which become louder as the vehicle speed increases.
- The engine is unstable even at idle speed.
- The car's acceleration time increases significantly because the engine does not respond well to pressing the gas pedal.
- Acceleration occurs in jerks, during which clouds of black smoke may fly out of the exhaust pipe.
- Valve wear accelerates many times over, and if the shafts are out of synchronization too much, the valves become deformed and their seats break.
- Incorrect adjustment can also lead to a broken timing chain. This, in turn, can puncture the radiator, break the fan and other engine parts.
- The engine constantly overheats, and the consumption of engine oil and antifreeze can increase significantly.
As can be seen from this article, correctly set timing marks are the key to long and uninterrupted engine operation. There is nothing complicated about this; even a novice car enthusiast can do it. It is important to take your time, follow the above sequence of actions, and also try not to drop the sprocket lock washers into the engine sump. Because it will be very difficult to get them from there.
Purpose
The first gear on the gearbox is engaged, allowing you to avoid spinning when unscrewing the crankshaft gear bolt. The fastener is removed with a lock washer.
To prevent the bolts from falling into the engine sump, use a deep-head wrench or unscrew the bolt by hand. Remove the chain tensioner using a screwdriver. It should be replaced in case of tension or tension, during scheduled maintenance, after a thousand km.
To do this, you need to loosen the fastening of the lock washer, and then remove the bolt from the camshaft sprocket using a 13mm wrench. After this, the gearbox must be set to speed 1 so that the bolt securing the crankshaft gear does not turn.
Tranquilizer
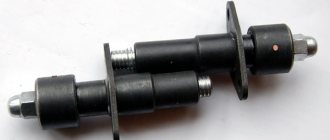
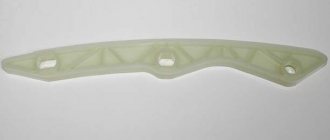
Another important element in this system is the Niva Chevrolet chain damper, which prevents the resonance effect from occurring. This system consists of the following elements:
The damper is located inside the cylinder head on the front side and is attached to it with two bolts. If it is damaged or worn out, vibrations appear, which can lead to the chain jumping and thereby damaging the motor.
Replacement
To replace, you will need a ten-size socket wrench and a screwdriver. When the tool is ready, we go through the following steps:
- Remove the cover from the cylinder head
- Remove the camshaft drive chain tensioner
- Without disconnecting from the chain, remove the sprocket from the camshaft flange
- Starting from the bottom bolt, unscrew the two fastening bolts
- We fix the chain together with the sprocket and remove the damper. During removal, it is advisable to hold it so that it does not fall into the oil pan.
- We inspect it and if there is damage, we replace it with a new damper.
- We take a new part and install it in reverse order.
It is necessary to purchase a new element exactly the same as the one that was installed previously, since models that were produced earlier may have a damper of a different shape.
Summarizing everything written above, we can conclude that to carry out this work you do not need to have special knowledge or have a special tool, therefore, if necessary, following all the above instructions, you can do all the work yourself.
Source
