Home » Domestic auto industry
Reading time: 11 minutes. Updated 08/04/2019
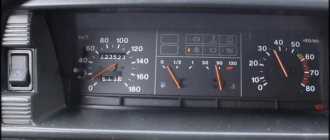
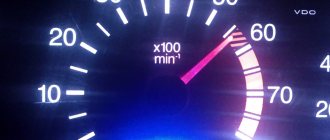
A speedometer malfunction is a non-critical, but quite unpleasant problem. Data on mileage and, most importantly, current speed should not be neglected. The cause of the problem lies in a breakdown of the speedometer or its drive. To repair a VAZ 2107 speedometer, it is enough to have minimal repair skills.
Basic speedometer faults
Malfunctions can be divided into two types:
- the speedometer does not show the current speed;
- The speedometer drive is noisy.
The VAZ 2107 speedometer may not work for the following reasons:
- The speedometer is faulty. In this case, the device must be replaced.
- The nuts securing the ends of the flexible shaft have come loose. To fix the problem, they need to be screwed on.
- The flexible shaft is broken. It must be replaced to restore the speedometer's functionality.
- The tip of the flexible shaft or the mating socket on the speedometer is damaged. In this case, you should change the VAZ 2107 speedometer cable or the speedometer itself
- The flexible shaft drive is faulty or the speedometer drive socket in the gearbox is damaged. This is a rare breakdown, the elimination of which involves repairing the gearbox and is worthy of description in a separate article.
The VAZ 2107 speedometer drive can make noise for two reasons:
- The drive is laid with small bending radii. To fix the problem, you need to re-route the speedometer cable, having previously lubricated it.
- The braiding of the VAZ 2107 speedometer cable is damaged. In this case, the flexible speedometer drive assembly needs to be replaced.
As practice shows, most malfunctions are related specifically to the VAZ 2107 speedometer cable and can be eliminated by replacing it.
Replacing the speedometer drive
But at first I just thought that the drive was faulty, I counted the teeth (luckily only the middle was ground down), there were 13 of them, as in principle on all cars of this model with a five-speed gearbox, I bought a new one and installed it.
Imagine the surprise when, after a couple of kilometers, the speedometer failed again. Having removed the drive again and contrived, he looked into the hole in the box, while turning the shaft. It turned out that there was a problem.
I’ll write about how to change the speedometer drive drive gear in another article, but for now about replacing the drive.
What do you need to know?
Often, problems with the speedometer are related to electronic problems. Although a lot depends on the car. For example, if the speedometer needle of a VAZ-2107 twitches, then it is not necessarily a matter of wiring. The speedometer in this car is of a mechanical type, there are a minimum of wires. Therefore, very often the problem is a cable that has lost tension.
At the same time, the issue may be a faulty speed sensor. Many motorists check its performance first. After all, it’s much easier than disassembling the dashboard, fixing the problem and putting it back together. Let's look in more detail at the main malfunctions of speedometers on some car brands and consider methods for eliminating them.
Mechanism design
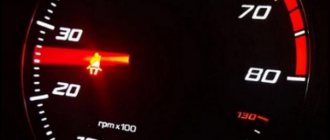
On a plastic case with a glass holder there is a milliammeter of the usual classical structure with an attached scale. On it, zones of dangerous crankshaft speeds are indicated in different colors: the preliminary zone (5500-6000) is highlighted in yellow, and the dangerous speed zone (more than 6000) is highlighted with red lines.
The device is uniformly illuminated by an AMN 12-3 lamp. At the bottom of the scale there are three colored lights, indicating respectively: the amount of charge, oil pressure and the status of the parking brake. Inside the tachometer there is a moving coil with a permanent magnet, thanks to which the pulse indicator needle is set in motion.
The device is electronic, so it is powered by the car's ignition.
Speed sensor problem
In order to understand the question of why the speedometer needle twitches, it is necessary to become more familiar with the design of the car. For example, domestic classics did not have a speed sensor. The system worked approximately as follows. The gearbox contained a motor (drive), which, while the car was moving, turned a cable going to the speedometer.
If the motor failed, then the arrow on the instrument panel completely “died” and always showed “0”. But most modern cars are equipped with a speed sensor that is installed in the gearbox. It determines the speed limit practically without error and transmits data to the speedometer via wires. From the same wire and sensor, data also comes from the distance traveled, that is, to the odometer.
Design of odometers and their errors
To measure the distance traveled on a vehicle, a special device is used - an odometer.
On-board odometers of all types do not belong to the class of precision instruments. For each type of these devices, permissible errors are established. To fully understand the information and figures provided, you need to keep in mind: 1. These errors are established only for the devices themselves. All design changes, as well as physical wear and tear of some components and assemblies of the vehicle are not included in this error. 2. According to UNECE technical requirements No. 39, speedometers cannot underestimate readings. The average error of the speedometer according to these rules (GOST R 41.39-99) can only be positive and not exceed the true speed by more than 10% + 6 km/h. Therefore, the odometer, which is structurally connected to the speedometer, also gives inflated readings. Manufacturers overestimate speed and mileage readings by 5-10%. There is a lot of talk and heated discussions about this on car enthusiast forums. It is possible that car manufacturers not only care about the safety of drivers, but also quite legally (based on UNECE rules No. 39) reduce the actual warranty mileage by an unknown amount, because there are no requirements for the accuracy of mileage measurement.
Typical faults
There is no need to talk about the reliability or unreliability of this sensor. On some cars it works throughout its entire service life, while on others it often fails. However, there are a number of typical problems that motorists face:
- Failure due to old age. Each electronic device, regardless of quality, has its own resource. Therefore, it can fail at any time.
- Mechanical impact. Simply put, damage to the sensor housing or wiring. If any work has been done to remove and install the sensor, it is likely to be damaged.
- Oxidized, dried out or broken wires. Also, the wiring simply wears out its own life if it has not been changed for a long time.
- The sensor does not fit this car model. In this case, you should not count on correct speedometer readings.
Classification by operating principle
- Mechanical or electromechanical tachometers with direct drive. The revolutions are transmitted to the dial indicator through a flexible shaft, which, through a worm gear, receives rotation directly from the crankshaft or one of the transmission shafts. The operating principle of the indicator is based on the phenomenon of eddy current induction. The operation and design of a magnetic tachometer are extremely similar to the operating principle of a car speedometer. In modern cars, a similar tachometer design is not used.
- Electric machine. A distinctive feature is the connection to a generator. It is used primarily on diesel engines, but for the purpose of unification, a device of this type can also be used on gasoline engines.
- Electronic. The signal can be taken either from the ignition system or directly from the computer. Installed on gasoline and diesel internal combustion engines.
Design and principle of operation
Main components of electric machine and electronic tachometers:
- measuring unit, or signal converter. It can be based on elements of analog circuitry or built using special microcircuits;
- display unit with analogue or digital display of the number of revolutions;
- auxiliary elements.
Connection diagram
When looking for the reason why the tachometer does not work, it is first of all important to understand the connection diagram and the type of signal. There are 3 typical connection schemes:
- to a contactless ignition system (the tachometer wire is connected to the primary circuit of the ignition coil). The operating principle is based on measuring the frequency of voltage surges in the primary circuit of the ignition system. Calculating the ignition angle is impossible without focusing on the number of crankshaft revolutions, therefore the sparking frequency directly depends on the crankshaft rotation speed. On 4-cylinder internal combustion engines, a full revolution of the crankshaft corresponds to 2 voltage pulses in the primary circuit. Accordingly, the higher the crankshaft rotation speed, the greater the frequency of voltage surges;
- connection to the contact ignition system. The operating principle and connection diagram are similar to the BSZ, but the design of the measuring unit will differ depending on the voltage of the input circuit;
- connection to the engine ECU. The principle of operation is still based on recording voltage pulses in the primary circuit of the ignition system, but the signal to the tachometer comes from the engine control unit;
- connection to the generator (the tachometer signal contact is connected to terminal W of the generator). The rotation of the generator pulley is carried out by a belt drive from the crankshaft, so the rotation speed of the generator rotor will always be proportional to the crankshaft speed. The change in the number of revolutions of the crankshaft can be calculated by constantly measuring the amount of EMF generated on the winding. According to its principle of operation, an electric machine tachometer resembles a regular one class=”aligncenter” width=”448″ height=”412″
Typical faults
If the mechanical tachometer on a car stops working, there is mechanical damage to any of the structural elements. A broken cable of a flexible shaft, wear of the worm gear elements, the appearance of backlashes, deformations - all these reasons can cause the engine speed indicator to fail.
What to pay attention to if the electronic tachometer does not work:
wiring integrity
In this case, it is important to check not only the signal wire, but also the ground and power supply of the instrument panel; quality of contacts. The presence of oxides and loose contact inside the chips may well cause the tachometer to fail; the integrity of the elements of the measuring unit, which are located behind the protective glass inside the dashboard. Among mechanical damage to transistors, burnout of microcircuits, tracks or swelling of resistors, the most common reason for a non-working tachometer is a violation of solder integrity
For example, on the Mitsubishi Padjero II, the appearance of microcracks in the soldering areas of the tachometer elements is a generally recognized disease.
Among mechanical damage to transistors, burnout of microcircuits, tracks or swelling of resistors, the most common reason for a non-working tachometer is a violation of solder integrity. For example, on the Mitsubishi Padjero II, the appearance of microcracks in the soldering areas of the tachometer elements is a generally recognized disease.
Troubleshooting Methods
Usually, the functionality of control devices can be restored by replacing the speed sensor. As an example, consider the Hyundai Accent car. The speedometer needle twitches - we go to the store to buy a new speed sensor. With a high mileage of this brand of car, this is a completely typical problem that many motorists encounter. If the gearbox is mechanical, then the problem is most often solved by replacing the cable. Lubrication with WD-40 also helps, but this is more of a temporary solution, so the problem may return in the future.
As for automatic transmissions, there are sensors installed there that often fail. Changing them won't be difficult. Let's see exactly how to do this and what we need to complete the work.
How to replace the speedometer drive?
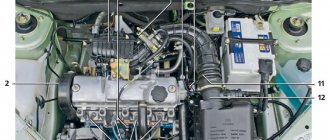
In order to replace the speedometer drive on a “classic”, you will need several wrenches (10, 13) and a lift or inspection ditch.
The sequence of operations for replacing the drive is given below. Each number in the image corresponds to a step in the list. The work is performed sequentially and takes about 20 minutes.
- Using a 13mm wrench, unscrew the bolt of the clamp securing the exhaust pipe of the muffler to the gearbox.
- Using a 10mm wrench, unscrew the drive fastening nut.
- Using a 13mm wrench, unscrew the two nuts securing the cross member to the body. Then we lower the rear of the transmission down so that the studs come out of the crossmember holes.
- We shift the gearbox to the right and remove the speedometer drive from the hole in the crankcase.
Unscrew the nut securing the flexible shaft of the speedometer drive.
We install the new drive in the reverse order of removal.
To replace the flexible shaft (cable), disconnect the upper fastening of the drive cable from the speedometer and remove it from the hole in the front body panel.
Replacing the speed sensor
If the speedometer needle of a VAZ-2107 twitches, then it is necessary to replace the cable or worn-out gears, the edges of which have already worn out during the operation of the car. This rule applies to practically all cars that are equipped with a manual transmission. A speed sensor is installed in the automatic transmission. Let's look at the replacement process using Accent as an example.
To carry out the work, we will need to buy original speed sensors costing 800-900 rubles apiece. From the tool you need a wrench for 10 and 12, as well as the corresponding heads. There are two sensors in total. The first is located on top of the box, the second on the bottom. To get to the top one, you need to dismantle the air filter box and remove the battery from the platform. After that, use a 10mm key to unscrew the old one and install the new one. The lower sensor is located behind the left wheel. To get to it, you need to remove the box protection and the front part of the fender liner.
Replacing the seven speedometer drive
- in order to remove the part from the box, you need to lower it a little by unscrewing the nut 13 securing the box;
- use a 10mm wrench to unscrew the drive;
- Pull it out a little and turn it to disconnect the connector and unscrew the speed sensor.
- We pull out the part to the end.
Unscrew the box fastening
Unscrew the speedometer cable
Unscrew the speed sensor
Assembly is carried out in reverse order.
Reinstalling the speedometer drive
Note
Now there are still enough fakes on the market, and in order not to buy a low-quality part, check it at least a little. To do this, grab the gear on one side and the output on the other and try to turn it. If the engagement slips, it is better to refrain from such a purchase.
Wiring fault
As noted above, the wires oxidize over time, become bent and simply dry out. Ultimately, this leads to the complete loss of contact, which previously appeared and disappeared, which led to the incorrect operation of the speedometer.
This problem can be solved in several ways. The simplest is to re-solder the wires and heat-shrink them. The problem may arise somewhere else, but it may not happen. The second method is to replace the entire braid. A more labor-intensive and complex method, but the result is normal wiring operation for a long time. You also need to understand that if the wire is exposed, it can short to ground. There is nothing good about this either, so if you notice this, then you should try to fix the problem as soon as possible.
The drive can make noise for the following reasons:
- the cable has a small bending radius. Here it is necessary to re-route the drive;
- The cable sheath is damaged. In such a situation, it is necessary to replace the speedometer drive assembly.
As practice shows, the largest number of breakdowns of the VAZ-2107 speedometer are associated with its drive and can be eliminated by replacing the flexible cable. To do this you will need pliers and a screwdriver. To facilitate installation, you can use steel wire with a length of about 2 m and a cross-section of 0.5 mm. The drive is fixed in the lower part of the crankcase to the gearbox, so repairs require a lift or inspection hole.
The speedometer needle of the VAZ-2109 twitches
Often, fixing the problem will require removing the dashboard. This takes a lot of time, although almost anyone can cope with this task. To dismantle, you need to remove the radio and cigarette lighter, the emergency lamp and unscrew all the necessary fasteners. Now you can begin the actual repair.
If the speedometer needle twitches when accelerating, then most likely the problem is in the drive, which has failed. Therefore, you need to remove the drive, gears, and seals. The latter must be replaced with new ones. Next, it is advisable to troubleshoot the gears. If the edges on them are licked off, then we change them.
In addition, it is advisable to check the cable. It is likely that it hits something while driving, which causes the speedometer needle to jump. If necessary, replace the cable and lubricate it. Next we carry out the assembly.
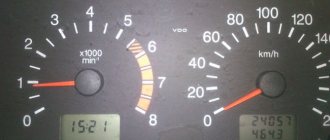
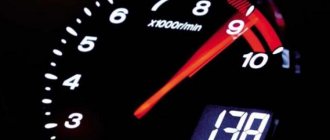
Why does the tachometer jump on a VAZ 2107?
If you are a little familiar with classic or contactless ignition systems, then you know that in them the tachometer is connected to the “K” terminal of the coil, or to a switch. This is where the impulse appears, which is necessary for the correct operation of the device. The speedometer is driven by a cable (if we are talking about a carburetor).
If you have an injector in the fuel system, then first of all look to see if the “Check Engine” warning light is on. If yes, then you need to do diagnostics to determine the exact malfunction. If not, then the diagnosis will not bring any results.
This step is relevant if you have an injector and a carburetor. Carefully inspect all electrical wiring, not only those parts that relate to the device, but also those lying nearby. The main thing is that there is no damage to the insulation, as this can lead to a short circuit.
Using a multimeter, check if there is ground on the tachometer. Very often, poor-quality contact becomes the reason why the VAZ 2107 tachometer jumps. Of course, if there is no minus in the entire dashboard, then you will not have a car, but a New Year’s garland - all electrical appliances will begin to turn on and off at their own discretion.
Atypical breakdowns
If the speedometer needle twitches (2109 is a VAZ or another model - it doesn’t matter, this type of breakdown is common to many cars), and the above method did not help, then there are several more options. One of them is wedging the arrow in a certain position. Therefore, when picking up speed, the instruments may show normally, but at some point there will be a jump. The problem can be solved by disassembling the dashboard and repairing the speedometer. It is likely that you will need to remove the arrow and lubricate it or replace it with a new one.
Why the sensor may not show
Cases when the fuel level sensor does not work on a VAZ 2107 are not at all uncommon. Experienced owners of 7s know what can cause a device to break down. Moreover, sensor breakdowns occur equally often on both carburetor and injection VAZ 2107 models.
The fuel level sensor or FLS is a rheostat made of nichrome wire. The position of the moving contact is changed using a float. The device is located on both injection and carburetor models inside the tank. The only difference is that the injection sevens additionally have a fuel pump, which is located next to the sensor. If the fuel gauge does not work, then there is a high probability that there is a malfunction of the sensor in the tank.
Failures of this device manifest themselves in different ways:
- The pointer indicator is constantly in the “0” position.
- When the car moves, the needle tends to “jump,” which also indicates a malfunction in the fuel level control system.
- When the ignition is turned on, the needle on the fuel level indicator is at zero, but when driving, after a while it begins to function.
- The indicator (light) does not light up, indicating that the amount of fuel in the tank is reduced.
What causes the fuel quantity indicator in the tank on the seven to not work needs to be disassembled in detail, this will help you find out where to start repair work. The causes of breakdowns are:
- The sensor fuse has blown - this element must be checked first so that you do not have to do unnecessary work. If the fuse is blown, the dial indicator will always show “0”.
- The board tracks are worn out - this type of malfunction is directly related to the sensor on which the tracks are erased due to their wear-out. This type of breakdown is not considered serious, as it can be easily fixed. To do this, you need to bend the slider so that it moves along the section of the track that has not yet been erased.
- If the true fuel level in the tank is distorted, it is necessary to adjust the sensor regulator. To solve the problem, you will need to change the position of the FLS pins. Changing the position of the pin is done by moving it to the side until the pointer arrow moves to “1”. The arrow in positions “0” and “1” must be stationary, and if it moves when installed in these positions, then it is necessary to bend the pin accordingly.
- Oxidation of the FLS contacts, which also causes the indicator to become inoperable. To eliminate the breakdown, you will need to clean the contacts.
- The sensor float is damaged - depending on the fullness of the tank, the float moves the moving contact of the rheostat to the appropriate position. The float is a sealed volume of air. If the integrity of the float is compromised, fuel gets inside, which results in the display of incorrect data.
Only after it has been determined why the fuel indicator is not working can the appropriate repair actions begin. However, to identify a breakdown, you will need diagnostics, which every owner of a domestic car can carry out.
Checking the fuel level sensor
Before replacing the fuel level sensor on a VAZ 2107, it is recommended to first verify the causes of the breakdown. Further manipulations should be carried out according to the instructions:
- You need to disconnect the pink wire from the sensor located inside the gas tank. In this case, the ignition must be turned on.
- If the arrow previously displayed a full tank, and after disconnecting the wire, the arrow on the fuel level indicator dropped to “0,” then the sensor itself is faulty.
- If the arrow displays a full tank when the wires are disconnected, this means that the indicator itself in the instrument panel is faulty.
- To check the pointer, you will need to remove the instrument panel, find the wires that are connected to the device and disconnect the gray wire with a red stripe.
- After disconnecting the wire, you need to turn on the ignition and observe the location of the indicator arrow. If the arrow deviates to zero, this means that the pointer is working properly, and the cause of the breakdown is a violation of the integrity of the wire.
How to replace a cable
Over time, the cable rots and gradually begins to fail. At first, the problem manifests itself in the form of the speedometer and tachometer needles twitching. If you do nothing, the instruments will soon stop showing the car’s speed and mileage altogether. To solve the problem, you need to drive the car into a pit. On the engine compartment side there is a drive cable. Having disconnected the protective cover, unscrew it using a regular open-end wrench. Now we can disconnect the wire.
It is advisable to first disassemble the instrument panel. This is due to the fact that after we have disconnected the cable from the drive, it must be disconnected from the speedometer. Unscrew the nut and remove the wire through the engine compartment. At the same time, it is advisable to remember how it went so that there are no problems with its installation later. Two types of dashboards were installed on the VAZ-2109: low and high. Accordingly, the length of the cables is different, so when purchasing, it is advisable to have a sample with you so as not to make a mistake.
Niva Chevrolet speedometer does not work
Modern cars have a large number of sensors that correct the operation of the car. And they are all very strongly interconnected. If the Chevrolet Niva speedometer does not work, then there may be several reasons for this, ranging from the speed sensor to the electronic control unit. This, in turn, can lead to improper engine operation, increased fuel consumption and other problems. Therefore, a non-functioning speedometer is not only a problem with traffic control, but also a possible cause of major malfunctions. This means that it is urgent to diagnose the car.
In the Niva Chevrolet, the speedometer needle is driven not by a cable, as on old cars, but by an electronic control system, which is controlled by a magnetic sensor. The speedometer needle is an ammeter driven by the difference in current transmitted by the sensor.
If, as a result of diagnostics, a problem is identified with the instrument panel, then in most cases it may require a complete replacement, since it is non-repairable and its components are located on one board.
The speed sensor transmitting the impulse to the instrument panel is installed on the transfer case. These signals are transmitted to the ECU, where they are processed, engine parameters are read and transmitted to the instrument panel.
It is quite simple to determine problems in the operation of the speedometer: these are inflated indicators, for example, when a car shows clearly inflated speed indicators, the needle twitches during uniform movement or does not rise from the zero mark.
There are several main reasons that can affect the operation of the speedometer:
- Mechanical damage to the instrument panel
- Damage to wiring or contacts
- Short circuit
- Speed sensor failure
- ECU failure
Some problems can be determined by connecting an OBDII sensor to the panel
If problems with the speedometer are accompanied by a Check Engine error, then in this case the problem will be related to the ECU. By checking it with a sensor, you can most likely detect error 0500.
First, you should conduct a self-diagnosis of the instrument panel. To do this you need to follow a few simple steps:
- Turn off the ignition and hold down the button to reset the daily mileage
- Hold the button to turn on the ignition
- Release the button
- If the instrument panel is working properly, then the instrument arrows should rise to the maximum division and return to their original position.
If the speedometer needle does not move or there are malfunctions in their operation, then the problem is in the instrument panel. You should disconnect it and check the condition of the contact blocks. It is possible that during operation due to vibrations, the contacts in the block became disconnected from the common bundle to the instrument panel.
Pin 9 is used to connect the speedometer. In some cases, for example, when repairing an instrument panel, it may be installed skewed, which may subsequently affect the operation of the system.
If these steps do not help, then you need to check the contact block on the speed sensor. To do this, you need to install the car on an inspection hole or overpass. It is located at the bottom of the transfer case and water and reagents used to treat roads can get on it.
After this, you need to check the wires leading from it to the speed sensor. The wire may fray or suffer other mechanical damage. The car body carries a negative charge - mass. And if the wire sheath is damaged, a short circuit may occur.
It is also necessary to pay attention to its condition. It is often made not only in a metal case, but also in a plastic one, which encloses a core with a winding and a rotor
Depending on the rotation speed, the level of current generated and, accordingly, the position of the speedometer needle depend.
This element is not repairable, since it is enclosed in a solid body. Therefore, if malfunctions occur, it must be replaced. You can check its performance using a multimeter. Before doing this, you need to remove it:
- The terminals are disconnected from the sensor
- The sensor is unscrewed
- An inspection and assessment of its condition is carried out.
- There are three terminals suitable for the sensor: minus, plus and central pulse. When checking, the multimeter is connected with a negative probe to ground, and a positive one to the central connector
- A tube is placed on the sensor roller and the multimeter is switched to minimum measurement mode
- Using the tube, the sensor rotates, and if it is working properly, the multimeter should show deviations from the rest state.
If the multimeter does not show the operation of the element being measured, it means that it is faulty and requires replacement.
A few important nuances
So we, in fact, figured out why the speedometer needle may twitch. As you can see, there can be a lot of reasons. But, when faced with such a problem, it is not at all necessary to immediately go to the service station. The malfunction can often be fixed on your own, of course, if you have the time and desire.
Oddly enough, with electronic systems in this case everything is much simpler. In most cases, it all ends with a banal replacement of the speed sensor or wiring. Another thing is that this sensor costs a lot of money for some cars. In this case, you can try to find a worthy analogue using online catalogs. But it is better to avoid openly Chinese products, which attract with their low cost. After all, such a sensor can please the owner of the car with correct operation for a short period of time, or even not work at all immediately after installation.