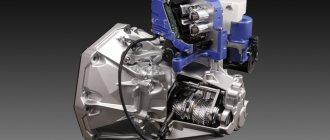
Any passenger car contains a great variety of different parts that ensure driver comfort and the movement of the vehicle itself.
There are big and small parts in it, but they are all important for the car. Even the most seemingly insignificant of them can play a significant role for the machine. Among such parts, we can highlight the key on the crankshaft as an example. The crankshaft itself is important for the car, but it will mean nothing if this small key is not attached to it. It is at its expense that the full movement of technology occurs. And there is no way to do without it. What is its role, why is it so important, you and I will try to understand in detail in this article.
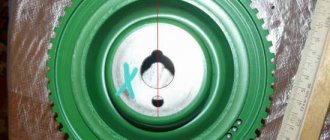
Lada Kalina crankshaft key
- To the beginning of the forum
- Forum Rules
- Old design
- FAQ
- Search
- Users
A friend of mine encountered this.
The car stalls and that's it. I don’t know how to determine death. I simply changed it at the first maintenance to a cast iron one and didn’t bother anymore. The rubber-metal one is lying around in the garage. Folks, have any of you encountered delamination of the damper on the crankshaft pulley on injection engines and, as a result, its failure? I would like to collect statistics and time the replacement of the pulley to coincide with the next replacement of the timing belt. Is it true that in this case the car does not move at all? How to determine the approaching death of a pulley, are there any symptoms? What is your opinion on pulleys without a damper (all-metal)? Nothing was found in the search.
In addition, they work better, since they dampen resonant and vibrational vibrations, and the engine runs smoother. ————————————————————————————
At one time I spent a long time analyzing whose oscillations this damper could dampen if all it turns is a generator. Does it really create such “dangerous” vibrations for the engine? In general, I don’t remember now, but somewhere on this forum there was an answer from engine specialists at VAZ that a damper was made to reduce noise for exporting the car to other countries, and since all the documentation for the 10 in the standard version provides for the installation of this damper, then they come to our market with this pulley. For Russia, the same engine experts recommended installing a solid pulley. And then choose for yourself what you need more - reliability or less noise (if it is at all possible to distinguish the difference in the operation of one or another pulley).
Source
Key design
Before considering the structure of the key, it is necessary to point out that such parts are widely used in all areas of mechanical engineering. And although the design itself is very simple and one might even say primitive, it is considered the highest quality connection in cars of various purposes and designs. In addition, the cost of such keys is quite low and anyone can buy them.
If such a part fails, this also cannot be called some kind of problem or complexity. It can be easily dismantled and just as easily installed back. However, the apparent simplicity and versatility of dowels at first glance is deceptive.
Crankshaft pulley key 4x5 for VAZ 2108-21099, 2110-2112, 2113-2115, Lada Kalina, Priora, Granta
Many car owners, especially domestically produced vehicles and used foreign cars, try to carry out most of the repair work on their own. Very often, for one reason or another, it becomes necessary to remove the crankshaft pulley of a VAZ 2109 - an injector is installed or a carburetor is installed.
There are a lot of recommendations on the Internet, after reading which you might think that everything is very simple. But one problem arises, namely removing the bolt, which is not only difficult to get to, but sometimes simply impossible to move, let alone unscrew. It's also unclear how to secure the crankshaft to keep it in place. The crankshaft pulley on the VAZ 2109 is deliberately very tightly tightened and, unscrewing it, there is a possibility of damaging various components and systems in the power unit compartment or the paint.
The difficulty is that the bolt that secures the crankshaft pulley (or nut, depending on the modification) is tightened with decent force during assembly. This was done to prevent it from spinning up while moving, otherwise the consequences could be simply catastrophic.
Why does a car need a crankshaft key?
First of all, it is worth noting the fact that this part serves as an important connecting link between the hub and the vehicle shaft itself. The key transmits rotation at the moment of movement of the wheel mechanism of the machine from one part of the machine to another and back. As a result, the rotation of the wheel required during movement is performed.
It turns out that without the presence of a crankshaft key, the car simply will not be able to move. Its wheels simply will not be able to perform rotating movements, and the car will be motionless. Here she is, a small but important key. What is she like?
Withdrawal procedure
- Removing the timing belt
- Unscrew the nut and bolt of the upper fastening of the rear timing belt cover
- Removing the cylinder head cover
- On engines with phased fuel injection, disconnect the wiring harness connector from the camshaft position sensor
- Disconnect the wiring harness from the coolant temperature sensor
Using a 10 mm socket wrench, unscrew the bolt and two nuts securing the plug. A rubber sealing ring is installed under the plug mounting bolt. Replace the damaged o-ring.
- We remove the plug. On an engine with a camshaft position sensor, the plug can only be removed if the pin (1) is located opposite the slot (2).
- Remove the sealing ring of the plug. The O-ring must be replaced if it is damaged or if oil is leaking from under the plug.
- Using a 13 mm socket wrench, evenly (in several steps) unscrew the ten nuts securing the two bearing housings.
- Remove the front bearing housing.
- Remove the rear bearing housing.
- Remove the camshaft from the cylinder head by slightly pulling the rear timing belt cover.
- Remove the oil seal from the camshaft.
Camshaft installation:
- Lubricate the camshaft journals with clean engine oil.
- Place the camshaft in the cylinder head with the pin facing up.
- Before installing the bearing housings, apply a thin layer of sealant to the mating surface of the block head in the areas of the front oil seal and plug.
- Evenly, in several steps, tighten the nuts of the bearing housings until the housings come into contact with the cylinder head (following the sequence indicated in the photo). Then tighten the nuts to a torque of 18.4–22.6 N m (1.9–2.3 kgf m).
- Pressing in a new camshaft oil seal
- Before installing the plug, put an O-ring on it.
- Further assembly is carried out in the reverse order of removal.
Why do you need a phase sensor (PF)?
Before talking about repairs, you need to find out what this sensor is needed for. It determines the operating cycles of the internal combustion engine. The camshaft cams drive the valves, and the DF determines which valve is open.
This is an integrated control unit, that is, it includes a sensitive element and a signal conversion system. There is a Hall element there - data is taken based on changes in the magnetic field.
The converter has a bridge circuit, a converter block, and an output stage. The work is that the DF determines the intake and exhaust phases of the 1st cylinder.
For carburetor engines it is not needed because the spark is supplied at the moment of compression and at the end of the exhaust gases. DPKV is sufficient for this.
Roughly speaking, the VAZ 2114, 2115 phase sensor functions as a fuel injection system. If it breaks down, the work of sparking falls on the crankshaft position sensor. The designs that are used on 16-valve cars differ from eight-valve cars.
Now let's try to explain in simple words how the phased injection system works. It turns out something like this: the DF gives a signal to the electronic engine control system (ECM), and it, in turn, gives a command to inject fuel, while the intake valve begins to open, and after it has opened, air is sucked in and mixed with gasoline to form a mixture.
When not running, fuel can be supplied to two cylinders simultaneously. If there is a breakdown, the on-board computer displays error 0340 or 0343, which indicates a faulty phase sensor.
The following signs may also be observed:
- When the starter rotates for four or five seconds, the engine starts and the check engine light comes on. This means that the ECU is waiting for a signal from the DF and, not receiving it, writes off the data from the crankshaft position sensor.
- Fuel consumption increases quite decently, by 15 percent.
- Self-diagnosis mode does not work.
- Engine dynamics drop.
Phase sensor malfunctions are difficult to determine at home. So its diagnosis needs to be carried out at special service stations, since the equipment for its diagnosis is quite expensive.
Video on the topic:
Thanks to the camshaft of the VAZ 2114, the intake and exhaust strokes of the internal combustion engine are synchronized. The camshaft is driven by rotation of the crankshaft, which, in turn, rotates through the movement of the crankshaft. The most important structural part of the camshaft is the so-called “cams”. The cams are directly responsible for the process of opening/closing valves.
Thanks to the cams, the valve timing of the engine is regulated. On all cars, the camshaft is located in the RBC (cylinder block camber). The VAZ 2114 is equipped with a cast iron camshaft, the design of which can be seen in the screenshot below. The standard eight-valve engines of the Samara-2 family have one camshaft installed.
"VAZ" camshafts have an average resource potential: 90 - 100 tkm. At this point, a major overhaul of the internal combustion engine is usually carried out.
Are all keys the same and universal for passenger cars?
This is a common misconception among car owners. Of course, such keys are different and may differ from one another. The main difference between these keys is the type of connection. They can be relaxed or tense.
Stressed joints are those joints that are classified as wedge keys. Unstressed ones are those that are connected according to a segmental or prismatic principle due to their structure. Moreover, keys are divided into factory standard GOST standards.
Which are marked according to the type to which this or that type of key belongs:
- prismatic type of part, has GOST marking - 23360-78;
- segment type - 24071-97;
- cylindrical - 3128-70, or maybe like this - 12207-79;
- wedge-24068-80;
- wedge-tangential - 24069-97 or 24070-80.
Owners of passenger cars have to deal more with fixed key connections, which are a relaxed type of connection.
Symptoms of a problem
Signs of a malfunction of the DPKV can be different. Often, dirt adheres to the end of the sensor itself, which can interfere with reading. Also, symptoms of a faulty crankshaft sensor may be as follows:
- The idle mode is unstable;
- Engine speed rises or falls spontaneously;
- Power drops;
- During acceleration, a “failure” is felt;
- The car doesn't start well.
In these cases, for the most part, the VAZ 2114 crankshaft position sensor is replaced.
In addition, the VAZ 2114 crankshaft sensor may well be in good working order. And on the “tidy” the DPKV error will appear (0335 or 0336). The reason for this may be a broken wire near the connector. This is easily determined visually; then it is enough to replace the connector without replacing the sensor itself.
If the owner notices signs of a malfunction of the crankshaft sensor on his car, then this is a “signal” about the need for diagnostics.
It’s not difficult to guess where the crankshaft sensor is located on a VAZ 2114 . Like many other VAZ models, it is attached to the engine, and more specifically to the oil pump, near the generator drive pulley, on its cover. The sensor is attached with one bolt, which is typical for many models of this family.
Typical causes of failure:
- Physical damage to the case;
- The interturn closure of the winding turns entails a change in the generation frequency transmitted to the control unit (frequency type sensors);
- Emergency wear or loss of pulley teeth.
New camshaft for 2114
Replacing the VAZ 2114 8-valve camshaft is one of the stages of engine overhaul. Online stores offer many options for the design of the part, including so-called “sports camshafts,” which supposedly promise a significant increase in power. But we will focus on the standard part with catalog number 21110100601000. This part is sold in most major online stores. Price range: 2100-2600 rubles.
Dimensional characteristics of the standard part:
The appearance of the new camshaft can be seen in the figure below.
How to replace the VAZ 2114 phase sensor yourself.
But replacing it is a very easy job. It is located at the end of the cylinder head next to the air filter.
Replacing the phase sensor begins by disconnecting the power from the battery. In this case, the control unit memory will be reset.
If this is not done, it will continue to operate in the same mode as with a faulty phase sensor. Normal operation will begin after a few engine starts.
The tool that will be needed is just a ten key and sealant. Next, disconnect the wires from the phase sensor and remove it using a key.
The new sensor needs to be coated with sealant, the layer should be small, and it should be left for about five minutes before installation. We install it on the seat and connect the wires.
Next, connect the battery, start the engine and see if the check engine light comes on. If it no longer lights up, then the sensor is installed correctly.
That's all the work was done, as they say, for ten minutes. Yes, the price of the sensor itself is around $15, depending on the region.
Steps to replace the camshaft on Lada 2114
We warn you that the actions described below imply interference with key vehicle systems. Ignoring the proposed algorithm and accompanying recommendations will lead to irreversible consequences - in particular, to the failure of the internal combustion engine. If you are not confident in your abilities, then it is better to seek qualified help from professional auto mechanics. The material presented below is aimed at experienced car enthusiasts who understand the structure of a car.
To replace the VAZ 2114 camshaft seals or the camshaft itself, the car owner will need:
- A set of wrenches: spanners, open-end wrenches, socket heads - everything will be used;
- Containers for fasteners and chalk parts;
- Screwdriver Set;
- Sealant;
- Dynamometer wrench (picture below).
Repair algorithm:
- We dismantle the camshaft pulley;
- We remove the pulley key from the camshaft groove;
- Unscrew the nut securing the gas distribution system;
- Remove the nuts securing the bracket to the cable;
- We dismantle the crankcase gas exhaust hoses, having first loosened the clamps;
We dismantle the engine valve cover by unscrewing the nuts;
Remove the camshaft oil seal;
Reasons for replacement
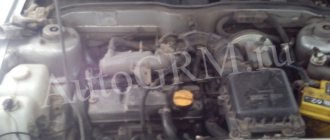
The crankshaft pulley is located on the right side of the engine compartment and is best accessed from below
Before proceeding directly to the process, it is necessary to consider the main reasons why it may be necessary to dismantle this part. In fact, everything is much simpler than it seems. So, let's look at the main reasons for dismantling:
- Major repairs will require removal of the pulley.
- Wear of the product (wear or broken teeth).
- Some repair operations will require dismantling the pulley ( setting valve timing , etc.).
Should we unscrew the crankshaft pulley?
So, when the reasons are considered, let's proceed directly to the process itself. It is worth noting that this operation cannot be completed alone, so you need to ask for help, in other words, you will need an assistant . Let's consider the immediate sequence of actions for removing the crankshaft pulley:
- We place the car on a pit or overpass.
- We dismantle the front right wheel. The car must be well secured in this position, since when unscrewed it may fall off the jack. Therefore, you need to install a stump under the threshold, and anti-roll bars under the rear wheels; you can use the removed wheel.
Car after wheel removal
Remove the plastic fender liner by unscrewing the 5 fastening screws
Generator drive circuit
We insert a crowbar into the flywheel so that it does not rotate when the nut is unscrewed
It is worth noting that the cutout on the crankshaft pulley, during installation, must coincide with the protrusion on the crankshaft itself.
Why do you need to twist the crankshaft pulley?
Removing the crankshaft pulley on a VAZ 2109 may be necessary in many cases. For example, you need to unscrew it to replace the crankshaft seals.
Gasket VAZ 2109
At a service station, a master will cope with this work within 10-15 minutes, but he will have to pay him a substantial amount. Therefore, there is a reason to learn how to do this work yourself.
Tools
To replace, we don’t need any special tools, just a standard set of wrenches and screwdrivers. You will also need a head with an extension. Liquid WD-40.
Stages of work
In order to cope with this work quickly and correctly, it is necessary to master and apply special techniques. In various engine models, a nut or bolt is used to secure the pulley.
In our case, the engine has an injector, therefore the removal procedure will differ from the removal process from a unit with a carburetor.
Since no one removes the crankshaft pulley on the VAZ 2109 injector unless necessary, we will consider this process when replacing the gasket. We will also tell you how to replace the part itself.
- Remove the timing belt.
- Using two screwdrivers we pry off the part we need.
Remove it with two screwdrivers
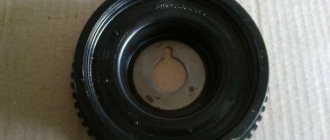
This is what the part we are filming looks like
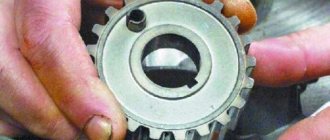
Having pryed, we remove the crankshaft key. Be careful not to lose it.
The key that is removed
Use the same screwdriver to pry off the oil seal.
Replacement process
Press-fitting using a head
As you can see, there is nothing complicated. If you still have questions and have not yet understood how to unscrew the required part, watch the video. It describes in detail the process described in this article, and it will be useful not only for beginners, but also for experienced drivers.
Communities › Lada Priora Club › Blog › For those who DO NOT drive and DO NOT pull - Solution
I looked, a lot of people have this problem on their Priors, mostly it’s on the gearbox, the check light doesn’t light up, the pedal is “wobbly” at the bottom, it’s dull, it dips at about 2000 and goes off at 3
Solution: The timing belt is knocked off - most likely the marks match, but it is knocked down due to the crankshaft key, usually breaking the lower pulley and the seat itself on the crankshaft
. here you can do without expensive repairs, just put the key on the polyester and tighten the lower pulley correctly, there are some nuances that I talked about in the video
PS for the smartest commentators
the key serves as a guide (who didn’t guess - it’s weak to hold the entire timing system) and therefore the Poxypol is enough to place the key correctly. It's all about tightening the crankshaft bolt)
No one is saying that this is an eternal option, but postponing repairs until later is also an option.
By the way, veneer repair is very expensive in terms of services.
If someone is smarter, tell me how best to do it?
Typical camshaft malfunctions, their symptoms
The main reasons why the described part may break:
- The cams wear out: a knocking noise appears when the engine starts. When wear reaches an extreme stage, sounds can be heard while the car is moving;
- The camshaft bearings wear out;
- Shaft elements break.
The camshaft is deformed: the malfunction is also characterized by extraneous noise during operation of the power unit;
The breakdowns described above lead to disruption of the fuel supply due to desynchronization of the camshaft and cylinder valves. In some cases, a part malfunction is caused by the use of low-quality motor oil with a large amount of impurities or a small amount of oil in the engine.
Crankshaft gear: structure and functions
The crankshaft gear is the gear through which the engine equipment rotates. Depending on engineering solutions, it has the shape of a gear with teeth for a chain or belt.
Crankshaft Gear for Chain
Crankshaft Gear for Belt
As a rule, timing gears (lower) and oil pump drives are installed on the crankshaft. The gears are mounted with a tight fit, fixed on the keyway, and pressed with threaded fasteners.
Crankshaft gear malfunctions
Common crankshaft gear problems include:
- Natural mechanical wear of the teeth. High speeds and vibrations affect the contact surfaces of gears. Over time, wear appears on the gears, and they are replaced with new ones. The wear on the timing gear can negatively affect the valve timing;
- Wear or damage to the keyway of the crankshaft gears. The fact is that even a slight gear play, which will not have a noticeable effect on the operation of the engine, will eventually develop into a problem. The crankshaft gear backlash will increase. If the problem is not addressed, the keyway may become severely damaged, requiring the crankshaft to be replaced.
Replacing the crankshaft gear
The easiest way to remove the gear from the crankshaft is if the shaft itself is removed from the engine. As a rule, gears are installed on the shaft with interference, so a puller will be required. The sequence is as follows:
- install the puller and by rotating its rod, gradually “press out” the gear;
- Remove the gear from the shaft, remove the key, and inspect the keyway on the shaft.
Replacing the crankshaft gear
To mount the gear, you will need a round attachment similar to a steel tube, which will easily fit onto the shaft. Necessary:
- install the key;
- lightly press the gear;
- placing the tube on the shaft, rest it against the gear;
- lightly tapping the tube with a hammer to “seat” the gear into place.
If you only need to replace the gear, this can be done without removing the engine and crankshaft. Removing the crankshaft gear must be done after the engine has completely cooled down and the car has been immobilized.
Let's consider the procedure for replacing the timing gear of a VAZ 2110 engine.
- The first step is to remove the timing case;
- Then install the timing mechanisms according to the marks on the crankshaft and camshaft pulley (this is necessary so as not to disrupt the engine’s timing);
- If you did everything correctly, the marks on the flywheel should match. To check this, remove the rubber plug on the gearbox;
- Then you need to fix the rotation of the engine. For this it is better to use special clamps. If this is not possible, you can insert a regular flat-head screwdriver into the transmission inspection window;
- Unscrew the pulley and remove it;
- Check the position of the mark on the timing sprocket;
- Loosen the timing belt tension roller and remove the belt;
- Remove the crankshaft gear and inspect the keyway;
- Reassemble components and mechanisms in the reverse order of disassembly, checking the timing marks.
Remove the timing mechanism casing Remove the timing mechanism casing Install the timing mechanisms according to the marks on the pulley Install the timing mechanisms according to the marks on the pulley Remove the rubber plug on the gearbox Remove the rubber plug on the gearbox Check the position of the mark on the timing sprocket
You can change the crankshaft gear in a home workshop, but you should understand that an error in setting the gas distribution mechanism can lead to serious engine damage. If you do not have experience with such repairs, it is better to contact specialists.
Repair. The key on the crankshaft under the timing pulley was broken.
Repair. The key on the crankshaft under the timing pulley was broken.
It seems like a fairly common breakdown:
The end bolt on the crankshaft, which secures the timing belt timing belt pulley and the large outer belt pulley, has become slightly unscrewed. As a result, the key under the timing gear pulley was broken. Replacing this pulley and installing a surrogate key did not help much. It broke again in 4 days.
The eternal question: WHAT TO DO? Do not suggest replacing the crankshaft or replacing the engine. Interesting concrete experience with results, both positive and negative.
There are proposals to put this entire farm on good cold welding. What do you say?
Re: Repair. The key on the crankshaft under the timing pulley was broken.
Re: Repair. The key on the crankshaft under the timing pulley was broken.
Unread message TDA_ » 07 Nov 2009, 20:01
surik_v wrote: The eternal question: WHAT TO DO? Do not suggest replacing the crankshaft or replacing the engine. Interesting concrete experience with results, both positive and negative.
There are proposals to put this entire farm on good cold welding. What do you say?
Re: Repair. The key on the crankshaft under the timing pulley was broken.
I think the problem is that the limit switch on the crank is also a little broken. therefore, even a new pulley could be put on the shaft easily by hand without effort. Apparently such play will also eat up the new keyway. Therefore, two options come to mind: - bore the pulley inside and make a bushing with a new groove so that it fits very tightly onto the shaft. — put on cold welding (very good)
why not use current for cold welding? what are the contraindications?
Re: Repair. The key on the crankshaft under the timing pulley was broken.
why cold welding, just put it on tape.
if it’s completely broken, it might actually be grabbed in a couple of places by regular welding, not cold, with that in mind. so that you can blow it off with a grinder if you need to remove it.
Re: Repair. The key on the crankshaft under the timing pulley was broken.
Unread message mals » 07 Nov 2009, 21:26
yeah, that's right about the tape. I had the same canoe, I took it to Lamarck, they “welded” the cjr, like cold welding, and gave me a lifetime guarantee. I only had it for 1,500 km, then I went to Vladik and back again. The glue guy himself went crazy, he walked around confusedly about what couldn’t stand it, “how can this be, it’s fastening it tightly.” So I sold the car, then I heard that it was broken again and the crankshaft was replaced.
ps. True, I constantly kept the revs in the region of 4.5-5 with peaks of up to 6.7 when I drove to Vladik and back, maybe because of such a load, but nevertheless.
Re: Repair. The key on the crankshaft under the timing pulley was broken.
mals wrote: yeah, right about the tape. I had the same canoe, I took it to Lamarck, they “welded” the cjr, like cold welding, and gave me a lifetime guarantee. I only had it for 1,500 km, then I went to Vladik and back again. The glue guy himself went crazy, he walked around confusedly about what couldn’t stand it, “how can this be, it’s fastening it tightly.” So I sold the car, then I heard that it was broken again and the crankshaft was replaced.
ps. True, I constantly kept the revs in the region of 4.5-5 with peaks of up to 6.7 when I drove to Vladik and back, maybe because of such a load, but nevertheless.
Re: Repair. The key on the crankshaft under the timing pulley was broken.
Catzilla will not be able to mill a new groove - if you move the teeth on the timing gear - that's it. The TDC and timing marks on the large pulley will go away - that’s two.
so not everything is as simple as it might seem. Considering the material of the knee, it is most likely due for replacement. If the pulleys are broken, then it’s a little simpler. In the large one, you can gouge out the groove and mark new marks, and gouge out the small horseradish. Firstly, it is nitrided, secondly, it is hardened, and thirdly, it is made from 30 CHC. Good luck.
There is only one way out - find a milling machine operator. which will make a new groove in the knee with a 180 degree offset. This will be the least error. Then relabel the pulley. First you need to count the teeth on the small gear. If their number is not a multiple of 2, then you are very unlucky.
Re: Repair. The key on the crankshaft under the timing pulley was broken.
Unread message TDA_ » 07 Nov 2009, 23:34
if it’s not a multiple, then you can make the angle a little smaller Because cold welding sucks. There are actually many options.. For example, put it on paint.
More promising but also less correct. Weld the key to the shaft and sell the car.
If you want to do it well, and don’t mind the sex, make a key from copper and fix it on the shaft. Fill the chips on the shaft. Pull out the key. Treat the shaft so that the pulley fits. Collect.
Re: Repair. The key on the crankshaft under the timing pulley was broken.
Well, laugh with laughter, but this is not the first time I’ve heard about tack welding, but I haven’t tried it myself.
To change the knee and butt, you will have to remove the box, and sometimes the entire engine.
Re: Repair. The key on the crankshaft under the timing pulley was broken.
Re: Repair. The key on the crankshaft under the timing pulley was broken.
Re: Repair. The key on the crankshaft under the timing pulley was broken.
Re: Repair. The key on the crankshaft under the timing pulley was broken.
Unread message TDA_ » 08 Nov 2009, 21:58
Re: Repair. The key on the crankshaft under the timing pulley was broken.
Re: Repair. The key on the crankshaft under the timing pulley was broken.
Re: Repair. The key on the crankshaft under the timing pulley was broken.
The keys are not made from any kind of rod, simply from a material suitable in terms of strength and hardness on a conventional surface grinding machine. At least that's what we do. The blanks are milled, then heated, and then finished on a grinder. Total business. And about the mythical rod. - give it a standard designation in the assortment, then I’ll believe it.
The question is - why change the earbuds if they are still quite normal? Is it really impossible to put the same ones in their places? What will change? IMHO - they install a new one only so that later they don’t have to disassemble the engine a second time for capital, since it has already been disassembled. Then change the rings and the seals around the edges.
Remill the groove; no amount of surfacing or graphite keys will help. The deposited material will be worse + you will get a heat-affected zone on the shank of the elbow and be happy if the pulley does not fall off at all after 1000 km. Milling a keyway is the simplest procedure, performed on a vertical machine with a finger cutter (calibrated according to the normal class). An hour's work with installing the part into the machine. What makes you think that this is more expensive than a new knee?
There are no electrodes specifically for surfacing. There is a material, there are its physical and chemical properties, and there is an electrode corresponding to all of this. Whether it will be E42 or UONII or Sarmite is chosen solely from what you want to get after surfacing. You can also fuse SV08G2S and it will work out well, depending on what for.
Re: Repair. The key on the crankshaft under the timing pulley was broken.
mail_robot Oh Dima, there are so many certificates in the office wall, and you don’t know about the inserts
Standard inserts come in several size groups, and one is selected for each neck at the factory. As far as I remember, Toyota has 3 main numbers, 5 connecting rod numbers. This is done to ensure a more even oil gap.