01/26/2022 3,394 Light and sound devices
Author: Ivan Baranov
One of the horn options is a pneumatic signal on a car, which has both its pros and cons. Previously very common, it is much less common on modern machines. However, many car enthusiasts still want to install such a device for themselves. You will learn how to do this and much more about pneumatic signals in the article.
[Hide]
Lada 2106 Akkerman71 › Logbook › Prevention and strengthening of the air signal.
Hi all. The other day the air signal malfunctioned for some reason. You can clearly hear the relay operating, the abnormal, rattling operation of the compressor and the complete absence of sound. The signal is a necessary thing, in some cases necessary, so I didn’t put it on the back burner, and the weather still allows me to do something else in the garage.
I removed the compressor, cleaned it of dirt and dust, and generously poured Xado penetrating lubricant with revitalizant into it through the outlet hole. After some time, the compressor started up and work was fine.
Apparently, from time to time, the compressor needs periodic lubrication, and if you miss the “right” moment, it can completely fail. Dudke also took preventative measures, disassembled it, and lubricated the membrane with silicone grease. A year ago, when I installed this signal, I immediately liked the sound, but I felt that it lacked a little pressure produced by the compressor. And when I moved it from behind the grille, under the bumper, the distance of the air line (tube) increased, and there was a slight delay in response. Of course it worked, but I wanted it to be better. At the same time, while everything was removed, I decided to add pressure to it, so I bought another compressor. I made a new mounting strip for two compressors and secured them.
For the warm season, I'm planning to redo the engine compartment, then I'll paint the trim as it should be, for now it's temporary. I decided to lay two lines from the compressors to the pipe and place the tee close to it.
According to the connection, the second compressor was connected in the same way as the first, using a relay,
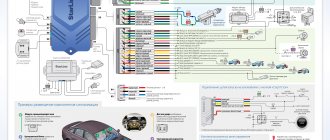
but the power supply is from the battery, and each has its own fuse, separate. For clarity, I will post the same connection diagram, the first one I came across from the network.
After installation and testing, I was pleased with the result. This signal should immediately come in a set, with two cospressors.) The problem with the delay disappeared, the sound changed a little, became higher and of course louder) exactly, just right, not so much as to put passers-by in a stupor,) but also at the right moment, something If only we had heard, this happens. Well, if one compressor refuses to work at any moment, the second one will not allow you to remain without a signal completely. Well, here's a photo:
Source
Making a pneumatic signal with your own hands
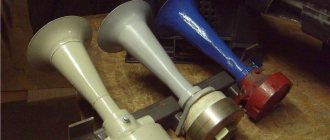
Three powerful pipes
You will definitely need to purchase the following elements to create a pneumatic signal with your own hands:
- Compressor. Most car enthusiasts in Russia and neighboring countries use products under the Berkut brand. It has several models, the power of the R15 will be enough for you.
- Solenoid valve. With its help, air is discharged from the receiver into the pipes. It can come with them. For convenience, we recommend purchasing these. However, you can buy the valve separately - then pay attention to the voltage and diameter.
- Check valve. It is installed at the outlet of the compressor and should not allow air to flow back from the receiver.
- Pressure switch. Used for this. So that the compressor turns off when the required pressure is reached and turns on again when it drops.
- Receiver. A 4-liter model with a pressure of 12.5 bar is suitable. It should have two holes - one for connecting the compressor and blower, the other for draining condensate.
- Pipes.
Also useful are pneumatic connectors (according to the thread size and the size of the holes of the receiver, compressor and pipe) and fittings.
Lada Priora Sedan › Logbook › Installation of air horn (very detailed + many photos)
A friend and I once went shopping, nothing foreshadowed trouble... We were looking for either a seal for his viburnum, or some other small thing. I suddenly remembered how I recently watched the guys install pneumatic horns, and they sound decent! I wanted the same one for myself, because the standard signal is quiet and inconspicuous anyway. I decided to ask, one elderly man brought me to his stall and showed me a huge selection of beeps. Of these, I liked this one the most.
I couldn’t find any clear instructions, many of the manuals just contain a couple of photos and diagrams, so I decided to write in detail how I did it myself. I hope this post will be useful to someone who doesn’t know much about it and wants to stage it.
And here, by the way, is a new buzzer.
At first I wanted to connect the contacts using construction adapters, I even sharpened and tried them on.
On the other side of the fuse holder I soldered a homemade power terminal made from shelf fasteners using a grinder and a drill =)
Then he wrapped the whole thing with a bunch of electrical tape and put it in a plastic corrugation.
And proceeded to connect the compressor.
Next to the battery I found a place for the relay
Before attaching the compressor, I put cellophane on it from under the pipe, it was already in the morning, because I had been fiddling around for half the night, so it was only in the morning that I realized that like a compressor it would suck air through the cellophane, then I fixed everything and here is the result:
Here is a video of the sound, although it was not possible to convey all the sound, in real life the buzz is louder.
I soldered everything with a regular soldering iron, used solder with rosin and soldering flux (a very good thing!).
In total, all the fun turned out to be 730 rubles. In my opinion they are worth it!
I hope the article turned out to be quite detailed and informative, it will help someone!)
Source
Similar master classes
Do-it-yourself automatic exhaust The most reliable relay for turn signals Has the battery died? A screwdriver will help! The simplest circuit for automatic water level control Do-it-yourself solid-state relay Washing machine malfunction
Particularly interesting
A 100% quick way to obtain seedlings with roots from Effective rooting of a rose using a plastic bottle 3 fresh ideas for the master and do-it-yourselfer 4 signs of how to identify a sweet watermelon 5 fresh ideas for your workshop A way to learn welding without consuming electrodes Comments (2)
Connecting an audio signal via a relay.
I have a 5-pin relay. (Contact 87A - not used)
Automotive relay 12V. Permissible current 30/40A. Relay 5-pin, 12V, 30-40A with mounting plate. Relay is an electrical device (switch) designed to close and open various sections of electrical circuits for given changes in electrical or non-electrical input quantities.
The electromagnetic relay consists of:
Electromagnet (represents an electric wire wound on a coil with a core of magnetic material). Anchors (a plate made of magnetic material that controls contacts through a pusher). Switches (can be making, breaking, switching).
Installation of wires inside the car
Power can be taken directly from the battery terminal, through a fuse. Or find the switching point in the standard fuse box (a diagram of your car is required).
Important! This box from aliexpress has input fuses for each line.
All additional wiring is done in corrugation and secured to the body with ties.
The harness is inserted into the passenger compartment through standard holes in the engine shield.
Inside the cabin, the cable is also laid in corrugation and attached to the structural elements.
All connections are made by soldering, insulated with thermocable and again corrugated.
Tuning VAZ 2109
- signals from the Volga with a “mass” on the body
- relay type 90.3747 with mounting flange
- relay socket
- female terminals wide
- heat-shrinkable tube (HERE)
- stranded wire with a cross section of 2.5 mm. sq.
- blade fuse block
- 20 A fuse
- metal corner
Spare parts for modification
First of all, remove the ground terminal from the battery.
To access the standard signal of the VAZ 2109, remove the radiator grille, unscrew the standard signal along with its fastening bar. The signal ground wire is attached nearby, we dismantle it too.
At home, we will first prepare the mounting of signals from the Volga based on a steel angle purchased at any building materials store. We will attach the signals to the standard place where the original signal is attached. We mark the corner at the installation location, saw it off, and drill holes for attaching signals from the Volga. It is also advisable to paint the corner to protect it from corrosion. Next, we attach the signals to the corner. The signal fastening bolt is also a “ground”, so it is necessary to ensure its electrical contact with the angle, for example, by securing the Volgov signals through a castle washer.
We fasten the corner with the signals to the bolt securing the standard Samara signal through a castle washer to ensure contact of the corner with the ground. It is possible that the bolts securing the Volgov signals on the corner will touch the radiator; in this case, we put washers, thereby moving the corner with the signals away from the radiator. Do not forget about the need to preserve the corner with the car body (“ground”). That's it, the mechanical part is over, let's move on to the electrical part.
Signals from the Volga to the VAZ 2109 are connected according to the following scheme:
Electrical diagram for connecting Volgov signals to Lada Samara
We crimp the ends of the wires with appropriate terminals. We hide all connections in a heat-shrinkable tube.
The relay can be mounted on the back of the radiator frame, next to the headlight.
First, let's look at the diagram
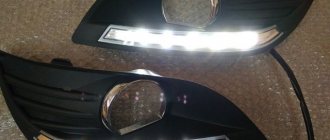
The operating algorithm is as follows: when starting the engine, the daytime running lights should light up and the recorder should turn on. After turning off the engine, these devices turn off. In addition, the DRLs must go out when the side lights or headlights are turned on: this is required by technical regulations.
For implementation, you will need three standard 5-pin automotive relays (sold in a car store). In the diagram they are indicated by numbers 1, 2 and 3.
1. Green wire – power supply. 12 volts through a fuse are constantly supplied to contacts No. 87 (normally open) of relays 1 and 3. Output contacts No. 30 are connected to the positive inputs of the recorder and the running light module. The negative wire (ground) can be connected to the car body at the location where the devices are installed.
2. The red wire in the diagram supplies the control voltage of 12 volts, which appears after the engine starts (or turns the ignition key). In automotive circuits it is designated as “HOT RUN”. There are quite a lot of connection points: from the radio to the power supply to the fuel pump. The signal is easy to find in the description of your car.
3. When 12 volts appears on the red wire (contact No. 85), relay coils 1 and 3 are activated, the supply voltage through the green wire is turned on by the recorder and DRL (contacts No. 87 and No. 30 are closed).
4. On relay 3, control voltage is supplied through normally closed contacts No. 87a and No. 30 of relay 2. When voltage is applied to contact No. 85 of relay 2, the coil is activated and stops supplying control voltage to relay 3. The control signal comes from the side lights being turned on: The DRL goes out, but the recorder (via relay 1) continues to work.
Repair of sound signals on VAZ cars of various modifications
Sound signals, as such, are not among the most complex elements of a car, however, traffic safety and the ability to avoid emergency situations largely depend on their good condition. Be that as it may, even with all its simplicity of design, the sound signal (including on various modifications of the VAZ) may stop working and if such an unpleasant situation arises, you can most often cope with the problem on your own, it is enough to have the appropriate diagram at hand and follow a few simple recommendations.
In general, the connection diagrams for the sound signal on the VAZ “classic” series and on subsequent front-wheel drive models are quite similar and the main differences relate to the relay markings, as well as the location of the fuse. Among other things, on the earliest versions of the VAZ (2101, 2102, 2103 and a number of modifications 2106), the electrical circuit of the sound signal or the presence of a unloading relay is not provided at all.
How to connect a pneumatic signal via a relay diagram on a VAZ 2107
Note: Our material relates to purely technical topics. Questions about the legality of making changes to the design are the topic of another article.
So, let's look at a typical set of electronic add-ons with tuning elements:
- automatic daytime running lights;
video recorder that turns on with the engine;
- pneumatic signal powered by an electric compressor.
If you are familiar with the electrical part of a car, you probably know that any consumer (headlights, starter, fans, power windows) is turned on using a relay. This is convenient from a management point of view, and allows you to separate thin signal wires from thick power cables. To connect newly installed devices, we assemble a new relay block.
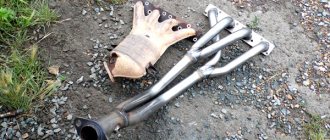
Sound signal NIVA
Sound signal GAZ in NIVU
Lately there have been a lot of inappropriate behavior on the roads. Few people pay attention to the native quiet signal. Therefore, I decided to install a signal from GAZ. I bought the following signals produced by LETZ without brackets:
I decided to put it behind the radiator grille, because... Under the hood the sound would still be a little muffled. Standard signal:
To place the signals, I made the following mounts from stainless steel:
Connection diagram via relay:
True, I took the power from fuse No. 15 which is 16A
The power wires go into the factory hole:
The relay is located on the brake fluid reservoir mounting stud:
The original “+” and “-” wires were not enough to reach the relay; we had to extend them by about 25 cm. In order for the signals to fit in, we need to file down the “pipes” a little with sandpaper. Next, everything is painted, moviled and assembled:
Signals don't come out
Installing a sound signal from GAZ (PAZ) in NIVU
Another day of vacation was marked by an improvement in the sound signal of my car. I was very depressed by the sound of the stock signal; it seemed like a solid car, but it beeped like a castrated hedgehog. Well, somehow it’s not solid. Ideally, these are pneumatic pipes, but while there is no pneumatic system, I bought two sound signals from GAZ (PAZ), one high, the other low. Their sound pressure level is 105-118 dB.
To begin with, I was looking for a place to stick them, they were too big. I planned to do it from the front, instead of the standard one, but I couldn’t unscrew the grille mounting bolts.
I opened the hood and began to think about where I could stick the new horns. And then I saw the spare tire fastener, which had not been used for its intended purpose for a long time... In which I drilled two holes with an 8mm metal drill:
Advantages and disadvantages of a pneumatic signal
We have already listed the advantages of pneumatic signals, but it is not difficult for us to repeat them. A very loud sound level will allow you to become “noticeable” among other motorists on the road, which can prevent an accident. In addition to the pneumatic signal, you also get a standard compressor on the body of your car, which is also not bad at all. The disadvantages of a pneumatic signal include the high cost of the equipment, as well as the complexity of its connection. In addition, working with pneumatics requires high tightness of the connections, otherwise the compressor will be turned on from time to time to pump into the receiver. Such inclusions can significantly drain your battery, especially during long-term parking. In this case, it is better to connect power to the system through a relay that turns on when power appears in the ignition system circuit. In any case, the tightness of such a system will be lost much earlier than the functionality of the standard signal, which will lead to the need to replace the sealing elements and valves in it. That is, we can say about more expensive maintenance. In any case, weighing all the pros and cons and making a choice based on what is a priority for you is only your prerogative.
KIA Rio =/SILVER= › Logbook › 11. Installation of sound signals from the Volga
For a very long time I was irritated by the standard signal - it’s kind of weird
What types of horns are there?
Today, every car owner can choose a signal for his vehicle to suit his taste. But before you go to the store, it is important to understand what is their difference from each other, what advantages and disadvantages are inherent in a particular type.
Car horns are divided into three main types:
- Electromagnetic
- Pneumatic
- Electronic.
The types of sound signals differ in both structure and sound. The main characteristic of a car horn is its noise level.
Pneumatic horns
The main working elements of pneumatic horns are: horn, diaphragm and membrane. When compressed air acts on the membrane, it causes it to deform and vibrate, and the resulting sound is amplified by the horn. The pneumatic horn is the loudest signal on a car - its volume reaches 145 dB.
Pneumatic horn
Powerful horns of this type are usually equipped with four tubes that generate a signal with a frequency of 400 to 800 Hz. To ensure the full operation of such a device, you will need a fairly powerful compressor capable of creating a pressure of 60 atmospheres.
A pneumatic horn is capable of reproducing not only a monophonic sound, but also some melodies. To do this, the compressor will need significant space under the hood, and the device will also need to be supplemented with a special electronic controller. The compressor for the horn is then controlled by electrical signals supplied by a programmed controller. The driver has several variations of melodies.
Characteristics of the pneumatic signal
A single system kit
Before moving on to how to make this device with your own hands, you need to understand what a pneumatic signal is. And also, what is its operating principle, what are its functions, design. And of course, the pros and cons of having such a horn on board your car.
Working principle and functions
The operating principle of the device is quite simple. Pressurized air from the compressor moves through the tube. This causes it to vibrate and make sounds of a certain frequency. Due to the certain complexity of the design, the cost of such a device is quite high . If you decide to assemble and install it yourself, you will save some money, but the costs will still be significant.
There are signals with different pipe shapes, as well as signal power, which can reach up to 125 dB (video author - Varan Varan).
Design
Basic parts before installation
This device consists of the compressor itself and the tube. The number of the latter can reach up to three. The increased number of horns allows you to achieve a richer and more powerful sound. However, even with one tube, the pneumatic type signal makes a powerful impression. The design also includes a solenoid valve, a check valve, a pressure switch and a receiver.
Advantages and disadvantages
The main advantage of this device is, of course, a powerful signal. It reminds anyone who hears of trucks and even steamships. With it, your car will definitely be noticed. But this often helps prevent accidents. Every driver knows how important it is to attract attention on the road and pneumatic signals will help you.
The disadvantages are the high price, first of all. Also, although the installation is not very simple, finding a specialist who will carry it out is not easy. However, the last minus, if you install the pneumatic signal yourself, does not play a special role.
Electronic signals
The main part of electronic beeps is a chip that generates a sound of the desired frequency and transmits it to the device’s loudspeaker. The signal volume can reach 110 dB, and the frequency range is very wide and can be completely different in each individual model.
Electronic horn
They can be installed on almost any car, regardless of the dimensions and voltage of the electrical circuit. Electronic horns can operate on both 12 and 24 V. The device can reproduce both single-tone sounds and various melodies.
It is worth remembering that a musical horn can cause unwanted attention from traffic police officers if the melody resembles a special signal. In this case, a fine may be imposed on the driver.
Contacts
Privacy Policy
Maintaining your privacy is important to us. For this reason, we have developed a Privacy Policy that describes how we use and store your information. Please review our privacy practices and let us know if you have any questions.
COLLECTION AND USE OF PERSONAL INFORMATION
Personal information refers to information that can be used to identify or contact a specific person. You may be asked to provide your personal information at any time you contact us.
Below are some examples of the types of personal information we may collect and how we may use such information.
What personal information do we collect:
When you submit an application on the site, we may collect various information, including your name, phone number, email address, etc. How we use your personal information:
The personal information we collect allows us to contact you with unique offers, promotions and other events and upcoming events.
From time to time, we may use your personal information to send important notices and communications.
We may also use personal information for internal purposes, such as conducting audits, data analysis and various research in order to improve the services we provide and provide you with recommendations regarding our services.
If you participate in a prize draw, contest or similar promotion, we may use the information you provide to administer such programs.
DISCLOSURE OF INFORMATION TO THIRD PARTIES
We do not disclose the information received from you to third parties.
If necessary - in accordance with the law, judicial procedure, in legal proceedings, and/or based on public requests or requests from government authorities in Ukraine - to disclose your personal information. We may also disclose information about you if we determine that such disclosure is necessary or appropriate for security, law enforcement, or other public importance purposes.
In the event of a reorganization, merger, or sale, we may transfer the personal information we collect to the applicable successor third party.
PROTECTION OF PERSONAL INFORMATION
We take precautions - including administrative, technical and physical - to protect your personal information from loss, theft, and misuse, as well as unauthorized access, disclosure, alteration and destruction.
MAINTAINING YOUR PRIVACY AT THE COMPANY LEVEL
To ensure that your personal information is secure, we communicate privacy and security standards to our employees and strictly enforce privacy practices.
Universal car horn WEISHINE (135 dB)
Price: from 431.21 rub. (check price and discount) Seller reliability: excellent!
Delivery within Russia: free!
Customer reviews:
Review No. 1: Delivery month to Arch.region. no tracking. The horn arrived simply in a bag and in its original packaging, surprisingly intact. I couldn't get an answer to my question from the seller. The sound is not super loud, but louder than what is installed on Kia from the factory. The tone seems rough (high). I checked the houses, it works, no one was scared. I will install two of these. Thanks to the seller.
Non-standard solutions
In some cases, drivers prefer to install a locomotive whistle on their car. It has very significant power and is able to dramatically attract the attention of others. However, its installation requires quite a lot of space in the engine compartment.
The locomotive whistle is the most powerful
The installation of locomotive or steamship signals is not prohibited, but the need for such a whistle is debatable. Its use in city mode may result in a fine. In addition, to use such signals, the car must have good sound insulation.
A locomotive whistle on a car can scare anyone. The video below shows jokes with a locomotive whistle installed on a small runabout.
Electromagnetic horns
It is this type of sound signals for cars that has become most widespread, largely due to the simplicity of the design and attractive cost. As we have already said, the main components of such devices are a pair of diaphragm - solenoid (electromagnet). According to their design, electromagnetic horns are divided into three subcategories:
- a snail that is relatively large in size due to its funnel-shaped geometry. For horns of this type, the maximum beep power level is about 120 dB - this is enough to effectively influence pedestrians and vehicle drivers. Due to its large dimensions, the snail is not easy to mount, and on many modern cars it is completely impossible to find a place for them in the engine compartment;
- The disc horn is the most compact in its class, providing a monophonic sound with a frequency of 350-400 Hz and a power of up to 115 dB. Due to its small size, it can be installed both in the engine compartment and outside (for example, on the radiator grille). There are disk devices of collapsible and non-dismountable designs;
- The horn horn resembles a pioneer horn in appearance, but structurally it is the same snail, but straightened and with a bell. Most often, such a signal is mounted outside the car; when located in the engine compartment, the sound volume is noticeably reduced.
Installing the horn
After purchasing a horn, the device needs to be installed. Each model comes with instructions, however, as far as the electrical part is concerned, everything is usually quite simple.
Installing a sound signal on a car
Installing a sound signal on a car to replace the old one is not difficult. The horn is installed in place of the old one, or if the new one is larger, then a space is selected for its mounting. It is much more difficult to install a pneumatic horn with a compressor, because you need to look not only for a larger space for the horn itself, but also for the compressor.
Choosing a place to install a sound signal on a car
When installing, ensure that the horn is securely fastened so as not to lose it while driving.
The loudest signal on a car is, of course, cool, but it must be taken into account that for normal operation of its compressor, a fairly large amount of current may be required. Therefore, before such a purchase, you should think about the match between the car’s battery and the generator.
Installing a pneumatic signal on a car
It is better to entrust the installation of such a device to a trusted car service.
Step-by-step installation process
Before starting work, it is advisable to print out a detailed wiring diagram linked to your car: with color-coded wires and power connection points. It is necessary to mark the contacts, otherwise errors during assembly may occur. The diagram adds relay No. 4 with a button to turn on the pneumatic signal and a front parking sensor switch.
Important! External connections may vary depending on the vehicle brand.
1. We carry out the wiring of wires and connectors for the relay according to the diagram.
2. Wires will inevitably cross each other; if the insulation is good, this is not a problem.
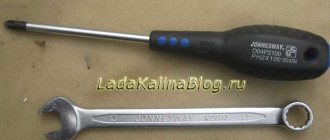
3. Contacts are crimped mechanically; a soldering iron is not used.
4. After connecting all the wires, we form bundles and place them in the corrugation.
5. To connect control and power wires, it is convenient to use a ready-made connector: in this case, from the steering column switch of a classic VAZ.
6. If the relay unit is installed under the hood, it must be covered with a standard cover. This is not necessary for salon installation.