There are two cuffs: front and back. To replace them, it is necessary to disassemble several bulky components, for example, the timing mechanism or clutch assembly. Depending on which of the seals leaked, the work occurs according to different algorithms. Let's figure out how to replace the crankshaft oil seal on a VAZ-2109, depending on its location.
How to replace the front and rear crankshaft oil seals on a VAZ 2109
Crankshaft oil seals or seals work in rotating mechanisms and act as protective dampers. Their main task is to protect the working device from oil leakage. Thus, the oil seal is a sealing element.
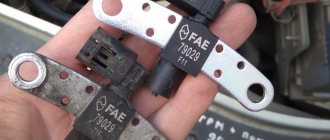
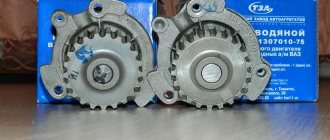
Brand new cuffs
To understand how you can change the front crankshaft oil seal yourself, refer to the instructions, and also be sure to watch the videos provided.
Front cuff
- Drain the oil from the lubrication system.
- Remove the oil pump.
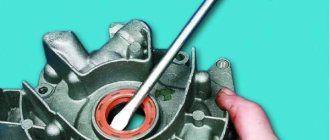
- Then everything is done quite simply. You need to use a screwdriver to remove the old, worn front cuff from its socket.
- The front crankshaft oil seal is located directly in the oil pump cover.
- Using kerosene or gasoline, thoroughly rinse the oil pump cover, and then be sure to wipe it dry.
Replacement procedure
- Armed with a new, proven oil seal, lubricate the oil seal seat with engine oil and install it.
- Make sure you install with the working edge facing inward.
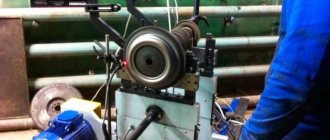
- Take a mandrel that fits the diameter of the new oil seal and press it in properly.
- Return the pump to its place, refill the oil or change the lubricant if the old one has been used for a long time.
- Assemble the unit, connect the negative terminal to the battery and test run the engine. After driving a couple of kilometers, you can make sure that the repair has produced results and the signs of malfunction have disappeared.
Changing crankshaft seals is quite simple, if you do not take into account certain labor-intensive processes, such as dismantling the oil pump. It is not at all necessary to contact a car service if you have a little experience and confidence in your own abilities.
Replacing crankshaft oil seals VAZ 2109
A radial-type shaft seal (oil seal) is used in rotating mechanisms and is a protective damper that prevents oil from leaking out in a working device, thereby ensuring the tightness of its housing.
Based on the types of repairs that a car enthusiast is able to perform on his own, one can judge his qualifications and experience in operating a car. If for the owner of a 9th VAZ series car, replacing the crankshaft oil seal of a VAZ 2109 does not present any difficulties, then we are dealing with a trained car owner who will not contact a car service center for every trivial breakdown.
Replacing the crankshaft oil seal is a rather complicated procedure, but quite doable even in an ordinary garage that does not have special devices and professional tools.
Any car owner with some technical knowledge knows that the oil seal is designed to prevent lubricants from leaking. If a shaft or axle comes out of any mechanism containing lubricating fluid inside, then an oil seal must be installed that will not allow the lubricant to leak out.
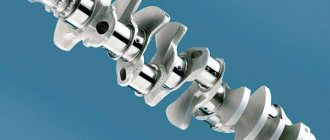
There are many components in a car where oil seals are installed, but the most important one is the engine crankshaft. The engine block of any car has a very complex lubrication system, and at the front and rear of the block, the edges of the crankshaft must protrude outward. The timing gear is attached to it at the front, and the clutch at the rear. Naturally, the lubricant should not leave the block.
The oil seal is a ring with a rigid outer ring and an elastic inner edge into which the shaft is inserted. The spring-reinforced edge compresses the shaft and does not allow oil to leak out. Since the oil seal loses elasticity or is damaged during operation, oil begins to leak and creates many problems for the driver.
Full preparation for any repair work is half the success. Any car maintenance and repair work must begin with preparation, which consists of three stages:
- preparing the car and workplace;
- selection of necessary tools and devices;
- purchase of consumables and spare parts.
If the goal is to replace old oil seals with new ones, you need to take care of purchasing them in advance. The front and rear oil seals are completely different in size and design. You will also need to buy new gaskets for the oil pump and rear oil seal holder. Replacing old gaskets with new ones must be made a mandatory rule for any repair of components where gaskets are present.
The tools you will need are a full set of wrenches, screwdrivers, hammers, and mandrels for installing oil seals. If a socket wrench head of “27” is suitable for the front one, then for the rear one you will have to find a metal disk or a piece of pipe with an outer diameter of 90 mm.
Be sure to wash the engine compartment, especially the engine, before repairing. Always have a clean rag on hand to remove dirt. Repairs must be carried out above the inspection hole, since some manipulations are more convenient to carry out while under the machine.
It is easier, more convenient and faster to change the front oil seal, that is, the one that is located at the end of the crankshaft that has the timing gear (at the right front wheel). To replace it, you must perform the following steps:
- remove the engine protection and timing belt cover;
- Place the piston of the first cylinder at TDC on the compression stroke;
- loosen and remove the timing belt;
- jack up and remove the right front wheel;
- remove the generator pulley and belt;
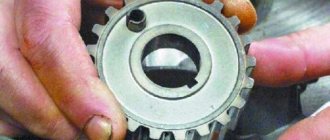
- using two screwdrivers, remove the crankshaft pulley (it is important to immediately remove the key);
- drain the engine oil;
- unscrew the oil pump, in the housing of which the oil seal is installed;
- use a screwdriver to remove the old oil seal;
- on a workbench, using a nozzle or a socket on “27”, install a new oil seal;
- then reassemble in reverse order.
Experienced drivers allow themselves to replace the front crankshaft oil seal on a VAZ 2109 without removing the oil pump housing. If you do not have sufficient skills, then making a replacement in this way is very risky. There is a possibility of damaging the crankshaft surface or installing a new oil seal that is skewed.
In order to change the rear oil seal, you will have to tinker a little longer, because it is hidden behind the clutch system. In order to carry out this event, you should enlist the support of an experienced auto mechanic or car owner with experience in such operations. First of all, you need to remove the clutch and flywheel.
The oil seal at the rear is installed in its own housing, which is mounted on 8 bolts, two of which are screwed into it from below through the pan. Once the oil seal body is in your hands, you can remove it and press in a new one. These parts are quite large and simple in design, so replacement should not be difficult.
Tips for selecting and installing oil seals
In addition to correctly performing the replacement procedure, you should know some rules that relate to the selection and installation of oil seals. Oil seals are made from materials of different composition and elasticity. This was done in order to select them depending on what engine oil is used. If you install oil seals designed for mineral oil and fill the system with synthetic oil, the latter may simply dissolve.
When buying oil seals, be sure to consider what kind of engine oil is used. Before installing the oil seal into the cage, be sure to try it on the shaft. The surface of the shaft, oil seal and race must be lubricated with engine oil before installation. The last rule concerns the need to check the condition of the seals after installation.
Replacing the front crankshaft oil seal on a VAZ 2109 is faster than in foreign cars. So, after the preparatory work, you can begin the main work. It is worth noting that the main work lasts 4-5 hours, depending on the dexterity of the person who carries it out. So, after preparation, you should perform the following steps:
- The pulley is removed from the crankshaft;
- Using two flat-head screwdrivers, you need to pull the pulley off the camshaft;
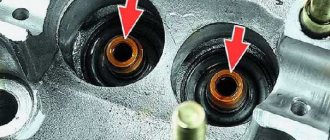
- After the above procedures, you need to remove the key, but only if it does not hold well (indicated by an arrow in the photo).
Next you need to remove the oil receiver: unscrew the bolts attached to the oil receiver cover and the fixing bolt connecting the oil receiver and the pump, after which the pump can be easily and quickly removed. The final step is to unscrew the 6 bolts, after which you can pry up the housing and pull out the pump.
After this, you need to pry off the old oil seal, pull it out, clean the place where it is fixed with gasoline and install a new oil seal. The new oil seal must be lubricated with oil and installed in place of the old oil seal. The place also needs to be lubricated with oil. The working edge of the oil seal should point inward. Next, you need to correctly install the pump and all other elements. If installed incorrectly, you can damage the components of the car and cost a pretty penny.
Symptoms of crankshaft oil seal wear
Cracks appear on a worn element and it becomes rigid. The part begins to pass through the engine oil, spraying it under the hood.
First you need to determine which seal has failed:
- If the front crankshaft seal is worn, traces of grease will be visible on the front of the pan just below the oil seal and on the oil pump cover;
- If the rear end is worn, there will be oil on the gearbox.
Preface
Replacing the crankshaft oil seal is a rather troublesome and time-consuming process that requires certain technical knowledge. For example, a person should know, not in theory, but in practice, what parts a car consists of, how to remove the timing belt or gearbox.
Oil seals are necessary to prevent fluid, in this case engine oil, from leaking out of the engine compartment. Oil seals are installed where there is a shaft coming out of a mechanism that operates in a lubricating fluid. There are quite a few different components in the car where oil seals are installed, but the most important of them are installed in the engine.
In VAZ 2109 engines, like everywhere else, two oil seals are installed: front and rear. The rear one is usually larger; in order to get to it you need to unscrew half the car. Engine oil seals protect the engine from loss of precious engine oil; if it is insufficient, engine wear increases, which promises serious and expensive problems in the future.
An oil seal is a ring that has a rigid outer part and an elastic inside; a shaft is inserted into this ring. The outer part of this ring is reinforced by a spring, which presses it tightly against the shaft. Usually the oil seal is replaced when it is time to replace it, but there are other reasons for replacement, usually premature.
Poor quality gasoline is harmful
Many problems when operating the propulsion system of a VAZ car are associated with the use of low-quality gasoline. Leftover gasoline at unreliable gas stations is very dangerous. The entire fuel line, carburetor, and possibly even the engine may need to be flushed. It is quite possible that the units will have to be disassembled, washed, soaked and blown with compressed air.
If circumstances force you to refuel in an unfamiliar place, use caution
| What to worry about | What results will this give? |
| Try not to use fuel filled in a proven location until the tank is empty. | Let there be at least a mixture of good and risky fuel in the gas tank, and not just questionable fuel - this will reduce the risk. |
| Fill only the minimum amount of fuel. | One that will allow you to get to a proven gas station worthy of your trust. |
| On long trips, carry a cleaning additive with you to add to your gas tank. | It is likely that you will be able to get away with adding the appropriate additive to the fuel tank when using questionable gasoline. It's like getting a flu shot - it boosts your immunity. |
One gas station at an untested gas station, and you face the prospect of serious repair work.
Causes and symptoms of malfunction
If the seals are faulty, you will only see puddles of oil, and even if the rear seal is leaking, the clutch may slip.
Bad seal that needs to be replaced
Let’s say right away that there may be other reasons for the appearance of grease on the surface, which are most often associated with problems in the crankcase ventilation system.
VAZ 2109 oil seals should be replaced every 45-55,000 km; they last less than in foreign cars, but they have about the same problems. The main reason for replacing the oil seal is time. So, over time, the components become loose and relax, which leads to oil leaks and, accordingly, to a loss of engine performance. Untimely replacement of the oil seal may be a consequence of the following causes of premature wear:
- Oil change not on time;
- Inaccurate repairs;
- Engine overheating, which is a common occurrence in the VAZ 2109.
The most common reasons for premature replacement of oil seals are untimely oil changes and overheating. The VAZ 2109 is a rather old car and all the components in it are and were manufactured according to rather old principles. The oil change in this car should be carried out not every 7500 km, but every 5000 km.
Overheating in the VAZ 2109 is common, this is due to the low power of the engines, from which the owners try to squeeze the maximum and even more. When overheated, the rubber (rubber) from which the inner part of the oil seal is made changes its structure and weakens, allowing oil to leak out.
Traces of oil drips are the main and main sign that indicates wear of the crankshaft oil seal. The presence of traces of oil indicates that the tightness of the engine lubrication system has been compromised.
Oil seals can be destroyed under the influence of several factors:
- Natural wear and tear, aging of the rubber used for the manufacture of crankshaft oil seals;
- Incorrect installation, which led to premature wear and loss of functionality. This usually happens during repairs at dubious service stations or when an inexperienced car owner does the replacement with his own hands;
- Mechanical damage to the element;
- Use of a defective, counterfeit oil seal.
The blame should not always be placed solely on the cuffs, which come in front and back. Before you suspect seals, make sure that other potential causes are not to blame.
By checking all elements of the lubrication system, you can make sure that the cause really lies in worn out, deformed oil seals. And then they can be replaced with new elements.
Object to be checked
Peculiarities
Engine oil level
Oil can leave the system for various reasons, including the oil seal. Therefore, it is recommended to be patient and check the level every day, adding a little oil while actively maintaining it. The sensors do not always work correctly, so you need to make sure that there is no pressure violation yourself
Crankcase ventilation system
If the ventilation system is clogged, this will lead to active accumulation of crankcase gas. By creating pressure, it pushes the oil through the seals. In this case, simply replacing the cuff will not do anything, since it will be necessary to clean the ventilation
They can bend, become deformed, or crack. As a result, oil comes out and the engine loses lubricant.
Lubrication system pressure
If the pressure increases, it causes oil to be pushed out through all sorts of passages. There are quite a few reasons for an increase in pressure, so check why exactly this indicator is increasing
If problems are detected with the crankshaft seals, the only correct solution is to replace them.
What's next?
After draining the oil from the car engine, unscrew and remove the pan. Then remove the two bolts securing the middle main bearing cap. It is removed, and the gap between the bearing and the half ring is measured using sensors. Add to this the standard parameter of 2.31 mm.
As a result, a new half-ring of the required size will be obtained. After this, pulling out the old half-ring, they are installed in their nests. It is important that the new element is introduced freely. After the work has been done, all removed parts are installed back.
Preparatory work
This sealing collar began to be used in the very first cars and, due to the simplicity of its design, is used in the modern automotive industry to this day. During operation, the oil seal practically does not touch the surface of the rotating surface; the gap between the parts is sealed due to the vacuum created by special notches on the end of the sealing collar.
Replacing the front crankshaft oil seal on a VAZ 2109
In order to start replacing the crankshaft oil seal, you need to collect the appropriate set of tools, including:
- Spanners of different solutions;
- Screwdrivers of different diameters;
- Rags;
- Bucket to drain engine oil;
- Hammer;
- The diameter of the mandrels coincides with the diameter of the oil seals.
Before starting the main work, you need to do the following:
- De-energize the car, or rather the engine compartment, separating the wires from the battery;
- After this, it is necessary to loosen the bolts that are attached to the generator compartment, then remove the belt; The field drains the oil into a bucket;
- The engine protective cover and oil pan are removed;
- The toothed belt driving the camshaft is dismantled.
Upon completion of the preparatory work, you can begin the main work, that is, replacing the front and rear crankshaft oil seals.
Change half rings
To do this, do not remove the crankshaft of the VAZ 2109. Replacing the oil seal, half-rings, liners (the crankshaft sensor, we note right away, also needs to be removed) begins with searching for the location of the elements. These parts are located on the sides of the central (third) main bearing. A yellow ceramic-metal semicircle is installed on the side of the middle support of the crankshaft. On the other hand, steel-aluminium. The elements must be dense, and depending on the wear of their sockets, they come in three sizes:
- standard;
- first repair;
- second renovation.
Diagnostics
Since oil drips are the first and main sign of wear on the crankshaft seals, they also tell us that the tightness of the engine lubrication system is compromised. Therefore, at the beginning of troubleshooting, we will have to make sure that it is the sealing collars that are causing the oil leak:
- First, we check the oil level in the engine (there is no need to rely entirely on sensors), top up if necessary and check every day until we find out the cause of the leaks;
- We check the crankcase ventilation system in the engine (clogged ventilation contributes to the accumulation of crankcase gases which, in turn, push oil through the sealing cuffs);
- Check the oil pipe hoses for kinks;
- We check the pressure in the lubrication system.
As a rule, replacing the crankshaft oil seal on a VAZ 2109 is a rather labor-intensive procedure, however, it can be done with your own hands. Therefore, before replacing the crankshaft oil seal of the VAZ 2109, we need to know the reasons why it fails in order to delay this unpleasant moment as long as possible. There are several reasons for the destruction of oil seals:
- First of all, this is, of course, its natural wear and aging (coarsening) of rubber;
- Due to improper installation and, as a rule, internal stresses, cracks appear on the working surface of the cuff;
- Mechanical damage;
- Poor quality tires (fake).
Replacing crankshaft oil seals on a VAZ 2109
It should be noted that most often the front radial crankshaft cuff is the first to fail, since it is more exposed to the external environment (dust, sand, dirt) and vibration loads from the car engine. And although the rear oil seal is in more favorable conditions, it is advisable to change the oil seals as a set, since their working life is almost the same.
Replacing the front crankshaft oil seal of a VAZ 2109 is relevant if oil leaks appear on the front cover of the engine block, in the area of the crankshaft pulley, which become more and more progressive as the “disease” develops. Since it is practically impossible to see the beginning of wear of the rear oil seal, replacing the rear crankshaft oil seal on a VAZ 2109 takes place if, when the car is moving, clutch slipping is observed, which is caused by the leaked oil spraying onto the clutch basket and onto its release plate as well.
If you notice at least one of the listed signs on your car, then I would not advise you to delay the repair procedure, since the price of a new repair kit is not comparable to the cost of engine repair. What does the engine have to do with it, you ask? The thing is that leaks of lubricating fluids lead to their uneven distribution to the mating surfaces, which is fraught with possible oil starvation of individual engine parts. In the first category of risk of oil shortage is the engine crankshaft itself, which manifests itself in scuffing on its working surface.
Consequences of oil starvation
Also, a consequence of oil leaks through the crankshaft seals is the passage of solid mechanical particles into the oil seal, which, like an abrasive, wear out the working surface of the oil seal on the crankshaft, which already leads to more complex and costly repairs.
Front cuff workplace
Nine carburetor engine
If the speed of the VAZ 2109 carburetor fluctuates and you are adjusting the idle speed of the car in your own garage, in the yard of your house, and are not in a hurry, you can try to understand why the speed is floating and adjust the carburetor with your own hands. You will need a slotted screwdriver.
The procedure is as follows.
- Warm up the engine to operating temperature of 90 degrees.
- Set the quality screw to the original position for adjustment. To do this, screw it all the way and unscrew it back 6 turns.
- Set the quantity screw to the initial position for adjustment. To do this, screw it all the way and unscrew it back one and a half turns.
- Start the engine.
- If the engine speed exceeds 800 rpm, turn out the speed screw and bring it to 800.
- By turning the quality screw clockwise and counterclockwise, select its position in the middle of the engine’s stable operation zone.
- By turning the quantity screw, bring the crankshaft speed to 900 rpm.
If the idle speed of the "nine" began to float while you were on the road, it is better not to try to adjust the carburetor in the field. Pull the choke control lever towards you to slightly increase the idle speed. The car will not stall while driving. Fuel consumption will increase slightly, but you will have to put up with this in order to get to the service center without any problems.
Replacing the back cuff
As mentioned above, replacing the front crankshaft oil seal on a VAZ 2109 is the most common and popular procedure, therefore, when carrying out repair work, it is very important to strictly follow all the recommendations of the manufacturer and be extremely careful, since the properties of the rubber from which the oil seal is made are such that it is very easy to damage during installation. There are two ways to replace the front crankshaft cuff: quick - “homemade” and recommended by the manufacturer.
First way
The method invented by the car owners themselves is as follows:
- Remove the timing belt;
- Using two screwdrivers/winders, remove the toothed pulley from the crankshaft, do not forget about its key;
Removing the crankshaft pulley and its key
- Using a hook or screwdriver, tear out the old cuff;
Taking out the old cuff
- We put the new cuff in place, and to make installation easier, lubricate its surface with oil;
- Using a mandrel, hammer it in until it stops.
Installing a new oil seal
Second way
When replacing the front crankshaft oil seal on a VAZ 2109, we will need the following:
- A pair of screwdrivers;
- Socket wrench set to “17”;
- Socket and open-end wrenches, as well as a “10” head;
- As a mandrel, the head is set to “27”;
- Timing pulley tensioner key;
- Since the “correct” replacement of the front cuff requires dismantling the oil pump, you need to stock up on a new gasket;
- And, of course, a new oil seal.
Next, you need to provide access to the engine crankcase, for which we put the car on an overpass or a lift, drain the oil and, as with any repair, disconnect the battery.
- If available, remove the engine protection, or rather its crankcase;
- Using a ten key, unscrew the four bolts securing the protective timing cover and remove it;
- We unscrew the six bolts securing the protective cover of the right half of the engine compartment using a key “8”;
- We remove the generator drive belt by loosening its tension with a key “17”;
- Remove the right front wheel;
- Having engaged a low gear, using a nineteen key, we “tear off” the bolt securing the pulley, then unscrew it and remove the pulley itself;
- We install the piston of the first cylinder at top dead center (attributable to the compression stroke). In this case, the installation marks on the rear protective casing and the camshaft drive must match, and the mark on the flywheel, visible through the clutch housing hatch, is located opposite the middle division of the installation scale.
- Using the key “17”, loosen the tension roller and remove the timing belt;
- We dismantle its lower cover from the clutch housing by unscrewing the four bolts securing it with a “10” key;
- Using a “10” head, unscrew the sixteen bolts securing the engine crankcase cover and remove it along with the gasket;
- Using the same head, unscrew the bolts securing the oil receiver to the oil pump and to the second main bearing, remove it;
- By analogy with the first method, use two screwdrivers to dismantle the toothed pulley (we also keep an eye on the key so as not to lose it);
- Using a “10” wrench, unscrew the 6 bolts of the oil pump (fastening it to the engine block)…
- ...and after tapping the pump housing, remove it together with the oil seal.
Removing the oil pump
We considered the further replacement process in the first option, but the assembly process itself occurs in the reverse order. Don’t forget to put a new gasket under the oil pump, having previously coated it with sealant (this makes it easier to install on the cylinder block).
It is also advisable to install a fresh gasket under the crankcase cover.
As a rule, along with replacing the front seal, the rear seal is replaced, which significantly prevents the possibility of its sudden destruction, especially since the degree of wear of the seals is almost the same, while detecting a leak in the rear seal is much more difficult. Before replacing the crankshaft oil seal on a VAZ 2109, you need to make sure where the leak is coming from - from the gearbox or from the car engine.
- We remove the engine flywheel by first unscrewing the bolts (six in number) securing it to the crankshaft, while using a screwdriver to keep it from turning (to do this, we screw in the bolt securing the gearbox);
- Unscrewing the last bolt securing the flywheel, remove the locking plate, and then the flywheel itself;
- We remove the rear clutch shield from its guides and unscrew the eight bolts of the rear cover of the engine block, after which we remove it;
Removing the back cover
- We dismantle the oil seal housing, carefully prying it away from the cylinder block with a screwdriver;
- We take out the old cuff from its seat...;
Pull out the back cuff
- ...in its place, using a mandrel with a diameter of 99 millimeters, we press a new radial cuff;
- We replace the old gasket of the cuff body;
New housing gasket
- Having applied a thin layer of engine oil to the working edge and the crankshaft flange, we install the crankshaft seal housing in place, while adjusting the edge of the oil seal with a wooden spatula (shown in the photo);
Reinstalling the cuff body
At this point, the procedure for replacing oil seals on a VAZ 2109 is considered complete. I hope that in this manual everything is described and illustrated quite clearly and no additional video is required. I hasten to say goodbye to this, and all you have to do is collect everything that you took apart in reverse order and continue to exploit your iron horse.
Regardless of whether your VAZ-2109 has a carburetor or is driven by an injector, the work of replacing oil seals follows the same principle. The front oil seal wears out the fastest. It is easier to change, since it does not require dismantling the clutch system.
To carry out the work you will need to have on hand:
- standard sets of keys and screwdrivers;
- clean container;
- rags.
After such preliminary preparation, you can begin work on replacing the front oil seal:
- Loosen the generator mounting bolts.
- Remove the belt drive.
- Drain the engine oil into a prepared container.
- Remove the protective casing from the power unit.
- Remove the oil pan.
- Gently and carefully remove the belt from the camshaft. Make sure that the crankshaft or camshaft does not rotate while removing the belt. Otherwise, the pistons will hit the valves and deform them. This will result in the need to install new valves.
- Using two screwdrivers, remove the crankshaft pulley.
- Remove the key.
- Find the 2 oil pickup bolts, unscrew them and remove this unit.
- The oil pump is held in place by 6 bolts, remove them before removing this unit.
- Use a flathead screwdriver to remove the old seal from the crankshaft. It is important that it has a fairly impressive size and is made of durable metal. Otherwise, the blade of the screwdriver may break off while performing this procedure. Remember that work with the shafts must be carried out carefully, avoiding rotation.
- Clean the oil seal location and lubricate it.
- Place the cuff, tucking its working part inward.
- Crimping is carried out using a frame of the required diameter.
- Wash the oil pump cover with gasoline and return it to its place.
- Starting with the oil pump, reassemble the mechanism in reverse order.
The final stage is the return of oil to the mechanism. If it is dark enough, then it is best to replace the lubricant with a new one. If you don't have time to do a complete disassembly, you can do without cleaning the oil pump cover. However, it is better to spend time servicing it, so as not to disassemble these units again later.
Acquaintance
Maximum speed of VAZ 2109
VAZ 2109 is a front-wheel drive car. Unlike its fellow “eight”, the “nine” is considered as a more solid and stylish car. The presence of five doors already speaks in favor of the car, an ideal option for a family man. The VAZ 2108 is held in high esteem by single drivers (this explains the passion for tuning the V8 to a sporty version).
Note. Despite its less expressive appearance, the VAZ 2109 did not escape the fate of being called a “chisel”, due to the characteristic wedge-shaped contours of the body.
Peculiarities
Important points regarding the “nine”:
- Since 1987, the VAZ 2109 began to be produced, but there can be no talk of a successful release yet;
- The so-called “successful” modification of the car was released only in 1990. Naturally, the price for it is already different, higher;
- The uniqueness of the new modification of the VAZ 21093 is given by a separate segment of the front part;
- As for the interior, the car is better designed than its predecessor in this regard: it is equipped with a more stylish dashboard, equipped with a tachometer and even a trip computer.
Maximum speed according to instruments VAZ 2109
Note. The on-board computer on the VAZ 2109 reminded of a key left behind, forgotten in the lock, unfastened seat belts, and so on.
- The most significant change between the modifications concerned the dynamic performance of the engine. Fuel efficiency is improving, but this does not in any way affect the power and maximum speed, which increase significantly (on the first modification of the VAZ 2109, the speed was 148 km/h, and now it is 156 km/h);
- The standard “nine” was equipped with a 1.3 liter carburetor 4-cylinder power unit. The engine power was 65 hp. A fully loaded “nine” could accelerate to 100 km/h in 18 seconds, and the maximum speed was 156 km/h;
- A new restyling occurred after 1997, when instead of the 1.3-liter engine, they began to install a 1.5-liter one. This unit already produced 72 hp. and he had the best acceleration result from a standstill.
Maximum speed of VAZ 21093i
Note. Later this version became standard. Unless a new version appears with an injection unit, but again a 1.5-liter one.