Cars of the 09 VAZ family are equipped with a cable-operated clutch. This technology is 5 times more reliable than classic variations with hydraulic drive. However, during operation, any mechanism requires calibration and this unit is no exception. A scheduled inspection must be performed every 15,000 km or once a year, whichever comes first. However, unexpected breakdowns occur that require surgical intervention.
The following factors are considered signs of incorrect operation of the unit.
- The car starts moving jerkily - the clutch slips, which causes uneven acceleration.
- Increase in fuel consumption by approximately 10-15%.
- Dissonance between engine speed and actual acceleration of the car.
- When shifting into gear, extraneous sounds and squeaks are heard from the gearbox.
- When inspecting the car, there is an unpleasant smell of burnt pads.
- The pedal falls or sticks.
- The drive does not operate in the middle of the pedal stroke.
If even 1 of the listed points is detected, the design must be adjusted.
Why do you need clutch adjustment?
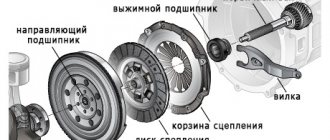
Adjustment is necessary due to normal wear and tear. Between the basket and the disc there are friction linings that are subject to abrasion. Consequently, after grinding them down, the pedal rises and the unit acts up.
The second reason is stretching of the clutch cable. As its length increases, similar defects occur.
Reasons for replacement
Practice shows that there are several main situations that force you to change the clutch cable.
| Situation | Peculiarities |
| The clutch does not work properly | It becomes difficult for the driver to depress the clutch pedal, which causes problems when trying to move away or start the car, the clutch slips |
| Gearbox is acting up | It begins to switch with certain problems, and during operation it also makes strange, incomprehensible sounds |
| The pedal has failed | If, after pressing the clutch pedal, it does not want to return to its original position when you remove your foot, this may indicate a problem with the cable |
Such symptoms can only suggest that the problem lies in the cable. To make sure of this, you should conduct a full check of the node's condition.
All the symptoms mentioned may indicate a broken cable or a broken fork. In the case of a cable, you will have to replace it. If the fork falls off, it will need to be returned to its place and clamped in order to prevent possible repeated falls.
Between a broken cable and a broken fork, it is better to face the first situation. Buying a new cable will cost 200 rubles, and a fork costs about 2000 rubles.
Clutch operation diagnostics
To understand whether the clutch is working correctly, just follow the procedure.
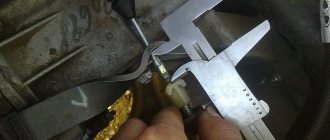
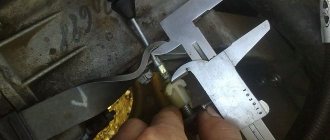
- Take a ruler and place it on the floor. The other end of the meter should be attached to the bottom of the pedal. It should be approximately 18-19 centimeters.
- Press the lever all the way and measure the distance again - normally it will be 7-8 cm.
- It is considered normal when the difference between the readings is 13.5-14.5 cm.
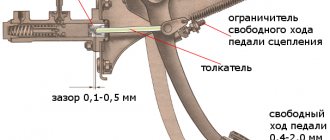
If there is a deviation in the parameters from the norm by more than 20 mm, the drive needs to be adjusted.
Auto repair school - Do-it-yourself car repair
Jun 8, 2022 VAZ 2108, VAZ 2109, VAZ 2110, VAZ 1117 Kalina, VAZ 2170 Priora by admin
In this article we will talk about replacing the clutch cable on cars of the VAZ 2108-21099 and VAZ 2113-2115 family . The clutch cable is a rather capricious and unpredictable part. It may work without problems for years, but it may break or start squeaking a week or two after installation. There are, of course, more questions about the quality of spare parts. But such unpleasant surprises are common, since no one is immune from purchasing a low-quality part! You will find recommendations for choosing a clutch cable below, but now let’s go through the reasons why you have to change the clutch cable. The first reason is a broken clutch cable (usually this happens near the clutch pedal). Everything is very clear here, the cable has broken, the clutch pedal is dangling back and forth, it is no longer possible to squeeze the clutch and engage the gear. The second reason is the break of several threads of the cable (as in photo 1). In this case, the gears (especially reverse and first) begin to engage poorly. You can temporarily improve the situation by adjusting the cable. It will be possible to get there or move somewhere, but you need to understand that the cable is on its last legs and it’s time to buy a new one. The third reason is the characteristic creaking of the cable when you press the clutch pedal. As a rule, the protective sheath of the cable is destroyed, moisture gets in, corrosion forms and, in addition to an unpleasant squeak, the clutch pedal becomes much harder. Here, not everything is so scary, you can continue to roll, squeak and swing your leg. But! I advise you to put a new cable in the trunk))) Since the squeak is the sound of friction and destruction of the cable. Accordingly, this process cannot last forever.
Spare parts . The catalog number of the new clutch cable (with a round tip) for VAZ 2108-2115 is 2109-1602210-10 . The catalog number of the old-style clutch cable (with a rectangular tip) for VAZ 2108-21099 is 21086-1602210 . The differences between the cables are clearly visible in photographs 2 and 3.
By manufacturer! The choice of cables on the market is quite large, but the only right choice is a clutch cable manufactured by DAAZ . I do not recommend considering other options. In any case, they will be weaker and less reliable.
Also, when replacing the cable, a plastic clutch cable bushing may come in handy. The catalog number of the plastic clutch cable bushing is 2108-1602096 . It is difficult to find this bushing on sale; it is easier to buy a clutch pedal repair kit, as in photo 4. There is a bushing, a lock (it can be lost or broken when removed), and a tip axle (the chance that it will be useful is small, but just in case in case this part might come in handy)
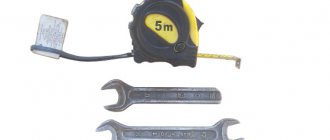
Necessary tools for replacing the clutch cable : two open-end wrenches 17 (preferably one of them - in a shortened version, see photo 5), socket wrenches 8 and 10, Phillips and flat-head screwdrivers. It would be enough.
Photo report describing the work of replacing and adjusting the clutch cable on a VAZ-21099 car . On VAZ-2108, VAZ-2109, VAZ 2113-2115 cars, the clutch cable is changed in the same way, with the exception of small nuances.
And so we begin. If you have a car with a carburetor engine, then you don’t have to read points 1, 2, 3 and 4.
1) Using a 10mm wrench, unscrew the two fastening nuts of the adsorber frame (Photos 6 and 7) and move it to the side. After removing the adsorber, access to the clutch cable appears. If you wish, you can work through this window. It's possible, but not convenient. That's why…
2) Disconnect the connector from the air flow sensor (Photo
3) Unscrew the corrugation clamp (photo 9)
4) Unscrew the two bolts of the air filter housing brackets (photo 10). We remove it (photo 11). After this, the clutch cable will be perfectly visible and easy to remove and install.
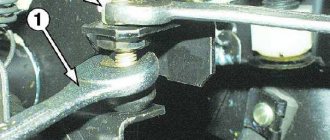
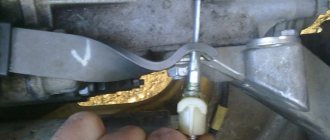
5) Using a 17mm wrench, unscrew the cable adjusting nuts (photo 12). We take out the cable from the bracket.
6) The cable guide is disconnected from the clutch fork (Photo 13).
7) Next, we climb into the car interior. Or more precisely, under a torpedo. There, first remove the clutch pedal pin retaining bracket (photos 14 and 15)
Disconnect the upper cable end from the pedal (photo 16)
9) Immediately pay attention to the presence or condition of the plastic bushing (photos 17, 18 and 19). The photo shows that this bushing has a cover. We install a new one.
10) We return to the engine compartment. Pull out the clutch cable.
11) We begin installing the new cable. We insert the cable into the hole in the body (photo 20). The rubber buffer should fit into its seat.
12) We attach the end of the cable to the clutch pedal (photo 21). Install the locking bracket (photo 22).
13) In the engine compartment, we put the cable lead on the clutch fork lever (photo 23).
14) Install the cable into the bracket and use the nuts to adjust the position of the clutch pedal (photo 24). The optimal position is when the clutch pedal is at the same level as the brake pedal (photo 25).
After this, press the clutch pedal several times. If the position of the pedal has changed, turn the nuts again and adjust the pedal. Let's press again. If everything is ok, tighten the nuts completely.
Don't forget to put the air filter housing and adsorber in place. If you filmed them, of course)))
All! Replacement of the clutch cable on the VAZ-21099 is completed . Thanks to all!
When using an article or photographs, an active direct hyperlink to the website www.avtorem.info is required!
Did you like the article? Share it on your page!
Replacing the clutch cable on a VAZ 2109
Installing a new part is easy. There is only primitive mechanics here, based on the transfer of energy through a cable.
Reasons for replacement
The reason for repair may be clutch slipping or difficulty shifting gears. It often happens that the cable breaks due to a sudden load or jerk - this becomes the main source of problems.
Replacement
Performed in 2 ways. You will need a simple set of tools and 30 minutes of personal time.
Taking off the frill
A complex procedure involves many unnecessary steps, but if there is a question, there will be an answer.
- Drive the car into the inspection hole.
- Unscrew the cable from the pedal and remove it.
- Next, remove the frill and windshield wiper and open the hood.
- Then you should find the place where the cable is attached to the car. Unscrew it.
- Remove the old line and install a new one in its place.
Without removing the frill
You can replace the cable at home like this.
- Remove the adjusting part from the mount on the gearbox housing.
- Unscrew the cable guide and disconnect it from the clutch fork.
- The end of the cable is disconnected from the pedal by removing the cotter pin.
- Next, the entire line is pulled out of the car.
- Installing a new line is performed in the reverse order.
Functionality check
After you have completed this work, you need to check the correctness of the work performed.
- First, measure the travel of the clutch pedal.
- With the engine turned off, depress the clutch pedal several times and return it to its place.
- Next, we take a new measurement and clarify the received readings.
- If they have not changed compared to the first measurements, then the work has been completed, correctly, and the first stage of verification can be considered completed.
- And if they differ from the first indicators, it means that the locking nut was not tightened tightly, and the adjustment process must be carried out again.
There is one rule among car enthusiasts! A properly adjusted clutch should begin to engage approximately halfway through the pedal stroke.
Setting up the VAZ 2109 clutch after replacement
After repair work is completed, the standard cable calibration procedure is carried out.
It is worth understanding that all elements of the chain, including the cable, release bearing springs, and drive disk are subject to shrinkage. This means that after 500-700 km an unscheduled design revision may be required. For example, a low-quality cable can stretch out over a given time (a problem with all such drives) by about 5-10 mm from its original length. This will negatively affect the accuracy of the unit and will need to be adjusted.
When is it necessary to adjust the pedal?
VAZ 21093 clutch adjustment
Adjusting the VAZ 2109 clutch is necessary because:
- If this is not done, your car will soon need to be repaired. This is because it will supply too much energy for the pedal to operate properly.
- Due to improper operation, the clutch pedal is partially disengaged. This causes the clutch disc to contact the engine flywheel, causing them both to wear out.
- If the pedal travel is insufficient, the car slips, that is, there is a loss of wheel torque.
Stages
Replacing a vehicle with a VAZ 2109 consists of the following steps:
- First, the work is done in the engine compartment.
- In the VAZ 2109 car, the cable is attached to the box thanks to a metal bracket. To remove the part to be replaced from the bracket, you must loosen the fasteners.
Two nuts securing the TC
- Then remove the lower end of the cable from the clutch release fork.
- For further work you need to go to the car interior. It is necessary to disconnect the car from the pedal. To do this, remove the rubber mats and remove the carpet.
- You then need to remove the clamp clamp using a regular screwdriver and then remove the pin that connects the TC to the pedal bracket.
Pull the retaining clip out of your finger
How to understand that the clutch needs adjustment
Signs that the clutch needs adjustment are:
- Jerking or vibration when pressing the clutch.
- Slight clutch slipping when pressed for a long time.
- The clutch drives.
In this case, adjusting the clutch cannot be avoided. To carry out this process, you should perform the following steps:
- Place the transmission in neutral.
- Remove the clutch housing.
- Remove the bearing.
Note: this must be done smoothly and slowly, otherwise you may slightly damage the bearing.
- Turn the adjusting nuts until the pedal travel is adjusted.
- You also need to check whether the clutch is too oily, as this can also cause the clutch to slip.
Note: in this case, to resolve it, it will be enough to just wash it with gasoline.
