The transmission is the most mysterious unit in a car, especially for people who are not technically savvy. And everything seems simple - you squeeze the clutch, push the handle and the car goes. However, if suddenly it doesn’t go, then you don’t know what to think. Therefore, when something happens to the gearbox - reverse gear does not engage, for example, then at least cry.
And if it happens in a garage or in a parking lot, where there are always a lot of advisers who always know exactly why the gear won’t engage, then after several minutes of heated discussions you begin to regret that the gearbox in the car is not an automatic, but a manual transmission. Although automatic transmission is also not without such problems. But let's start in order.
So, reverse gear does not work, what should I do? Well, for starters, it would be nice to figure out how serious the damage is. To do this, you need to remember how the box behaved in recent days. If nothing has caused concern, then there is hope that not everything is so bad: the transmission is still a complex and reliable element, with a large margin of safety - and it doesn’t just break out of the blue. If reverse gear does not engage, there may be several reasons. We will move from simple to complex.
Wear of the rocker bushing
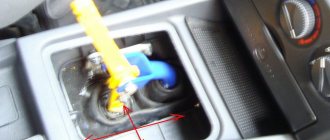
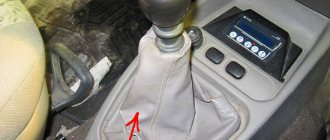
This malfunction may be indicated by some looseness of the lever. However, if the wear proceeded evenly - it ran its course - you could get used to the free movements of the scenes and not notice the impending troubles. The problem is solved by replacing the bushing - remove the lever cover, then remove the rocker itself, replace the plastic bushing with a new one and put everything in place. The procedure is carried out in the car interior.
Troubleshooting
Many transmission malfunctions that cause the reverse gear to disappear or fall out can be eliminated without removing the unit from the car.
If the cause is a loosening of the bolt securing the clamp on the rod, then to correct the defect it is necessary:
- Place the car on a lift.
- Completely loosen the clamp nut.
- Place the gearshift lever in the fully engaged reverse gear position.
- Fully engage reverse gear at the gearbox using the shift rod on the crankcase.
- Tighten the clamp mounting bolt.
Backstage adjustment
If tightening the clamp does not help get rid of the problem, then you need to check the condition of the shift drive parts. One of the reasons why the reverse gear does not engage may be a poorly adjusted rocker.
To make adjustments to the mechanism, you may need the following tools:
- two wrenches with a size of 13 mm, preferably a socket design;
- any wrench or 10 mm socket;
- small hammer;
- slotted screwdriver.
Since the cause of malfunction of the link can be wear of parts, spare parts may be needed:
- universal joint of the rocker;
- Sometimes the shift rod seal may need to be replaced.
Two people are required to adjust the rocker or replace parts of its drive. One person must change gears from the passenger compartment, and the second must adjust the travel of the shift rods.
The order of work is as follows:
- Provide access to the bottom of the car by placing it on a pit or a lift.
- Using a 13 mm wrench, loosen the clamp installed on the gear shift rod.
- Remove the rod from the box rod.
- Using a screwdriver, carefully remove the boot.
- Using a 10 mm wrench, unscrew the fixing bolt on the cardan shaft.
- Knock off the cardan shaft with light blows of a hammer. It is important not to damage the shaft.
- Remove the universal joint seal boot.
- If there is an oil leak, the sealing gland on the box rod must be replaced.
- Install a new boot (or leave the old one if it is intact) and install the universal joint on the shaft.
- Align the hole on the cardan with the notch on the shaft.
- Tighten the 10 mm clamp and install the boot completely in place.
- Install the rod on the cardan rod and adjust the gearshift lever travel.
- The second person should sit in the driver's seat, set the gear shift lever to neutral, move it slightly to the right and hold it in that position.
- After this, you need to tighten the 13 mm clamp nut.
Typically, after such a repair, the reverse gear starts to engage without problems. In addition, the operation of the entire gear selection mechanism on the VAZ-2109 becomes clearer.
The video from the author MegaMeyhem shows the process of replacing the backstage.
Changing the gearbox oil
If the oil seal on the rod is damaged, oil leaks out of the gearbox housing, and dirt can get into the box itself. These factors may be the reason why reverse gear stops engaging. In addition, the oil in the box loses its properties during operation, so it must be replaced preventively at least once every 35–40 thousand kilometers. Before replacing, you need to check the condition of the oil in the box. To do this, you need to remove the oil dipstick installed in the gearbox housing and visually assess the quality of the oil. The presence of metal and dirt particles in the oil on the dipstick is unacceptable. The oil itself should be quite liquid and not stick to your hands in a thick layer.
Dipstick with oil level marks
To replace, you will need the following materials and tools:
- New oil. When purchasing oil, you need to consider the type of gearbox. For fairly rare four-speed gearboxes, three liters of oil are required, for newer five-speed ones - 3.3 liters. The oil itself must have a tolerance of 80W-85, the manufacturer does not matter.
- A container for draining old oil with a volume of at least 4 liters.
- A funnel with a hose for pouring new oil or a syringe.
- Wrenches 12 and 17 mm of any type.
- Rags and cleaning solvent.
The actual work order is as follows:
- Place the car with the heated gearbox on the pit.
- Remove the rubber plug from the gearbox ventilation valve installed on the top of the crankcase.
- Clean the valve and plug from dust and dirt. It is convenient to clean parts with thin wire and a rag.
- Reinstall clean parts.
- Wipe off dirt from the bottom of the box. Unscrew the plug on the bottom of the box housing.
- Place a container under the drain hole and drain the oil. It will completely merge in at least 20-25 minutes.
- After this, screw the drain plug back into place and carefully tighten it with a wrench. First, the plug and hole must be thoroughly wiped with a rag.
- Pour fresh oil through the oil level dipstick hole in the box.
- During filling, it is necessary to check the oil level, which normally should be between o and “MAX” on the dipstick rod.
- If there is an overflow, the oil can be pumped out with a large medical syringe with a tube on the spout.
- Within a few days after the change, it is advisable to check the level and appearance of the oil. You also need to make sure that there are no leaks through the plug and box seals.
We recommend: Cooling system liquid pump repair
Rubber crankcase ventilation cap Drain hole on the crankcase Dipstick in the upper part of the crankcase An oil funnel installed in the dipstick hole
On early versions of front-wheel drive VAZ gearboxes there is no hole for the dipstick. To fill the oil in the crankcase of such boxes there is a control hole closed with a threaded plug. Filling is carried out using an oil syringe. The oil level is considered normal when it reaches the lower edge of the inspection hole.
The arrow indicates the inspection hole on the side of the gearbox housing. Filling oil with a transmission syringe.
Replacing the gear selection mechanism
One of the common reasons why the reverse gear of a VAZ 2109 does not engage is the breakdown of spring 2 installed in a separate mechanism.
Gear selection mechanism
To access it, it is necessary to remove and repair the mechanism itself, located inside the box.
A short list of necessary actions:
- Disconnect the car.
- Remove the air filter completely.
- Remove the left wheel and loosen the CV joint hub nut.
- Drain the oil from the gearbox crankcase.
- Remove the two bolts securing the left ball joint to the steering knuckle.
- Unlock and remove the steering tip.
- Remove the fist from the CV joint splines.
- Completely remove the left drive.
- Remove the starter and negative wire from the gearbox housing.
- Remove the gear shift rods from the gearbox and clutch.
- Unscrew the speedometer drive cable.
- Place a support under the box housing and remove the box support fastening
- Remove the gearbox from the vehicle and disassemble it.
When disassembling the gearbox, it is necessary to check the condition of the gear locks, since wear is the main reason why the reverse gear spontaneously jumps out of gear. You can get to the lock without removing and disassembling the box; it is located on the side of the crankcase and is closed with a screw plug. Disassembling the gearbox and inspecting the gear selection mechanism will also help solve the problem in which the reverse gear on the VAZ-2109 does not turn off.
Spring replacement
Often, owners change the entire mechanism assembly, which costs on average about 2 thousand rubles. But you can disassemble the mechanism and get by with replacing the spring, which costs up to 50 rubles.
You need to do the following:
- Remove the stopper from the blocker axle and remove the axle itself.
- Unscrew the lever axle nut.
- Remove the axle and replace the spring.
- Reassemble in reverse order.
Old gearbox oil or low level
If the car is not new, then who knows if the gearbox oil was changed and when? You need to change the oil and pray that something worse doesn't happen. If there is a leak, drop by drop a day and you may not notice how the oil leaks out of the box. As a rule, this happens through the gearbox gasket or shaft seals. Over time, the box reacts to this with increased noise, but you might not have noticed this either. It is better to change the oil and replace gaskets with seals at a service station, or on your own if you have a “green” understanding of what you are doing.
Recommendations from experts
Sometimes the driver is forced to drive a car with a faulty gearbox in order to get to the repair site. But how to turn on the speed if the clutch is faulty or the synchronizer is worn out?
- If first gear does not work, you can carefully move away in second gear.
- If difficulties arise when turning on the engine while the engine is running, you can do this with the engine stopped and then start it. But this method can only be used by experienced drivers, as it can damage the transmission.
- Double squeezing and re-gasping. It is necessary to set the gearshift knob to the neutral position, then press the clutch pedal, and lightly press the gas (up to 2500 rpm according to the tachometer). After this, you need to slow down and disengage the clutch again, and then engage the gear. If this does not work, then you need to repeat all the operations again. While driving, experienced drivers know how to change gears without a clutch mechanism.
- When engaging reverse, the lever may not reach all the way. Then you need to slightly release the clutch pedal, the gear will turn, the teeth will engage, and the handle will reach the end.
- After pressing the pedal, it is recommended to wait 3 seconds and then engage reverse gear.
- You can try turning on the reverse by first setting the handle to 4th, then to the rear.
- Repeatedly squeezing the clutch and returning the gearshift lever to neutral sometimes also helps solve the problem.
If you have personal advice and experience on solving these issues, write in the comments.
Wear of release bearing, springs, forks, gears, synchronizers, shafts
As a rule, all these breakdowns are accompanied by extraneous noise during operation, which is difficult to ignore. Repairs will require dismantling the gearbox and the participation of specialists. Your task is not to delay your visit to the service station. This will save you money and possibly prevent irreversible damage.
We deliberately did not touch upon the problems with engaging reverse gear in an automatic transmission, for the simple reason that automatic transmissions are foolproof from birth - it is very difficult to break them yourself. But the most important thing is that the automatic transmission signals the driver about its problems with characteristic jolts when operating in normal mode. It is impossible not to notice them.
Text belongs to:
Difficulty engaging first and reverse gears
These two speeds cause problems for drivers on most car models. The reverse gear does not engage well due to the fact that there is no synchronizer on its gear. They are installed only on higher-class cars, and they are not on budget cars. The first speed also often makes it difficult to drive a car, since it is used more often than others. Although a synchronizer is always installed on its gear.
More of these faults can be found on used cars. But even on new budget class models such breakdowns are not uncommon.
A little about clutch operation
Difficulties with gear shifting due to a faulty clutch are associated with incomplete disengagement of the flywheel and driven disk. In this case, the synchronizers are not able to ensure smooth meshing of the gears, which is why the gears are difficult to engage and a characteristic crunching sound occurs. The cause of the malfunction can be either in the release drive or in the clutch basket itself. Manual transmissions are equipped with two types of clutch release drive:
- Mechanical (cable). The clutch pedal is connected by a cable to the clutch release fork. Moving the cable changes the position of the fork, which moves the release bearing towards the damper pressure plates.
- Hydraulic drive. The design is based on the incompressibility property of the fluid, and the operating principle itself is similar to the operation of the brake system. By pressing the brake pedal, we move the pusher of the main hydraulic drive to release the clutch. Inside the hydraulic drive there is brake fluid, which, under pressure from the piston, flows through a pipeline to the working cylinder. As it extends, the piston presses on the clutch release fork.
Cabin wires
When the fuse is fully operational, everything is in order with the plug, and the Kalina does not engage reverse gear, look at the switch located under the decorative cover near the gearshift lever itself. There are two wires connected to this switch. They are connected to each other. If the transmission started to turn on normally, then the reason was precisely in the switch.
You can measure the voltage on the wires using needles. There must be at least 12 V at the switch. If you don’t have a multimeter, you can measure the voltage using a light bulb. If it does not light up, this indicates a broken wire. This usually happens in the place where the clamp is installed on the pallet. This easily explains the question: why reverse gear does not engage on the Lada Kalina.
We recommend: How to test a car battery for performance
The clamp is removed and compressed at the bottom of the fastener. Next, disconnect the lamp switch connector. Then take out the entire tourniquet. The broken wire will be visible immediately. What to do next? The cord is connected to a piece of good wire - you can make a simple twist.
But it's best to solder the connection. Then everything is assembled in reverse order. If the transmission is engaged, then the problem is solved.
Synchronizers or clutch?
In the design of a manual transmission, synchronizers are necessary to equalize the rotation speed of the input shaft and the selectable gear mounted on the secondary shaft.
The hub is rigidly connected to the gearbox output shaft, while the helical gear of each gear rotates freely on the shaft. When changing gears, the sliding clutch moves, locking together a pair of hub and helical gear corresponding to the desired gear. Since the speed of rotation of the hub and gear will be different when moving to a higher/lower stage, synchronizers are needed for smooth and silent shifting.
In the design of a synchronized manual transmission, the clutch, when moving, presses the locking ring against the synchronizer cone. Due to the high friction force between the cone and ring, the speed of the output shaft and the helical gear are equalized. The sliding clutch then seamlessly engages the gear with the output shaft hub.
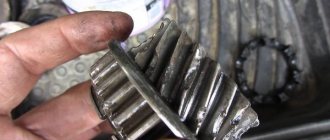
If the synchronizer malfunctions, due to different rotation speeds of the input shaft and gear on the secondary shaft, rigid engagement occurs, accompanied by a characteristic roar/crunch.
You can distinguish a synchronizer malfunction from a clutch failure by the frequency of sounds. If the problem is in the release drive or the clutch basket itself, then the gearbox crunches with every shift. In the case of burnt or worn synchronizers, the sound appears when changing to a specific gear. For example, on front-wheel drive VAZ cars, due to a design flaw in the domestic manual transmission, a characteristic roar most often occurs when switching from 1st to 2nd gear.
After disengaging the gear, release and then depress the clutch again before engaging the next gear. If after double squeezing the gears shift softer, the problem is clearly in the synchronizer.


