Sooner or later, the time comes when it is urgently necessary to replace the input shaft bearing of the VAZ 2107 gearbox. How soon this need will occur to you depends on many factors. And some of them are determined by your personal qualities.
The only exception is the original quality of the bearing, but even when purchasing it you can be meticulous and picky enough to provide your car with a normal spare part. Other reasons for the rapid failure of the input shaft bearing include, first of all, driving style.
If you consider yourself a Schumacher, you tear the lever where it is necessary and where it is not, rest assured that the bearing will not last long. The second factor is the conditions in which the machine is operated. A garage and the absence of constant overloads will greatly prolong the normal functioning of all components of the car. And the third, very common reason for early bearing failure is neglect of regular and highly recommended maintenance.
Replacing the bearing of the input shaft of a VAZ 2107 gearbox, as many believe, forces you to completely disassemble the gearbox. And so people are doomedly drawn to the service station, counting out money that is not at all extra. However, craftsmen from among the people have proven that rebuilding the gearbox is not absolutely necessary. Yes, you will have to remove it - but any VAZ owner can easily cope with this. But you don’t have to go deep inside.
Signs of a breakdown
- In neutral, with the engine running, extraneous and incessant noise is heard;
- The gearbox taps while moving, and there are sounds in any gear;
- Periodically, programs turn off without your participation, spontaneously;
- In some cases, the clutch does not disengage - this is if the bearing is jammed;
- Simply forgetting about the problem means providing yourself with a huge headache and significant expenses in the near future.
A skewed bearing is quite capable of contributing to the destruction of the clutch disc. But even without misalignment, a worn part will quickly lead to the need to repair the entire clutch or gearbox.
Tips that will help you not think about replacing a manual transmission for a long time
Despite its relatively high reliability, a manual transmission requires compliance with certain operating rules. This is necessary for the long service life of the unit and its uninterrupted operation throughout its entire life.
- Driving style. Jerky acceleration at high speeds contributes to the failure of not only the manual transmission, but also the car engine. Therefore, gears should be changed smoothly, in accordance with the current speed. This ensures comfortable and dynamic transmission of torque from the engine to the wheels, reducing wear on the engine and gearbox by reducing the load.
- Timely maintenance of manual transmission. Transmission oil is changed at least once every 3 years or every 40-50 thousand kilometers (for some car models this interval is increased). The period for replacing the fluid is set by the manufacturer and is indicated in the operating manual for the specific vehicle.
- Quality of transmission fluids and spare parts. Changing the oil of a manual transmission and repairing this unit are performed quite rarely. Therefore, you should not skimp on purchasing high-quality spare parts and recommended fluids.
- Timely maintenance. It is advisable to check the transmission fluid level every six months of operation or upon reaching 15 thousand kilometers after the previous check. If necessary, oil should be added to the required level. If the car is used in extreme conditions or the driving style is quite aggressive, the period between checks can be shortened.
By following these simple rules, you will ensure long-term operation of your car's manual transmission. Moreover, unlike an automatic transmission, a manual transmission is not so demanding in maintenance.
Removing the gearbox
The manual describes the process in such a way that even the most big-headed comrade, well acquainted with the insides of VAZs, is unlikely to understand what is meant. We present our vision of the issue.
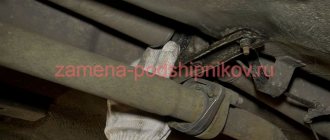
- The rear axle is hung with a lining under the front of the anti-roll bars. The gearshift lever switches to neutral, the car is removed from the handbrake;
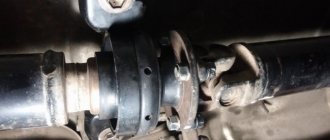
- The fasteners connecting the cardan to the gearbox flange are twisted, after which they are separated;
- The battery is removed;
- Unscrew the 4 bolts securing the exhaust pipe to the exhaust manifold;
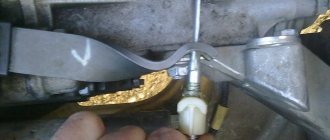
- The oxygen sensor block is disconnected, the mounting clamp is removed; The starter mounts with the box casing and its protection (if any) are removed;
- The console is removed from inside the cabin, the upholstery on the floor is wrapped, and the screws holding the plastic of the shift lever are unscrewed. It is removed together with the seal;
- The gearbox protection is removed;
- Unscrew the clamp connecting the intake pipe/gearbox and the catalytic converter;
- The clutch cylinder is twisted off the box and moved to the side;
- The box is disconnected from the engine by twisting 2 bolts;
- Next, remove the boot, speedometer cable and wires from the sensors;
- After removing the driveshaft protection, the boot is disconnected on this side as well;
- The outboard is unscrewed, the cardan is removed from the coupling;
- While holding the box, the traverse is unscrewed;
- The gearbox itself is pulled out, the 6 bolts that secure the clutch basket to the flywheel are removed - and you can begin the planned actions.
Toothed belt tensioner bearings
The bearings of the toothed belt tensioning mechanism are ball, angular contact, double-row, closed. There are 2 pieces installed on the car.
Names of bearings of the toothed belt tensioning mechanism:
- According to VAZ classification - 2105-1006124;
- According to the bearing plant classification - R70-6120.
Toothed belt tensioner bearing dimensions:
- External diameter D - 37 mm;
- Internal diameter d - 25 mm;
- Height h - 17 mm.
Changing the bearing
When the box is dismantled, the bell and retaining rings are removed. You won't have to disassemble anything else.
- Using a powerful screwdriver, the bearing is hooked under the ring groove. Since serious physical impacts await us, we approach the choice of a screwdriver carefully: it may bend or even break;
- The input shaft moves forward slightly. The shaft bearing will act as a fulcrum;
- A hammer strikes the end of the primary. In this case, the shaft must be rotated between blows. Depending on how closely the bearing has bonded with the input shaft, it will come off in 5-30 minutes.
Replacement
To fix it, it is recommended to completely disassemble the box, but in fact this work can be done without “splitting” the gearbox. In any case, you need to remove it. Before removing the box, disconnect the battery, remove all the chips from the box and unscrew the speedometer drive. On some models, it may be necessary to remove the exhaust system "pants". Only after this is the gearbox removed.
After removing the box, the bell should be removed. Otherwise, it will interfere with further work. It is also advisable to clean the box from dirt.
On most gearboxes, the bearing is secured using retaining rings. They are removed using a screwdriver. You need to pry them off and loosen them a little, after which they can be easily removed. For greater convenience, you can take the ring with tweezers. After this, you need to use a screwdriver to pry the bearing by the ring groove, and at the same time you need to move the input shaft forward.
Next, a pry bar is placed between the bearing and the box. For this you will need an assistant. He will hold the montage. Your task is to press out the bearing with careful but strong blows on the input shaft. During the process it is necessary to rotate the shaft. In total this can take up to 20 minutes. There are special pullers, but using them on an unassembled box is problematic. To disassemble a gearbox, you need to have experience in such work.
Before installation, the bearing is lubricated with engine oil. It should be pressed in carefully. To do this, the shaft is pulled forward. The bearing must be driven into place with light blows of a small hammer. You should knock on the inner ring, and do it evenly, in a circle. After pressing the bearing into place, make sure it is working properly. It should spin absolutely calmly. Afterwards the box is assembled in the reverse order and installed on the car.
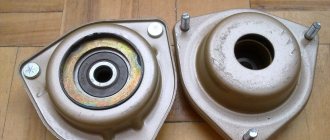
Where is the crankshaft bearing installed and what is it used for?
The bearing installed in the crankshaft flange is not part of the engine, but of the transmission. The main purpose of this assembly is to center and support the transmission input shaft - it serves as a front rotating support. Anyone who has ever installed a gearbox on a car is familiar with the crankshaft bearing - it is so difficult to get into its inner race with the shank of the input shaft. As for the high service life of the part, it can be explained simply. The fact is that the rolling unit only works when the clutch is depressed. The rest of the time, the crankshaft and gearbox input shaft rotate at the same frequency. Despite the low load, it is recommended to replenish the lubricant supply in the bearing when replacing the crankshaft rear oil seal, repairing the clutch, etc. This way you will delay the need for repairs for a long time.
Gearbox device
In general, the concept of “remaking” the box is not entirely correct, since the design of the VAZ-2105 gearbox with 4 speeds was practically no different from the same gearbox 2101. The 2105 gearbox has a three-shaft layout, with constant gear meshing and manual control. Externally, the Kopeika and Pyaterki checkpoints can be distinguished almost only by the markings on the body of the box.
The VAZ-2105 gearbox diagram with 4 stages is presented below, and structurally it does not differ from modifications 2101 and 2106:
| 1 | Bottom cover; | 40 | Needle bearing of the front end of the secondary shaft; |
| 2 | Filler and inspection plug; | 41 | Synchronizer spring thrust washer; |
| 3 | Intermediate shaft second gear gear; | 42 | Fourth gear synchronizer ring gear; |
| 4 | Intermediate shaft third gear gear; | 43 | Sliding clutch for synchronizer of third and fourth gears; |
| 5 | Intermediate shaft; | 44 | Third and fourth gear synchronizer sliding clutch hub; |
| 6 | Front intermediate shaft bearing; | 45 | Synchronizer retaining ring; |
| 7 | Clamp washer bolt; | 46 | Synchronizer locking ring; |
| 8 | Intermediate shaft front bearing clamp washer; | 47 | Synchronizer spring; |
| 9 | Intermediate shaft constant mesh gear; | 48 | Third gear synchronizer gear and ring gear; |
| 10 | Constant mesh gear of the input shaft; | 49 | Second gear synchronizer gear and ring gear; |
| 11 | Spring washer; | 50 | Secondary shaft; |
| 12 | Retaining ring; | 51 | First gear synchronizer gear and ring gear; |
| 13 | Rear input shaft bearing; | 52 | First gear gear bushing; |
| 14 | Input shaft oil seal; | 53 | Secondary shaft intermediate bearing; |
| 15 | Transmission front cover; | 54 | Intermediate bearing lock plate; |
| 16 | Bearing mounting ring; | 55 | Secondary shaft reverse gear; |
| 17 | Clutch housing; | 56 | Elastic cushion for gear shift lever damper; |
| 18 | Gearbox input shaft; | 57 | Damper rubber bushing; |
| 19 | Reversing light switch; | 58 | Damper spacer; |
| 20 | Intermediate shaft reverse gear; | 59 | Damper locking sleeve; |
| 21 | Reverse intermediate gear; | 60 | Inner gear shift lever cover; |
| 22 | Reverse fork; | 61 | Secondary shaft rear bearing oil seal; |
| 23 | Gear shift lever release spring; | 62 | Flange of the elastic coupling of the propeller shaft; |
| 24 | Tension spring bolt; | 63 | Screw; |
| 25 | Gear shift lever guide cup; | 64 | Centering ring seal; |
| 26 | Ball joint of the lever; | 65 | Centering ring retaining ring; |
| 27 | Spherical washer; | 66 | Centering ring; |
| 28 | Spring; | 67 | Rear secondary shaft bearing; |
| 29 | Gear shift lever; | 68 | Drain plug; |
| 30 | First and second gear shift fork; | 69 | Mud deflector; |
| 31 | Third and fourth gear shift fork; | 70 | Speedometer drive gear; |
| 32 | Fork rod for first and second gears; | 71 | Speedometer drive; |
| 33 | 3rd and 4th gear fork rod; | 72 | Rear gearbox cover; |
| 34 | Locking blocks; | 73 | Reverse idler gear axis; |
| 35 | Reverse fork rod; | 74 | Rear intermediate shaft bearing; |
| 36 | Rod lock ball; | 75 | Intermediate shaft first gear; |
| 37 | Retainer spring; | 76 | Gearbox housing; |
| 38 | Retainer cover; | 77 | Sliding clutch for synchronizer of first and second gears. |
| 39 | Breather; |
Since the box from the VAZ-2105 is structurally similar to the 2101, the kinematic diagram of the gearbox is the same. But the gear ratios are different; on 2105 gearboxes they are:
- 1st – 3.67;
- 2nd – 2.10;
- 3rd – 1.36;
- 4th – 1.00;
- Rear – 3.53;
As for the differences in the design between gearboxes 2105 and 2101, they mainly come down to different numbers of teeth on different gears. So, on the intermediate shaft of the gearbox, a 1st speed gear with 14 teeth is used (15 for 2101), and their inclination angle is greater. The constant mesh gear of this shaft has 28 teeth (29 for 2101). The input shaft uses an 18-tooth gear (19 for 2101). Because of these features, the shafts with gear blocks of these two gearboxes are not interchangeable if you try to install them separately. But in the case of a complex replacement - the input shaft along with the intermediate shaft and all gear blocks, then installation is quite possible. As for the secondary shaft, modification 2105 differs from shaft 2101 in the first gear gear (its teeth have a different angle, although their number is the same, and its diameter is also slightly larger).
Symptoms of a problem
Although the input shaft support bearing is an inexpensive part, replacing it is a labor-intensive process. And this is connected not so much with the difficulty of dismantling the rolling unit itself, but with the need to remove other parts and assemblies of the engine. To avoid wasting hard work, bearing failure must be correctly diagnosed. Signs indicating this type of malfunction:
- Noise coming from a running engine when the clutch is depressed. A similar rustling or rustling noise also appears when the release bearing fails. And if the noise from the latter is detected even with slight pressure on the petals of the spring diaphragm of the clutch basket, then the gearbox support bearing will make extraneous sounds only when the clutch is completely disengaged.
- Wear or jamming of the bearing due to lack of lubrication leads to the fact that the input shaft of the gearbox is subject to the action of torque even while the driven disk is completely removed from the flywheel. In fact, this manifests itself with the same symptoms as with a clutch that “drives” - it is difficult to engage first gear when starting from a stop, jerks appear when changing gears while moving, etc.
- An irregular knock that appears from the gearbox indicates destruction of the bearing cage. In this case, the balls can spill out or clump together, causing an unpleasant sound and causing an imbalance in the crank and gearbox input shaft.
The latter happens rarely and indicates that the driver did not pay attention to noise and other signs of malfunction for a long time.
Problems with reverse gear on automatic transmission
In practice, gearbox malfunctions associated with engaging reverse gear occur on both manual and automatic transmissions. "Automatic machines" have different designs. Robotic boxes are similar in design to “mechanics”. But the automatic transmission has its own list of breakdowns when it works hard or the reverse gear has disappeared.
- The fluid level is below normal, or it is contaminated and has lost its working qualities. The automatic transmission device is sensitive to the quality of the lubricant and its level. Therefore, it is better to start finding out the cause by checking the transmission fluid. An excessive oil level also contributes to improper operation of the unit. The service life of the fluid is limited to a mileage of 60 thousand km, but sometimes it is necessary to change it more often, as the lubricant becomes cloudy and contaminated.
- Wear of friction discs. The correct operation of reverse gear, as well as the “D” (drive) mode, depends on this. Worn clutches may prevent 3rd, 4th and reverse gears from engaging. In this case, eliminating the breakdown consists only of replacing the clutches.
- The splines on the drive drum are cut off. The car can move forward, but it will be impossible to go backward.
- Worn friction brake band. There is no reverse movement, but forward movement works.
- The brake band piston cuffs are torn or worn. This will only be noticeable when you engage reverse.
- Control solenoids or hydraulic units are jammed.
Sometimes the lack of communication between the torque converter and the oil pump gear also affects the reverse operation.
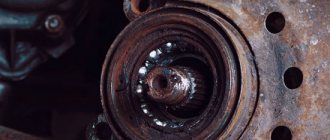
What is the risk of crankshaft bearing failure?
Most often, after a suspicious rustling sound appears, the car will be able to travel for hundreds of kilometers. But don’t put off replacing the bearing for too long, since a seemingly trivial malfunction can turn into other problems:
- bearing destruction is the cause of increased vibration of the crankshaft, and this leads to wear of the rear oil seal and engine oil leakage;
- due to loss of support and imbalance, the input shaft shank experiences alternating loads, which may ultimately result in gearbox failure;
- the races of a jammed bearing can damage the seats on the gearbox shaft or in the crankshaft flange;
- When the separator is destroyed and the balls are lost, dismantling the outer and inner races becomes more difficult.
A short summary
General structure of manual gearboxes on VAZ
The device of a 5-speed manual transmission Lada Priora, Kalina. General diagram of the gearbox.
New cable transmissions installed on car models with 16-valve engines have become much quieter even when braking the engine. They have reinforced synchronizers (which, however, cannot be called problem-free). They are capable, according to the passport data, of withstanding a torque of 160 Nm. In practice, they work properly even under much higher loads when the car engine is boosted.
You should not think that we are deliberately praising VAZ manual gearboxes; we only noted their well-deserved positive qualities. But, of course, they encounter problems during operation. Let us note the most common malfunctions, their causes and solutions.
Table of the most common malfunctions of VAZ manual gearboxes, as well as their elimination and repair
The most successful manual transmission on Ladas is considered to be the one installed on the Lada Vesta
A new level in the design of VAZ manual gearboxes for front-wheel drive cars has become the VAZ 21807 gearbox, this is a five-speed manual transmission installed on the Lada Vesta. It is considered one of the most successful manual transmissions, as it is reinforced and capable of holding high torque. Problems such as gearbox noise, rapid wear of bearings and gears, oil leaks from seals are not typical for this box, but knocking at idle sometimes occurs, although not on all copies, which is an amazing phenomenon.
It should also be noted that the VAZ 21809 manual transmission is installed on the Lada X-ray. It is as durable as the VAZ 21807, but in the operational practice of owners, oil seal leaks and difficulty in engaging reverse gear are often encountered.
Lada X-ray with manual transmission, which is also quite successful
Gear shift diagram for a 4-speed manual transmission used on VAZ 2101, 2102, 2103, 2104, 2105, 2106, 2107, Niva 2121
Small Summary
So, what can we ultimately say about manual transmissions on VAZs and Ladas? Probably the fact that they started out in the 70s with phenomenally high quality, then the 5-speed manual transmissions suffered a little in quality, which, of course, slightly upset the owners. But it’s also impossible not to note how VAZ figured out (well, almost figured out) many of the problems of its manual transmissions. Just look at the box of the Lada Vesta and its Sport version, with a boosted 140 horsepower engine, how wonderfully the box works with a torque of as much as 180 Nm!
All VAZ boxes are incredibly repairable; they can be restored from any condition, and this can be done for relatively little money. Another big question is the quality of spare parts for gearboxes on our market. Now we are talking not only about cheap analogues, but, unfortunately, also about factory spare parts.
Thank you for your attention to this article, we tried to collect a lot of useful information about the operation and repair of VAZ manual transmissions, problems and ways to solve them, as well as other information about VAZ gearboxes. We hope you found it interesting and found something useful and necessary for yourself! Source
Source
Procedure for bearing replacement
To get to the faulty unit, you will have to remove the gearbox, clutch and flywheel. Carry out similar work on a lift, pit or overpass, using a special crankshaft bearing puller (a device for pressing out of blind holes).
Crankshaft bearing puller
The replacement procedure is as follows:
1.First, disassemble the crankshaft bearing removal tool into its component parts, otherwise you will damage the thread when installing it. After this, lubricate the conical protrusion on the puller bushing with engine oil or grease - this will protect its surface from damage.
2.Install the press-out spacer sleeve into the inner race of the bearing and drive the device in until it stops.
3.To remove the bearing from the crankshaft, do the following. First tighten the puller screw by hand. Then, holding the press-out sleeve from turning with a 14-point open-end wrench, tighten the screw with a 17-point socket. Resting against the blank wall of the hole in the crankshaft flange, the shank of the device moves out of the coupling, pushing it along with the bearing out of the socket.
4. Having removed the damaged part, wipe the seat in the crankshaft from dust and lubricate it with engine oil. Don’t forget to check and, if necessary, replenish the amount of lubricant in the new bearing - manufacturers often sin with excessive efficiency.
5. When installing the new VAZ 2107 crankshaft bearing in place, make sure that it does not warp. The final pressing is carried out with a hammer and a suitable mandrel. If one is not found, then use the dismantled unit or hammer the bearing with a hard rubber mallet.
6.Installation is complete when the top plane of the bearing is flush with the flange.
If you are unable to find a press-out, do not despair. Every experienced auto mechanic knows how to remove a bearing from a crankshaft without a tool. In this case, you will need: a drift with a diameter of 15 mm (you can use a suitable bolt) and plastic material - lithol, plasticine or bread crumb mixed with sawdust. It is placed through the opening in the inner race in such a way as to fill the space under the bearing. Then a drift is inserted into the hole and hit with a hammer. Expanding to the sides, the soft mixture squeezes the bearing out. This way you can replace the faulty unit and avoid troubles in the future.
Something else useful for you:
Video: An easy way to replace a crankshaft bearing
Replacing input shaft bearing
VAZ
2107
The gearbox on the VAZ classic (which includes the “seven”) is particularly reliable. Sooner or later, the time comes when it is urgently necessary to replace the input shaft bearing of the VAZ 2107 gearbox. Often the gearbox “survives” 1-2 engine repairs before it has to be repaired. But at some point, it’s her turn. One of the gearbox parts that most often requires replacement is the VAZ 2107 input shaft bearing . Replacing the silent blocks of the front levers on VAZ 2101 - 2107 cars is not an easy task. Do-it-yourself oil change in a VAZ LADA 2107 gearbox…. The reason for its premature failure may be a factory defect or extreme driving style. Changing the oil in the gearbox and rear axle of a VAZ 2106. If you “tear the gearbox lever”, constantly overload it with sudden acceleration or heavy loads when towing, even a high-quality bearing will not be able to last long. Another reason for bearing failure may be neglect of regular gearbox maintenance regulated by the manufacturer.
Many believe that replacing the input shaft bearing requires complete disassembly of the gearbox and prefer to entrust this operation to specialists at a service station. Replacement of the alternator belt for 16 VAZ 2110 cars, shaft for VAZ-2112 16 valves. But practice has shown that complete disassembly of the gearbox is not required. Repairing the VAZ 2107 gearbox We remove the gearbox front shaft from the input shaft bore. input shaft bearing yourself
it is possible without serious disassembly of the gearbox and the operation does not require the highest qualifications and special devices and tools.
Second phase. Disassembly and direct repair
Before starting repairs, it is necessary to clean the outer part of the gearbox using a brush and rinse it with kerosene. Now we can begin. The fork that disengages the clutch and the release bearing in the clutch is removed from the gearbox. We separate the secondary shaft from the propeller shaft and disconnect the edge of the EF from the secondary shaft. Then we separate the entire power unit block. We remove the speedometer drive.
- It is necessary to remove the cuff from the ball joint;
- Unscrew the three fastening nuts that secure the shift lever to the rear of the crankcase;
- The sealing gasket is removed from the stud;
- Using a socket-type wrench, loosen the nuts that secure the supports (bracket) of the exhaust pipe;
- This support is removed and the bolt that is located between them is removed;
- The nuts that secure the cover from the back must be unscrewed using a thirteen wrench;
- Using a 10mm socket wrench, unscrew the 10 nuts securing the bottom cover of the box;
- After which the cover is removed and the gasket is removed from under it;
If the nuts are turned out at the same time as the studs, it would be wise to use fixing glue. Before applying it to threaded holes and studs, they must first be washed with solvent. After completing this procedure, you need to take a 30mm wrench and unscrew the nut that secures the back cover. You can see it inside the crankcase itself.
Then you need to remove the back cover. Important! It is necessary to put in second gear. We take out the plug made of plastic, which is located on the back of the lid; using tweezers or tweezers, you need to remove the thrust ring. And finally, we take out the secondary shaft ring, which is located inside.
Sometimes it becomes necessary to replace bearings. So, replacing the VAZ 2107 gearbox bearings will be carried out according to the following algorithm:
- The retaining ring is removed from the holder located outside;
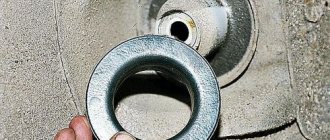
- Using a puller, the ring is removed;
- Then we take out the old bearing and insert a new one, after which we put the retaining ring in place.
This completes the disassembly of the VAZ2107 gearbox. Now you can replace all unusable parts.
The vehicle's transmission helps transmit the required torque to the vehicle's wheels in accordance with the vehicle's speed. In this article we will look at what a gearbox secondary shaft is, and also touch upon such important parts as the bearing, secondary shaft oil seal and their replacement.
Signs of a malfunction of the input shaft bearing of the VAZ 2107 gearbox
There are several signs that indicate a bearing is faulty:
- When the engine is running at neutral speed, extraneous noise is heard, which changes with increasing speed.
- The gearbox periodically taps while the car is moving. And the knock is present in any gear.
- Gears switch on or off spontaneously.
- The clutch does not engage due to a stuck bearing.
The problem cannot be ignored: misalignment of a faulty bearing will lead to breakage of the clutch basket. And even if misalignment does not occur, a worn part will cause rapid failure of the gearbox and/or clutch.
Gearbox seals and their replacement
Oil seals in any mechanism where they exist act as gaskets. In this case, they are designed to seal the holes from which the primary and secondary shafts come out. Previously, oil seals were cast from rubber.
Currently made from modern composite materials, more resistant to temperature changes and aggressive environments.
Input shaft oil seal
The oil seal, which is installed on the input shaft, has the following dimensions:
- • outer diameter – 47 mm;
- • internal diameter – 28 mm;
- • width – 8 mm;
- • weight – 20 grams.
It is installed in the shaft output hole in the clutch housing and serves to prevent lubricant from flowing through the shaft.
There is no difficulty in replacing the oil seal, but the gearbox will have to be removed.
The order of work to change the oil seal is as follows:
- Remove the clutch cover from the gearbox.
- Remove the release bearing and clutch fork.
- Remove the used oil seal by picking it up with a screwdriver or knife.
- Clean the place where the oil seal was located and wipe it dry.
- Install the new oil seal in its original place.
- Replace all the parts that were removed from the box in reverse order.
Secondary shaft oil seal
The oil seal, which is installed on the secondary shaft, is larger and has dimensions:
- outer diameter – 56 mm;
- internal diameter – 32 mm;
- width – 10 mm;
- weight – 10 grams.
It is installed at the output of the secondary shaft at the rear of the box.
The order of work to change the oil seal is as follows.
- Unscrew the nut securing the flange, having previously secured it.
- Remove the centering metal ring from the shaft.
- Remove the flange and washer using a puller.
- Pull out the old oil seal using a tool.
- Clean and wash the seal area.
- Install a new oil seal.
Dismantling the classic 5st gearbox
For those who repair their cars themselves. Replacing the front brake pads of a VAZ 2107 yourself. The article provides detailed video instructions and advice from professionals. This video shows the step-by-step disassembly of a 5st gearbox VAZ
2105.
- Disconnect (better remove) the battery.
- Engage neutral gear, disengage the handbrake, raise and hang the rear axle.
- Unscrew the bolts securing the cardan and the gearbox flange, and disconnect the cardan.
- Remove the exhaust manifold pipe by unscrewing the bolts.
- Disconnect the oxygen sensor.
- Remove the starter.
- Inside the car, remove the console and gearshift knob.
- Remove the gearbox protection.
- Unscrew the clamp connecting the catalyst to the exhaust pipe.
- Remove the clutch slave cylinder.
- Unscrew the speedometer cable, remove the boot and the reverse speed sensor wire.
- Remove the driveshaft.
- Unscrew the traverse while holding the gearbox.
- Unscrew and pull out the gearbox.
Gear ratios at the gearbox
The seventh model of the Zhiguli received a good version of a five-speed gearbox. The designers of the Volzhsky Automobile Plant took a box from a VAZ 2105 as a prototype, replaced the gear ratio of the main gearbox pair from 4.3 to 4.1, then to 3.9 and obtained the following gear ratios.
| home | 1st gear | 2nd gear | 3rd gear | 4th gear | 5th gear | Reverse |
| 4,1/3,9 | 3,667 | 2,100 | 1,361 | 1,000 | 0,820 | 3,530 |
The gear ratio is the ratio of the number of teeth on the driven gear to the number of teeth on the drive gear.
Primary shaft
The input shaft transmits torque from the engine crankshaft through the clutch disc to the gearbox. The disc is located on the splines of the front part of the shaft. A constant mesh gear is rigidly mounted on the shaft.
For free rotation, it is placed in two bearings. One bearing is located at the end of the crankshaft, the other is in the front cover of the gearbox.
Secondary shaft
In a complex gearbox mechanism, the secondary shaft is the final stage in converting torque and transmitting it to the cardan. The gears of the first three speeds move freely on this shaft. At a certain gear, they engage with the intermediate shaft gears and provide the required torque.
The shaft is placed in bearings, there are three of them. One is pressed into the end of the input shaft, the other into the box body, and the third into the rear cover.
Intermediate shaft
The intermediate shaft transmits rotation from the primary shaft to the secondary shaft.
He plays the role of a satellite. The gears and shaft are made from a single piece. It is installed on three bearings. The gears for fifth and reverse speed are located on it.
Forks
In the process of switching speeds, forks are involved, which move gears along the shaft to a certain place.
The gear shift lever moves the forks.
Steering gear worm bearings
Bearing of the upper support of the steering gear worm
Bearing of the upper support of the steering gear worm, ball, angular contact
Designation of the upper support of the steering gear worm:
- According to VAZ classification - 2101-3401122 or 2101-3401129;
- According to the bearing plant classification - 996905-01 or 996805-97.
Dimensions of the upper support of the steering gear worm:
- External diameter (D) - 47 mm;
- Internal diameter (d) - 28 mm;
- Height (width) (B) - 13.40 mm.
Steering worm lower bearing (lower support)
Bearing of the lower support of the steering gear worm, ball, angular contact
Designation of the lower support of the steering gear worm:
- According to VAZ classification - 2101-3401123 or 2101-3401129;
- According to the bearing plant classification - 996905-01 or 996805-97.
Dimensions of the lower support of the steering gear worm:
- External diameter (D) - 50 mm;
- Internal diameter (d) - 28 mm;
- Height (width) (B) - 20.20 mm.
Coolant pump bearings
Coolant pump bearings are ball, radial, double row, sealed.
Coolant pump bearing designation:
- According to VAZ classification - 2101-1307027 or 2101-1307027-0];
- According to the bearing plant classification - 6-330902С17 or 6-330902 EC 17.
Toothed belt tensioner bearing dimensions:
- External diameter (D) - 30 mm;
- Internal diameter (d) - 16 mm;
- Height (width) (B) - 115 mm.
- The width of the outer race (C) is 39 mm.