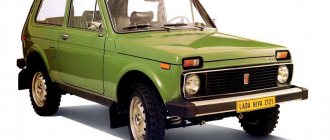
At the time of its appearance on the market, the Niva was a comfortable car, equipped with an independent front suspension. Now the machine is used less often, but it has an audience of admirers. You can make Niva thresholds with your own hands from a standard set of components and tools. The work is simple, but requires some skill.
Mounting methods
Thresholds are mounted in two ways: manually or by welding. It depends solely on the type of part. Methods for connecting elements to the body:
- Removable method. For the most part, plastic and some metal structures are attached this way. For installation you will only need metal screws. Can be quickly replaced with a new or different model. The disadvantages include poor reliability of fasteners. It should also be noted that new holes must be treated with anti-corrosion compounds.
- Welding method. This is a radical fixation of metal and chrome models to the car body. This installation should be done by professionals. Once installed, you can safely step on the part; they can withstand the weight of a large adult person.
Platform trailer for a passenger car: design options
- Removable. These are often plastic or metal products. To install them on the car body, appropriate metal screws are used. Their advantage is that the thresholds can be quickly removed and replaced with new ones, if necessary. The mount is not the most reliable, but in fact the most practical;
- Welding. As you understand, welding machines are used here. This method is important to use if you have metal or chrome thresholds. I don’t recommend using the device without experience and skills. An option for those who are confident in their decision and are ready for long-term use of thresholds on the body of their Niva.
Decide for yourself what to do in your case. I personally would first try the removable option, figure out which thresholds look better. If I had found the ideal solution, I would have welded it already.
Replacing thresholds with your own hands
Chevrolet Niva thresholds can be changed independently if you have welding skills. Repair requires special tools and materials:
- angle grinder, grinder, replaceable discs;
- semi-automatic welding;
- set of thresholds;
- electric drill;
- automotive primer, degreaser, putty;
- clamps, you can use pliers, clamping pliers;
- chisel, hammer, set of screwdrivers.
Before replacing a part, preparatory work is carried out: the battery is removed, the fuel is drained, and the interior is dismantled. After dismantling the doors, it is recommended to install a spacer between the posts or weld a channel. The element will allow you to adjust the gaps and maintain the overall geometry of the body. The process of replacing sidewall sills on a Niva step by step:
- Place the car on a lift, remove the front fender, dismantle the doors.
- Clean the factory part from the paintwork, drill out the spot welding areas.
- Cut out the old trim with a grinder or chisel.
If a power step is installed after replacement, then painting is done last.
Replacing plastic thresholds with your own hands
Plastic replicas are installed on cars using self-tapping screws. For dismantling, you will need a minimum of tools: screwdrivers, wrenches, if the body kit is installed with bolts on the bracket. Replacing decorative trims step by step:
- The car is placed on a lift.
- Unscrew 2 screws: securing the mudguard to the body and one screw at the end of the threshold in the arch.
- Unscrew 5 nuts from the bottom of the body kit; you can use a 10mm wrench.
- The clips move towards the rear wheel.
- Metal is processed under plastic covers. Repairs are carried out if necessary.
Install the plastic covers in reverse order. For anti-corrosion protection, it is recommended to use paraffin anti-corrosion agent; the joints between screws and metal are treated with gun fat. For additional protection, plastic thresholds are sealed with armor film.
Niva 2121 #5 Manufacturing of power thresholds.
The process moves from uprooting rot to renewing iron.
First of all, we return rigidity to the body.
We start with the manufacture of power thresholds.
We prepare the installation site - remove the unnecessary, modify the useful. We carefully review what we will treat and what we will change.
Since the car is for tourism and not for sports, we use a 40x80 profile. We dampen the ends of the profile. Since the part is located in the active sandblasting zone, all seams are sealed. From the outside it looks like this:
And inside it's like this:
The water won't pass
After cutting the seam, we try the part in place:
When installed, the threshold will go even deeper into the body and will protrude by about 20mm.
We refine the threshold until it is fully compatible with the surrounding reality:
And depending on the degree of destruction of the surrounding panels, we make transition plates and corners.
We mark the holes for installation, remove rust from parts and cover them with a phosphating compound:
Be careful, hot acid!
When the reaction is over, we temporarily assemble the parts and install them in place to clarify the markings
We make markings, disassemble the parts and prepare the new threshold amplifier for installation:
After cutting, the parts are reassembled for intermediate installation in place, and the new threshold amplifier takes its place:
You can compare it to how it was:
There is some difference, right?
After cutting the seams and anti-corrosion treatment of the welding site, we install the outer part of the threshold in place:
A little special welding magic and this thing sits in place without any outside help:
Now all that remains is to complete the installation by making the connection to the external body panel:
You can proceed to manufacturing the inner part of the threshold. True, in this case you will first have to make a new floor in the cabin
To be continued
chugunder.livejournal.com
Self-production
There are a great many options for modifying the Niva. Of the most popular, I would highlight the following:
If you don’t have enough thresholds to be completely happy, and the options offered in stores don’t suit you, you can assemble the structure yourself.
The process is not the easiest. But experience suggests that the most difficult stage is the creation of drawings and blanks.
Therefore, the step-by-step procedure looks like this:
- Measurements and drawings. All Nivas are standard, so you can use someone else’s work and use the drawings available on the Internet. Just make sure that these are the thresholds that suit you. If not, then take your own measurements to the nearest millimeter. Otherwise there will be problems;
- Material. Typically thresholds are made from profile pipes. The diameter is selected individually. Two sections are made according to the drawings, everything is cleaned, polished, holes for fastening are drilled, etc.;
- Step. Made from iron. Such an element is required directly for installation on the car body;
- Welding. The step is connected to the threshold itself. Try to work carefully and follow safety precautions;
- Anti-slip insert. It is made from different materials that prevent the foot from slipping in the cold. A useful addition that also gives a good visual effect;
- Fastening. Now the entire structure is mounted to the body using a bolted connection. Do not forget to treat all places where you drilled the body with anti-corrosion compounds.
At this point, manufacturing, assembly and installation are completed. If you do not plan to perform any additional work on applying paint and varnish materials to the thresholds, then you can easily complete the job in 1-2 days.
Thresholds are a useful, practical and beautiful addition to the Niva, regardless of its model and manufacturer.
Thank you for attention! Subscribe, ask questions, leave comments and wait for new materials on our website!
54,60
Communities › Kulibin Club › Blog › Body: Do-it-yourself power thresholds on Niva
Hi all! I want to tell you how I made power thresholds on my Niva. Since the thresholds on the Niva were rotten and were pierced with a screwdriver, I decided to replace them, and since the native Niva rapids are weak, I decided to make power ones, but with the condition that they did not differ in appearance from the original ones, or at least almost did not differ. After digging through a bunch of information on the Internet, I decided to go my own way. For this purpose, original thresholds, original floor and threshold connector, original threshold amplifiers (were not useful) and a 60x60mm square profile with a wall thickness of 2mm were purchased. Next, look at the photos and captions:
As a result, externally the sills look almost like original ones, since the trim is original, but a couple of centimeters shorter at the bottom, which helps to increase ground clearance, you can now jack it at any place on the sill without fear of bending it, six-month tests have shown the survivability of this design, I am satisfied with the work done . I hope my post will be useful to someone... If there is interest, I will describe here other improvements to the Niva, for example, repair and strengthening of cracked front side members, installation of power steering on the Niva, installation of electric fans and much more, but not all at once))) That's all for now))) and see you again.
I see that many people write about the lack of connection between the threshold and the spar, here, in addition, I’m posting a couple of photos of the connection between the threshold and the spar:
I haven’t made a more rigid design yet due to the fact that the car is not for competitions... I’ve been driving it for more than half a year now and no changes in the design have been noticed yet...
How to choose parts: average prices
If you carry out a complete re-equipment of a Chevrolet Niva with the installation of power steps, then the cost of work at a service station will exceed 15,000 rubles. If you repair it yourself in parts, you can save more than 10,000 rubles. If you use a profile pipe to strengthen the sidewall and suitable steel sheets for the power stage, then the cost of the material will not exceed 2,000 rubles.
Body sills
Original replicas of Chevrolet Niva are produced directly by the workshops of AvtoVAZ, KamAZ and dozens of companies. In the production of the threshold and amplifier, low-carbon steel is used; the parts are not galvanized, but are covered with transport primer.
Original replicas fit in size and in most cases do not require additional trimming or straightening. Replica cost:
- Threshold left, right from AvtoVAZ from 3,000 rubles. thing.
- Perforated amplifier - 1200 rub. thing.
Plastic covers
Plastic body kits and trims are produced by dozens of companies. When choosing, take into account the year of manufacture of the car and the exact dimensions so that you do not have to cut the plastic yourself. The cost of the kit, which includes self-tapping screws if the installation is carried out with bolts, auto glue if the part is glued to the main threshold, starts from 300 rubles.
Protective pad
Protective parts are made of stainless steel and additionally chrome plated. The cost of power protection for Niva starts from RUB 3,000. for a set of two parts. Certified body elements can cost from 10,000 rubles. for a set of threshold protection with overlays and power steps.
Sale of towbars and legal installation: is it so difficult to find?
I can’t say specifically how much these or those thresholds cost. There are a lot of options, including a Boomer design and some unique designs, the prices of which are prohibitive.
But you can start with painted plastic parts. Installation is extremely simple; replacement is completed in a matter of minutes if the previous ones were damaged. If you prefer the repair option, that is, there are thresholds that can be restored but provide increased protection, take steel or chrome-plated products. The plastic is purely for decoration, so they will only get in the way when driving off-road.
Installation methods
If you purchased a set of thresholds for the Niva, you should first find out what installation method they are designed for before purchasing.
There are two connection methods in total.
Thresholds are beautiful and practical
Quite often thresholds are installed on the Niva 2121. They are an excellent addition to the appearance of this “high” car and allow you to increase the convenience when getting children or women in heels into the car. In addition, the elements perform certain protective functions, protecting the sides of the car from moisture and minor damage. In case of minor collisions, these elements allow the impact force to “not reach” the door.
Thresholds are produced simply in the form of pipes, with plastic, rubber or metal gaskets (steel, aluminum). There are also options “with a tread”, when a part is allocated on the pipe in order to place your foot. Extreme enthusiasts believe that if you climb somewhere up to your belly in car 21214, then the rapids provide an opportunity to find a foothold when getting out of the car. Cheaper models usually have plastic plugs on the ends of the pipes and last less time.
Thresholds act as steps
Thresholds are usually hung in jacks, but craftsmen sometimes weld them to 2121 or 2131, which makes it possible to obtain additional rigidity and protection during impacts from the rear or front. After installing the thresholds, you cannot use a standard jack; you have to buy a hydraulic one.
If the thresholds are installed in connection with the side members (the side members are drilled through, a pipe is inserted and welding is done on both sides), then a “power version” is obtained, which can be “propelled” using a rack jack if the Niva 2131 sits in the mud.
What are thresholds for?
Car thresholds are one of the most vulnerable parts. They experience increased loads and may fail. Cars in which women and children are frequent passengers are at risk - children do not watch where they are, and constant contact with stilettos and other high-heeled shoes contributes to accelerated wear. Special linings will partially solve the problem.
Thresholds for Niva can be used in their pure form or with decorative overlays. For self-production of elements, a profile pipe is usually used.
Decorative elements made of stainless steel have a significant service life and look attractive. Manufacturing is carried out for specific car models. If the sills themselves give the car an attractive appearance and increase comfort when entering, then decorative overlays protect them from damage and extend their service life.
There are two types of pads:
- lower;
- internal.
Fastening is done using 3M tape; other methods are used less frequently. If you plan to protect finished structures with pads, first remove dirt and degrease. The procedure must be carried out at a temperature of 18 degrees or more. When the garage is very cold, the lining is first glued and then heated using an industrial hair dryer.
Strengthening thresholds
Power thresholds are made from a profile pipe with a cross-section of 3 mm. The procedure is performed as part of a standard replacement when the old products have served their purpose. Strengthening benefits:
- improving the functionality of the Niva’s load-bearing body;
- corrosion protection;
- there is no need to do power steps.
The execution procedure is similar to that described above, only the steel profile is additionally welded. Motorists on the forums write that the work is labor-intensive and long, so it’s easier to immediately buy a reinforced unit. Similar services are provided at service stations.
Features of garage repair
Hobbies in times of crisis
Sooner or later (better late), corrosion begins to take over on cars, and you have to move from cosmetic methods (primer + paint) to surgical ones (cutting and welding). I hope this small instruction will help you figure out what needs to be changed and in what order, what you need to buy, and, in general, what everything looks like inside.
So. There is a need to replace the thresholds on your car.
Before starting work, it is necessary to conduct an inspection and find out the extent of the damage. To do this, we lift the car, put it on supports (ATTENTION! OBSERVE SAFETY) and, armed with a thin screwdriver, begin to explore.
Let me take a short detour into the design of the car in order to decide where to “explore” with this very screwdriver.
Complete replacement
Thresholds on Niva Urban and other models are completely replaced in case of severe wear. Sequencing:
- Cut off the old structure, inspect it, assess the condition of the unit.
- Trim the reinforcement in the central parts of the holes.
- Cut off the old element that is used to connect to the floor covering.
- Prime the internal parts of the system.
- Cut the profile to the required length, weld the ends, weld them to the amplifier.
- Make an insert without removing the stand, and weld the joints.
- Take the original threshold, cut off about 2 cm along the bottom, make holes with a drill and weld everything in place.
- Raise the car to weld a new connecting element.
- Weld part of the front fender.
- Fill and prime the joints.
If everything is done correctly, the homemade elements will look like originals and will harmoniously complement the exterior of the vehicle. A machine is used for welding with the spar.
Installation features
When the original thresholds are worn out or rotten, new ones are required. The replacement procedure is carried out according to the following scheme:
If everything is done correctly, the new homemade thresholds will look no worse than the original ones, and will also harmoniously complement the design of the vehicle’s exterior. The same welding is used for connection with the spar. You can use 2121 channels on the Niva instead of a threshold - whichever is more convenient.
Assembly options
The first step is to measure the distance for the parts. Using the subframe drawings, we assemble the structural parts according to the measurements obtained. Here are three build options:
- A simple version of the Niva-Comfort type frame, where you only need 5 main parts and a couple of fasteners for them. It is assembled from five square-shaped channel pieces with an additional reinforcement strip. The ends of the four parts are bent into the frame and holes are drilled into them for bolted connections. The frame parts can be welded or bolted together. A more complex design consists of almost a dozen parts and is assembled according to three drawings.
- In this homemade version, one wide channel is used as a basis, in which there will be a hole exactly for the transfer case. On the sides of the channel there are large corners, and at the ends there are shelves made from smaller corners. All parts are connected exclusively by bolted connections. This design protects the bottom of the machine well, but is more labor-intensive for manual production. The great advantage of this particular option is the installation of engine crankcase protection, which can be connected to the subframe; in addition, the protection of all parts around is improved.
Chevrolet Niva thresholds: type, installation, repair
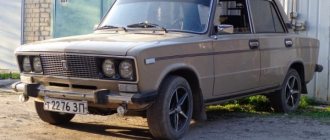
The Chevrolet Niva, as you know, belongs to the SUV class, which makes it clear that ride height is one of the most important factors for a crossover. But today we will not talk about ground clearance at all, but about such additional devices on the Chevrolet Niva as thresholds. Standard Shevik models come from the assembly line without thresholds, but they can additionally be installed later. About how this is done, why, and how, in general, the product is repaired and replaced? We will consider all this in today’s topic of the article.
- 1 Why are thresholds needed 1.1 How to install?
- 1.2 Repair
It is not at all necessary to install thresholds on a Chevrolet Niva car; this is often done during the modernization or strengthening of the vehicle. But why are thresholds so attractive that every owner of even a passenger car wants to install them? The main purpose of these products is to perform the following functions:
- Thresholds protect the car from small stones and dirt falling from under the wheels onto the side surface of the body, thereby preventing the appearance of scratches, dents and other deformations. The most important function is to protect the exterior of the body.
- Since the Chevrolet Niva has considerable ground clearance, the threshold is an excellent step for the driver and passengers. This type of footrest is especially useful for children.
- Thresholds, in addition to everything else, perform another important function - improving the design of the vehicle. Indeed, no matter what type of footrest is installed, the car ends up with an elegant and sophisticated look. Judge for yourself in the photo below.
Useful video
The choice of elements depends solely on the wishes of the owner and the conditions of use of the car. Homemade threshold protection for Niva 21214 also exists, but, as experienced Niva owners say, production costs and time do not outweigh the purchase of factory parts.
At the time of its appearance on the market, the Niva was a comfortable car, equipped with an independent front suspension. Now the machine is used less often, but it has an audience of admirers. You can make Niva thresholds with your own hands from a standard set of components and tools. The work is simple, but requires some skill.
Thresholds on Niva: do-it-yourself installation options, photos, drawings
Hello! You all know about the existence of such a car as the Niva. Moreover, this crossover is produced by domestic and foreign manufacturers represented by AvtoVAZ and Chevrolet, respectively.
Today I would like to equally touch on the VAZ and Chevrolet, since all the proposed options are perfect for the domestic version of the crossover, for the almost American one. Still, Chevrolet is a brand from the USA. But that's not the point.
There are such elements as rapids on the Niva. This is special additional equipment aimed at performing several functions simultaneously. It all depends on what thresholds you decide to set. Therefore, I want to tell you about such overlays, what they are like, how installation is carried out and whether it is possible to make them yourself using available materials, drawings, video and photo instructions. Go!
Why is this necessary?
We have already discussed with you tuning Chevrolet Niva, where I suggested installing thresholds and a body kit as a solution for external modifications. But he didn’t tell anything in detail about them. It's time to fix it. In addition, the installation of such elements is becoming increasingly popular. They allow you to enhance the visual effect, as well as provide more important protective properties.
No one forces you to do or install anything with your own hands. This is a solution for those who do not like the standard appearance of the Niva and want to make some changes. If in doubt, go to the virtual 3D tuning program, try on different thresholds and other elements on the car to understand how it might look in reality.
What Nivas do you know? I can remember the following:
These are all good cars that could benefit from additional sill installation.
They have several main functions:
- Protecting the car from stones and other objects flying out from under the wheels. It is because of them that scratches appear, then chips and the process of corrosion of the exposed metal begins;
Protecting the thresholds with appropriate elements is considered a competent, although not mandatory, solution for the Niva.
If you decide to install a lift kit for your Niva, or you are going to additionally install a power bumper, it would be logical to complete all this tuning by installing thresholds for the appropriate protective purpose.
Suggested options
There should be no problems with where to buy such elements. Go to Avito, browse the Internet, or just go to auto parts stores. The assortment is now huge, and the price is reasonable.
The question is what is your goal when setting thresholds. The type of elements directly depends on this.
In total, 3 categories of thresholds are offered for the Niva.
- Decorative. These are plastic covers that are mounted on the sides of the car. They are somewhat similar to car moldings in that they are easy to install and inexpensive. They have certain protective properties, since plastic prevents damage to the car from small stones, dirt, etc. You shouldn’t expect help from them off-road. Moreover, there is a risk of damaging and breaking them, since plastic is cheap and fragile;
Technical tuning of Niva
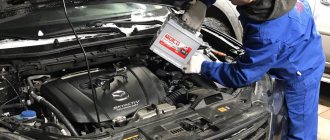
First of all, we started work with the technical part. To begin with, we increased the flow areas of the valve seats, replaced the original valves with lightweight ones, and installed new valve guides. It was also decided to increase the cross-sections of the intake and exhaust channels of the manifold and the block head. This was done in such a way as to ensure mating of the collector and head.
Next, we decided to install a new carburetor: Solex, which has 24-26 diffusers, was perfect for these purposes. Instead of the factory ignition system, we installed an electronic one equipped with a Hall sensor.
Then a different camshaft was installed in the head, which allows for traction at low as well as medium speeds. Only the crankshaft, rings and pistons were left from the original ones for the Niva. Since the power eventually increased significantly, a different radiator was required, with a larger cooling area. True, in the end we had to remove the standard cooling fan by as much as 20 mm.
Since it was necessary to get an SUV for hunting and fishing, the suspension was also affected. So, the front travel was increased by 45 mm. The result was an approximately 35mm suspension lift, which made it possible to install 205/70 R15 tires. The wheels were installed with ET-40, but we still recommend installing wheels with ET-20: in this case, the chassis bearings will last much longer, and the body kits will be easier to install. Springs from a Chevy Niva were also installed in front.
Long-travel shock absorbers from Rancho were installed at the rear (by the way, shock absorbers from the same manufacturer were also installed in the front). And to provide the necessary lift, they installed springs from the “four”.
It was also necessary to ensure stable and normal rebound operation and maintain the viability of the shock absorbers, so we welded a glass inside the lower spring support (its height was 45 mm).
We also trimmed the front arches in various places in order to provide the front wheels with sufficient turning, and also install body kits later.
We also worked on the brakes: they installed a vacuum booster. To do this, it was necessary to lengthen the master cylinder rod, and attach the amplifier itself to the bracket.
Don't forget that we are talking about preparing a real SUV. Therefore, among other things, the car needed to be strengthened. Thus, additional metal boxes were placed on the rear axle (metal thickness was 3 mm)
We also installed a disk lock in the gearbox with a tension of 3.5 kg.
As part of the strengthening, the following work was also carried out:
- a metal stiffener and a lower metal semicircular box were welded onto the upper rods;
- 3 mm metal was applied to the front spar up to the place where the seats (front) were attached;
- the most problematic areas of the body - the joints of parts - were thoroughly welded;
- Finally, the entire front shock absorber bracket was made of metal.
During the technical tuning, we also installed another mechanical box - taken from the “six”, replaced its mount and installed a longer and curved lever.
Types of body kits for Niva 2121, 2131, 21214
Body kits can be divided into two types – power and plastic. The first not only protects the body of the Niva 2121 from damage and chips in difficult harsh conditions, but also has an auxiliary function. Most protective body kits are made of metal. The second type of body kit is plastic, it is installed mostly for beauty. And now about each in more detail.
Power bumper
It was born almost half a century ago, representing a simple channel. Many car enthusiasts easily cooked it in their garage with their own hands. With the advent of foreign SUVs, the appearance of the power bumper began to change. Now the power bumper comes in front and rear. Modifications of the models on the market meet the various needs of the Niva 2131 car owner.
Types of bumpers:
- These body kits allow you to install a winch; for this purpose, there is a special platform in the middle of the bumper. A winch is a must-have for any jeeper. If you get stuck in impassable mud, you don’t have to wait for help, but climb onto the nearest tree trunk.
- There is a place for a hi-jack. This useful device will help pull the Niva 2121 out of the muddy mud in which the wheels are firmly stuck - it works on the principle of a jack.
- With or without kangaroo.
- It may be provided with jack stops.
- Towing eyes are installed.
- Branch cutters can be attached.
- The front bumper frame can become a holder for additional lighting.
- Power bumpers allow you to cut down small trees and undergrowth if necessary.
However, the presence of various models of bumpers does not mean that auto mechanics have stopped making body kits with their own hands. Although, such reinforced devices, not provided for by the factory design of the vehicle, can do their owner a disservice.
The law does not directly prohibit their use, however, when undergoing maintenance, the VAZ 2121 car will probably be “wrapped”, and in the event of an accident, the guilt of the driver with a makeshift bumper will be in doubt. In any case, when installing a power bumper, make changes about the vehicle in the title.
The rear bumper also has its own characteristics and varieties.
- It could simply be part of a metal pipe.
- The pipe may have corners for lighting.
- The corners themselves can act as a power bumper.
- The metal base can be equipped with a platform that allows you to stand on it.
- The pipe has a grille to protect the rear parking lights.
Rear body kits are installed, rather, for protection within the city from unexpected actions of drivers from behind.
Thresholds
In everyday life, thresholds serve for the convenience of the owner and passengers, allowing women and children to sit in the VAZ 2131 interior. They are made of metal pipes covered with a rubberized gasket.
Active lovers of “rides” in thickets and windfalls noted that the rapids become a fulcrum when exiting the car, when the “Niva 2121”, plunging its wheels into a ton of mud, sits askew on its belly. Particularly “advanced” jeepers are able to deftly turn the car ninety degrees around its axis on a tiny spot in the forest thanks to power thresholds. To do this, you need to drive up sideways to a thick tree and rest the center of the threshold against it, and then turn the wheels all the way in the right direction and sharply give the gas.
Minus. After installing the thresholds on the VAZ 2131, 21214 models, you should purchase a hydraulic jack, since it will not be possible to use a standard one. Plus. The sills can provide an additional protective frame to which the hi-jack can be hooked if they are welded to the side members. To do this, the side members need to be drilled through and welded to the sills using pipes on both sides.
Stairs to the roof
The ladder is made of metal and welded to the back door. With its help you can reach the roof, stow and secure cargo and carry out work on the trunk. And also climb it if the car is loaded somewhere. This body kit can withstand weight up to 100 kg. In addition, the ladder to the roof will be appreciated at the car wash when the Niva 2121, dirty to the ears, comes to them after a ride.
"Basket" on the roof
An indispensable thing for jeepers who prefer traveling rather than just wallowing in the mud. Allows you to take with you much more luggage than the standard trunk of the Niva 2131 can accommodate. In addition, it is convenient to mount a “working” light on the “basket”, both front and rear.
Cons: the center of gravity changes, the VAZ 2131 becomes more rolly. With a successful combination of circumstances, he may even “lie down to rest” - fall on his side, for example, in a rut. In addition, things immersed in the body kit are open to rain and snow.
Making a Niva 2121 elevator with your own hands, drawings, dimensions
We will tell you how to properly perform tuning modifications in this material.
Do-it-yourself elevator - drawings, diagrams, sizes, types of kits. Lifting varies in the degree of intervention in the standard structure. For some, it is enough to raise the SUV by a few centimeters, and for others by as much as 20.
Extreme tuning – maximizing cross-country ability for traveling on severe off-road conditions.
- Regular jack
- Hijack jack
- Spring puller
- Balloon wrench
- Ratchet socket set
- Set of open-end wrenches
- Mount
- Wooden deck (stump)
Raise the front end. You can safely cling to the standard bumper, only the jack is installed under the pipe securing it. By removing the wheel, we get full access to the lever and spring. The front suspension 21214 is made using a double wishbone design, which simplifies the task.
The lever travel is limited by the shock absorber. Unscrew its fastening and move it to the side. Next you need to free the suspension from the anti-roll bar. The mounting bolts may become stuck due to corrosion, so we will use a penetrating liquid (such as WD-40). The stabilizer silent block clamp can be pryed off with a pry bar.
Then disconnect the hub from the lower arm. To do this, you need to jack up the suspension and fix the steering knuckle of the wheel. You can tie it with wire. Then unscrew the 3 mounting bolts and release the ball joint.
We fix the spring with ties and lower the jack. We remove the old elastic element. In some cases, it is enough to simply lower the lever with your foot, and the spring will come out without the use of ties.
Remove the upper support rings from the old springs. With their help, the elastic element is centered in the cups.
By manipulating the jack, we “catch” the mounting holes for the stabilizer bar clamp. With its bolts it should get into the normal place without distortion. After such modernization, the clearance increases by 30-50 mm. This is enough to install wheels of larger diameter, and the bottom will still rise above the ground.
The rear axle of the Niva can be lifted by installing spacer supports of increased height. When using a size of up to 50 mm (according to changes in front end height), no modifications to the rear axle are required. By lifting the rear axle, maintenance can be carried out on the axle and brake system.
The handbrake cable may need to be replaced. It is lengthened by a couple of centimeters. Otherwise, the Niva lift will lead to increased wear of the brake pads in the rear drums. Disconnect the lower shock absorber mounts and lower them until the springs stretch.
We take out the elastic elements and knock off the support rings from them. We clean the upper cup and carry out anticorrosive treatment. We install new supports of increased size and seat the springs using a jack. We fasten the shock absorbers, assemble the axle, and mount the wheels.
Making a Niva-2121 elevator with your own hands, the drawings, the dimensions of which are freely available, will not be difficult. Thanks to such a trick, you can make your car more stable on the road and overcome a lot of obstacles with it. Of course, to bring a truly high-quality Niva elevator to life with your own hands, you will have to work hard.
The process will take time and require effort, because even the easiest elevator requires a significant immersion in the technical aspects of the issue. However, the end result will live up to all expectations, allowing the modest Niva to show its exceptional side.
Dimensions and design description
The thresholds made of corrugated pipe on the Niva have a mass of about 150 kg, the main load falls on the front suspension, which can negatively affect its service life. The production technology is simple - a 50 mm pipe is cut and connected in the bending areas using bends. Then they are cut to form the desired angle and scalded in a circle.
Joints in visible places during the work are sanded using a grinder.
Pipes of standard sizes 15, 20, 25 can be conveniently processed using a pipe bender. It makes sense to remove the front bumper, hang a new element on standard fasteners - more powerful and heavier, it can be made from pipes, and install an electric winch on top. The protection for the pallet is stretched to the cross member from the bumper - it, together with the other elements on the bottom, acts as a ski. This makes it possible to overcome obstacles casually; a small stump on the road is not scary.
For manufacturing, pipes cut in half are used, connecting a pair of transverse pipes by 20. Bolts are used for fastening. One edge is fixed to the front bumper by the arch to the side members and using special brackets.
Suspension. not radically improve?
Since the Niva is an all-wheel drive SUV, when tuning it is necessary to pay attention to the suspension. The first step is the Niva elevator - increasing the ground clearance
This will create an impressive reserve for overcoming various obstacles. The concept of tuning the Niva 2121 chassis, as well as a suspension lift, includes:
- Installation of spacers between suspension elements. You can make them yourself or buy them in stores.
- Installation of shock absorbers "Rancho"
- Installation of springs VAZ 2104
- Strengthening the front and rear axles using steel boxes
The Niva 2121 suspension lift is a simple process from a technological point of view that can significantly increase the vehicle's cross-country ability. It must be remembered that lifting is directly dependent on the size of the wheels; the larger their diameter, the more significant modifications will be required. Therefore, it is necessary to maintain a balance so that tuning the Niva 2121 suspension with your own hands does not turn into a headache.
Tuning of the Niva 2121 transfer case is also necessary, although this process is largely a refinement. The main problem is the backlash of the front and rear axle shafts. It can be eliminated by installing new components:
- Bearings (it is better to install a double-row variety)
- Lids
- Valov
- Flanges
A good solution would be to strengthen the shaft support. To do this, instead of the original flange, install a modernized one, which has an additional bearing and oil seal.
The second common problem with transfer case is leaking seals. The solution here is extremely simple, you should correctly install high-quality oil seals and the childhood disease of the unit will be eliminated.
The third problem is the correct alignment of the transfer case in the horizontal and vertical plane. This is necessary to reduce vibration and, accordingly, wear of the moving parts of the unit. You can do the alignment manually, but it takes a lot of time, requires patience and the result does not always meet expectations.
The VAZ-2121 suspension was quite revolutionary for the seventies - before the Niva, such technical solutions were not used in off-road vehicles.
The front suspension is independent, on wishbones, equipped with springs working in pairs and hydraulic shock absorbers. The design includes a stability stabilizer.
The rear suspension is dependent, with mounting to the rear axle beam and a Panhard rod. The suspension is provided by hydraulic shock absorbers and springs similar to those used in the front suspension.
The simplest and very justified step for those wishing to tune the Niva 2121 is to replace sets of springs and shock absorbers. The latest devices are now gas-filled, they are more reliable and handle irregularities better.
You can also recommend strengthening the shaft supports and the front and rear axles by installing special steel inserts - boxes, as well as increasing the ground clearance by using special inserts between the suspension elements.
All these measures will somewhat reduce the discomfort of driving on a bad road, slightly improve the ride and off-road qualities of the car, but they will not be able to radically change anything.
If you need really serious changes, you should think about replacing the rear suspension of the outdated Panhard system with a more modern independent design. This will not only improve the smoothness of the ride, but also significantly improve the vehicle's handling characteristics, especially on hard road surfaces.
Generator - device, characteristics, operation check
Start the engine, let it run for a few minutes, then, pressing the gas pedal, bring the crankshaft speed to 3000 rpm.
Turn on the high beam headlights, heated rear window, and heater fan. Measure the voltage at the battery terminals, which should be above 13.2 V for generator 9412.3701 and 13.6 V for generator 371.3701.
If this is not the case, the voltage regulator with the brush assembly, the generator windings are faulty (open or shorted) or the contact rings of the field winding are oxidized.
The removed voltage regulator of the generator 9412.3701 can be checked by connecting a lamp (1–5 W, 12 V) between the brushes, and a power source to the “D” and “ground” terminals (DC only, “minus” to ground!) , initially with a voltage of 12 V, and then 15–16 V.
In the first case, the lamp should be on, in the second - not. If the lamp lights up in both cases, there is a breakdown in the regulator; if it doesn’t light up, there is a break or broken contact between the brushes and the regulator terminals. In both cases the regulator should be replaced. To check the generator regulator 371.3701, the current source should be connected to terminals “B” and “C” (“plus”) and “ground” (“minus”).
To check the valves of the rectifier unit, disconnect the wires from the battery, generator and from the voltage regulator terminal(s).
Connect the “plus” of the battery through a lamp (1–5 W, 12 V) to terminal “B” of the generator 9412.3701 (to terminal “30” of the generator 371.3701), and the “minus” to its body.
If the lamp is on, then there is a short circuit in both the block of “positive” and the block of “negative” valves.
To check the short circuit in the “positive” valves, connect the “plus” of the battery through a lamp to the “B” terminal of the generator 9412.3701 (with the “30” terminal of the 371.3701 generator), and the “minus” - to the terminal of one of the phase windings of the stator. If the lamp is on, one or more positive valves are broken.
To check the short circuit in the “negative” valves, connect the “plus” of the battery through a lamp to the terminal of one of the phase windings of the stator, and the “minus” to the generator housing. If the lamp is on, one or more negative valves are broken or the stator windings are shorted to the generator housing.
To prevent short-circuiting of the windings, remove the generator from the car and, having disconnected the windings from the voltage regulator and rectifier unit, check their short circuit to ground with a lamp or ohmmeter. The generator valves can also be checked with an ohmmeter without connecting the battery and test lamp.
The short circuit of additional diodes can be checked by connecting the “plus” of the battery through a lamp to terminal “D” of the generator 9412.3701 (to terminal “61” of the generator 371.3701), and the “minus” - to the terminal of one of the phase windings of the stator (to one of the mounting bolts of the rectifier block ). If the lamp is on, one or more additional diodes are broken.
A break in the main valves is determined by a sharp decrease in the output current (voltage drop under load). However, it can also be caused by an open or shorted circuit in the generator windings.
A break in the additional valves can be determined by the low voltage at plug “D” of generator 9412.3701 or plug “61” of generator 371.
3701 (below 14 V) at low and medium generator rotor speeds.
The serviceability of each diode (main or additional) can only be determined with a removed rectifier unit using an ohmmeter or a test lamp. If the rectifier unit fails, it is recommended to replace it as an assembly.
And also interesting: 4x4 tuning professionally. Tuning center 4x4, Moscow and region
It is possible to replace individual valves, but the main valves will require repressing them in the holder - an operation that requires care and skill.
Read news about the new field
- Niva generator transfer bracket drawing
- Niva Chevrolet front hub repair
- Niva Chevrolet where is the starter relay located?
- Do-it-yourself Niva suspension lift. How to lift the front and rear suspension of a Niva car?
- Generator Niva 2121, 21213, 21214: which one is installed, replacement
- Generator Niva 2121, 21213, 21214: which one is installed, replacement
- Generator Niva 2121, 21213, 21214: which one is installed, replacement
- Generator Niva 2121, 21213, 21214: which one is installed, replacement
What are the dangers of using homemade thresholds?
The main difficulty is the complexity of their production. Removable and non-removable structures must be made in accordance with the regulations, using welding, drawing and other technologies. You can save your budget, but you need the appropriate skills to carry out the work.
The top flange will be durable, practical and aesthetic if it is made from high quality raw materials. The same can be said about the shelf, stamping under the door, sidewall, bottom flange. If the work is performed incorrectly, parts may sag, rust, and as a result their characteristics will change.
The fastenings are made reliable, otherwise the thresholds may fall off, which will increase the risk of injury. The tightness of the connections prevents moisture and dirt from entering the joints. So there are no risks when using high-quality homemade thresholds, but making them that way is not easy. You need to work according to the described scheme and use high-quality materials.
What thresholds should I install on a Chevrolet Niva?
The original number of the right threshold is 2123-5401064, average price is 3025 rubles, the left one is 2123-5401065, average price is 3108 rubles.
The threshold is susceptible to rust and requires replacement.
The car is placed on a flat surface. We remove the front fender.
Unscrew and remove the doors.
We cut off the rusted threshold using a grinder. The grinder must follow the lines exactly (this greatly simplifies the cutting process).
Trying on a new threshold.
We fix the new threshold using a clamp or clamps. Before carrying out welding work, to ensure correct installation, you must first hang the doors.
We carry out welding work in compliance with fire safety rules.
Source
Thresholds made of profile pipe 80x40 — Lada 4x4 3D, 1.7 l., 2003 on DRIVE2
I had a presentiment for a long time that I would have to do this - although I really didn’t want to. But their time has come...
On the last rides, the long longitudinal rod was torn off from the bottom. Somehow we made it to the garage. While we were driving, the car behaved strangely: the bridge tried to turn, but the short thrust still held. When I crawled under the car and started poking it with a screwdriver, I realized that everything was held there by mastic and dried clay. I came to the difficult decision that I needed to weld the sills and strengthen the fastenings.
We decided to weld a profile pipe. At work I spent a lot of time studying the issue (thanks to my fellow drivers in the field) and finally got an idea of “how, what and where” and drew up a work plan. Over the weekend we bought a profile pipe 80x40x2mm L-3000mm, as well as threshold-to-floor connectors - 2 pcs.
Left threshold
Right threshold
, after opening it I saw that the amplifier was more or less alive, although I literally disassembled the inside of the threshold with my hands. I cut the amplifier 35mm below the line where I cut the threshold, so that a profile pipe could be welded onto it, and both pillars coming out of the body:
At the same time I cut out the rotten part of the floor:
Muted profile:
The front pillar was welded through a 4mm steel plate. The rear one docked perfectly.
I also decided, instead of the standard platform for long rods, to weld cross members from the same profile between the threshold and the spar:
I also welded a 50x50x3mm profile pipe into the front connector of the threshold and spar:
On both sides I closed the threshold with the floor with connectors (that is, for one threshold - two connectors), and I already invented the corners and ends from scraps. After everything was welded, I drilled 8mm holes to fill the sill cavity with Movil through them. The holes were closed with purchased rubber plugs.
Everything is top coated with rust converter, then primer with zinc and then mastic.
I also made a hole in the rear part at the lowest point to drain water or condensate, and also with a plug.
www.drive2.ru
How to make a pipe part yourself
You can make Niva thresholds from a profile pipe with your own hands to replace worn-out structures. Cars that constantly move off-road are at risk. Example - it is easy to tear off a long longitudinal rod from the bottom while driving over rough terrain with stumps, snags, etc.
The unit needs to be checked regularly - if the threshold is there and holds, it is not a fact that everything is in order with it. Fixation with mastic and dried clay is not what is needed for a safe and comfortable ride.
To make thresholds from a profile pipe, you need to prepare 80x40x2 mm products with a length of 3000 mm, and immediately buy a pair of connectors for the Niva. Reinforcement elements are replaced only when the old ones can no longer be used. If you do not plan to take new ones, cut the current products approximately 35 mm below the cutting line - this will allow both posts and the pipe profile to be welded.
At the bottom of the structure, you can additionally drain condensate and water. A small hole is enough; it is also closed with a plug. It is convenient to use a profile instead of thresholds; it will cost about 2 thousand rubles.