The flywheel from a VAZ 2106 car is removed for replacement or repair if the ring gear is damaged or if the friction surface is damaged or severely worn.
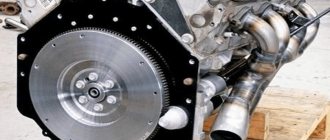
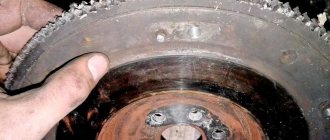
The flywheel is installed at the rear end of the crankshaft and secured to it with six bolts: 1 - ring gear; 2 — fastening bolt; a is the friction surface. You will need: a screwdriver, a 17mm socket wrench, a torque wrench. 1. Remove the gearbox from the VAZ 2106 (see section 5 “Transmission of the VAZ 2106”).
2. Remove the clutch housing with the pressure plate and the driven clutch disk from the flywheel (see section 5 “Transmission of a VAZ 2106”). 3. Screw the bolt into the lower left threaded hole of the clutch housing mount, secure the flywheel from turning by resting the screwdriver against the ring gear and resting it on the installed bolt and bipod of the steering mechanism, and unscrew the six bolts securing the flywheel.
4. Remove the support washer while holding the flywheel. 5. Remove the flywheel. 6. Check the condition of the ring gear; If the teeth are damaged, replace the flywheel. 7. The surfaces of the flywheel mating with the crankshaft and the clutch driven disc must be free of scratches, burrs and completely flat. If there are scratches on the working surface 3 of the flywheel under the clutch driven disc, grind this surface, removing a layer of metal no more than 1 mm thick. Then grind surface 2, maintaining the dimension (0.5+0.1) mm and ensuring parallelism of surfaces 2 and 3 relative to surface 1. The tolerance for non-parallelism is 0.1 mm. After grooving, install the flywheel on the mandrel, centering it along the mounting hole with the emphasis on surface 1, check the runout of planes 3 and 2. At the extreme points, the indicator should not show runouts exceeding 0.1 mm.
8. Install the flywheel and the removed components and parts on the VAZ 2106 car in the reverse order of removal. The flywheel can be installed on the crankshaft in two opposite positions, determined by the location of the mounting holes. However, at the factory it is balanced together with the crankshaft, so it must be installed strictly in its original position. For correct installation, a mark is made on the flywheel
in the form of a conical hole, which should be oriented when installed in the same direction as the connecting rod journal of the fourth (first) cylinder.
If the crankshaft was turned after removing the flywheel, set the piston of the fourth cylinder to the TDC position of the compression stroke (see “Installing the piston of the fourth cylinder to the TDC position of the compression stroke”). and install the flywheel on the crankshaft, turning it with mark a
vertically upward. Tighten the flywheel mounting bolts evenly crosswise with the torque given in Appendix 1. “Tightening torques for threaded connections of VAZ 2106”
Welcome!
The engine flywheel is one of the most important parts in the design of a car engine, and therefore, if the flywheel is heavily worn, or if it is installed incorrectly, the car begins to “slip” when starting from a standstill - this means that when starting from a standstill or while driving, the speed is the engine will jump and the car itself will not accelerate, but will only roar.” Therefore, the flywheel must be changed in a timely manner, since driving on a worn one will bring pleasure but only bring discomfort.
Note!
To replace, you will need to stock up on: A screwdriver, as well as an L-shaped socket wrench and, if possible, take a torque wrench with you!
When should you replace the flywheel?
It must be replaced when:
How will the car behave with a worn flywheel?
- As noted earlier, the first thing that will most likely happen is that the clutch will slip on the worn flywheel.
- And also, most likely, when starting from a stop, the car will move, but this will be accompanied by strong vibration, which as a result will be transmitted to the entire car.
Dual mass flywheel
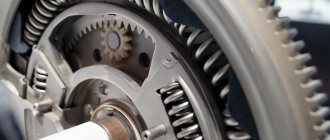
The damper flywheel has the more common name “dual-mass”. The dual-mass flywheel is used as a torsional vibration damper. The dual-mass flywheel consists of two cast-iron discs connected to each other by a complex spring system.
A dual-mass flywheel is used to absorb torsional vibrations, which ensures uniform operation of the entire transmission. This engine flywheel is particularly reliable, but when carrying out maintenance, it is strongly recommended to carefully check the condition of this flywheel.
How to replace the flywheel on a VAZ 2101-VAZ 2107?
Removal:
1) First, remove the transmission from the car. (For information on how to remove the gearbox, see the article entitled: “Replacing the gearbox”)
3) Next, secure the flywheel with a screwdriver so that it does not turn when unscrewing the bolts. After fixing, use a socket wrench to remove all six bolts securing the flywheel to the car engine.
Note!
Unscrew the bolts crosswise, because this will be much more convenient!
4) Now remove the flywheel itself and remove the support washer along with the flywheel.
Note!
When you remove the flywheel, be sure to look at the mark “indicated by the letter A in the photo” before removing it and then remember or take a photo of how the flywheel is installed relative to this mark in order to install the new flywheel in the same way! (Be sure to read the “” paragraph at the bottom of the article)
Installation:
1) First install the new flywheel in the same position as the old one. (Determine this position by the mark)
2) Then install all remaining parts in the reverse order of removal.
Note!
When it comes to tightening the flywheel mounting bolts, tighten them evenly, crosswise. And when all the bolts are tightened, check how the flywheel is positioned; there should be no slopes or distortions, otherwise this will lead to rapid wear!
Important!
After removing the old flywheel, try not to rotate the crankshaft, otherwise installing a new flywheel may be difficult.
Note!
But if you still crank the crankshaft, then in this case set the piston of the fourth cylinder to the “TDC - Top Dead Center” position! (For information on how to set the piston to the “Top Dead Center”, see the article entitled: “Installing the piston of the fourth cylinder to the TDC position”)
After the piston is installed, install the new flywheel in its place, strictly vertically with the mark up and nothing else!
For newbies!
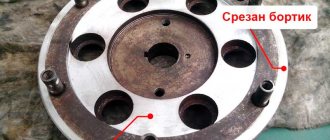
Question: Where is the friction surface of the flywheel, as well as the ring gear, and all six mounting bolts? Answer: A – Flywheel friction surface. 1 – Ring gear. 2 – Flywheel mounting bolts.
The flywheel is one of the main components of a car. Its main function is to transfer energy from the power unit (engine) to the gearbox. The product is a multi-component disk consisting of high-strength hardened metal. In appearance, the flywheel is somewhat similar to a gear, so finding it in a car will not be difficult.
Purpose
As we have already said, the flywheel transmits rotation from the car’s crankshaft to the gearbox. But this function is not the only one. The disc is able to effectively dampen vibrations of the crankshaft and smooth out the operation of the power unit, preventing its detonation.
The flywheel makes it possible to automatically start the engine (without using a curved handle). As a rule, when the ignition is turned on, the starter begins to rotate, which, in turn, turns a small gear. The latter turns the flywheel. And then the movement is transferred to the crankshaft. Another function of the “hero” of our article is the accumulation of kinetic energy, which allows it to be stored during acceleration and released during the process of stopping the vehicle.
But that's not all. It is thanks to the flywheel that it becomes possible to ensure a low idle speed, reduce the load on the power unit and thus save fuel.
Main faults and causes
Despite its visual reliability, the flywheel can also fail. However, defects and their causes may be different. Let's look at the most common options:
- Damage to teeth or their natural wear during operation. There may be several reasons for this phenomenon - the technology was broken during the assembly process, the starter is faulty (worn out), foreign “debris” got into the flywheel housing. In such situations, you can install a new ring gear, adjust or repair the starter, and restore the wiring.
- Flywheel beats appear. The causes of this problem include malfunction or natural wear of the clutch, the appearance of its slipping, long-term operation (natural wear), and gross errors during assembly. If such problems occur, it is necessary to check the strength of the beating. If the problem is insignificant, then you can limit yourself to surface treatment on a lathe. In cases where the runout is very strong, installing a new clutch or repairing an old clutch is required.
- The working surface is damaged. The reasons are the same as in the previous case. The way out of the situation is to install a new flywheel, tune or adjust the clutch.
- The integrity of the seating area under the crankshaft flange has been compromised. This can be caused by prolonged operation of the motor or errors during the assembly process. In this case, change the flywheel, check and (if necessary) change the crankshaft. Tighten the mounting bolts securing the crankshaft and flywheel as necessary.
- The threads for the bolts are broken (or worn out during operation). This could have been caused by installation errors and prolonged use of the car. The best solution here is to replace the flywheel. But if possible, you can cut a new thread and perform balancing. By the way, the latter work is very labor-intensive and does not always allow you to achieve the desired result.
Features of replacing the flywheel on a VAZ-2101-2107
So, when serious problems appeared (we described them above), you decided to install a new flywheel. There are two options - trust the experts at the service station or do everything yourself. We will look at the budget version - a do-it-yourself replacement. And really, why spend extra money if there are no difficulties in such work?
Proceed in the following order:
- Prepare the tools necessary to replace the flywheel. All you need is a torque wrench, a screwdriver (preferably one with a thick tube) and a set of socket wrenches.
- Remove the gearbox. Otherwise, you won't be able to get to the flywheel.
- Remove the clutch cover from the flywheel. Together with them, remove both disks (pressure and driven).
- Securely secure the flywheel with a strong screwdriver to prevent it from turning.
- Unscrew the six disk mounting bolts.
- Remove the flywheel (after removing the bolts, it should easily come out of the shaft). When removing, hold the support washer (put it aside for now). Please note that there is a special mark on the flywheel, the location of which must be remembered. When installing a new unit, make sure that the mark is in the same place (this is a very important point).
- Install the new flywheel and make sure its mark is in the correct position.
- Put everything back in the reverse order - screw in the flywheel bolts, put on the clutch cover and return the gearbox to its place. Pay special attention to pulling the bolts - they need to be tightened not one by one (as many beginners do), but “cross to cross”. This approach avoids accidental misalignment of the flywheel.
During the installation process, be sure to consider some recommendations:
First, while removing the flywheel, try not to allow the car's crankshaft to rotate. Otherwise, you will have more work;
Secondly, if the crankshaft does move, move the piston of the 4th cylinder to the top dead center position.
After the piston has been placed at top dead center, place the flywheel exclusively with the mark facing up (you can no longer rely on the previous sketches).
Conclusion
For some reason, many novice car enthusiasts are terribly afraid of the work of replacing the flywheel. But there is nothing complicated here. The most time-consuming part of the job is removing the gearbox. But the main thing here is attention and strict adherence to the operating instructions. All work takes no more than 2-4 hours. At the same time, you can save 3-4 thousand rubles, which will definitely be requested at the service station. The main thing here is self-confidence, utmost attention and strict adherence to the time-tested algorithm. Good luck.
4. Remove the support washer while holding the flywheel. 5. Remove the flywheel. 6. Check the condition of the ring gear; If the teeth are damaged, replace the flywheel. 7. The surfaces of the flywheel mating with the crankshaft and the clutch driven disc must be free of scratches, burrs and completely flat. If there are scratches on the working surface 3 (Fig. 4.5) of the flywheel under the clutch driven disc, grind this surface, removing a layer of metal no more than 1 mm thick. Then grind surface 2, maintaining the dimension (0.5+0.1) mm and ensuring parallelism of surfaces 2 and 3 relative to surface 1. The tolerance for non-parallelism is 0.1 mm. After grooving, install the flywheel on the mandrel, centering it along the mounting hole with the emphasis on surface 1, check the runout of planes 3 and 2. At the extreme points, the indicator should not show runouts exceeding 0.1 mm.
Rice. 4.5. Flywheel VAZ 2106: 1 - surface of attachment to the crankshaft flange; 2 — clutch mounting surface; 3 - supporting surface of the clutch driven disc
Tinting
Camera
Painting
Withdrawal procedure
- Remove the clutch pressure and driven discs.
- Using any available method, we mark the position of the flywheel on the shaft.
- Using a 17 mm socket wrench, unscrew the six bolts securing the flywheel, holding it from turning with a mounting blade or screwdriver, resting it against the protrusion of the cylinder block.
- Remove the washer and flywheel.
- If necessary, remove the upper cover of the clutch housing from the guide bushings.
Symptoms of a problem
Although the input shaft support bearing is an inexpensive part, replacing it is a labor-intensive process. And this is connected not so much with the difficulty of dismantling the rolling unit itself, but with the need to remove other parts and assemblies of the engine. To avoid wasting hard work, bearing failure must be correctly diagnosed. Signs indicating this type of malfunction:
- Noise coming from a running engine when the clutch is depressed. A similar rustling or rustling noise also appears when the release bearing fails. And if the noise from the latter is detected even with slight pressure on the petals of the spring diaphragm of the clutch basket, then the gearbox support bearing will make extraneous sounds only when the clutch is completely disengaged.
- Wear or jamming of the bearing due to lack of lubrication leads to the fact that the input shaft of the gearbox is subject to the action of torque even while the driven disk is completely removed from the flywheel. In fact, this manifests itself with the same symptoms as with a clutch that “drives” - it is difficult to engage first gear when starting from a stop, jerks appear when changing gears while moving, etc.
- An irregular knock that appears from the gearbox indicates destruction of the bearing cage. In this case, the balls can spill out or clump together, causing an unpleasant sound and causing an imbalance in the crank and gearbox input shaft.
Installation procedure
We install the flywheel in the reverse order in accordance with the mark made during disassembly. Before tightening the flywheel mounting bolts, apply thread locker to their threaded part. The flywheel must be installed on the crankshaft in only one position. If the mark made has been erased, the flywheel can be installed on the shaft according to the factory mark - for this purpose, a hole is drilled on the outside of the flywheel. When installing the flywheel on the crankshaft, the mark should be located opposite the crankpin of the fourth cylinder. Do not confuse the mark with the balancing holes, which are made with a larger diameter drill.
Where is the crankshaft bearing installed and what is it used for?
The bearing installed in the crankshaft flange is not part of the engine, but of the transmission. The main purpose of this assembly is to center and support the transmission input shaft - it serves as a front rotating support. Anyone who has ever installed a gearbox on a car is familiar with the crankshaft bearing - it is so difficult to get into its inner race with the shank of the input shaft. As for the high service life of the part, it can be explained simply. The fact is that the rolling unit only works when the clutch is depressed. The rest of the time, the crankshaft and gearbox input shaft rotate at the same frequency. Despite the low load, it is recommended to replenish the lubricant supply in the bearing when replacing the crankshaft rear oil seal, repairing the clutch, etc. This way you will delay the need for repairs for a long time.
What is used in VAZ cars?
It is not surprising that for VAZ cars, for example, such as 2112, 2114, 2110, as already noted, a variety of flywheels are used. In cars of this family, a conventional flywheel is used, not a dual-mass flywheel. True, for the representative of each VAZ family it is different, differing in the weight and size of the clutch disc.
So, all VAZ classics are equipped with a flywheel from 2101, Niva and Chevy Niva - from 21213. Eights are equipped with products from 2109. Tens, Kalinas, Priors, Grants use a flywheel from VAZ 2110. All types of flywheels, from VAZ of various families, for example such , like 2112, 2114, 2110, are distinguished by different seats, outer diameters and crowns. » alt=»»> The role and importance of the flywheel in an internal combustion engine is difficult to overestimate, and probably simply impossible. It is this that smoothes out jerks, creates normal conditions for the operation of the transmission and reduces vibration from the engine transmitted to the body. In order to increase its efficiency, various designs are used, although often the design in the form of a conventional disk works quite successfully in the engine.
How to remove and install the flywheel. Troubleshooting it
Detailed procedure for removing the flywheel on a VAZ 2110 car, its troubleshooting (identification of defects and their elimination if possible) and reinstallation. Detailed procedure for removing the flywheel on a VAZ 2110 car, its troubleshooting (identification of defects and their elimination if possible) and reinstallation.
Over time, our car has a significant mileage, problems with the clutch begin, and it deteriorates. Usually the flywheel does not require replacement until 200-300 thousand kilometers of the car or even more, but if it begins to fail after 50 or 100 thousand km, then you need to look for the reason for its rapid wear (this could be harsh driving, weather conditions or clutch defects that need to be repaired). The procedure for replacing the flywheel itself is not complicated, but it does require a certain amount of time, because because of this part you will have to dismantle the gearbox and disassemble the clutch (read about clutch repair on VAZ cars).
What is a flywheel in a car?
In fact, the engine flywheel is an integral part of several independent systems. Its functions include:
To better understand the principle of its operation and the capabilities that a particular device implements, it is necessary to consider each application case separately.
Removing and installing the Lada Priora flywheel.
They differ in the number of teeth on the crown of the VAZ 2101 - 129 teeth, on the crown of the VAZ 2110 - 128 teeth.
Crown 2101-1005115 VAZ 2101-2107 Weight - 0.62 kg Outer diameter - 277.5 mm Landing diameter - 256.795 mm Width - 12 mm Number of teeth - 129 Module - 2.1166
Crown 2112-1005115 VAZ 2110-2170 Weight - 0.672 kg Outer diameter - 278.5 mm Landing diameter - 256.795 -0.07 mm Width - 12 mm Number of teeth - 128 Module - 2.1166 Flywheel weight - 6.5 kg
Crown 2108-1005115 VAZ 2108 - 2115 Weight - 0.556 kg Outer diameter - 273.9 mm Landing diameter - 254.795 +0.725 Width - 12 mm Number of teeth - 128 Module - 2.1166
Symptoms and causes of malfunction
Due to difficult access to the flywheel, visual inspection of this gear of the gearbox is difficult, so car owners remember about it with the following symptoms:
- problems starting the engine;
- jerking, grinding and extraneous sounds when the bendix engages the flywheel.
Engagement of the ring gear with the starter
The reasons why teeth wear out are:
- defects in the manufacture of the flywheel - overheating of the toothed rim during landing leads to tempering of the steel, a decrease in strength, and an increase in the ductility of the structural material;
- non-parallelism of the axes - the gear ratio is very high, any deviation of the axis of the starter shaft from the axis of the crankshaft will lead to the development of a tooth involute on one side;
- violation of the tooth profile - over time, the transmission elements wear out, at the moment of gear engagement/disengagement, the profile is cut off completely;
- lack of lubrication - due to the design features of the transmission, it is physically impossible to apply lubricant to the bendix and the flywheel crown.
Tooth wear
In any of these cases, it is recommended to replace the flywheel crown. In some cases, bedix can grind off only part of the tooth from the outside, so it is enough to change the sides of the crown.
Attention: The flywheel assembly is not a symmetrical part; it will not be possible to turn it over due to the displacement of one mounting hole of the bolted connection, so you will have to remove the crown and turn it over to the side suitable for further operation of the gearbox.
Isn't it easier to buy a new one?
It may be simpler, but imagine the cost of this part. As a rule, if you change the whole thing, the price will be 5–6 times more expensive than buying just a crown. However, there are small problems - replacement is not an easy process and if you have never done it, you may simply install this part incorrectly, it will quickly wear off. Or you will “kill” the starter gear.
Therefore, the bottom line is that the replacement should be carried out by professionals, preferably at a service station, with a guarantee.
