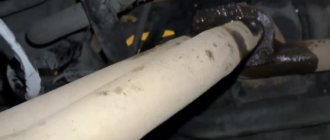
Block plane and broken gasket
Roughly processed plane of the engine block
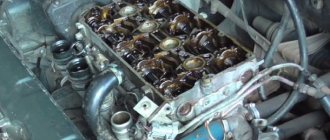
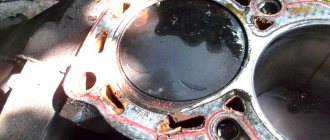
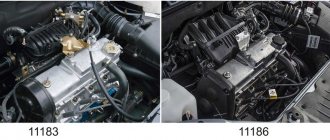
“Punctured” cylinder head gasket on Niva and Shnivy is a birth defect. At some point they just went en masse. There is no need to be surprised. With modifications to the engine to meet new environmental standards, the designers are pushing the fan operating temperature further and further. This gives us an element of “glow” ignition. At a mileage of 15-25 thousand, the cylinder head gasket breaks, and so on down the list. Antifreeze to oil, oil to antifreeze. What do they do in the Papuan service? They buy a Fritex metal bag, install it, and 10 thousand later the client comes back with a new one, with the same question. Or rather, with two. How long? And the classic “what should I do?” It is not the Niva cylinder head gaskets or bolts that are to blame, it is the factory quality of processing of the block plane and the cylinder head plane that is to blame. Below I publish a photo of one of the blocks. I personally changed the gasket on it twice until I found the optimal set, which I now recommend. The metal bag does not help, but rather hinders. It cannot be crimped and does not fill uneven surfaces of the block. You need a shrink gasket that will completely accept the topography of the surface and the bolts that will constantly press it. This is the reason why hardened bolts are not rolled here. For a long time, the plant installed the Yaroslavl metal package “Fritex”, and now they have switched again to shrink gaskets. In a decent production facility, it would be easier to update the machine park and equipment, but at AvtoTAZ it turned out to be easier to go back ten steps along the road of technical progress.
How to remove the cylinder head cover
The car should be placed on an overpass. To begin work, from the top of the cylinder head, remove the brake booster pipe fastenings and the throttle cable. They are held in place by fastenings to the left and right of the center of the assembly.
Then, using a 10 mm wrench, unscrew the screw holding the air duct pipe. Remove it from the work site. After that, use a screwdriver to unscrew the crankcase ventilation pipe at the junction with the air duct. Using a 10mm wrench, remove the screws that hold the cylinder head housing in place. The sequence of unscrewing the bolts is not important.
Next, remove the following items:
- fastening the throttle cable and engine shield;
- bolts for pressing the casing;
- air duct ventilation pipes.
After this, the main cylinder head casing is removed.
Torsion bolts (plastically deformable)
cylinder head bolt of a new type
Part number: 21213-1003271-01-0. Name: Torx cylinder head bolt. This name (torsion bar bolts) is fundamentally incorrect, but what can you do if they are called that on all forums and in all stores. According to science, when they say torsion bar, they mean deformation from twisting. And in this case, tensile deformation. In stores, these bolts are also called cylinder head bolts for Niva Chevrolet or cylinder head bolts of a new type. I also came across the name torx or chamomile. These bolts, unlike hardened ones, provide a constant load. That is, in a very primitive way we can talk about the grommet effect, that is, about the constant force to compress the cylinder head gasket in the axial direction of the bolt. These bolts are widely used on imported engines because they avoid human factor errors. In fact, you don't need to tighten with the precision of a torque wrench. The final values are taken as angular values. I don’t really like this approach, but such things are now commonly called “assembly guarantee”.
How to drain antifreeze in a Chevrolet Niva
When replacing the gasket, the first step is to drain the antifreeze.
The step-by-step algorithm of actions will be as follows:
- First, remove the mudguard and the oil pan cover - you will find all these devices under the hood.
- Reduce the pressure in the coolant assembly by opening the hood of the distribution assembly. Then it will need to be covered to reduce the pressure of the liquid.
- Place a 9 liter tank to drain the liquid to the left of the heat exchanger.
- Unscrew the plug and wait until the coolant drains completely.
- Test the lining on the drain cover - it should also be replaced if it shows signs of wear.
- Then the expansion tank plug must be removed again to clean the system of antifreeze residues in the engine cooling unit.
- In this case, the tank must be placed under the drain near the ignition system, to the left of the cylinder head (the cap is unscrewed with a 13 key).
- After the emulsion has completely flowed out, it is necessary to close the covers of the cylinder head and heat exchanger. For the cylinder head, the force will be 25 N/m.
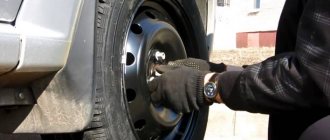
Interesting: Wheel bolt pattern on Chevrolet Niva
Niva cylinder head bolts, installation
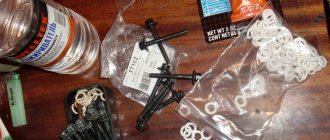
To work with bolts, a special tool is required. E16 head, which is not always included in universal tool kits, and a torque wrench. To make the process logically complete, the price list includes an E16 head (Sata or Force) and a torque wrench ( JTK) .
I won’t invent anything about the installation technology, just completely follow the factory manual.
- Submerge the bolts in a container of engine oil.
- Let it drain. Exposure for at least 30 minutes.
- Wrap and tighten according to the diagram.
Tightening force:
Stage 1 – tightening torque (12…20) N.m [(1.2…2.0) kgf.m];
Stage 2 – tightening with torque (50…70) N.m [(5.0…7.0) kgf.m];
Stage 3 – turning the bolts by 90-110 degrees;
Stage 4 – turning the bolts 90-110 degrees.
Tightening torque of bolt 11 (at the cylinder head tail): preliminary – (14…16) N.m [(1.4…1.6) kgf.m]; final – (32…40) N.m [(3.2…4.0) kgf.m].
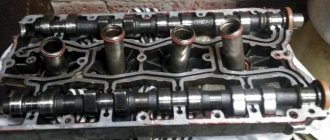
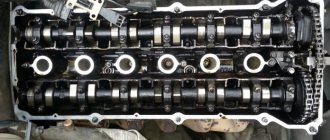
Cylinder head structure
The cylinder head performs the following functional actions:
- Supplies the fuel mixture into the combustion chamber.
- Includes gas distribution system.
- Removes the exhaust gas mixture.
- The combustion of the fuel mixture occurs in it, and compression occurs.
- Lubricating fluid is supplied and extracted, which activates the correct operation of the cylinder head.
This functionality is made of an alloy, the main component of which is aluminum and is expressed in the form of a rectangle. The design contains: incoming and outgoing valves, spark plugs, a spring element, a fitting and a hydraulic compensator.
Installing a new camshaft
If the camshaft is very worn, the valves are knocking and there is no way to adjust the clearance properly, then it's time to buy a new one! The cost of a new unit can range from 3,000 to 5,000 rubles.
After purchasing, do not rush to open the hood and change the spare part! The first step is to carefully examine the camshaft for defects or manufacturing defects. There should be no large burrs, burrs, excess or leaks of aluminum on it; the new shaft should rotate freely and easily by hand. Everything should look perfect, have a marketable appearance, because you are purchasing a new spare part, and it should last a long time and reliably, without any linings.
If, as a result of a visual inspection, something is suspicious to you, do not be afraid to return the part to the manufacturer and request a replacement. Ignoring a minor defect can lead to serious damage in the future.
Important tip
If the camshaft is replaced with a new one in a NIVA car, it will not be superfluous to replace the valve levers (rockers). This is done in order to avoid differences in the degree of production, which can affect premature wear of the entire mechanism.
Camshaft replacement process
Don't forget to apply the handbrake and engage fourth or fifth gear. The initial step for removing the target unit is to release the air filter pipe from the 4 bolts and the latch.
To carry out the work successfully, you cannot do without a torque wrench.
Next, the candle tips are removed, after which the elements themselves are removed. The vacuum hose and crankcase exhaust pipe are also dismantled. For convenience, they are retracted to the side.
The valve cover is then cleaned of dirt to prevent particles from accidentally getting inside. The throttle assembly is disconnected (located at the end). Use a wrench to unscrew the 8 studs holding the valve cover.
When disassembling, it is useful to additionally replace old gaskets and treat them with sealant.
And also interesting: Tow hitch Lada 2121, 21213, 21214 with gas equipment Leader Plus VAZ-35H GAZ (VAZ Lada tow bar, Niva leader plus trailer hitch)
The car should be jacked up at the front so that it is convenient to turn the wheel. Then the mark on the back of the gear is aligned with the camshaft mark.
The machine is lowered to the ground, the chain is attached to the gear in a convenient way (using a wire or tie).
A cord is attached to the upper hole of the gear and is connected to the hood lock. Using gentle movements, unscrew the lock washer until it can no longer be turned by hand while holding the washers. Next, the gear is removed from its seat and secured by a cord.
The oil supply ramp is unscrewed.
And it is removed - up and back (to the battery).
Carefully unscrew the remaining camshaft fasteners and dismantle the part.
A new camshaft is installed in place of the old one.
The rockers are removed. They are laid out in the same order as they were.
The hydraulic compensators are unscrewed with a 24 mm wrench.
Oil is removed from wells.
Locking plates with bushings are installed.
The adjusting bolts and nuts are screwed in entirely. Rockers and springs are fixed.
The RV is mounted and tightened. The camshaft tightening torque is 8.33 - 22.6 Nm. In this case, this is done in strict order according to the scheme.
Features of the camshaft on a NIVA car
At first glance, the camshaft of a NIVA car is very similar to any other camshaft, however, there are some points by which you can easily determine that this part is specifically for the NIVA.
- Most camshafts have a hex key (usually 27) between the cams of the second cylinder. The camshafts that are manufactured for the NIVA car have two hexagons on their axis (between the cams of the second and third cylinders). Visually, this is the main distinguishing feature of this part.
- The next differentiating factor is the distance between the base and the top of the cam. If you need to make sure that the part is specifically for NIVA, and the presence of a second hexagon does not guarantee the authenticity of the product, pick up a caliper and start measuring. The basic camshaft cam size is the same in most cases and is 30 millimeters. But the distance from the base to the top of the Niva is 37 millimeters. Measuring any other camshaft, the distance will be no more than 36.3 millimeters.
If both of these points are met, rest assured that the spare part is genuine and you can begin installing the camshaft on your Niva.
Technical features
Due to the increased size of the cams, as already described above, the intake phase increases. When compared with other cars, on a NIVA car this phase turns out to be 20 degrees higher (which is also indicated in the passport), this allows you to easily start even at idle.
Which camshaft is better to install?
One way to avoid main engine noise is to replace them with adjusting bolts. In this case, it is also necessary to purchase a 213th camshaft, which can improve engine performance.
Problems with the shaft itself include:
- bearing wear;
- bullying in bed;
- cracks, fractures, axial deformation;
- seal damage.
Video 1, the shaft burst 2 times in a row.
Let's start disassembling (procedure)
- The first step is to remove the air filter. The four screws along the edges of the cover are unscrewed. The pipes are detached.
- The cable and the gas damper drive open.
- The valve cover must be cleaned of dirt; this is done in order to avoid clogging the engine from dust and debris accumulated under the cover.
- Next, you need to loosen the camshaft fastenings. It is important to secure the engine from accidental rotation; fixation can be done using any strong metal object clamped between the chain and the sprocket (for example, a screwdriver).
After completing all these steps, you can start replacing.
How to change the cylinder head gasket
After draining the antifreeze and removing the cover, you can proceed directly to replacing the gasket on the Chevrolet cylinder head. Disconnect the camshaft and bearings by unfastening them from the cylinder head rods. Make marks for ease of reassembly and remove the torus gear.
Next, follow the following algorithm:
- Disconnect the engine valve tiller and unscrew the supports.
- Disconnect the oil lines from the hydraulic mounts.
- Separate the Niva throttle indicator blocks, idle balancer, coolant temperature and pipelines going to the sprayer.
- Unscrew the wires on the spark plugs.
- Find the indicator that controls the temperature of the antifreeze, remove its protective cover and disconnect the wire from it.
- Disconnect the exhaust pipe from the manifold.
- Unscrew the inlet wire screws.
- Using a screwdriver, open the fittings of the absorber, liquid supply to the heat exchanger and stove, and thermostat.
- Disconnect the cylinder head and the fuel mixture supply line.
- Remove the starter protective cover and the network tensioner.
- Unscrew the power steering pump mount from the engine.
- Remove the camshaft chain and gear.
- Unscrew all 10 screws holding the cylinder head using a special wrench.
- To unscrew the cylinder head itself, you need to use the services of an assistant, since the head has large weight parameters.
- Remove any remaining used liner. When removing the gasket, do not scratch the surface of the cylinder head - you need to act very precisely and carefully.
- Sand the surface of the head with fine sandpaper and make sure that excess old gasket does not penetrate into the coolant lines.
- After installing the new lining material, the cylinder head is installed on top. It is very important to tighten the cylinder head correctly:
Parts and tool kit for cylinder head assembly
To carry out this type of work you will need the following tools:
- Socket wrench (10,12,13,14,17 mm), socket wrench.
- Valve removal tool.
- Screwdrivers plus and minus.
- Torque wrench.
- Ratchet key (38) for turning the motor and testing the markings.
- Valve adjustment rod (0.15 mm).
- Sealant.
- Fine sandpaper for grouting.
New materials for the cylinder head assembly:
- Valve top key (art. 2101-1003270).
- Collectors key (art. 2123-02-1008081-01).
- Cylinder head lining (art. 21213-1003020-02).
- Camshaft (art. 21213-1006008).
- Adjusting bolts (art. 2101-1007116).
- Valve gasket (art. 70-34223-00).
- Coolant tank.
Before starting work, the cylinder head must be washed and thoroughly cleaned with an air stream, after which the unit is prepared for assembly.