Lada Priora has always been produced in various configurations, and depending on this, the drive of auxiliary units had its own differences. So, for example, the version with an electric power steering had the usual familiar mechanism for tensioning the alternator belt, and replacing it would not have taken more than 5 minutes, since the design was no different from the models of the tenth family.
If we consider cars equipped with power steering or air conditioning, then the belt path is slightly different, and the replacement procedure itself is somewhat different from the standard one. Let’s look at the differences below using the example below.
Alternator belt tension on a Priora with power steering or air conditioning
As for belt tension, everything is done a little differently with the power steering or climate system. The fact is that in the usual configuration, when there is nothing else except the generator pulley and the crankshaft, when you press on a belt branch, it should bend from 8 to 12 mm. In our case, such tension will most likely not be enough. From the personal experience of many owners, the belt should bend by about 5 mm (factory values).
And it is best to use the so-called experimental method. To do this, we apply a tension slightly greater than that recommended in the instructions. After this, we start the engine and turn on the maximum consumers of electricity in the car: high beams, heated rear window, seats, heater. If in this mode the belt does not start to whistle, and at the same time there are no extraneous sounds when the roller and generator bearing operate, then the tension can be considered normal.
How to replace the timing belt on a Lada Priora on your own?
The process includes not only the rotation of the rubber transmission, but also the rollers - tension and support - change along with it. Repair kits are usually sold at auto dealerships. To work you will need the following tools:
- head at “17”;
- keys to “15”, “13”, “10”, “8”;
- inbus key (hexagon) to “5”;
- a special key for adjusting the roller or pliers for removing the locking ring.
Next, the process of changing the drive occurs in the following order:
- Unscrew 5 bolts with a hexagon on the upper plastic casing of the gas distribution mechanism and 2 on the lower one, remove them.
- Using the socket at “17”, turn the crankshaft clockwise and align both camshafts at TDC on the compression stroke of the first cylinder according to the marks. This moment is determined by aligning marks 1 on the camshaft pulleys with marks 2, which are located on the rear cover.
- Remove the rubber plug in the clutch housing and check the position of the crankshaft: the marks on the flywheel and the slot on the upper housing cover must match.
- Before replacing the timing belt on a Priora car , you need to remove the auxiliary drive pulley. To do this, the assistant must engage 5th gear and press the brake, and the car owner, using the “17” socket with a knob, unscrew the pulley mounting bolt and remove it.
- For the convenience of subsequent assembly, before dismantling the rubber part, experienced car enthusiasts recommend fixing the camshaft pulleys with a simple wooden wedge, which should be driven between them.
- Using a “15” wrench, loosen the tension roller bolt and remove the belt from the shafts. Next, remove the tension and support rollers.
- Apply fixing sealant to the threads of the bolts of the new rollers. Tighten the support roller to a torque of 35-41 Nm , but do not completely tighten the tension roller. Check the position of the crankshaft using the mark on the oil pump cover.
- Place the toothed rubber drive onto the crankshaft pulley. Pull both branches and put the front part on the support roller, and the back part on the pump pulley and place it behind the tension roller. If a wooden wedge was used, it must be removed.
Important! During the repair process, you need to check the condition of the coolant pump. Its shaft should rotate freely, without play or extraneous noise. Traces of coolant leakage are unacceptable. If one of the factors is present, be sure to change the pump.
How to adjust the drive tension on a VAZ 2170?
The final stage of replacing the timing belt on a Lada Priora car is performed according to the following scheme:
- Use a special wrench or pliers to turn the tension roller counterclockwise.
- Align cutout 1 with mark 2 on the inner roller bushing and tighten the fastening bolt to a torque of 20-15 Nm (see photo above).
- Install the auxiliary drive pulley in its original place.
- Turn the crankshaft 2 turns clockwise using the pulley bolt and check the alignment of the camshaft and crankshaft timing marks, as well as the belt tension. If necessary, repeat the operation.
Which alternator belt to choose?
Today there are a huge number of companies and manufacturers on the market that produce components for cars. And as for belts, the most popular brands are:
- GATES
- BRT - Balakovo belts
- Luzar
- Andycar
The first two manufacturers can be called the highest quality of what is sold in the store, and it is they who are installed to a greater extent on the assembly line. But as for the quality of what is actually bought in a store, the difference is very big. Factory components can go two, three or even five times longer than the same “original” from the shop.
Video review of replacing the accessory drive belt on a 2170
A video review of the Priora repair was recorded especially for this site and specifically for this article. It clearly and easily shows the entire process of replacing a belt.
I hope that after watching the video there are even fewer questions left. If there are any, you can ask them below in the comments or on the channel.
How to replace or tighten the alternator belt using Priority and belt replacement technology
Hello, dear motorists! Well, let's move on to specific cars and their fans?
"PRIOR GUARDS". This is what owners of cars from one of the latest VAZ series called “Lada” call themselves. "Priora".
I like the stylish and modern car in many ways. The ingrained belief that domestic cars are useless for anything is gradually dissolving. Cars have indeed become more convenient, attractive, and their technical equipment has improved significantly.
The differences between Priora and previous modifications are noticeable immediately as soon as the hood is opened. The new owner of a new Lada will have to learn a lot from scratch. Such a simple, at first glance, manipulation, like replacing the generator belt with a Prior, will require significant effort.
A distinctive feature of new car models is the ability to choose a car with additional equipment already in the basic configuration. Thus, the Priora can be equipped with a hydraulic booster (power steering) or air conditioning.
Of course, driving such a machine becomes even more comfortable, but the price for comfort becomes a more complex design of the generator belt drive. The Priora alternator belt with air conditioning or GUR is much longer, follows a different path (alternator belt chain), and is maintained and changed according to completely different rules.
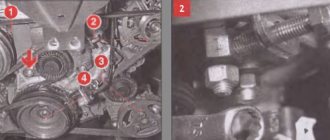
WE OPEN ACCESS TO THE TIMING BELT
- To get to the gas distribution mechanism drive, we need to unscrew the five bolts of the upper timing cover using a hexagon.
The location of these bolts is shown in the photo below:
FIG 6. Upper timing cover bolts
- Then use the same key to unscrew the two bolts of the lower timing cover and remove the cover.
FIG 7. Bolts of the lower timing cover
- Using a 17-point head, we turn the crankshaft toothed pulley until the marks are firmly in place according to Figure 4. You also need to check the alignment of the marks on the flywheel so that they are located as shown in Figure 3. The crankshaft must be turned clockwise.
And one more important point! It is the crankshaft that needs to rotate the entire timing mechanism. This cannot be done using the camshaft pulleys. To ensure that the camshaft marks do not get lost during operation, they must be secured to each other. This is done in different ways. I once saw a mechanic insert a socket head between the teeth of a pulley. You can also take a pin and two thick plates with holes. We put plates on the stud, nuts on both sides and insert this structure between the pulleys so that the plates rest against the teeth of the pulleys and tighten the nuts.
It looks something like this! Here, however, is an engine from another car:
FIG 8. Device for fixing camshafts
We have completed the preparatory work and it is time to proceed directly to replacing the Priora timing belt.
- To remove the Priora timing belt, you first need to loosen its tension. To do this, use a 15mm wrench to unscrew the tension roller nut; the support roller must also be removed. Because when the timing belt is replaced, both rollers are also changed.
Then remove the timing belt and inspect it carefully. First of all, we pay attention to the presence of cracks, fraying of the edges of the belt, and, of course, we look at the condition of the teeth. There should be 137 of them, they should be round in shape. If you find at least one of these defects or the time has come for mileage in kilometers, then the Priora timing belt must be replaced with a new one. Next, you need to pay attention to the condition of the pump. Holding the toothed pulley of the pump, you need to tug it; if there is play in the pulley, then the pump must be replaced.
REPLACING THE PRIORA PUMP
- In order to replace the pump, we will have to drain the coolant. Using a 15 wrench, unscrew the nuts, remove the camshaft toothed pulleys and the rear timing drive cover.
Description and location
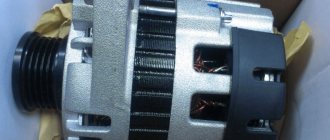
The generator's job is to provide power to the vehicle's electrical equipment. Like other components in a car, the generator is powered by the engine; to ensure constant rotation of the rotor, pulleys are installed on the generator shaft and the crankshaft of the power plant. A belt is pulled between them. After starting the engine, the crankshaft begins to rotate, and the movement is transmitted through the belt to the rotor.
On the latest Priora models, this element operates the air conditioning and power steering. This material discusses the replacement and tensioning of the belt in a new model car, where additional equipment is installed.
The belt is a consumable item that requires replacement after 45-60 thousand kilometers . The size of the standard belt on a Priora with air conditioning is 1125 mm.
Symptoms of malfunction and their elimination
You can determine whether a replacement is needed or whether you can simply tighten the power steering belt with air conditioning on the Priora 16 valves only after inspecting this component. To do this, just open the hood and examine the belt; it is located next to the right front wheel. There are signs that indicate it's time to check the alternator belt: something whistling and squeaking from under the hood.
The reasons may be the following:
- Antifreeze, oil or other working fluids have come into contact with the generator pulley or belt.
- The belt is worn out - you can tell by its appearance.
- The tension has dropped - in this case, the component must be tightened.
- The bearing in the generator is worn out.
When the belt whistles in a Priora with 16 valves, it’s time to carry out diagnostics. If there are cracks, tears or other serious damage on its surface, then replacement is required. If the generator component with hydraulic booster and air conditioning looks normal, you should check its tension; the optimal level of deflection is 6-8 mm - you need to press the component in the middle between the generator and the pulleys.
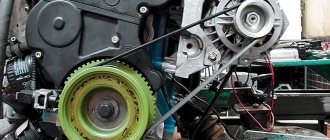
Installing a new timing belt
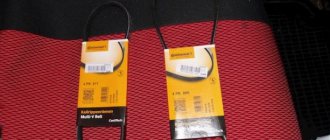
- We get a new timing belt kit.
Timing kit.
Attention! On the tension roller there is a direction of tension (shown by an arrow) and an indicator of the correct tension, indicator type.
Direction of tension on the roller.
- We install the tension and support rollers in their places and check that all marks match. We tighten the bolt securing the support roller, and simply tighten the tension roller.
The timing marks on the camshafts tend to run a bit, so if you're doing it alone, you'll have to be very tricky to hold the camshafts and fit the timing belt. You can fix the pulleys for convenience by installing a homemade clamp between the pulleys from a bolt with a nut and two washers. The Internet is full of pictures and examples, we won’t dwell on that.
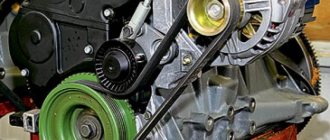
- We put the timing belt first on the crankshaft pulley and pump, then on the idler pulley, the intake and exhaust camshaft pulleys and the tension roller. The branch between the crankshaft and intake camshaft pulleys must be tensioned.
- We tighten the timing belt with a roller in the direction of the arrows using a special wrench until the correct tension marks match. That is, when the pointer on the bottom of the roller is opposite the groove on the top. Tighten the bolt. Please note that an under-tightened belt will lead to rapid wear of the teeth, and an over-tightened belt will lead to increased wear on the pump bearing and reduced service life.
Correct tension.
- We check that everything should be on the mark. If the marks do not match, remove and reinstall the belt. If they match, then turn the crankshaft two turns and check the marks and tension again.
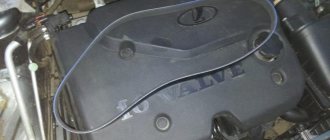
The new belt is in place.
- If everything is in place, install all the parts in place in the reverse order of removal. We start the car.
This is how easy it is to replace the timing belt on your Priora in a simple garage or even on the street.
Alternator belt tension
If the quality of adhesion of pulleys, rollers and the surface of the generator belt decreases, the tension should be increased. This procedure should also be carried out if the consumable has been used for more than 15-20 thousand km, but there is no damage (replacement is not required). If you open the hood and see a frayed tape, then immediately proceed to the replacement instructions, then you will still have to retighten it. To carry out the work, you will need a special key for the roller and standard keys for 19 and 17.
Process and result verification
- We clamp the clip with a wrench and loosen the roller fastening nut;
- Now we need to clamp the eccentric collar and start cranking. The rotation of the tool should be minimal - this will allow for better tension of the component;
As you can see, the process consists of only three steps, but the main stage is checking the tension on a Priora with air conditioning and power steering (or with these components separately). In this case, the tension should be stronger when compared with the basic version of the VAZ 2170 with 16 valves. In the longest section between the shaft and the pulleys, the material should bend by about 5-6 mm.
You can determine the result by the sound: when moving, you can hear slipping, the belt whistles - insufficient tension; from under the hood after adjustment you can hear the hum of the bearings - the component is overtightened, the holder needs to be loosened.
Replacing the Tension Roller of the Priora Generator
replacing the tension roller for the alternator belt on a Priora
On Priora vehicles equipped with additional options such as power steering or air conditioning, due to the special arrangement of the units and, accordingly, the drive belt mechanisms, the tension of this drive is adjusted using a tension eccentric. Also the crucible is used to draw on the latest Priora releases. This tensioning mechanism is made on the model of the viburnum belt drive belt. Due to differences in design, stretchers are available in two types:
- plastic for Priora with options;
- plastic for standard vehicles.
Symptoms of tension
The most pronounced malfunction is the characteristic sound made by the tensioner when the Priora engine is running. To check, remove the belt from the crankshaft pulley and start the engine. If the sound stops, turn the roller by hand in all directions for a closer inspection. A faulty tensioner makes a slight rustling noise and begins to play. Sometimes, depending on wear, these are wedges. With any necessary such symptom replacement . These parts cannot be repaired.
Tensioner pulley for alternator belt for vehicles with power steering or air conditioning
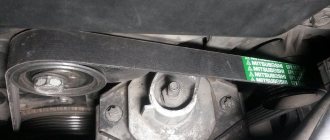
The Priora, equipped with various options, has an alternator belt longer than a meter. It passes through four reference points. Three of them are pulleys. The first is the engine drive pulley, and the second is the alternator and power steering or air conditioning compressor. The fourth point is the traction roller itself.
This simple mechanism is made in the form of a conventional rolling bearing, with an eccentric base.
That is, by rotating it around the axis, due to the bolt hole located not in the center of the bearing, but offset relative to the edge, it can lengthen or weaken the drive belt of all additional Priora mechanisms in the form of a protruding part.
Replacing VAZ 2110 2170 2172 Priora tension pulley
Replacing rollers
VAZ Tensioner 2110 2170 2172
priority
A clear demonstration of the nuances of saving on maintenance.
stretching alternator belt (K)
A clear description of the principle of belt tension is given. generator
use of automotive priority
tensioner pulley
.
This bearing has a plastic cap on the outside with a small flange across the width of the belt. The cover has a cutout that matches the recesses of the drive belt of the Priora additional mechanisms, which prevents it from rotating along the roller and does not destroy the inner belt cover.
The central part of the bearing is made in the form of an all-metal washer with a hole in the diameter of the bolt, with which the roller is attached to the engine block. The hole, as already mentioned, is shifted to the edge of the washer and is not cut in the center. Thanks to this design, replacing the roller becomes the easiest operation.
You just need to prepare a 17 ring wrench, and with the engine off, unscrew the mounting bolt using a nut. Everything can be deleted. Insert the new one, turn the new tensioner to tighten the belt, lock it. That's the whole operation.
Replacement
Required Tools
We will prepare everything necessary for the repair:
- Lubricant WD-40.
- Keys to 19, 17.
- Two copies of the key for 13.
- Head for 10 and 17.
- Jack.
- Special key for tensioning.
- Lever arm.
The alternator belt on a modified Priora with air conditioning and power steering runs around the engine mount. The designers decided to carry out such a modification for the Priora 16 due to the fact that the power steering pulley is installed low. Hence there are additional steps that you need to be aware of.
Step-by-step instruction
- First of all, we need to wet the bolts that hold the bracket and motor mounts. Wait 10-15 minutes for the lubricant to spread over the surface;
The replacement is complete, all that remains is to adjust the alternator belt with power steering and air conditioning. The new consumables on the Priora will have to be tightened several times until you get the required tension. If the component whistles or there is a hum coming from under the hood, then it is necessary to carry out repeated adjustments until these defects are eliminated.
Replacing the generator belt tensioner pulley: Priora, Lacetti, Kalina, Logan
Problems with the generator can lead to more serious problems. If electric current is not generated by the car, if it runs on one battery, then battery failure is also inevitable. If there is insufficient production of on-board current, as indicated by the corresponding light on the instrument panel, first of all, it is necessary to check the tension of the alternator belt.
- Other VAZ models
- Nuances of the procedure on foreign cars
- How much or where is it cheaper?
In addition, in many cars, the belt drive we are talking about, which, by the way, is driven by a timing pulley, often connects other critical components. These units are also called attachments. In particular, the belt can drive a pump that pumps antifreeze. So loosening the belt can lead to more than just power problems!
It is regulated by a special roller, which is located on the tensioner bracket. If this wheel rotates noisily, sticks, or releases grease from the cuff, the defective alternator belt tensioner roller needs to be replaced. Why does this small critical element fail and how to change it? Let's first consider the example of Kalina.
The reasons for part failures are simple.
- Wear due to end of life.
- Violation of the integrity of the cuff.
- Manufacturing defects.
To replace the belt tensioner roller of the Kalinovsky generator, we will need the following tools:
- set of wrenches;
- screwdriver.
In principle, the procedure for replacing the tensioner belt roller of the Kalina generator is easy to learn from a video on the Internet. But we will also provide fairly clear instructions.
- Find the hexagon of the adjusting pin above the pulleys and place a 8mm wrench on it.
- Having loosened the locknut with a 19mm wrench, we rotate the pin clockwise, so our treasured part will move away from the belt.
- Use a screwdriver to remove the roller cover.
- Unscrew the roller mounting bolt with a size 17 wrench.
- We remove the roller assembly with bolt, bushing and washer.
- With the new part, we assemble everything in the reverse order.
From these instructions it is easy to understand that replacing the generator belt tensioner pulley in Kalina is a fairly simple process.
Other VAZ models
However, for other modern VAZ cars with front-wheel drive, the procedure follows a similar scenario. For example, the technology for replacing the generator belt tensioner roller on a Priora is almost no different from that described. But the Priora does not have an adjustment pin. In principle, the roller can be unscrewed immediately. However, if it turns out that the belt is leaky, you will have to suffer.
Also find out why hydraulic lifters knock when hot and why valves knock when the engine is cold.
To replace the belt together with our part from the Priora, you need to hang the engine and unscrew the engine support cushion, as it interferes with removing the leaky V-belt drive.
As for the other AVTOVAZ model, the Lada Granta, initially it did not have a mechanism for tensioning the generator belt; due to the strong constriction of the belt drive, the electric motor bearing suffered. But the car was in the lead on the hot list of the cheapest cars in the world. Therefore, the owners were offered to independently replace the generator bracket with the same one from Kalina with minor modifications.
Consequently, replacing the generator tensioner belt roller for the Lada Granta is identical to a similar operation on the Kalina, provided that the Granta engine is equipped with a V-belt drive tensioning mechanism.
Nuances of the procedure on foreign cars
Well, with VAZs everything is clear, their maintainability is often pleasing, but in some popular foreign cars you need to disassemble half the car to get to any component. The situation is similar, for example, with a Chevrolet family car. To replace the generator belt tensioner roller on a Chevrolet Lacetti you will have to work hard. Although the reasons for the part failure are the same.
First, let's indicate what is required from the tool:
There are many stages to go through, we will list them.
- Remove the interfering air filter housing.
- Remove the exhaust manifold thermal shield.
- We disconnect the power steering pump from the mounts and move it to the side on the hoses.
- Using a 15mm wrench, we install our broken part into the mounting position.
- We unscrew it.
- We install the new one in the reverse order.
Here you can put an end to the repair.
Another popular foreign car, unfortunately, also causes difficulties in carrying out the described operation. More specifically, let's look at the procedure for replacing the alternator belt tensioner pulley in a Renault Logan car.
To implement the technology we will need:
- set of wrenches;
- screwdriver.
Repairs must be made from below the car, for example, from the inspection hole. Let's describe the process step by step.
- Remove the mudguard of the engine compartment on the right.
- We throw a 13mm wrench onto the bolt of our broken wheel, but don’t flatter yourself – we won’t unscrew it just yet. Turning the key clockwise, move the tensioner bracket until the two holes align - in the body and on the bracket. This will lock the roller and relax the belt.
- Now we unscrew the bolt of the broken part we need.
- We install a new spare part and assemble the mechanism in reverse.