Design and principle of operation
The Chevrolet Niva transmission includes the following components:
- A five-speed manual gearbox allows you to change not only the amount of torque, but also the direction of rotation.
- Split front axle with a gearbox mounted on the power elements of the body.
- Dry single-plate clutch, which, when the pedal is pressed, briefly disconnects the transmission from the engine.
- Solid rear axle, into which the gearbox and differential are integrated. This allows you to increase and distribute torque between the wheels of the same axle.
- The intermediate shaft through which torque is transmitted from the gearbox to the transfer case.
- Transfer case that distributes rotational energy between axles.
- Two cardan shafts transmitting power to the axles (front and rear).
- Constant velocity joints that drive the steering wheels.
It works like this: engine torque is transmitted to the manual transmission through the clutch, then through the intermediate shaft to the transfer case and a pair of drive axles.
Help: the transmission of SUVs often includes a winch drive. To do this, a power take-off shaft is built into it. However, this option is not provided in the factory configuration of the Chevrolet Niva.
Description of possible problems with the transfer case
During the operation of off-road vehicles, parts and components of the transfer case gradually become unusable due to wear. Most often, the following interruptions in the operation of the mechanism occur:
The transfer case is overheating.
Changing the oil in the transfer case Niva 2121
To ensure the performance of the vehicle, it is necessary to carry out timely maintenance. Changing the oil is included in the mandatory list of machine maintenance work. To change consumables in the Niva 2121 transfer case, you will need 0.8 - 1.5 liters of gear oil.
The frequency of replacing lubricating fluid is equal to 45,000 km of distance traveled. The first procedure is carried out after 60,000 km, and then in accordance with the established schedule.
Attention: If problems arise with shifting gears, extraneous sounds, vibrations and vibrations, it is necessary to check the condition and amount of oil in the transfer case and the transmission as a whole.
The procedure for changing the oil in the transfer case of a Niva SUV:
- warm up car systems and mechanisms, to do this you need to start the engine and drive a short distance;
- install the machine on an overpass or over a special inspection hole;
- clean the filler and drain plugs of the transfer case from dirt and dust;
- place a container under the drain to collect waste material;
- unscrew the plugs and drain the liquid;
- remove metal fragments, shavings, splinters and other wear elements;
- screw in the plug;
- pour into the washing liquid (about one liter);
- start the engine;
- move the lever through the transfer case gears with slight delays;
- turn off the engine;
- drain the flushing composition;
- fill the transfer case with new oil;
- check the oil level;
- if necessary, add the required amount.
For the transfer case of the Niva 2121 SUV, transmission oils of the famous brands Mobil, TNK, Castrol of the GL-4 class are most often used.
vote
Article rating
Signs of trouble
The transmission is constantly subjected to high loads while driving, especially off-road. At the same time, the parts, despite the lubrication and the safety margin laid down by the designers, wear out intensively. Therefore, failure of the Chevrolet Niva transmission is not at all uncommon. And the point here is not in the quality of the parts, but in the level of loads and complexity of the mechanism.
Symptoms of malfunction depend on which component is experiencing problems:
- Clutch. In case of breakdowns, jerking occurs when starting to move, slipping under load, or “driving” when trying to stop or change gear. Sometimes the malfunction manifests itself in the form of noise when pressing the clutch pedal or in other conditions.
- Gear box. This unit is more complex, and accordingly, its breakdowns are more varied. They manifest themselves in unclear or difficult gear shifting. Oil leaks, crunching noises and extraneous noises are also possible.
- Cardans and intermediate shaft. Here, malfunctions manifest themselves in the form of knocking during acceleration, squeaking or vibration while driving.
- Main bridge. In the event of a breakdown, the mechanism begins to make noise, knocking noises occur when accelerating and oil leaks.
- Transfer case. Problems make themselves felt in the form of spontaneous shutdown of bridges, noise and knocking. There may also be an oil leak.
- Constant velocity joints. Worn parts begin to crunch and knock while driving. The crunch is especially noticeable when the steering wheel is turned hard.
In what cases is this procedure necessary?
With proper operation, the gearbox can last quite a long time, since it is a self-sufficient design element that does not require frequent maintenance. On the Chevrolet Niva, the gearbox is designed in such a way as to satisfy the off-road ambitions of the crossover, because initially this car was equipped with all-wheel drive in order to overcome various obstacles. This means that the car’s transmission is designed for increased loads. But it is necessary to take into account such processes as metal fatigue and the production of parts. Over time, under increased loads, the gearbox begins to operate for a long time, experiencing overheating, which leads to expansion of parts and increased wear.
There may be several main reasons when it is necessary to remove the gearbox:
- Dismantling to completely replace the entire mechanism. It is usually rarely used in practice, since in most cases it is possible to repair an old gearbox except in cases where the housing is damaged.
- To carry out maintenance. Components can be cleaned or consumables can be replaced: oil seals, slides or gaskets, depending on the specific case.
- When carrying out other repair work, when the gearbox will prevent access to the desired unit.
Before removing the gearbox, you must carefully study the feasibility of these actions. For processes such as changing the oil, installing a rocker seal or clutch cylinder, removing the box is not required.
Resource of parts and assemblies
The service life of drive parts depends on compliance with maintenance regulations. The operating manual states that the mileage before transmission repair is 200 thousand kilometers. In practice, this does not apply only to CV joints, which often have to be changed even with less mileage. As for the gearbox and transfer case, according to the owners' reviews, they can withstand the required 200 thousand kilometers without any problems.
A sharp reduction in service life is observed only during extreme off-road use of the vehicle. For example, CV joints quickly break when the anthers are damaged.
Maintenance Recommendations
The cause of the malfunction may be the exhaustion of the intended resource, but most often it lies in non-compliance with basic recommendations for operation and maintenance. Routine maintenance includes only timely replacement of transmission lubricant. It needs to be changed every 40 - 45 thousand kilometers.
Repairing a box is an expensive proposition. It often has to be carried out at a service station, so it is necessary to periodically check the oil level in the gearbox and inspect the crankcase for leaks.
Read news about the new Niva
- Chevrolet Niva gearbox diagram video
- Chevrolet Niva gearbox diagram video
- Chevrolet Niva fuse box with description (up to 2009 release)
- The modernized Lada Niva Legend (4x4) 2021 was shown on the Internet
- Lada 4×4 Bronto - sales stopped, new details » Lada.Online - all the most interesting and useful about LADA cars
- Description of the instrument panel Lada 4×4 (VAZ 2121, 2131) » Lada.Online - all the most interesting and useful about LADA cars
- LADA Niva – Operating manual – Official LADA website
- Chevrolet Niva gasoline consumption per 100 km
| Device and design, technical characteristics, maintenance |
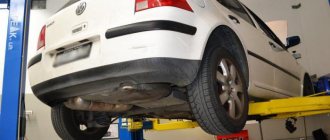
How to remove engine and transmission protection?
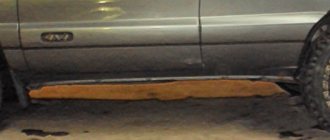
The standard equipment of the Chevrolet Niva includes protection in the form of a curved steel plate. This part prevents damage to the engine crankcase and the most critical elements of the transmission. Below it is a mudguard that prevents road dirt from entering the engine compartment.
However, the protection prevents maintenance of the gearbox and front axle gearbox. Therefore, to change the oil or repair key transmission elements, the plate must be removed. To do this, you will need 8 and 10 socket wrenches.
Professional repair of gearboxes for VAZ, GAZ, foreign cars on the same day!
WARRANTY for work according to the warranty card!
Gearbox repair from RUB 1,500.
Does not include the cost of spare parts. Guarantee!
Transmission replacement from RUB 3,000
with warranty (Excluding installation)
Sale of gearboxes from 5000 rub.
A gearbox after a major overhaul with a guarantee is always on sale.
Change of oil
Gearbox oil change, engine oil change
Seasonal tire fitting
The service is not available in all services.
Clutch replacement
A discount is provided when replacing a gearbox in all services.
Transmission of Chevrolet Niva and Lada 4x4: what is the difference
The first thing that catches the eye of the average user is that the Lada’s transmission is controlled by two levers, while the Chevrolet Niva has only one, not counting the gearbox control lever. This is due to the fact that Chevrolet’s upshift and downshift ranges, as well as the center differential lock, are implemented using a single-lever design. In addition, the Niva's front axle gearbox is not attached directly to the engine cylinder block, and the transfer case has three mounting points, unlike the Lada, which has two.
Nevertheless, both cars are absolutely identical in transmission design, have one engine for two, but due to the transfer case set back, the Niva’s intermediate shaft is longer than that of the Lada 4x4 by exactly 250 mm. Moreover, both cardan shafts driving the front and rear axles are completely interchangeable.
Design and diagram of the Chevrolet Niva transmission
The Chevrolet Niva transmission, in terms of operating principle and architecture, completely replicates the donor car, the VAZ 2121 and its modification, the VAZ 21213. This means that the drive is carried out to all four wheels constantly, without the possibility of disabling the front axle. The design provides a number of reduction gears, as well as a manually lockable center differential.
The main elements of the transmission are as follows:
- dry single-plate clutch;
- five-speed gearbox;
- intermediate shaft;
- transfer case;
- 2 cardan shafts driving the front and rear axles;
- front split axle with a gearbox separately mounted on the load-bearing frame;
- continuous, solid rear axle with integrated gearbox and differential, as in classic Tolyatti models.
The transmission structure is shown in the drawing and it is no different from most SUVs with permanent all-wheel drive, as well as the operating principle.
Torque is transmitted from the engine crankshaft through a dry single-plate clutch to the gearbox input shaft. Next, the torque enters through the reduction gears in the box and is transmitted through the output shaft to the transfer case, where it is evenly distributed between the drive axles. The stock Chevrolet Niva does not have a power take-off shaft, which can be used to transmit rotation to the winch.
Carter
The Niva gearbox housing on the left side is equipped with a filler neck, and there is an analogue at the bottom. The holes are blocked with plugs with cone-type threads. The drain compartment has a magnet that traps metal particles that enter the oil due to wear of parts.
A breather is screwed into the top of the crankcase, which prevents the pressure in the gearbox from increasing due to excessive heating. If this element is faulty, lubricant may actively leak through the seals. In this case, the parts dry out, which increases the wear of the components.
1. tension spring; 2. lock nut; 3. adjusting element; 4. cotter pin; 5. fork; 6. pusher; 7. mounting bolt; 8. working cylinder.
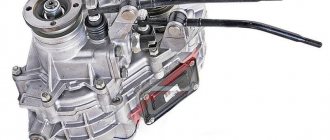
Gearbox and clutch Niva Chevrolet
The Niva has virtually the same VAZ gearbox, but with minor changes designed to increase the durability of the unit. Firstly, this is the replacement of the VAZ rear bearings of the primary shafts and intermediate bearings on the secondary shafts with similar, but sealed types. This eliminates bearing malfunctions associated with contamination and premature wear. Secondly, the gear shift control drive has been changed. It is easy to notice that in a Chevrolet the gearbox control lever is closer to the driver, which makes control more convenient. This was achieved through the use of an extension with a 250 mm horizontal rod. Gear ratios remain the same, as does the gear shift pattern.
The clutch device in the Chevrolet Niva transmission has undergone some changes and received a number of improvements and more progressive parts from front-wheel drive VAZ cars.
Location.
On Niva DS is installed on the gearbox. This allows data to be read only while driving, turning off when the engine is in neutral.
The device itself consists of a plastic case, inside of which electronic components are located. For proper operation, it is placed in close proximity to the shaft. There is a built-in magnetic bar inside the shaft that creates electrical signals when rotated.
The product is quite fragile, so when dismantling or installing you must be extremely careful not to damage its body.
Features and malfunctions of the transfer case
The Chevrolet Niva transfer case not only moved back by 250 mm, but also changed the installation angle by 4 degrees. Chevrolet engineers calculated that this angle would be optimal for the operation of driveshaft joints. The design of the transfer case uses small-module, low-noise gears, so the howling of the transfer case, as on the old Niva, is now completely eliminated.
Another common malfunction of the transfer case on old Nivas was vibration. On Chevrolet, this issue has been practically resolved by installing new pillows and the appearance of a third attachment point. This will eliminate not only operational vibrations and noise, but also the likelihood of incorrect installation of the transfer case after repair, prevention or troubleshooting.
There is another malfunction that few people think about, however, this problem is related to the resource and endurance of constant velocity joints. The fact is that a cermet valve is installed directly under the CV joint boot mounting clamp. Its task is to compensate for excess pressure inside the cover, thereby protecting it from rupture, and the CV joint itself from water and dirt. If you monitor the performance of the cermet valve during repairs or replacement of hinges, the boot will last a long time and will reliably protect the CV joint.
Transmission of Chevrolet Niva and Lada 4x4: what is the difference
The first thing that catches the eye of the average user is that the Lada’s transmission is controlled by two levers, while the Chevrolet Niva has only one, not counting the gearbox control lever. This is due to the fact that Chevrolet’s upshift and downshift ranges, as well as the center differential lock, are implemented using a single-lever design. In addition, the Niva's front axle gearbox is not attached directly to the engine cylinder block, and the transfer case has three mounting points, unlike the Lada, which has two.
Nevertheless, both cars are absolutely identical in transmission design, have one engine for two, but due to the transfer case set back, the Niva’s intermediate shaft is longer than that of the Lada 4x4 by exactly 250 mm. Moreover, both cardan shafts driving the front and rear axles are completely interchangeable.
Design and diagram of the Chevrolet Niva transmission
The Chevrolet Niva transmission, in terms of operating principle and architecture, completely replicates the donor car, the VAZ 2121 and its modification, the VAZ 21213. This means that the drive is carried out to all four wheels constantly, without the possibility of disabling the front axle. The design provides a number of reduction gears, as well as a manually lockable center differential.
The main elements of the transmission are as follows:
- dry single-plate clutch;
- five-speed gearbox;
- intermediate shaft;
- transfer case;
- 2 cardan shafts driving the front and rear axles;
- front split axle with a gearbox separately mounted on the load-bearing frame;
- continuous, solid rear axle with integrated gearbox and differential, as in classic Tolyatti models.
The transmission structure is shown in the drawing and it is no different from most SUVs with permanent all-wheel drive, as well as the operating principle.
Torque is transmitted from the engine crankshaft through a dry single-plate clutch to the gearbox input shaft. Next, the torque enters through the reduction gears in the box and is transmitted through the output shaft to the transfer case, where it is evenly distributed between the drive axles. The stock Chevrolet Niva does not have a power take-off shaft, which can be used to transmit rotation to the winch.
Differential
This mechanism is a kind of distributor of traction forces coming from the motor to the wheels. An important feature is that the latter have the ability to rotate at different speeds. The importance of having a differential mechanism is due to the fact that during turning maneuvers, the wheel located inside makes fewer revolutions when compared with the number of turns of the outer wheel.
In the absence of a differential mechanism, this would cause detrimental consequences, such as wear and damage, because the result would be the following: when turning, one wheel would be in a slip state, and the second would simply rub against the road surface. The design features of the Niva transmission provide for the presence of 3 differentials. They are located in each of the bridges and in the transfer mechanism.
When the car moves on a flat road and in a straight line with differentials, the traction force is divided equally between all 4 wheels. If there is insufficient adhesion of the wheels to the surface or slipping occurs, the differentials will redistribute the load on the slipping and sliding wheel so that the first receives more force, and the second, accordingly, less.
We have already mentioned UAZ. Despite many similarities, it should be understood that the VAZ’s all-wheel drive is made in the “pat-time” style. This means that when connected, the axes are firmly connected to each other, and rotation occurs at the same speeds. This device imposes some restrictions on the use of all-wheel drive - it can only be used in cases where road conditions allow slipping. In cases with hard asphalt roads and highways, it is recommended to switch the car to single-drive mode.
Gearbox and clutch Niva Chevrolet
The Niva has virtually the same VAZ gearbox, but with minor changes designed to increase the durability of the unit. Firstly, this is the replacement of the VAZ rear bearings of the primary shafts and intermediate bearings on the secondary shafts with similar, but sealed types. This eliminates bearing malfunctions associated with contamination and premature wear. Secondly, the gear shift control drive has been changed. It is easy to notice that in a Chevrolet the gearbox control lever is closer to the driver, which makes control more convenient. This was achieved through the use of an extension with a 250 mm horizontal rod. Gear ratios remain the same, as does the gear shift pattern.
The clutch device in the Chevrolet Niva transmission has undergone some changes and received a number of improvements and more progressive parts from front-wheel drive VAZ cars.
Backstage repair
In order to remove the knock of the box, you first need to remove it. To repair the box, you need to have keys (10, 13, 19), a 12 hex key, a screwdriver and pliers. So let's get started:
- Place your machine on a hill or in a hole.
- Disconnect the battery terminal and pour out the oil.
- Get inside the car. Remove the handles from the levers, as well as the transfer cases, the element casing and the cover.
- Remove the casing, boot, lock sensor connector. Remove the gearbox lever itself.
- Set up a gear that reverses, remove the locking sleeve.
- Try to mark the cardan flanges and also the transfer case, so that later you can assemble everything in the correct order.
- Remove the cardan (which is the front one) and the washer (which is the oil deflector).
- Did you see the flange (look at the secondary shaft)? Unscrew the nuts of the elastic coupling from it (this is done with a size 19 wrench).
- Unscrew the nuts on the cushions to the very end of the studs and remove the transfer case.
- Now you need to unscrew the bolts from the cylinder and the starter itself, after first removing the cotter pin and the spring next to it. An extension cord is required for this action.
- And move the starter closer to the radiator.
- Disconnect the sensor that controls the lights (reverse), unscrew the muffler clamp, as well as the bolts from the crankcase and the yoke nuts.
- Unscrew the bolts that hold the box closer to the engine. Carefully disconnect it, just try not to let it hang with all its weight on the input shaft.
- Rock it a little from side to side and gradually move it back until you reach the stop.
- Lower the crankcase down and remove the link from the hole.
Also interesting: Niva Chevrolet front hub repair
Installing the car in the inspection hole
Congratulations, you've removed the gearbox! In order to continue the repair, it needs to be disassembled. You should take your time to disassemble it; immediately prepare a work space for yourself. Advice, lay out all the removed parts exactly in the order in which you remove them, this will greatly simplify the reverse process. As you disassemble the device, observe how the bearings, gears, axles behave, whether there are any abrasions, how the input shaft behaves.
You may not have to completely disassemble the element, for example, identifying wear on the bearings is very simple, when you remove the bottom cover, move them a little, if any of the bearings move, it means it is worn out and needs to be replaced. So, let's continue the renovation. You need to do the following:
- First, unscrew the shank nut. Carefully remove the helicopter flange and the mechanism that selects the gear. Check the linkage for cracks.
- Now remove the cover from the back. If you suddenly cannot remove it, then push the bearing race down. It is by looking at the races that the condition and nature of the bearings are examined. If you decide to replace them, then you will need to pierce the bearing (now the secondary shaft) down, remove the clutch housing and check the spring washer.
- Now take out the clip, the bushing (which is remote), and the washer. You will have to disassemble the locking mechanism. To do this, unscrew the gear bolts, as well as the bolt (look at the secondary shaft). Lastly, remove the fungus and the ring.
- Remove fifth gear completely. Disassemble the gear. Take out the fixing ball; to do this, you need to push it inside. Unscrew the third and fourth speed fork bolt, extend the rod, remove it and the cracker. Remove the fixing ball and cracker. And by analogy, disassemble the first and second gears.
- Unscrew the fifth speed fork. Remove the rear gear. Don't forget to check the play.
- Take out the middle bearing, remove the front one, move the shaft back, and then pull it forward. The clip that is inside needs to be knocked down with a chisel.
- Remove the first, second, third and fourth gear forks. Also remove the input shaft, the locking ring needs to be removed, use a hammer or puller for this. Take pliers and remove the ring. Carefully inspect the needle bearing.
- Rocking from side to side, remove the bearing. The shaft needs to be removed. Remove the first and second speed gears, as well as the first, second, third and fourth hub couplings. If you find any malfunctions, you need to release the stopper and remove the third and fourth hub of the third speed. Replace the seals.
We disassemble the handle and lever in the cabin
Hooray, you're done, you've dismantled the box! In order to eliminate the knocking noise, you need to identify the part that has been damaged or worn out. After you find it, continue repairing the box, replace the damaged part, reassemble the device in the reverse order and put it in place.
Features and malfunctions of the transfer case
The Chevrolet Niva transfer case not only moved back by 250 mm, but also changed the installation angle by 4 degrees. Chevrolet engineers calculated that this angle would be optimal for the operation of driveshaft joints. The design of the transfer case uses small-module, low-noise gears, so the howling of the transfer case, as on the old Niva, is now completely eliminated.
Another common malfunction of the transfer case on old Nivas was vibration. On Chevrolet, this issue has been practically resolved by installing new pillows and the appearance of a third attachment point. This will eliminate not only operational vibrations and noise, but also the likelihood of incorrect installation of the transfer case after repair, prevention or troubleshooting.
There is another malfunction that few people think about, however, this problem is related to the resource and endurance of constant velocity joints. The fact is that a cermet valve is installed directly under the CV joint boot mounting clamp. Its task is to compensate for excess pressure inside the cover, thereby protecting it from rupture, and the CV joint itself from water and dirt. If you monitor the performance of the cermet valve during repairs or replacement of hinges, the boot will last a long time and will reliably protect the CV joint.
Chevrolet Niva gearbox: diagram and device
Remove the gear selection mechanism drive. Unscrew the two nuts securing the bracket to the support plate. Remove the bushing plate from the holes. Remove the spring. Inspect it and replace if necessary.
Assembly of the Niva Chevrolet gear selection mechanism drive is performed in the reverse order of removal. Assembling the Niva Chevrolet gearbox Assemble the gearbox in the reverse order of disassembly, taking into account the features given in this subsection.
Press the intermediate bearing of the secondary shaft using a mandrel resting on the inner race of the bearing. The fit of the inner bearing ring on the shaft is much tighter than the outer ring in the crankcase. In this regard, when pressing the bearing with force applied to the outer ring, it may be damaged. After tightening the screws securing the locking plate of the secondary shaft bearing, anchor the screws to prevent their spontaneous loosening. If there are traces of turning the bearing rings on the surfaces of the bearing bores, anchor these surfaces. For final installation of the input shaft assembly with how to assemble a Chevrolet Niva gearbox with the bearing of the front end of the secondary shaft, press the bearing assembly with the shaft until it stops with light blows of a hammer through a wooden block around the circumference of the outer ring of the bearing.
Having installed the retaining ring in the groove on the outer ring of the bearing, check the ease of rotation of the input shaft. Install the intermediate shaft into the gearbox housing, having first installed the shift forks I and II, III and IV, the rod clamps and the rods themselves.
Chevrolet Niva gearbox: diagram and device
Install the front how to assemble a Niva Chevrolet gearbox, the rear intermediate shaft bearings using a mandrel, how to assemble a Niva Chevrolet gearbox force to their inner rings. Do not forget to install the key in the groove of the secondary shaft if it was removed during disassembly. Tighten the bolt securing the front intermediate shaft bearing with a torque wrench, at the same time shifting into two gears. Lubricate the working surfaces of the gears and the annular grooves of the synchronizer clutches with transmission oil. Having installed the clutch housing on the assembled gearbox with the front and bottom covers installed, as well as the cross-member for mounting the power unit, tighten the nuts securing the clutch housing to the gearbox with a torque wrench.
Before installation, lubricate the inner surface of the clutch release bearing clutch with grease. After final assembly of the gearbox, place the driven clutch disc on the splines of the input shaft and check the ease of movement of the disc along the splines of the shaft.
After installing the gearbox on the car, do not forget to fill the crankcase with oil. Adjusting the mechanism drive, how to assemble a Niva Chevrolet gearbox, Chevrolet Niva gears To adjust the Niva Chevrolet rocker, you will need a wrench to Loosen the nut of the coupling bolt of the clamp securing the drive rod of the gear selection mechanism.
By moving the drive rod relative to the shaft of the gear selection mechanism in the longitudinal direction, ensure that all gears are clearly engaged.
Tighten the clamp bolt nut.
Tell your friends: To do this, remove the drive rod clamp 33 cm. Then, unscrew the fastening nuts 21 cm. Unscrew the six rear cover fastening nuts 36, and one of the rear cover fastening nuts is unscrewed from the inside of the gearbox housing when the lower cover is removed.
Reasons for withdrawal
Everyone knows that the gearbox on cars is the most unpretentious product, but only if you handle it correctly. Let's start from the beginning: the Chevrolet Niva is an all-wheel drive SUV, which, from the very design, was prepared for a track with various types of obstacles. In the video, but you can easily do everything yourself to replace the front struts. Overcoming obstacles means loading the car, and many problems arise from the loads and overloads of the vehicle, in particular, parts of the engine, gearbox, clutch, etc. fail.
Thus, the reasons for dismantling the gearbox may be as follows:
- Removal for subsequent replacement of the entire mechanism. But it’s immediately worth noting that a new box is installed only if the old one is completely unusable. But this doesn’t happen often, only on cars with high mileage.
- For carrying out repair and cleaning work. This work may include: replacement of failed components, gaskets, scenes and other products. replacing the timing chain on a 1.2 Skoda Fabia engine. Brief content and do-it-yourself repairs without using special tools my page in. Chevrolet Niva car. Gearbox on a Chevrolet Niva. On the Chevrolet field with your own hands. It all depends on what was disabled.
- When carrying out repair work on other vehicle components, if the gearbox interferes with these activities.
We won’t take a long look at what you already know, but let’s get straight to the process of dismantling the gearbox on a Chevrolet Niva.
Before you begin the process of dismantling the gearbox, you will need to make sure that this activity is necessary. For example, to change the oil in the box or replace the clutch slave cylinder, you do not need to remove it.