Why does the check light come on on Kalina 8 and 16 valves? What to do and how to act? »
Why does the check light come on on Kalina 8 and 16 valves?
What to do and how to act? Finding out this with 100% accuracy is only possible at the diagnostic station. However, the warning light can also light up due to minor problems in the heart of the car, which can be eliminated independently, without significant costs.
Causes
Why the check light is on on Kalina 8 and 16 valves, as well as the main reasons for this, we will consider further in more detail:
- Failure of the oxygen sensor. This element controls the operation of exhaust gases and informs about how much oxygen is not produced during the combustion of the fuel mixture. On Kalina, depending on the number of valves, from 2 to 4 oxygen sensors are installed. It’s not difficult to find out what’s wrong if you have a home scanner (if you have the opportunity to use it, that’s great). The main reason for the malfunction of the oxygen indicator is its contamination with oil waste;
- Problems with the sealing of the fuel tank. In this case, air enters the system, which is fraught with additional fuel consumption and, as evidenced by the activation of the check indicator;
- . A malfunction of the unit that controls the exhaust of harmful gases is one of the reasons why the check can burn for a long time on both 16 and 8 valve Kalina. It is quite possible that the incorrect operation of the element in question is due to a malfunction of the oxygen sensor;
- If the check light is on, you need to check the spark plugs. Failure to replace them in a timely manner or driving on bad fuel leads to the formation of soot and lack of spark. Identifying a problem with your spark plugs shouldn't be too difficult. If there is a noticeable increase in fuel consumption, problems starting the car, malfunction of the catalyst and the check light comes on, you should first check the spark plugs;
- Another reason for the Check Engine sensor to operate for a long time is the failure of the mass fuel consumption indicator, as a result of which the car consumes more gasoline.
How to rebuild a Lada engine
Serious malfunctions, of course, are very difficult to fix on your own, without special equipment, but every driver should know the basics. So, how to rebuild an engine?
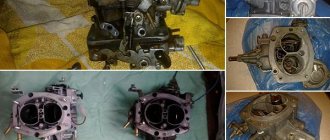
Remove the motor and dismantle its components in the following sequence:
- water pump;
- generator;
- carburetor;
- starter;
- gasoline pump;
- collectors;
- ignition system breaker;
- camshaft drive;
- valve cover;
- flywheel;
- clutch device;
- pulley;
- cylinder head.
Now clean the parts and carefully inspect them for damage. If you notice any defective ones, replace them with new ones. It is advisable not to use used parts, even if they are in reasonable condition.
Repairing the cylinder head. Here you should change the seals and put the valves in order. We carry out installation in reverse order
When replacing spark plugs, it is important not to forget to check the safety valve, since a short circuit may also blow the fuse
Is the engine acting up? Check the spark plugs!
So, what should we do if we set off on a long journey, but suddenly, unable to withstand a severe test of strength, the car stalled midway? The situation is not pleasant. But don’t give up, it’s time to get down to business. The problem may lie in the following.
- Most likely, you filled your car with gasoline of not the best quality. It's possible that debris somehow got into the motor. Just in case, it’s still worth cleaning the fuel lines and the tank itself, drying it and filling it with normal fuel that you are sure of. By measuring the pressure in the fuel rail, you will know whether there is a problem here or whether you need to look further.
- Damage to the fuel pump. It is easier to identify this problem: if the ignition is still turned on, then if there is a defect, the fuel pump makes a characteristic sound, indicating a malfunction. Remove the pump from the gas tank and check the outlet pressure in the tank using the power supply method. The pressure coefficient should not be less than 2 atmospheres.
- Ignition system failure: spark plugs do not produce a spark. To fix the breakdown, you just need to replace the spark plugs with new ones; it won’t take much time.
- Throttle assembly defective. This unit is the most important part that performs a significant part of the engine’s work. When it deteriorates, air and fuel mix, which leads to engine stupor.
- Injector failure. This is the most rarely encountered problem.
- It is necessary to adjust the timing valves if for some reason there is a violation of the clearances.
- The gas pedal needs repair.
- The motor has not yet been run in, so it malfunctions. The solution to the problem is simple: you need to be patient and break it in, driving 6000-7000 km. But it is worth remembering that the speed cannot be raised above 3000, otherwise serious repairs will be required after break-in.
This sensor monitors oil pressure
Why does the check light on Kalina light up?
Why does the car jerk on the gas?
causes and solutions to the malfunction When the check engine light comes on on Kalina 2, the reasons may be different. A comprehensive system test should be carried out to eliminate or confirm all possible faults. It is possible to eliminate the problem and prevent its worsening in the future only by accurately identifying the provoking factors.
Why does the check light on the Kalina car light up?
The check mark on the Kalina instrument panel usually starts flashing in case of engine problems, but these are not all the probable causes. You need to inspect the cap on the fuel tank to make sure it is in order. According to the current conditions (they are specified in the regulations), it must be installed correctly, and then screwed as tightly as possible. If the closure is not tight enough, there is basically no lid, blinking will definitely appear. You need to tighten it tightly and test the signal.
Another option is that the indicator lights up while driving. In this case, the car is stopped and the wires are tested. The test will show the condition of the cable in a free position. It is located in the space under the hood and can be inspected at any time. Additionally, you need to test the terminal - if everything is in order, it is usually open.
Since failures associated with a check may indicate serious malfunctions, a comprehensive check is mandatory
If, after the steps described above, the check engine light on the Lada Kalina error 4 is on, check the ignition system. In this case, testers are indispensable, which will demonstrate the real degree of wear of the wire insulation. Assessing system performance manually is much more difficult. Also, the check light may be caused by incorrect operation of the pumping station. To check it, turn off the engine and carefully evaluate the noise. Ideally, the hum should be smooth, without pauses, clicks, or interference. If there are sounds, strong ones, the pump is removed. Additionally, they do a filter test and remove contaminants. After cleaning is completed, the test is repeated.
Why is the check flashing on Kalina?
If the check on Kalina 16 valves comes on, and the system works without failures, do a step-by-step test. They brake the car and carefully listen to the sounds the engine makes. You definitely need to look at the quality and condition of the fuel mixture and oil. When there are no visual defects, but there are blinking signs, go to a service station to perform a comprehensive check.
You can check the ignition system, inspect the car coil, spark plugs, and determine the quality of the fuel. If you fail to figure out the problem before it is fixed, the error will remain.
Refilling gasoline at trusted places is a guarantee that there will be no unnecessary problems with your receipt.
Why does the check light on Kalina come on and the engine stalls?
The check light on Kalina periodically lights up, then the signal disappears on its own - a bad sign. You can do nothing only if the problem appeared once and then disappeared. Engine tripping should be especially alarming. In this case, the cleaning catalyst is checked - it is likely that excess exhaust has accumulated in it.
Catalytic converters are expensive, vulnerable components. They fail for various reasons. Flashing will begin after the unit has been operating at maximum speed for a long time. The triplets themselves often indicate malfunctions in the cylinders. The problem is likely in only one node or several at once. Often they work, but they do it incorrectly. As a result, problems arise with fuel combustion.
Be sure to check the battery and brushes during a comprehensive system test - this will allow problems to be detected in a timely manner and eliminated. The battery needs to be fully charged, its performance checked, and wear assessed. They do the work on their own or go to a service station. Professional-grade services are affordable and prevent unnecessary costs for emergency system recovery in the future.
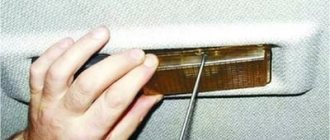
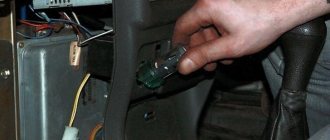
This is what the removed dashboard and check indicator look like
How to activate the immobilizer?
Often, a VAZ Kalina car reaches its owner with an inactivated immobilizer. To carry out the independent activation procedure, you need both car keys (with a red mark and a regular one). A prerequisite is that the doors are closed (until the limit switch is activated).
To ensure the correctness of the immo activation procedure on Kalina, it is recommended to refuel the car, since the low fuel level signal is identical to the sound during programming.
Activation on Kalina-1
The training procedure on Kalina-1 is as follows:
- Take the training key with the red mark and insert it into the ignition switch.
- Turn the key to the ignition switch point. Since the immobilizer is not active, after six seconds the control indicator on the instrument cluster should turn on. If this does not happen, the system is in an active state and further steps are not performed.
- Turn off the ignition, and the immobilizer indicator will switch to rapid flash mode. The flashing mode lasts six seconds, which are allocated to the owner to install a regular key in the ignition switch.
- Turn the lock cylinder to the activation position. The correctness of the procedure is confirmed by the alarm buzzer sounding three times. The absence of a sound indication indicates that the time interval allocated for installing the key has been exceeded, or that the immobilizer is faulty. The option of “training” the standard key to work with a device from another car cannot be ruled out.
- Wait 5-6 seconds, the buzzer should sound two more times. Then you need to turn off the ignition and remove the key from the lock.
- After this, the owner has six seconds at his disposal, during which he must turn on the ignition with the key with a red mark. During this time, the immobilizer indicator light flashes on the instrument cluster.
- After turning on the ignition, the buzzer should sound three times. Wait a few seconds until the second series of beeps sounds (two separate beeps).
- Turn off the ignition, leaving the key in the lock. After some time, a single signal will be sent by the buzzer, and the warning lamp on the instrument panel will begin to flash with increased frequency. Up to 15 seconds pass between turning off the ignition circuits and the indicator switching to the accelerated flashing mode. The time interval depends on the model of the immobilizer control unit installed on the car.
- After this, within 10 seconds you need to turn on the ignition briefly (for 3 seconds).
- Turn off the ignition. The alarm should sound three times. This confirms the successful completion of programming.
- Wait until the indicator on the instrument cluster stops blinking. Then you should remove the red key, programming the devices is completed.
Activation on Kalina-2
On Kalina-2 the procedure is different:
- When you turn on the ignition with the key with a red mark, three short beeps will follow from the buzzer. After the third signal passes, the ignition is turned off and the key is removed from the lock. Important - if the car was operated with a red key, the immobilizer will not make sounds. In this case, you need to wait a few seconds and move on to the next step.
- Within 5-6 seconds, insert a regular key and activate the ignition circuits again. Three beeps will sound, followed by a pause followed by two more beeps.
- Change the keys in the lock (within 6 seconds). After turning on the ignition with the red key, three signals will be given, then two more.
- Turn off the ignition, leaving the key in the lock. A buzzer will sound, after which the key will be turned to the ignition switch position. The car's standard horn will sound, indicating that the regular key has been stored in memory.
- Turn off the ignition. The indicator on the instrument cluster will go off. Otherwise, we are talking about device failure or programming error.
The procedure for activating the immobilizer on the VAZ Kalina, as well as Priora and Grant is shown in a video from the channel “avtodopka. ru".
Deciphering codes, checking devices
Timing faults: signs, causes and solutions
Mistake No. 2. Overvoltage. Error No. 3. An error has been detected in the fuel sensor level; it occurs if the circuit is broken.
Error No. 4. Coolant temperature sensor error. Error No. 5. The outside temperature sensor has failed. Error No. 6. The motor has overheated. This happens if the engine overheating alarm is triggered. Mistake No. 7. Oil pressure is in poor condition. Happens if the alert bell is triggered. Mistake No. 8. Problems with the brakes. Happens if the alert bell is triggered. Mistake #9: The battery is dead. Happens when the alert bell is triggered.
To reset all types of errors, press and hold the reset button until all data on the display is cleared. Testing of devices and their combinations is carried out in accordance with technical specifications using special equipment (pulse generator, from a stable power source, etc.). If a short circuit suddenly occurs in existing devices (less than 40-50 Ohms), the maximum temperature indication must prevail.
How to check the performance of the DTOZH?
Taras Kalenyuk
auto RU
In order to independently determine the serviceability of a thermistor-type measuring device, you need to acquire a multimeter and a thermometer that can withstand high temperatures.
You need to dismantle the device according to the instructions described above, and then connect it to a multimeter, previously set to ohmmeter mode.
Coolant is poured into a pre-prepared container, and the DTOZH and thermometer are placed there.
The antifreeze begins to heat up, and the owner looks at the resistance readings on the ohmmeter screen and at the thermometer, comparing the data with the plate to assess the accuracy of the device. Device data may vary from model to model, so it is best to use the instructions included with your existing device.
One thing remains unchanged - in devices with a negative coefficient, the resistance readings will fall with increasing temperature.
We recommend to buy
Resetting the daily mileage readings in Vesta
Why antifreeze boils: the main reasons and ways to eliminate them
To reset the readings, use two buttons on the windshield wiper control lever.
- Press the up button for a few seconds (the on-board computer goes into editing mode);
- Press the up button again until the daily mileage readings are reset;
- By pressing the down button we exit the editing menu.
That's all, you can see the reset and settings function more clearly in the video.
Other materials on servicing the Lada Vesta can always be found on our website.
Almost all modern cars, with extremely rare exceptions, are equipped with on-board computers. Some companies use the simplest solutions, others try to provide car owners with the most technologically advanced, informative and efficient car computers.
On-board computers (OB) are designed to display basic and additional information related to the operation of the engine, various systems and auxiliary mechanisms. The data is displayed on a special display. The on-board computer collects information from all controllers and sensors and displays it on the screen.
Tips and tricks
As you can see, if the engine stalls at idle or at low crankshaft speed, the reasons may be different.
At the same time, it is important to understand that malfunctions in the distributor or fuel pump can also lead to disturbances during the operation of the internal combustion engine, but in this case the engine will often fire on all cylinders one by one
In some cases, to solve the problem, it is enough to refuel with high-quality fuel, warm up the engine well, and then drive for 15-20 minutes at high speeds. In others, you just need to clean the spark plugs or replace the armor wires. However, unfortunately, these simple methods do not always work.
Why might the engine vibrate at idle? Causes of malfunction, diagnostics. Tips and recommendations for reducing engine vibration levels.
At idle the speed “floats”: why does this happen? The main malfunctions associated with idle speed on gasoline and diesel engines.
When you sharply press the gas pedal, the engine jerks, jerks and dips appear, the car does not pick up speed: the main causes of the malfunction and diagnostics.
Engine trouble: symptoms. Why does tripping occur and how to find the reason why the motor starts to trip. Checking power, ignition, compression, etc.
Signs of a non-working cylinder (tribbing and vibration) of a diesel engine. Troubleshooting: compression, diesel injectors, glow plugs, injection pump and others.
Other engine and system malfunctions
- Compression in the engine cylinders is low.
- The cylinder head gasket is damaged.
- The engine control system is faulty.
- The valves of the gas distribution mechanism are burnt out and leaky.
- The exhaust system is leaking.
- The valve clearances are not adjusted (8-valve engines only).
- The hydraulic pushers are faulty.
- The engine air filter is dirty.
- Vacuum hose connections are leaking.
Have you encountered power failures or observed unstable engine operation? What was the reason? We solve similar power unit problems in the comments or on the forum. Let us remind you that along with misfires, other engine malfunctions may appear, for example, floating speed.
Found an error? Select it and press Ctrl+Enter..
Many Lada Kalina car owners have encountered the “CHECK” icon lighting up on the instrument panel. This is primarily due to the fact that the engine has failed. Not everyone knows how to determine a malfunction, so in this article we will look at the causes and possible solutions to the problem.
Failure of the fuel tank, failure of the neutralizer
When the check engine light comes on, the owner of a Lada Kalina with an 8-valve engine first of all aims to find faults directly in the engine. However, the reason can sometimes “lurk” elsewhere. The glow of the symbol is caused by a loss of tightness in the fuel circuit. Even a loose tank cap can cause this situation.
Depressurization of the system involves the penetration of an additional portion of air into the circuit. In this case, a symptom such as an increase in fuel consumption appears, and the correct functioning of the engine itself is also disrupted.
When the owner of a Lada Kalina does not detect any extraneous sounds in the engine or other deviations in its operation, but the lamp on the dashboard still continues to glow, then the first step is to make sure that the gas tank cap is tight. Quite often there are situations in which drivers, in a frantic rush, forget to check that the cap is correctly and securely seated after refueling.
If after such a check the lamp on the dashboard “refuses” to go out, then you need to continue searching for other reasons. What to do when the catalyst “announces” its malfunction? This important component of the exhaust system serves to neutralize the flow of exhaust gases. It is no secret that a huge number of substances harmful to the surrounding atmosphere accumulate in the exhaust system during engine operation. Due to the presence and functioning of the neutralizer, the level of their emissions is reduced significantly.
Among the main signs of a breakdown of the catalyst in Lada Kalina, 2 experts highlight the factor of reduced engine power. This also manifests itself in worsening dynamics.
As already noted, a common reason for the neutralizer to become unusable is the breakdown of the lambda probe in the Lada Kalina 2. Also, worn-out spark plugs can significantly shorten the “life” of the exhaust circuit element considered here.
As a result of the influence of these factors, a significant decrease in the effect of gas neutralization is observed. Oxides accumulate inside the component, which over time leads to overheating and the risk of catalyst destruction. Operating a car with such a breakdown is undesirable, since incorrect operation of the engine will not allow the unit to develop the declared characteristics. Over time, a neutralizer that has become unusable can cause damage to the power plant, so timely replacement of this component is a more rational and cheaper measure compared to engine overhaul. To replace it, you will need to contact a service center, since it is unlikely that you will be able to carry out the repair procedure yourself.
Let us remind you that the keys to a long service life of the neutralizer are:
- timely replacement of spark plugs;
- use of high-quality fuel;
- correct operation of the lambda probe.
Another factor if the check light is on is the failure of the sensor responsible for the mass flow of air sucked into the intake manifold. This malfunction is characterized by a decrease in the engine power level and the failure of the unit to start smoothly when cold.
Why can the mass air flow sensor fail? One of the reasons for this annoying situation is the untimely replacement of the filter element in the air intake circuit. The motor itself is unlikely to suffer from a faulty state of the sensor, other than the indicated loss of power parameter. However, the owner will refuel more, due to the increase in consumption provoked by this fact. The price of the mass air flow sensor is not exorbitant, so it is not advisable to delay replacement. The repair procedure itself is not difficult to perform. This can also be done at the service center during scheduled maintenance.
Video “Disabling the immobilizer unit”
The channel Useful tips from Shurani demonstrates disabling the APS 6 immobilizer unit on Kalina.
There were several reasons why the Lada Kalina does not start, the starter does not turn, and the immobilizer is blinking. There are several reasons and each of them can cause different damage, but we will consider them all.
The video shows a problem with the immobilizer on Kalina:
Lada Kalina check engine light is on, find out the error
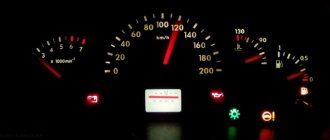
Most car owners learn about what a Check Engine is only after they have this problem. Understanding does not solve the problem, but only adds headaches, because there can be quite a few reasons why this light comes on. Sometimes you have to search for a very long time, and in some cases you cannot do without computer diagnostics at all. Today I will try to explain what a Check Engine is, why it lights up and what it threatens the motorist with.
Check Engine indicator “Check Engine” literally translates as “check the engine”, the indicator is located on the instrument panel and if it lights up, it means something is wrong with the engine. The warning light lights up based on a signal from the control unit, which has detected irregularities in engine operation. The very first “checks” were equipped with mini-computers, the main task of which was to control the carburetor, but as in the history of personal PCs, which were also originally intended to perform high-complexity computing tasks, the mini-computer of modern Check Engines has seriously evolved.
What should you do if the Check Engine light comes on?
- If the “Check Engine” indicator lights up when you start the engine and then immediately goes out, you have no need to worry, your engine is perfectly fine.
- If the Check Engine light comes on and does not go out for a very long time, this is a cause for concern; there is probably something wrong with the engine. However, there is no need to immediately get upset and despair; the reasons for the light bulb catching fire may not be serious, although critical breakdowns are also possible.
1. The “Check Engine” light came on while driving—possibly the cause was a low oil level. In order to understand what's going on, I recommend stopping, opening the hood and listening to the engine. Make sure that the motor runs smoothly and there is no extraneous noise or knocking, also check that everything is hermetically sealed; there may be leaks on the motor housing. If you find any of the above, take corrective measures, but if you couldn’t find anything, I recommend that you seek help from specialists.
2. Sometimes the Check Engine light comes on when the engine is running smoothly. In this case, the reason may be faulty spark plugs, most likely one of them misfires. Also, the cause may be poor quality fuel; as a rule, this can be detected immediately after leaving the gas station; such a “Check” is very relevant for our country...
- If the “Check” light is on due to low quality fuel, try to drain the contents of the tank and fill it with normal fuel.
- Check lights up due to problems with the spark plugs (cracked insulator, incorrect gap in the spark plugs, carbon deposits, etc.) - check the spark plugs and replace if necessary. If the gap between the electrode is broken, put it in order; the value should be no more than 1.3 mm.
- The ignition coil is also often the reason why the Check Engine light comes on - make sure there is a spark, and also check the resistance at the coil terminals with a multimeter (or ohmmeter), the discrepancy should not exceed 1-4 and 2-3.
- The oxygen sensor or, as it is also called, the lambda probe, can also be the reason why the Check light comes on; the problem is solved by checking the functionality of the lambda probe. If the sensor is confirmed to be faulty, replace it.
- Problems with the catalyst can also be treated by checking and replacing.
- Faulty injectors can cause the “Check” to light up. To confirm or refute this version, check the injectors and clean if necessary.
- Problems with the fuel pump or fuel filter. This problem is solved by checking the pressure in the rail; it should not be less than 3 atmospheres; if problems are found, replace or clean the filter/mesh or completely replace the fuel pump.
- High-voltage wires, as I already said, can also cause problems with the “Check”. To check high-voltage wires, follow the instructions.
If carrying out all the above tests and checks did not lead to anything and you still have not been able to understand why the Check Engine light is on, I advise you to seek help from professionals. At the service station, thanks to modern equipment, they will quickly find the cause and help resolve it, not for free, of course. You may have to fork out money for serious repairs, or perhaps the reason is completely simple and can be solved quickly and cheaply, depending on your luck... In any case, you should not delay, as this can lead to major repairs and more serious expenses.
Setting a secret code
The APS-6 module, if it has been activated, cannot be taken and turned off for the entire duration of further use. But there is a procedure for setting the code that you will later use to start the engine. If you set the code once, you can start the engine with a blank, but you will have to enter the code value with the gas pedal. Here we will look at how to set a value that is thought up in advance and consists of 6 decimal digits. Read carefully.
Setting the code is always combined with the operation of “writing” the keys. That is, you will need all the keys that you plan to use. This also applies to the “training” key.
Red mark on the training key
The ignition switch is equipped with three marks: 0, I, II. You will move the key between the first two. Close all doors and follow these steps:
- Place the training key in the lock, move it to position I, and after 6 seconds again to position 0 (the lamp with the “machine” will begin to blink);
- Change the key to “normal”, turn on the ignition (position I), wait for the sound signal;
- If multiple keys are used, perform “step 2” for each of them, first removing the “previous” key;
- Reinstall the training key in the lock, move it to position I. After the sound signal, turn off the ignition (position 0), wait for the signal and move the key to position I. The horn will sound, the “dimensions” will blink;
- The learning key remains in the lock and the ignition is on. Wait a minute until the Check Engine light goes off;
- Start dialing: short presses set the first digit, and the transition to the next digit is initiated by a long press (until the “Check Engine” goes out);
- After dialing the 6th digit, the Check Engine light does not go out. Wait 12 seconds, release the gas pedal, remove the learning key.
Congratulations on successfully completing the secret sequence.
Be aware that the numbers in the code sequence can take values from “1” to “9”. Zero is excluded.
How to reset a check on Kalina yourself
It is not recommended to reset errors yourself if the Lada Kalina check engine light is on. The error information will disappear. In a car service, if something happens to the engine after the reset, they will not be able to determine what kind of malfunction caused the engine to stop working. This means that you will have to completely disassemble the motor. It's an expensive endeavor.
However, if the car owner is sure that the wires were simply shorted after washing the car (this happens), then he can do the following at his own peril and risk:
- Turn the ignition key, but do not start the engine.
- Open the hood and remove the terminal from the positive terminal of the battery.
- Wait about 5 or 10 minutes.
- Reinstall the positive battery terminal. Close the hood.
- Turn off the ignition and turn it on again. Now start the engine and get ready to start driving.
The check lamp should disappear from the panel.
Comments and reviews
Ivan Ivanovich Baranov
Experience working at a service station:
View all answers
Avtozam.com - your assistant in car repair and maintenance
Your use of this website constitutes your agreement that your use is at your own risk.
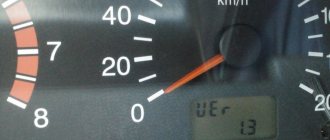
I was driving calmly from Kamensk Uralsky home from my studies and suddenly the check engine light came on! The car drives as it did, there are no problems with the work at all... the question is what to do?! there is no on-board computer... should I go for diagnostics or contact the authorities? For now I'm leaning towards diagnostics at the service center. It really bothers me that this lamp is on! some travel with it for 2 years, but I can’t! and further! When testing the tidy (hold the odometer button for 3 seconds and without releasing it, turn on the ignition), the following error codes appear (as I think) or what can you tell me?
Mileage 23900 km
Troubleshooting methods
Now that all the causes have been identified, we can begin to consider troubleshooting. But, before we begin, it is worth noting that a car enthusiast needs to have an idea of the design features of the engine if he wants to fix the problem himself. Otherwise, go directly to a car service center, in order to avoid other problems that, due to lack of experience, car enthusiasts usually create for themselves.
Sensors
Often, the reason why the check light on Kalina may come on is the failure of one of the sensors. Possible ones that are worth checking right away include: mass air flow sensor, idle speed control, crankshaft position sensor, oxygen sensor and coolant temperature sensor.
But, there is a simpler and more effective way to determine the malfunction of a particular sensor, namely connecting to the electronic engine control unit. Here you can look at the errors and, by deciphering them, determine where the problem is.
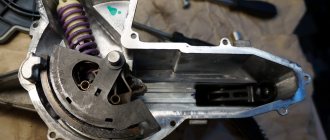
Throttle
A clogged throttle valve can often cause the check engine light to come on because not enough air is supplied to the power unit. The solution to the problem is cleaning. This process can be carried out using carburetor cleaning fluid or VD-40 fluid.
The part is removed from the car and cleaned, after which it is installed in place. It is also recommended to check the throttle position sensor, which may have failed.
Injectors
One of the common reasons for the “check” icon to appear on the dashboard is a malfunction of one or more injectors that do not spray the fuel mixture properly. So, it is worth dismantling all the elements and checking them using a special stand.
If there is none, then you can use the traditional method by pouring flushing fluid into the fuel supply pipes and activating the injectors using the battery. This way it will be clear which injector is not working well. But, experienced auto mechanics recommend cleaning and checking the nozzles on a stand, since the effectiveness of the procedure is higher.
Fuel pump and filter
Another cause of the malfunction may be a malfunction of the gasoline pump or its filter. Lack of power or contamination of the filter elements leads to the fact that an insufficient amount of fuel will enter the power unit to form an air-fuel mixture.
The malfunction can be cured by checking the functionality of the gasoline pump, as well as by replacing the filter inside the gasoline pump. It is also worth looking at the fuel filter, which could become clogged when pouring low-quality gasoline.
Air filter
A clogged air filter can cause insufficient air in the combustion chambers. So, to check this element, it must be dismantled, which is done quite simply. By inspecting the filter element, you can find out how dirty it is and whether the product needs to be replaced. So, after replacement, the check signal from the dashboard may disappear.
Spark plugs and high voltage wires
Wiring is also often the reason why the check icon lights up on the panel. This happens when the spark plug is inoperative or there is a breakdown in one of the high-voltage wires.
It is recommended to check spark plugs on a special spark plug stand. But, if there is none, then you can use the generally accepted “old-fashioned” methods. But high-voltage wires are checked using a conventional multimeter, where the resistance along each wire should be about 5 ohms. If a broken part is found, it must be replaced.
Petrol
But, in addition to the above reasons, the problem may lie on the surface. Thus, ordinary low-quality gasoline can cause the “Check Engine” icon to appear on the car’s dashboard. To eliminate the breakdown, it is necessary to drain the low-quality fuel and flush the fuel supply system. But, if you drive for a long time on such fuel, the batteries may fail, which should also be checked when flushing.
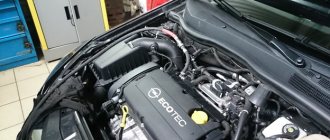
Engine diagnostics
Before you start tinkering with the hardware, it’s worth turning to the car’s software and understanding whether the reason may lie in the failure of one of the power unit’s sensors or in a so-called software failure.
Getting access to the car's software is quite simple. To do this, the motorist will need some equipment and materials. First, you should find out which engine control unit is installed on the vehicle.
To do this, you need to look at the service documentation or decipher the body number. The second option is not available to everyone, and therefore it is worth following the path of the slightest resistance. Electronic engine control units marked 11186-1411020-12 can be installed on the Lada Kalina 2 power unit.
Diagnostics Lada Kalina 2.
Depending on which ECU is installed on the car, it is worth choosing software for diagnosing and repairing software. Also, in the process you cannot do without a USB data cable, which is called OBD II. Well, to perform direct diagnostics and guide the process - a laptop computer or tablet.
Let's proceed directly to the process of diagnostics and troubleshooting. We install the appropriate program on the tablet, which will not only allow it to synchronize with the ECU, but will also make it possible to carry out full diagnostics. After installing the software, connect the cable to the tablet and control unit.
By analyzing the data obtained, you can understand what the condition of the equipment is and whether there are problems. Typically, diagnostics show failed sensors that need to be replaced. After replacement, it is worth clearing the accumulated errors and trying to see if the engine operation has changed. If this does not happen and the cause remains, then you should go directly to looking for the causes in the hardware.
Interruptions in engine operation
Diagnostics of the engine condition by the appearance of the spark plugs
During interruptions, the engine idles unevenly, does not develop sufficient power, and consumes gasoline increased. Interruptions are usually explained by a malfunction of the injectors or electric fuel pump, see “Power system”; “Electronic engine control system (fuel injection system)”, spark plugs of one of the cylinders, air leakage into one of the cylinders. It is necessary to find the fault and, if possible, eliminate it.
1. Start the engine and let it idle. Go to the exhaust pipe and listen to the sound of the exhaust. You can bring your hand to the cut of the exhaust pipe - this way the interruptions are felt better. The sound should be even, “soft”, of the same tone. Popping noises from the exhaust pipe at regular intervals indicate that one cylinder is not working due to a failed spark plug, lack of a spark, an injector failure, a strong air leak into one cylinder or a significant decrease in compression in it. Popping noises occur at irregular intervals due to dirty injector nozzles, severe wear or dirty spark plugs. If popping noises occur at irregular intervals, you can try to replace the entire set of spark plugs yourself, regardless of mileage and appearance, but it is better to do this after contacting a car service center to diagnose and repair the engine management system.
2. If the popping sounds are regular, stop the engine and open the hood. Check the condition of the ignition system wiring harness and the fastening of the wire blocks on the ignition coils. If there is damage to the wires, replace the entire ignition system wiring harness.
3. Remove the spark plugs (see “Replacing and servicing spark plugs”).
4. Carefully inspect the spark plugs and compare their appearance with the photographs given in the subsection “Diagnostics of the engine condition by the appearance of the spark plugs.”
5. If all the spark plugs look good...
6. ...check the gap between the spark plug electrodes (with a round feeler gauge only). It should be 1.00–1.13 mm.
7. If the gap differs from the specified one, adjust it by bending the side electrode.
8. Reinstall the spark plugs and coils and connect the wiring harness connectors to them.
9. Disconnect the wiring harness block from the cylinder 1 coil. Start the engine. If engine interruptions do not worsen, replace the spark plug in cylinder 1 with a known good one. Attach the high voltage wire and start the engine. If the interruptions intensify, repeat the procedure sequentially with all cylinders to identify the faulty spark plug.
If, as a result of the measures taken, engine interruptions are not eliminated, check the compression in each of the cylinders (see “Checking compression in the cylinders”). Normal compression is more than 1.0 MPa (10 kgf/cm2), a difference in compression values in the cylinders of more than 0.2 MPa (2 kgf/cm2) indicates the need for engine repair.
LADA (VAZ) cars Repair and diagnostics of VAZ cars. replacing the Kalina camshaft position sensor, adjusting the Kalina clutch, removing the bumper of the VAZ Kalina, the electric motor of the cooling system fan. Kalina, remove and install the rear bumper of the VAZ 2112, the Lada key does not learn, Lada Kalina heater, Kalina controls, Kalina gas exhaust system, VAZ 2112 malfunctions, diagnostics of Kalina steering tips, how to check the removed Lada Kalina controller, VAZ 2112 control panel Contact nkvd site moderator #russia.ru Buy, sell used VAZ, Lada cars. 2010 (C) LADAOMG
lada-omg.ru
Kalina, misfires on cylinders 1 and 4
Hi all. KALINA-1.6,8V 11183-1411020-22, I201CO57. January 7.2 E2 suffered all day, cylinders 1 and 4 do not work. No reaction at all on these cylinders, as if they were not there at all, when removing the spark plug wires from these cylinders, zero reaction .Compression is 11 in cylinders 1 and 4, and 2 and 3 are 10 atm each. Valve regulation is in order, fuel pressure is 3.8, spark plugs, wires, oil pump are in order. Of the errors, of course, there are leaks in cylinders 1 and 4. I checked the air intake , no leaks. The spark plugs for 1 and 4 are black, there are no short circuits in the injector wires, I checked them separately from the ECU for each injector. I changed the DPKV. The client claims that all this happened after replacing the clutch disc, i.e. The gearbox was also removed. And also errors according to EMUR MAKHACHKALA.
It’s strange, there’s compression, there’s a spark, the valve adjustment is fine, there’s no air suction, the injectors are controlled, there’s no difference between cold and hot, :bezpo:
Modified November 27, 2022 by Qena
§
I haven’t worked with a postograph, but I’ve studied its functionality; to be honest, the settings are a little unclear. In principle, something simpler, like Osa, is enough, because if you’re not going to diagnose everything using an oscillator, including tire pressure :), then the Postolovsky is not needed at all, it’s expensive, and basically it will lie on the shelf. For example, it’s easier for me to look at the marks on the belts visually, more reliably, and faster than hanging the engine with wires every time and fussing with the settings, and a compression gauge it’s easier and faster to stick it into the cylinders than hemorrhoids with a pressure sensor. For diagnosing the secondary, and not only there is a good thing from ACELab for 8 tr, I’ve been using it for the second year or so, it’s quick to use, auto-tuning and all sensors can also be checked, and for the secondary there are two types of probes, for wires and individual coils, take a closer look at it, it’s definitely worth the money, and to check the coils I additionally use a Chinese RLC meter for 3 tr, in the mode of checking the quality factor of the coils, I read somewhere on the sites, I bought it and use it, using the coils I calculate 100% using these two gadgets
Operating principle of DTOZH
Complex processes of temperature and voltage fluctuations constantly occur inside the motor. When the temperature drops below the permissible level, an enriched mixture is required for normalization. If the scale rises above a certain mark, then, on the contrary, an enriched mixture can lead to damnable consequences for the engine. During normal operation of the DTOZh, all this data comes to the dashboard in an impeccable format, becoming good hints of the car’s wishes addressed to the driver.
But in the event of a break, even the most microscopic one, in the sensor wiring, these measurements are already performed in a broken format. As a result, when this is not necessary, the system supplies an enriched mixture, which causes excess fuel consumption in the engine. How many sensors are there on the Prior? (Solved) - 3 answers. The unit begins to work at an excessive level due to wear and tear, the result of which is a high percentage of harmful emissions into the atmosphere.
Lada Kalina - Car Owners Blog: The “CHECK” light came on. Serious consequences
I didn’t think twice about it, since the car was under warranty, I took it to the official AvtoVAZ service center. There they first reassured me, saying that most likely it was bad gasoline, which is why the light came on. But then they decided to do engine diagnostics. And as a result, it turned out that I had a burnt-out valve on one of the cylinders. I was simply shocked by this statement, since I never spared money for my Kalina - I only refueled with 95 gasoline and always at normal gas stations. But it is clear that at proven gas stations they can fill up with a surrogate. The master told me to take the car to the car wash, after which it would have to have the engine repaired, or rather a valve replaced. I washed my Kalina and drove it into the box; they repaired the engine, probably about 7 hours in time. We assembled the engine, adjusted the valves and that’s it: my car is back in service. Still, I wondered why it could happen that the valve burned out in such a short period of time? It would be fine if I drove on gas, such problems often occur there, but I drive on gasoline and only on AI-95. Unclear.