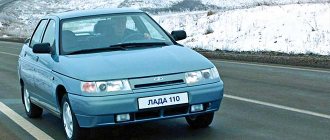
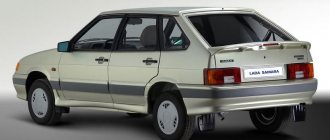
Niva, LADA 4×4, VAZ 2121 - Russian and Soviet all-terrain vehicle with permanent all-wheel drive. The universal SUV has been produced since 1977; the model became the basis for the compact crossover Suzuki Vitara. Until the latest Urban generation, Niva door trims were made of leatherette or vinyl leather, the material was glued or installed on self-tapping screws, a plastic or wooden door card. The upholstery of doors and trunk is not a frequent repair, since the lining is generally replaced after significant wear of the outer covering or when the card is deformed.
How to remove door trim Niva 21214
Removal and installation of the trim is required for any repairs inside the door: malfunction of the window regulator, lock, electric lock. The operation takes no more than 15 minutes for each stage.
Removing the front door trim
Remove the window handle. To do this, you need to turn the handle down and insert the tip of a screwdriver into the gap between the handle socket and the lining (as these parts are called in the catalogue). There is a ledge on the facing that snaps it into the socket. The screwdriver releases the latch and the trim can be pushed up, after which the handle and socket are simply removed:
Use the tip of a screwdriver to remove the plastic lining of the internal door opening handle (the lining is simply snapped onto the handle):
Pull out the armrest plug, unscrew the screw under it and the two screws at the bottom of the armrest (a cross-head screwdriver), remove the armrest:
The door trim is held in place by eight buttons: four on the bottom edge and two on each side. You need to slip a flat-head screwdriver between the upholstery and the inner door panel, feel for the button and, turning the screwdriver, pull the button out of the panel. You should start from the bottom, then along the sides:
Remove the upper edge of the upholstery from under the strip welded to the inner panel of the door, turn it 90° clockwise and remove it from the internal door opening handle:
Remove the dust-proof film (it is simply glued with tape):
Installing the front door trim
Place the dustproof film on the internal door opening handle and attach it to the door panel so that the holes in the film coincide with the holes for attaching the armrest (arrows in the left photo). Glue the film with existing tape (you can replace it with pieces of electrical tape or adhesive tape). The adhesive tape securing the upper corner must be inserted into the hole at the edge of the door and glued to the inner panel of the door on the back side (arrow in the right photo):
At the bottom, insert the edge of the film inside the door:
Inspect the buttons on the door trim and, if necessary, replace broken or missing ones (in the VAZ-21213 buttons 2121-6102053 are used). The buttons are inserted into the oval holes of the hardboard upholstery and are fixed by turning 90°:
Turn the trim 90° clockwise (relative to its normal position) and place the hole on the internal door opening handle:
Return the trim to its normal position and slide its top edge under the strip welded to the inner door panel. Make sure that the top button on the outer edge of the door is against the hole and click it into place:
Snap the remaining buttons: first the side ones, then the bottom ones:
Place the plastic lining of the internal door opening handle onto the handle and snap it into place:
Place the socket and the handle itself onto the window handle shaft, leaving a gap between them approximately equal to the thickness of the cladding. Push the trim into this gap (from the back of the handle) and snap it into place:
Source
Front door
Squeeze the tabs of the latch and remove button 4 (see Fig. 8-43) to disable the door lock.
Remove three key switches on the left door and one on the right, disconnect the plug blocks, remove plugs 5 (Fig. 8-40), unscrew screws 3 and 4 securing handle 10 of door armrest 12, remove armrest handle and side mirror trim.
Unscrew the screw securing the trim 1 (Fig. 8-41), move it back and remove the trim of the inner door handle 2.
Unscrew three self-tapping screws 6 (see Fig. 8-40) and remove pocket 9 of the front door trim.
Unscrew the two screws, press out the button 2 with a screwdriver and remove the upholstery 13.
Rice. 8-40. Removing the front door trim: 1 – upper seal of the front door opening; 2 – button; 3 – screw; 4 – screw; 5 – plug; 6 – screw; 7 – threshold seal; 8 – piston; 9 – door trim pocket; 10 – armrest handle; 11 – door seal; 12 – front door; 13 – front door trim.
Rice. 8-41. Removing the front door handles: 1 – trim of the inner door handle; 2 – internal door handle; 3 – front door; 4 – outer front door handle; 5 – lock cylinder; 6 – screw; 7 – bracket.
Rice. 8-43. Front door locking mechanism: 1 – rod for internal lock drive; 2 – button pull; 3 – button insertion; 4 – door lock release button; 5 – outer handle rod; 6 – lock retainer; 7 – lock release rod; 8 – fixing screw; 9 – front door lock; 10 – electrical connector of the gearmotor; 11 – gear motor.
The process of removing the Niva front door trim is also shown in the video:
Why do you need door trim?
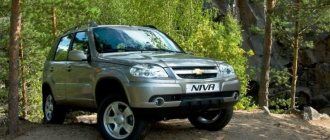
This element is made of plastic and hides the inner surface of all doors in the Chevrolet Niva. There may be other decorative elements on top of the plastic on the upholstery .
The inner surface of the Niva Chevrolet doors is lined with plastic.
Purpose:
- Hides the metal base of the door.
- Gives the salon style.
- It has a handle on its surface for opening/closing the door.
- Reduces the level of external noise in the cabin.
- Serves as a place to install speakers and store small items in pockets.
Backdoor
Squeeze the tabs of the latch and remove button 2 (see Fig. 8-47) to disable the door lock.
Unscrew two screws 5 (see Fig. 8-45) and remove pocket 4.
Unscrew the screw securing the trim 1 (Fig. 8-46), slide it back and remove the trim of the inner door handle 2.
Remove the trim 9 (Fig. 8-48) and the window lifter handle 10.
Press buttons 1 (see Fig. 8-45) and remove rear door trim 8.
Rice. 8-45. Removing the rear door trim: 1 – button; 2 – armrest handle insert; 3 – upholstery holder; 4 – rear door trim pocket; 5 – screw; 6 – door sill seal; 7 – rear door opening seal; 8 – back door.
Rice. 8-46. Removing the rear door handles: 1 – inner handle trim; 2 – internal door handle; 3 – bracket; 4 – rear door; 5 – nut; 6 – outer rear door handle; 7 – bolt; 8 – screw.
Features of repair and replacement of door trim on Niva
Niva, LADA 4×4, VAZ 2121 - Russian and Soviet all-terrain vehicle with permanent all-wheel drive. The universal SUV has been produced since 1977; the model became the basis for the compact crossover Suzuki Vitara. Until the latest Urban generation, Niva door trims were made of leatherette or vinyl leather, the material was glued or installed on self-tapping screws, a plastic or wooden door card. The upholstery of doors and trunk is not a frequent repair, since the lining is generally replaced after significant wear of the outer covering or when the card is deformed.
Which torpedo is suitable for the field?
Fans of domestic off-road vehicles LADA 4x4 and Chevrolet Niva are often people who are fond of active recreation.
These cars are purchased for hunting, fishing, tourism, or those who live in rural areas, who like to overcome difficult road obstacles and test the car's strength. This means that various things are often transported in the cabin, sometimes non-standard and large, which can easily damage the appearance of the interior, which will not have a favorable effect on comfort. Fortunately, we know what to offer you in this situation. Do you want to simply update the interior or is your Niva no longer new? Our online store can offer you factory door trims for a three-door (VAZ 2121, 21213, 21214) or five-door model (VAZ 2131). We offer a wide range of door and interior upholstery. There are kits for the entire interior, which include plastic elements, not including the instrument panel.
We also have for sale an assembled instrument panel for Lada Niva 4x4, as well as its individual elements. The floor tunnel, which is available in several designs, and the ceiling cladding with a lampshade are also in great demand. These products will update the appearance of your SUV's interior and add comfort with a more modern design.
Not only the plastic wears out (and, as a rule, it is not of the best quality in our cars), but also the leather parts of the interior, for example the gearbox (gearbox) and manual transmission (transfer case) casing. We are pleased to offer you high-quality, factory-made gearbox and manual transmission covers for the Chevrolet Niva.
There are times when, when transporting cargo, you can accidentally tear and cut seat covers. The problem is not critical, we sell seat upholstery for all VAZ models, including Lada Niva 2121, 21213, 21214, 2131 and VAZ 2123, sewn according to factory patterns. When replacing the upholstery cannot help, you can always completely replace the VAZ seat assembly.
When all the old parts of your car's interior are replaced with new ones, you need to think about comfort!
Features of the skin in different Niva models
Over the 42 years of Niva production, the interior trim of the SUV has not changed radically. Waterproof fiberboard is used for door cards.
The plywood is covered with stitched leatherette; for relief, a sheet of dense foam rubber is laid between the outer material and the wooden frame.
21213
The VAZ 21213 model is a restyled version of the first generation Niva 2121. The interior of the modernized SUV was trimmed with leatherette. Depending on the assembly, the car was produced both at the head plant in Tolyatti and in Ukraine; three color options for the door card were offered: blue, brown, black.
21214
Modification 21214 in the interior is similar to the previous configuration. The door trim of the updated version copies the door trim of the VAZ 2121 with the only difference - the door panel provides space for a larger diameter speaker. It is installed on the door using bolts and screws. Starting with model 21214, drivers replace the old lining with new door card samples, plastic flat linings with parts of patch pockets.
In addition to leatherette, natural leather, Alcantara, and eco-leather are used for upholstery. Alcantara remains the most popular, since you can choose any color, artificial leather retains elasticity and strength under temperature changes, and does not wear out.
Urban
Niva Urban appeared on the market in 2014. The model is recognized as a technological breakthrough for VAZ. The SUV retained some parts of the transmission, wheelbase, and elements of the braking system from its predecessor. Durable plastic with a texture reminiscent of shagreen is used to trim the trunk, front and rear doors and the interior.
A characteristic feature of all Niva models remains the interchangeability of power units and interior elements. The driver can independently reinstall parts of the floor tunnel, door cards, dashboard, etc. Factory trim numbers for Niva Urban 2015:
What is the best way to drag?
It is very important to choose the right material for reupholstering door panels. These can be either natural or artificial fabrics.
Genuine Leather
Sheathing made from this material has an excellent appearance and can last for a long time. The only drawback of genuine leather is the cost, which is one of the highest. This material is ideal if you plan to do all the work yourself.
Leatherette
An option that is inferior in quality to its natural counterpart, but has a more affordable price.
Eco leather
Another worthy alternative, which has high elasticity and can withstand mechanical and temperature influences.
Eco-leather is the same as leatherette, it will look good, cost inexpensively, and last less than the original
Velours
An excellent option for reupholstering not only doors, but also the entire interior of the car. Less commonly used for re-lining ceilings.
Velor is a favorite of many car enthusiasts, a material that is pleasant to the touch and to look at.
Alcantara
Interesting texture and pleasant canvas. Please note that decent samples cost a lot. As an alternative, you can choose products from the budget segment.
Alcantara is artificial suede, but it is made using advanced technologies
Faux suede
The dense fabric consists of polyester with a cotton base. The structure is velvety and moderately soft.
Faux suede is a budget material that is also pleasant to the touch. Looks pretty good in the showroom
Is it possible to install a door trim from a Niva Urban onto a regular Niva?
The Urban cladding is suitable in size and shape for the first Niva configurations. The only difficulty is that not a single technological hole in the door cards matches.
The cards of both cars are mounted on long and short self-tapping screws; inside the trim there are clips that secure the trim, preventing vibrations and rattling.
To reinstall Urban door cards on Niva 21213-14, you will need to drill new holes for screws in the door:
The trim in the area of the door handle is standardly attached to Urban with two M6 bolts. You can weld the corresponding nuts onto the door using 21213 or use long self-tapping screws.
To make the conversion go quickly and not have to drill inaccurate holes, it is recommended to first make an Urban map template, mark the locations for the bolts, attach it to the door, and mark the exact location.
Engine tuning
A fairly common type of tuning is the modification of the Niva-2131 engine. However, it is worth noting that its improvement will not be so significant, since the car is initially produced with a very powerful unit adapted for off-road use.
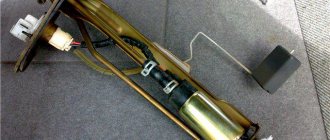
Among the small modifications, the most popular is the installation of an oil pressure indicator in the engine. With its help, it will be possible to timely assess the condition of the oil and increase its volume if the situation requires it. The advantage is that you can install the sensor yourself. Have to take:
- indicator tee;
- sensor;
- tools.
First of all, it is necessary to remove the standard sensor, which warns of emergency oil pressure. Instead, a “tee” is installed, and after that the previously dismantled sensor is added. If the car owner does not have certain skills and knowledge, then to connect it is best to contact specialists at a service station.
Sheathing fastening
As standard for all Niva modifications, original VAZ 2121, 21213, 21214 NIVA caps are produced. Catalog number 2121-6102053. Pistons are made of durable plastic, usually white.
The shape of the pin fasteners is simple: a double skirt and a forked pressure tip. With the first skirt, the piston is installed into the casing, and the tip enters the clip.
Design features of car door trim holders
Today, the market offers a series of Niva skins from various manufacturers. Depending on the cladding model, the shape of the fastener also differs. As a standard, all door cards are installed with clips and screws in standard places and do not require additional preparation of the door metal.
The trim on the VAZ 21213 Lux series is produced in Syzran. The new door card is a gray plastic panel, the texture of the material resembles shagreen or smooth leather. There are no additional pockets in the cover; clips and a set of pistons are included.
The new VAZ 21213 door upholstery is manufactured at the AvtoVAZ head plant in Tolyatti. Covering material – genuine leather (on request), high-quality black leatherette.
Clips are not included in the kit.
Rules for removing and installing casing
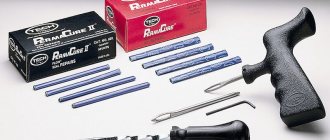
To quickly remove the casing, you need to prepare the following:
Dismantling the door trim of Niva Urban and Lada 4x4 differs in the procedure for unscrewing the screws and removing the linings. Regardless of the configuration, before work it is necessary to remove the negative terminal from the battery. The procedure for dismantling the cladding on Niva 21213-14:
To replace the clip, the part is rotated 90 degrees and removed from the casing. Installation of a new piston is carried out in the reverse order.
Repair work to replace the casing
For the Niva Urban, the algorithm for dismantling the trim differs from the classic assembly of the VAZ 2121. It is recommended to use a screwdriver instead of a Phillips screwdriver. Reinstalling a plastic door card in steps:
- Remove the door handle plug and remove the two fastening screws.
- Remove the pistons along the upper edge of the cladding; there are four screws under them, and unscrew them with a screwdriver.
- Use a screwdriver to pry off the inner handle trim and remove. For the rear door, use a screwdriver to pry between the washer and the latch.
- Pull out the door lock, pointing the part down.
- Remove 3 plugs along the bottom edge, remove three screws under the plugs.
- If the latest generation model has a speaker installed, remove the mesh, remove the four screws, the speaker will fall into your hand, and carefully unfasten the two power supply terminals.
- Remove the screw at the bottom of the space under the speaker.
- Unfasten 4 or 8 pistons around the perimeter.
Reassembling the casing should be done in the reverse order, starting with installing the pistons and screwing in the first screw under the speaker.
How to eliminate rattling sheathing
Vibration of the door card is becoming a frequent problem; many owners call the defect a “childhood disease” of the VAZ. The characteristic sound is not produced by the door trim itself, but by an incorrectly adjusted door locking mechanism in the area of the striker. The defect also spread to the Niva Urban sample. If the door card itself is rattling, then it is necessary
If the rattling is associated with a loose fit of the lock pawl to the engaging plate, then drivers are advised not to waste time on lengthy disassembly and adjustment of the locking mechanism. It is better to take a medical adhesive plaster and seal the bracket at the end of the door in one layer.
Additional recommendations
Drivers recommend choosing new plastic door cards when reinstalling the trim on classic models. The panels are resistant to damage, do not scratch, and retain an attractive appearance.
If you are re-upholstering an old door card, then it is better to choose classic, domestic leatherette instead of vinyl leather or more expensive Alcantara. The Chinese-made material cracks after a few months and contracts strongly during frost, deforming the card.
Source
General provisions
Door card (panel) is a special insert in car doors that covers internal elements, namely the glass lifting mechanism, wires, etc. On older cars, leather or a special type of material was used as a base. Today, in order to save money, manufacturers use plastic or other “budget” material.
The need to reupholster the door card arises in the following cases:
- desire to improve the appearance of the interior;
- bringing the design of the door card and seats into line;
- wear or peeling of the old surface;
- other reasons.
Features of repair and replacement of door trim on Niva
Niva, LADA 4×4, VAZ 2121 - Russian and Soviet all-terrain vehicle with permanent all-wheel drive. The universal SUV has been produced since 1977; the model became the basis for the compact crossover Suzuki Vitara. Until the latest Urban generation, Niva door trims were made of leatherette or vinyl leather, the material was glued or installed on self-tapping screws, a plastic or wooden door card. The upholstery of doors and trunk is not a frequent repair, since the lining is generally replaced after significant wear of the outer covering or when the card is deformed.
Removing the front door trim on a Chevrolet Niva
There may be many reasons why you will need to remove this element from the door. This could be a simple speaker installation or door mechanism repair.
The trim hides the metal base of the door and its mechanisms.
The casing is designed in such a way that it is quite difficult for an ignorant person to immediately understand how it is dismantled. But in fact, there is nothing complicated here and such work can be done independently. It is recommended to be careful during the process and follow the instructions below so as not to damage the casing.
Sequencing
Remove the plugs and unscrew the screws securing the inner handle
To dismantle the door trim, unscrew all the screws shown in the diagram.
We remove the plastic cover of the handle to open the door.
After this, everything will be ready to remove the casing. It is attached to the base using plastic dowels. First you need to go around the perimeter of the lining with a screwdriver and remove the keys from the holes in the door . Then the casing can be easily removed from its place.
We dismantle the trim by removing the keys from the door holes
After this, you can perform any required actions with the internal elements of the door. This process can take no more than 10-15 minutes even for those who do not have skills in this matter .
Important! Take your time when removing the trim from the dowels, so as not to damage them.
Installation is carried out in reverse order.
How to make sound insulation for a Chevrolet Niva with your own hands
In general, the sound insulation installation system is similar in all cars . We will look at the process of installing insulating materials using the Niva Chevrolet as an example.
Before you begin modifying the car's interior, it is recommended that you carefully read the installation instructions and prepare all the necessary materials.
Connecting ESP without ignition
By default, the front door power windows on the Chevrolet Niva only work when the ignition is on. There are several ways to connect an ESP bypassing the central locking.
We will need a simple tool: a Phillips screwdriver, a thin screwdriver, wire cutters, and insulating tape. To replace the relay, we purchase a simple jumper, or we make it ourselves. Process: 1. We bridge the power legs of the relay, which supply power to the window regulator. To do this, remove the protective plastic cover. There are three to five relays under the fuse block.
2. To determine which one is responsible for the window regulator, turn on the ignition, hold down the button and remove each relay in turn. At the desired relay, the glass will stop rising.
3. We jumper two contacts: 30 and 87. If you purchased a ready-made jumper, it is recommended, for safety reasons, to insulate it.
4. Install the relay in its original place.
The second method is to modify the ESP relay. Two contacts also close, but not outside the relay, but inside it. This modification is done at a car dealership.
The third method is to connect the power windows to the cigarette lighter:
Important! Remember that changes in the connection of power windows significantly increase energy consumption, which quickly drains the battery.
Installation of Urban door cards. — Lada 4×4 3D, 1.7 l., 2005 on DRIVE2
As I wrote above, they brought me door cards of a new type. And of course I decided to install them. Initially I wanted to buy these cards.
but they didn’t find them for me in Tolyatti, and that’s why they brought these ones, although a little more expensive (2900 rubles), but oh well! Started the installation. I disassembled the door and started trying it on... After trying it on, I realized that not a single hole for the clips matches the old ones, that the most interesting thing is that the thread for the handle also doesn’t match, I had to drill new ones, and the top part of the card didn’t want to fit close to the glass! Afterwards it turned out that 2 guides were in the way. Probably on the new fields there are holes for them, but I don’t have them, so I decided to get rid of them (I cut them off with a knife).
Next, I used a knife to cut a hole for the window regulator (for those with ESP, there is no need to cut)
Hole for lift
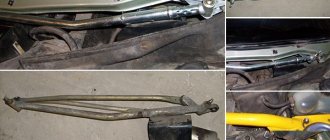
By the way, how did I disassemble the water? I found something in the door in the corner...
What kind of things they are and how they got into the door is a mystery! They look like the remains of door rods, maybe they were forgotten there when installing the alarm system?
But God bless them, we throw them away. Let's move on. We try the card on the door, after removing the guides everything fits perfectly...
And then we mark and drill 4 holes for the upper screws and 3 for the lower ones.
Top mounting holes
I drilled holes for the clips like this (by the way, I used clips from the 08-10 family), inserted all the clips in place, grabbed the top of the card with screws, and then leaning the card with the clips against the door, marked new places along them and drilled them. Next in line is the speaker, which used to be there closer to the middle of the door, which did not suit me, because... it was blocked by the seat. It will now stand correctly in the corner of the map. Marked and cut a hole for it in the map.
I covered the edges with masking tape so that when cutting with a jigsaw I wouldn’t scratch the trim.
Trying on the speaker - it fits well!
Since there is a gap of about 28-30 mm between the new card and the metal of the door, and in order to secure the speaker not only to the card, a 28 mm thick lining ring was cut out between the metal and the card.
What is the Chevrolet Niva door trim and its purpose?
The door trim is a plastic element that hides the inside surface of the door. Decorative fabric is applied over the plastic, which softens the touch of the doors and dilutes the rough shape of the plastic. Without this lining, the interior of the Shniva is a metal base with recesses for handles and window lifts.
It is intended for:
The process of dismantling the front door trim from a Shniv car
There are plenty of reasons why it is necessary to dismantle the front door trim. This can be either installing speakers or replacing them, or repairing internal mechanisms. The upholstery is designed in such a way that it is very difficult at first glance to understand how it is removed. In fact, everything is simple, it is important to be careful and attentive so as not to damage the fastening elements of the material during dismantling.
Places for fastening the casing
The process of removing the front upholstery includes the following sequence of actions:
Now you can carry out any repair or diagnostic work on internal parts or casing. Removal takes no more than ten minutes; it is important not to rush when dismantling the cladding, as the fastening dowels can be damaged. Installation of the casing is carried out in the reverse order of removal.
The process of removing the trim from the rear door
The rear doors have a mechanical window lift design, so removing the trim is a little different. Therefore, withdrawal is carried out in the following order:
Simple trim tuning
To change the design of the upholstery, it is necessary to replace the decorative fabric with leatherette or other material of the desired color. This is the simplest tuning of the Chevrolet Niva door trim, which can be performed by any driver. To carry out the work you need to: remove the old fabric from the upholstery and replace it with new material; for this you can use a furniture stapler or glue. This trim is an important and integral element in the interior of a Chevrolet Niva car. Without it, not only the driver, but also the passengers in the cabin will feel uncomfortable.
Source
Body upgrade
There are many ways to improve the body, and the driver himself chooses the direction of tuning work to give unique qualities to his car.
Headlights and fog lights
The Niva's standard optics quickly fail and require replacement. But such a need can be considered as an opportunity to improve the appearance of the car. It is recommended to install similar lighting devices of higher quality from other manufacturers.
Installing xenon, lens or diode optics radically changes the appearance. Fog lights will organically complement the image of the car and increase the safety of the vehicle.
Moldings
Such elements are installed mainly to protect the body from various contaminants, damage and to evenly distribute the load during impacts. Properly selected moldings can give the car a more presentable appearance.
When tuning, different types of structures are used, which differ not only in the material of manufacture, but also in their functions.
- Overhead. The most popular option, installed on the body frame, doors and fenders. Made from rubber, plastic and chrome steel. Thanks to the elasticity of the part, it is possible to increase the rigidity of the body, thereby increasing the maneuverability of the vehicle.
- Hidden. Covers the gaps between the glass and the body, preventing dust and moisture from entering.
- Threshold covers. Moldings protect elements from mechanical damage and give a stylish look to the car.
Radiator grille
There are many ways to make your car more original. But the first thing that attracts attention in the car is the radiator grille. The choice of material, color and shape depends on the purpose pursued during tuning.
Grilles made of carbon look attractive and stylish. A piece made of aluminum or stainless steel will add originality to the car. Considering the cost of the material, many use fiberglass to make this element.
Particular attention should be paid to the shape of the updated radiator grille. It should smoothly continue the outline of the car, harmoniously fitting into the design. This helps improve aerodynamic properties by directing the air flow over the hood.