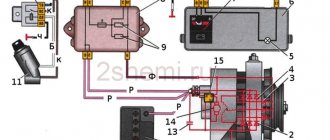
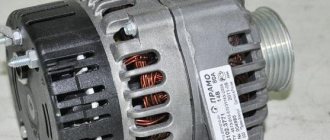
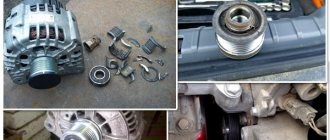
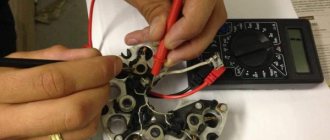
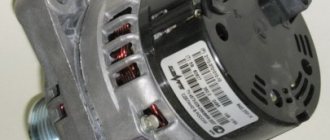
We will show you how to repair, disassemble and diagnose the Eltra generator with your own hands, which was installed on VAZ 2115, VAZ 2114, VAZ 2113 cars. The reason for the repair was that the owner’s battery was discharged on the road, the car twitched and stalled, when they tried to start the relay crackled, the battery was completely empty discharged. After that, the car was lit, it drove for some distance and stalled again. It was clear that the generator was faulty. A charged battery was taken, and when it was connected, the generator began to smoke. As soon as partial disassembly was completed, a malfunction immediately became visible; several diodes burned out on the diode bridge. Before further disassembly and subsequent repairs, it is necessary to re-solder the diode bridge to check the winding and everything else. The places where the winding will be soldered must be cleaned with a brush with metal bristles.
Video of repair and disassembly of the ELTRA generator in the VAZ 2115 2114 2113:
Reserve video on repair and diagnostics of the ELTRA generator in the VAZ 2115, VAZ 2114, VAZ 2113:
The generator is easy to disassemble, all its fastenings are 8 nuts, it is convenient to unscrew them without changing the head, plus a couple of screws for a flat-head screwdriver.
The VAZ 2114 generator is the main source of voltage in the car. It is this that generates electricity when the engine is running. Remember that the battery is actually needed for one purpose - to start the internal combustion engine. But, like any other component, the generator can fail completely, or some of its elements. And therefore it is necessary to carry out repairs, and you can do it without much difficulty with your own hands, without resorting to the help of specialists at service stations.
Unfortunately, there are always masters who, let’s say, “starred.” In other words, they don’t undertake repairs of domestic cars, although recently they were even ready to repair mopeds. Well, it’s better for us - DIY repairs will cost much less. By the way, if the generator is completely “bad”, there is damage to the covers, windings, and rotor, then it will be much easier to buy and install a new one. Now let’s look at the features of the operation of the generator set on a car as a whole and smoothly move on to repairs specifically on the VAZ 2114.
Main malfunctions of the VAZ 2114 generator
- The fuse has blown. To fix this problem, you just need to change the fuse. But first you need to find out the reason.
- The circuit supplying the devices is broken. Be sure to check the connection of the neutral wire with other contacts.
- Damage to the ignition switch. Make sure the ignition switch circuit board is in good condition.
- Indicator lamp malfunction.
- Brush malfunction. To eliminate the problem, it is necessary to replace the brush holder and the brushes themselves; it is enough to clean the oxidized slip rings with gasoline, or treat them with WD-40.
- Malfunction in the voltage regulator.
- Damage or malfunction of the alternator belt.
- The bearing is faulty or broken.
The described malfunctions are very common, if you ignore them and do not make the necessary repairs in a timely manner, the generator will be permanently damaged, and subsequently it will have to be completely replaced. Which in monetary terms is much more expensive than repairing minor problems.
But don't rely on yourself if you don't have the appropriate training. The best solution would be to contact a service station for qualified assistance.
Why change brushes?
If signs of brush breakage are detected, they should be replaced. If repairs are not carried out in a timely manner, there is a possibility that you will soon need to purchase a new generator, and this is a completely different expense. The battery can only hold the ignition without brushes for a few minutes, which means it will have to be constantly charged. And soon it will be replaced. You can check the condition of the brushes by the size of their protrusion from the seat. If the protrusion size does not reach five millimeters, then they should be replaced immediately to avoid possible problems.
It is recommended to replace it every 50,000 km or every season, which is the key to safe operation of the vehicle. It is better to have a spare set of spare parts so as not to get into an unpleasant situation on the road and then call a tow truck.
For a set of brushes you will need to pay from 150 to 200 rubles, depending on the store. The cost of repairs at a car service center will cost 200-300 rubles, inexpensive, of course, but why pay for something that you can do yourself?
Checking the serviceability of the generator
Defects in the operation of the generator can have unpredictable consequences. If there is insufficient charge coming from the alternator, the consequence will be that the battery will die and as a result the car will simply stall. But the most dangerous thing is that if the alternator produces high voltage, the entire electrical system of the vehicle will be damaged as a result.
We check the power of the VAZ 2114 generator using a tester:
- After turning on the ignition key, make sure that the instrument panel lights are on, only then the engine starts. If the battery icon is lit or blinks dimly, this indicates damage to the generator circuit.
- The engine must be warmed up to 90 degrees, only after that all energy-consuming devices must be turned on.
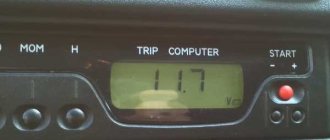
- We connect the tester directly to the battery. The assistant accelerates, keeping the rpm at approximately 3200 - 2500. If the voltage is 13V, the generator is working.
- We turn off the devices consuming energy, and again take measurements, also at engine speeds of 3200 - 3500. The generator is operational if the voltage is 14.7V.
On a note! The main reason why the generator produces low voltage, below the level of 13V, may be due to malfunctions: insufficient tension of the generator belt, the generator circuit is damaged, the voltage regulator is damaged, the brushes are completely worn out, the generator must be replaced.
While the car is running, you need to pay attention to the sounds coming from the generator; if you hear a hum, this is an indicator of bearing wear, in this case it needs to be replaced.
Basic problems
There are several main problems specific to a generator. If you study them, it will be quite possible to carry out repairs even on your own.
We will list them and also tell you about the necessary additional actions to eliminate them.
| Breaking | Your actions |
| Fuse blown | To fix this problem, simply replace the old fuse with a new one. But be sure to determine the reason why the problem arose |
| The circuit supplying the devices has broken | In this situation, be sure to make sure that the neutral wire is connected securely to the other contacts |
| Having problems with the ignition switch | Check if the ignition switch board is working |
| The control lamp has failed | Just change the device to a new one if the lamp just burns out |
| The brushes are out of order | You will have to change the brushes themselves, as well as their holders. Check the contacts for oxidation. They can be treated with WD40 or cleaned with gasoline |
| Voltage regulator does not work | This unit must be replaced. It is impossible to repair it |
| The alternator belt is damaged or faulty | You can try to adjust the belt tension if this is the problem. If the unit is damaged, it must be completely replaced. |
| The bearing has failed | Only its complete replacement will help here. |
Such breakdowns occur quite often, so they cannot be ignored at the first sign. Having understood the structure of the generator, solving problems with its malfunction becomes much easier.
In some cases, it is not possible to resolve the issue by replacing or repairing individual elements of the generator, so the only correct solution is to completely replace the unit.
Where is he located
Before removing the generator, you need to at least figure out where this device is located.
This unit is located in the engine compartment to the left of the engine. Look in relation to the interior in the area near the front right headlight.
This is exactly where the desired element is located.
Location
Functionality check
If the generator does not work correctly, the consequences can be unpredictable. If the charge coming from the device is low, the battery will quickly run out and your VAZ 2114 will simply stall. High voltage is even more dangerous because it damages the entire electrical circuit of the car.
The power indicators of the generator can be measured using a tester.
- Turn the ignition on and make sure all the lights on the dashboard come on. After this, start the power unit.
- If the battery icon lights up on the panel or blinks dimly, there is damage to the alternator circuit.
- Warm up the engine to approximately 90 degrees, then turn on all volatile devices.
- Connect the tester directly to the battery. The second person at this moment will press the gas pedal and keep the speed in the region of 3.2-2.5 thousand revolutions.
- When the tester reads 13V, the generator is working properly.
- Now turn off all power consumers and take measurements again. The revolutions are kept the same. If the generator is working properly, the tester readings will be 14.7V.
- At the same time, we recommend paying attention to the sounds that come from the generator. If there is a hum, there is a high probability of bearing wear, which should be replaced.
Low voltage can be caused by one of several reasons:
- The timing belt tension is not strong enough;
- The generator circuit is damaged;
- The voltage regulator is faulty;
- The brushes are worn out;
- The generator is worn out and needs to be replaced.
What causes the battery sign to light up on the dashboard?
When you turn the ignition key, the system turns on all the lights on the dashboard, allowing you to check that the systems are working properly. After this, the engine starts and all these lamps go out. But only if the car is in good working order.
If one of the lamps remains on, there is a problem with the car.
As for the battery icon, its glow when the engine is running indicates that the voltage generated by the generator is too weak or completely absent.
Replacing brushes
Replacing generator brushes is not difficult if the need arises. Such work is carried out if natural depreciation occurs.
There can be several reasons for depreciation:
- The battery is not receiving a charge;
- At night, the headlights do not generate enough light;
- Reduces tension, etc.
Typically, service stations do not pay much attention to minor generator malfunctions, so discovering failed brushes is often a complete surprise.
To replace, you will need to disassemble the assembly along with the voltage regulator.
- Disconnect the negative terminal from the battery.
- Disconnect all wires.
- Remove the cap from the plus terminal wiring system, unscrew the nut that holds this bundle in place, and remove it from the block.
- Remove the plastic casing. To do this, you must first disconnect the clamps.
- Now unfasten the regulator fasteners.
- When you remove the regulator, be sure to disconnect the wiring harness.
- The brushes are replaced in a similar way, but with a changed sequence.
- All disassembled elements are returned to their places.
The brushes are replaced as they wear out. The rod should be less than 0.5 millimeters in length, which indicates the need for replacement. If the rod length is normal, the cause of the malfunction may be a damaged regulator.
Regulator check
The regulator is checked together with the brush holders. This will allow you to immediately detect damage in the circuit of the regulator and brushes, if any.
Three-level voltage regulator
To check you will need:
- Wires;
- 12V light bulb;
- AA batteries;
- Car battery.
- If the regulator is working properly, the voltage will be 14.7V. If the supply is higher than the norm, the voltage supplied to the brushes will have to be stopped.
- If there is a problem with the regulator, the lamp is on, the device is most likely damaged.
- If the lamp is not lit, the contact that connects the brushes to the regulator may be broken. Or there is a break in the circuit.
- If the voltage is less than 13V, the regulator must be replaced with a new one.
- The job of removing and replacing the voltage regulator is similar to replacing the brushes, since both devices are removed together.
Belt tension
In many ways, the functionality of the generator depends on how correctly the timing belt is tensioned. If the tension is too weak, problems will occur in the on-board system. You can identify the problem by a whistle coming from under the hood and a flashing battery icon on the dashboard.
When the tension is too strong, there is little good in it either. Because the service life of the bearings is significantly reduced, and they soon fail.
The timing belt must be replaced after every 15 thousand kilometers. Be sure to periodically check its condition for signs of peeling or tears. If they are found, be sure to replace the unit.
The tension indicator depends on the timing belt model used.
- Model 37.3701 provides tension with a permissible deflection of 10-15 millimeters;
- Model 9402.3701 allows deflection within 6-10 millimeters with a pressure of 10 kilograms.
The tensioning procedure directly depends on the type of engine used in your VAZ 2114. Therefore, we will tell you about each type of engine separately in our table.
| engine's type | Tension procedure |
| 1.5 liter engine | — Loosen the generator fasteners; — Use the adjusting screw to adjust the tension; — To increase tension, the screw moves clockwise; — When the tension is weakened, we move counterclockwise; — After adjustment, secure the generator and check the belt. |
| 1.6 liter engine | — In a similar way to the 1.5-liter engine, we loosen the generator fasteners; — Using a crowbar, the generator is slightly moved away from the motor, which allows you to tighten the belt; — By moving the generator towards the engine, you loosen the tension; — Tension the belt, secure the generator and check for proper operation |
If this method does not resolve the problem, you should look for other causes of the problem.
Device from Priora on VAZ 2114
It is not uncommon for VAZ 2114 owners to think about installing a more efficient, powerful generator on their car.
Regulator from Priora
In this case, experts recommend using a device from Priora or Kalina, which these models receive with air conditioning.
The power of the units is 115A, while a regular factory generator has only 80A. The difference is significant, as you can see.
In this case, you will definitely have to change the pulley on your VAZ 2114. The task is simple, and it will cost a small amount of money.
Also pay attention to the Eldix generator. Its power is 115A, perfect for the “fourteenth” model. The only, but serious, disadvantage is that it is very difficult to find spare parts for it.
Why does the battery icon light up on the dashboard?
When you turn the ignition key, the system displays all icons on the instrument panel to check the vehicle’s serviceability, i.e. All system lights are fully functional. Then the engine starts, so the lights should go out when the machine is in full working order. But if one of the lights does not go out, this indicates an existing problem.
Accordingly, if the battery icon does not go out, this is a consequence of the fact that the generator supplies too little voltage, or it is completely absent.
What is this?
A generator is a device that produces electricity from mechanical energy to power equipment in a car. Thanks to this device, the wipers function, the battery is maintained in good condition, the headlights and side lights shine normally.
The generator is constantly under heavy load. This leads to it breaking over time. The following signs indicate that it is time to start looking for a unit:
- Light fixtures began to emit dimmer light.
- The sidelights and headlights dim as the speed increases.
- The low battery light flashes or stays on.
- The car stalls in the middle of the highway.
- The battery recharges spontaneously.
- The wipers do not function.
If one part of the autogenerator fails, the situation can be corrected by repair. If there are too many faulty elements, then it is more advisable to replace the device completely.
Replacing generator brushes after their natural depreciation
Reasons for depreciation of generator brushes:
- Voltage drop.
- At dusk, there is insufficient illumination from headlights.
- The battery is not charging.
- and etc.
During normal maintenance, no one pays attention to small problems of the generator; for this reason, worn brushes are always a surprise. Do not rush headlong to change brushes if primary symptoms of problems occur. Find out the source of the problem, then disassemble the generator housing.
How to dismantle the generator brushes:
Before carrying out work on replacing the generator brushes, it is necessary to remove the assembly together with the voltage regulator, so we unfasten the minus terminal and disconnect the wires from the casing.
- Disconnect the wires.
- We remove the cap from the output wire system to +, disconnect the nut securing this bundle and remove it from the block.
- We remove the plastic casing, having first disconnected the clamps.
- Disconnect the voltage regulator fasteners.
- When removing the regulator, do not forget to disconnect the wire block.
- We change the brushes using the same method, but the sequence changes; we install everything in its original place.
Just a note! Be sure to check the wear of the brushes; they change when the length of the rod wears down to less than 0.5 mm. If the brushes are of normal length, a possible reason for the lack of charge is a malfunction of the voltage regulator or brush regulator circuit.
Diagnostics
If such signs of generator malfunction occur, it is necessary to diagnose and repair the generator.
Before starting repairs, it is necessary to carry out diagnostics and exclude trivial breakdowns, such as a fuse and loose battery and generator terminals.
If the battery is not charged, it is necessary to check the integrity of the fuse numbered F16; this fuse is responsible for the excitation winding of the generator. If the field winding fuse fails, the generator will not produce voltage.
If the charge is in progress, but the voltage at the generator output is negligible, then it is necessary to check the tightness of the terminals on the battery and the tightness of the positive contact on the generator.
If the diagnostics show that the fuse is intact and the terminals are sufficiently tightened, then you should begin repairing the generator.
Checking the voltage regulator
As we have already found out, the voltage regulator is checked together with the brush holders, so that if the circuit between the brushes and the regulator is damaged, we can immediately see this problem.
First, we check the brushes to see if they are broken or worn out; therefore, on your VAZ 2114, replacing the generator brushes is inevitable.
We prepare the necessary parts for testing, these are wires, a car battery, a 12V light bulb, AA batteries, to build two circuits:
Checking the voltage regulator
Checking the voltage regulator
If the voltage regulator is working properly, then the voltage is 14.7 V. If the supply exceeds the norm, it is necessary to stop the supply of voltage to the brushes.
If there is a problem with the voltage regulator, if the lamp is on, the cause is damage to the regulator. If the lamp does not light up at all, the reason is that there is no contact connecting the regulator and the brushes, or the circuit may be broken.
The regulator must be replaced if the voltage is less than 13V when the on-board system devices are turned on. An increased voltage of more than 14.7V may also be a consequence of damage to the regulator.
The process of removing and reinstalling the voltage regulator completely coincides with the process of removing the brushes from the generator, because they are removed along with the voltage regulator.
Problems with the diode post
Checking the serviceability of the diode bridge is quite simple. The fact that it is faulty is indicated by either increased voltage or lack of charge. You should not delay repairs, as this may result in serious problems in the vehicle's electrical network.
But the diode bridge can fail only in the event of a breakdown of the power diodes. They can be replaced if necessary. True, sometimes some problems arise with this. The fact is that finding power diodes is quite difficult. You may have to make an exciting journey through the disassembly of a VAZ-2114, but it is much faster and easier to replace the old diode bridge with a new one.
As you can see, a generator is a necessary part in a car, without which it simply cannot work. If the generator breaks down, you can replace it if you can’t repair it yourself. In addition, replacement of the generator will be required in the following cases:
- improving the car sound system;
- installation of additional vehicle lighting, both inside and outside;
- installing additional outdoor lighting or replacing the old one with a more powerful one.
Alternator belt tensioning procedure
An important factor is the tension of the alternator belt. If its tension is weak, the voltage in the on-board system can be reduced. In this situation, a whistle is heard, and the battery icon on the dashboard begins to flash.
Strong tension also has a negative effect, since it negatively affects the life of the bearings in the generator.
Important! The alternator belt must be replaced every 15,000 km. When visually checking the belt, pay attention to its structure; it should not peel off or tear, otherwise it should be changed urgently.
The permissible belt tension depends on the generator: for model 37.3701, when tensioning, the permissible deflection is 10 -15 mm, for model 9402.3701, the deflection is allowed 6 - 10 mm, when pressing 10 kg.
We tighten the belt
The tensioning process itself depends on the engine size of 1.5 or 1.6, since the VAZ 2114 model.
1.5 L engine:
- We loosen the fastening of the VAZ 2114 generator.
- Using the adjustment screw, we adjust the belt tension; if we need to tighten it, we act clockwise; if necessary, loosen the direction of movement counterclockwise.
- When we have reached the required belt tension, we strengthen the generator and be sure to check the belt.
1.6 L engine:
- In the same way as in the first case, we loosen the fastening of the VAZ 2114 generator.
- Using a crowbar, we move the generator slightly away from the engine and tighten the belt; if it is necessary to loosen the belt, we move the generator in a different direction, i.e., towards the engine.
- After completion, secure the generator and check the belt tension.
Important! After the work was done, the problem did not disappear, the voltage drop process continues, so the problem was not identified, be sure to check the generator.
Unit Removal Guide
If the bearing is destroyed, disassembly of the generator is necessary, and for this you will have to dismantle it. The generator set is attached to the engine cylinder block on a special bracket. There is also a bar for adjusting the belt tension.
To remove the generator set on a VAZ 2114, you need to stock up on the following tools:
- a set of wrenches, preferably both box and open-end wrenches;
- socket head at “15”;
- mount, or a piece of metal pipe.
There are options for dismantling the generator set with or without removing the power unit protection. We will consider the option without dismantling the protection. Before removing the generator set, you must disconnect the negative terminal on the battery to avoid short circuiting.
The procedure consists of the following steps:
- First, using a key set to “17”, you need to loosen the tension on the generator belt. To do this, you need to unscrew the fastening nut from above and move the unit to the cylinder block.
- Next, you need to unscrew the nut on the output bolt “31” and disconnect the supply wire that goes to the rotor excitation winding.
- The generator is attached to the bottom using a nut and a long bolt; they need to be unscrewed.
- To make it more convenient to remove the generator, you need to unscrew the bar with which the unit is attached to the engine cylinder block. To do this, you need to unscrew two bolts.
- You should also carefully unscrew the nut securing the bar to the starter. If the fasteners are stuck, you can use a penetrating lubricant, which makes it possible to remove rust and dirt.
- To remove the axis of fastening the generator to the bracket, it is better to turn it clockwise.
- Next, use a key set to “19” to unscrew the nut and remove it and the spacer sleeve.
- Now the generator unit can be lifted up.
Generators for VAZ 2114 and Priora in comparison
Many car enthusiasts want to install the most powerful type of generator in their car. In this case, the best option would be a generator with air conditioning used for installation on models such as Priora and Kalina. The power is 115A, while the power of the factory copy is only 80A.
But there is a small nuance: you will have to replace the pulley; this is an inexpensive and fairly easy procedure.
Many car owners recommend the Eldix model generator, with a power of 115 A. It is a good model, but it has a huge disadvantage: it is impossible to get spare parts.
Signs of a faulty generator diode bridge
The bridge is an electrical circuit of diodes that process signals from alternating current flows into direct current. Problems with the generator directly depend on problems in the diode bridge.
Problems that can completely leave the battery without a charge or charge the battery more than normal ultimately have huge negative consequences with the internal electrical system of the car.
The function of the diode system is not only in the process of converting current pulses, but also in its unipolar transmission from the generator to the battery. Accordingly, if the diode is faulty, the current is directed in both directions, or the current supply is completely stopped. The cause of damage and malfunction of the diode bridge is poor-quality contacts, or as a result of moisture penetration.
To check the diodes, the bridge must be dismantled using fairly light manipulations.
We dismantle the diode bridge of the generator:
- Disconnect the “-” terminal from the surface of the battery and detach the wiring system from the casing.
- Unscrew the wires.
- We remove the rubber cap from the wires + terminal, disconnect the nut securing these wires and remove them from the generator block.
- We remove the plastic casing, having previously unfastened the fastening system.
- Disconnect the mount for the regulator.
- When removing the voltage regulator with brushes, do not forget to unfasten the wire block.
- Use a wrench to remove the bolts securing the bridge.
- Having bent the leads directed to the stator winding, we unscrew the capacitor mount.
- We take out the diode bridge. We unscrew the 2 nuts of the contact bolt, remove the bushings from it, and also remove the bolt from the bridge. That's all, now you can change or check the diode bridge.
- We repeat the installation process in reverse order.
Removing the diode bridge
How to remove a generator on a VAZ 2114
We remove the VAZ 2114 generator:
- In order to remove the VAZ 2114 generator you need a pit or a lift.
- The protection must be removed from the engine.
- The tension roller for the drive belt needs to be loosened.
- Disconnect the top bolt securing the generator.
- Then remove the bottom bolt securing the generator.
- Disconnect the air conditioning compressor mount.
- The drive belt is removed and the VAZ 2114 generator is removed from its seats and subsequently shifted to the right closer to the battery.
- Then simply unscrew the top bolt securing the air conditioning compressor.
- We simply take out the compressor and hang it up; the tubes are strong enough and can easily support its weight.
- The generator holder bolts must be unscrewed.
- After disconnecting the terminal, the generator and its holders can be pulled down.
- Installation follows the same method but in reverse order, and be sure to adjust the drive belt.
As a result, if the winding is shorted, it is necessary to find out the reason. If any contact ring has become unsoldered, this problem can be eliminated by unwinding the defective turn back, then removing the broken end and soldering the unwound drive. If desoldering occurs, it is also enough to simply solder the wires.
Relay problems also occur due to a sufficiently strong or weak charge; it is changed during repair of the generator. If the generator is working properly and the signal on the panel is flashing, this indicates a malfunction of the diodes. Since these elements are located in the generator, their necessary replacement is carried out when the VAZ 2114 generator is disassembled.
Excessive noise is the result of wear on the rotor bearing. If it is completely worn out, it must be replaced; if the violations are related to the lack of play in the bearing, it is enough to fill it with oil.
You can repair a generator yourself if you know and follow the procedure. If possible, check the operation of your vehicle in a timely manner and carry out the necessary replacement of parts.
Features of the generator
The generator starts working immediately after starting the engine. Normally, the device produces a current in the range of 13.2 - 14.5 V. This current strength is enough to operate all the electronics in the car. If a powerful speaker system is installed in the car, then it is possible that the battery life will also be used. The voltage regulator, which is built into the generator, rectifies the current to the desired level and makes the system stable.
If the generator on a VAZ-2114 fails, the voltage drops below the stated parameters, and the car begins to use the battery. Since the part is quite expensive, and most often the cause of generator breakdown is faulty brushes, most often car enthusiasts resort to replacing them.
