Step-by-step algorithm of work
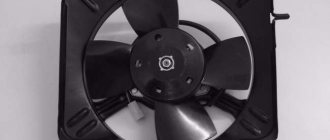
In each specific case, fan repair will differ depending on the existing breakdown. It is necessary to carry out appropriate diagnostics, which will allow us to determine why the radiator cooling fan on the VAZ 2114 does not turn on in a timely manner, which will simplify subsequent repairs. First of all, it is recommended to disconnect the fan connector, and then, observing the polarity, reconnect the connector directly to the battery terminal. If, with such a direct connection, the fan begins to rotate, this indicates a working drive, and the reason in this case may be electrical wiring, a faulty temperature sensor, or problems with the fuse.
You can check the fuse responsible for the operation of the cooling fan without opening the plastic box. The fact is that such a relay is dual and is simultaneously responsible for the operation of the horn. Therefore, if the car's sound signal disappears and the fan does not work at the same time, this indicates a blown fuse. The block with such relays is located under the hood in a small plastic box. To open it, you need to remove two latches, then use tweezers to remove and change the fuse you need.
Relay failures are difficult to diagnose. We can recommend that you get a 100% working relay, temporarily install it in the socket and check that the fan is turned on correctly. If during such a test the fan starts working, then you should simply replace the relay used with a working one.
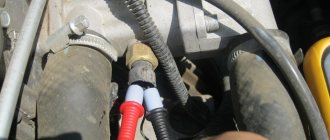
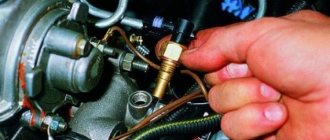
To check the temperature sensor, from which the signal goes directly to the radiator, disconnect the connector from the sensor and then turn on the ignition. In this case, the automation starts the fan for constant blowing in emergency mode. If, when the connector from the sensor is disconnected in this way, the fan turns on late, then we can therefore conclude that the temperature sensor has failed and will require replacement. The temperature sensor itself is fixed with two bolts, which can be unscrewed with a simple Phillips screwdriver. This sensor replacement usually takes no more than 5 minutes.
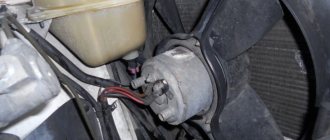
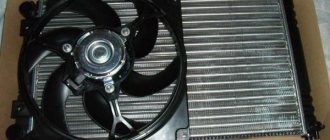
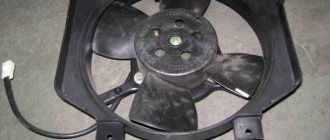
If the cause of the breakdown is still the fan, you can try to repair it first or immediately replace it with a new one. The problem may be with the bearing or brushes. In this case, you can replace such damaged parts, which will completely restore the functionality of the cooling system fan. If the cause of the fan breakdown is the electric motor, then the repair presents certain difficulties, and such a failed drive is best replaced with a new one.
To remove a fan with a drive you must:
- The VAZ 2114 car is placed on a level surface and the parking brake is applied
- Open the hood and disconnect the negative terminal
- The air filter housing should be unscrewed with a ten key
- Loosen the clamps at the air duct
- We twist the screws that secure the air filter and remove the filter element
- Next, unscrew and dismantle the air intake, which will require an eight key
- Remove the fan casing by unscrewing 6 nuts with an eighth key
- Remove the engine block
- Remove the fan with drive
All you have to do is install the new drive or the entire fan assembly in place and reassemble in reverse order. After such repairs, you should check the correct functioning of the fan, for which we warm up the engine and wait for the blower to turn on.
Why does the fan switch sensor not work on Kalina and Priora and what to do about it?
Modern domestically produced cars are equipped with various controllers and sensors that ensure full operation of the car. If one of the devices fails, this can lead to incorrect operation of the nodes. From this material you can find out what the Priora and Kalina fan switch is and what malfunctions are typical.
As you know, any Priora and Kalina have a cooling system that ensures normal engine operation and helps prevent it from overheating. One of the devices that allows cooling the power unit is a fan sensor, upon the signal of which the ventilation device should turn on. On Kalina, this controller is designed to turn on the fan when a certain engine temperature point is reached. Thanks to the fan, which must turn on according to a signal from the controller, the engine temperature will always be normal and will not exceed the permissible threshold. If the device does not work, the fan does not turn on, and the engine may overheat.
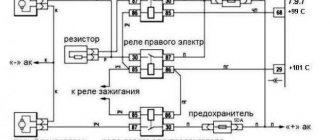
Sensor connection diagram in the cooling system
The main reasons for sensor malfunctions
So, for what reasons, on Kalinas and Priors, and on all VAZs, in principle, the controller may not work:
- The first reason is the thermostat not working. This problem is one of the most difficult; when it occurs, the fan does not work properly. To make sure that the thermostat is working, you will have to touch the lower tube - if it is cold, the device has really failed. In general, for Kalina, thermostat failure is a fairly common occurrence.
- If the thermostat is working properly, it is necessary to diagnose the safety elements. You should also check the condition of the circuits themselves; use a multimeter to do this. The fuse diagram must be marked on the back of the unit cover. In the case of Kalina, the unit is located under the instrument panel, you are interested in fuse element 3, its power is 50 amperes. If the fuse has tripped, then it is necessary to diagnose the fan relay, it is indicated by the number 1. If these points work, then you will need to remove the fan control unit: to do this, move the air duct and, using a 10 English key, unscrew its fastening. There should be two relays on the block, they need to be checked.
- In addition, it would not be a bad idea to climb into the engine compartment and ring the contacts directly to the fan. The problem could be an open circuit, broken wiring, oxidation of contacts, or a burnt winding inside the device. Problems with wires and contacts are solved without problems - faulty wiring is replaced and contacts are cleaned. But if the problem lies in the winding, then the device will have to be completely changed.
- The problem may also lie directly in the sensor itself. To start the ventilation unit, you will need to reset the terminals from the device. The controller is diagnosed by disassembling the thermostat and placing it in a container of hot water - the thermostat should open at this time.
- Another reason that rarely happens is a broken circuit. This problem can be diagnosed using a multimeter - broken wires need to be replaced (the author of the video about diagnosing the regulator with your own hands is Dmitry Maznitsyn).
DIY fault repair
We will not talk about eliminating problems such as a failure of the fuse or the sensor itself. Everything is so simple here - failed elements are removed from their installation sites and replaced with new ones.
Separately, it is necessary to highlight the replacement of the ventilation unit - read below:
- To avoid having to disassemble the radiator during the repair process, do everything carefully, as there is a possibility of damage to other elements.
- Open the hood and disconnect the battery. Remove the air filter.
- Once this is done, you can disassemble the grille.
- In addition, it will be necessary to unscrew the upper optics holders - the right and left headlights.
- Using a 10 key (this will make it easier to take the key), you will need to remove the upper front panel.
- After completing these steps, you will need to disconnect the plugs that came with the air handling unit. Once this is done, the threads can be twisted a little.
- Subsequently, using a wrench, you will need to unscrew the four screws that secure the device you are replacing. The arrows in the photo indicate the screws that secure the unit; they will need to be unscrewed.
- Only after the group is released will it be necessary to disassemble it and replace it with a new one. After removal, just in case, clean the connectors themselves so that in the future you will not be bothered by the problem of poor contact. Further assembly of the system and installation of all elements are carried out in the reverse order.
1. Remove the air filter. 2. Unscrew the mounting bolts marked with arrows.
Video “How to properly replace the thermostat on a Lada Kalina?”
If the problem of a non-working sensor in a Lada Kalina car is a failure of the thermostat, then this unit will also have to be modified; detailed instructions for replacing it at home are presented below (video author - Alexey Golubkov).
Loading. This article was helpful This article was helpful Share with friends
The cooling fan does not turn on, 3 problems that you can fix yourself
The car is almost boiling, and the cooling fan doesn’t even think about turning on... We solve the problem ourselves.
Hello, not long ago I had to drive a car off-road (we were going fishing), and got stuck several times along the way. While I was driving out, the car almost boiled several times, and the cooling fan did not work.
Having arrived home, I solved this problem on my own, I think many of you, in some cases (depending on the cause of the malfunction) will be able to repair your car yourself.
So, the most common causes of fan drive cooling system failure and repair methods.
The cooling fan itself has failed.
This malfunction is quite easy to identify on your own. To do this, the fan must be directly connected to the battery. The easiest way to do this is with two wires. If the fan works, then everything is fine with it, move on
Be sure to pay attention to the contacts of the chips, perhaps they should be cleaned and the problem will be solved
After making sure that the fan is working properly, you should check the fan fuse and relay. Very often a blown fuse or relay is to blame. This is malfunction number 1, which is easy to fix yourself. To find out exactly where the fuse and relay are located in your car, use the Internet.
Malfunction No. 2.
Quite often, fan sensors fail. How to check if the sensor is working properly? This can be done as follows: Warm up the car to a temperature of approximately 105-110 degrees. On passenger injection cars, the fan would definitely have to work. The fan is not working. We turn off the engine and disconnect the sensor. Having disconnected the sensor, we start the engine again. Is the fan working?
— The sensor is faulty, we replace it with a new one and enjoy life! The Internet will also help you find where the fan sensor is installed in your car. This is what it most often looks like:
Malfunction No. 3.
Expansion tank cap.
The most common malfunction in the cooling system is the failure of the valve, which is located in the cap of the expansion tank.
This valve exists to maintain the required pressure in the system. When the valve fails, antifreeze may boil in the tank and the cooling fan may not work.
How about
trust its performance?
-Some do it by sound, some by touch, but the best way is to just buy a new cover. On any car it is very cheap, but you will be sure that it is definitely not the problem.
In my practice of working at a service station, there were cases when people came and told me that after the cooling fan failed, they began to look for the fault.
As a result, we spent a lot of time and never found the reason. The first thing I did was send them to the store for a new expansion tank cap. Not to lie, in almost 50% of cases the problem was solved.
Remember, the cooling fan will not operate if there is not enough coolant in the system! Therefore, before you start doing anything, make sure that there is enough coolant in the expansion tank.
And also, carefully inspect the wires coming from the fan, or better yet, check for power using a multimeter.
Have you read the article: “The cooling fan on the car does not turn on, 3 problems that can be fixed without a trip to the service station”
Like and subscribe to the channel!
- Why do gas stations prohibit the use of mobile phones when refueling?
- Does the traffic police camera jammer work or is it just another scam?
Car under 10,000 euros: a choice for everyone
Protection system
Since the fan is an electrical part, it must have some kind of protection against short circuits or overheating. To provide this protection, it uses a relay and a fuse, which quite often fail, resulting in the fan not working.
Priora cooling fan fuse
To protect the circuit from short circuits and overloads, a fuse is used, which breaks the circuit when it overheats or a short circuit occurs in it.
The Priora uses several fuses to protect the cooling fan circuit: power and control. The cooling fan power fuse is located under the hood in a block near the battery number F3 at 60A. The control circuit fuse is located in the fuse box under the steering column and is numbered F1 at 25A.
Priora cooling fan relay
The location of the relay depends on the vehicle configuration.
In the “NORM” configuration, the fan relay is located on the main fuse block under the steering column and has the number K1.
In the “NORM+” and “LUX” configurations, the relays are located in the engine compartment and there are 2 of them. For the right fan, relay number 3, for the left fan, relay number 5.
Priora cooling fan sensor
The cooling fan on the Priora turns on automatically when a certain temperature is reached. The coolant temperature is determined by a special sensor installed in the thermostat housing, which sends signals to the ECU when the engine temperature reaches a high temperature, after which the cooling fan turns on and begins to create an artificial air flow through the radiator.
The sensor is a simple part inside which houses a thermistor. As the temperature changes, it changes its resistance.
Engine overheating on a Lada Priora VAZ 2170
|
| When the engine is running on a Lada Priora VAZ 2170, a working cooling system maintains optimal temperature conditions. Malfunctions in the cooling system can lead to engine overheating. If you miss this moment, unpleasant consequences may arise: breakdown of the head gasket, warping of the head and, as a result, complex and expensive engine repairs. |
VAZ 2170 | Checking the cooling fan | Priora
A faulty fan can cause the engine to overheat. If the fan fails while driving, you should stop, let the engine cool, and then drive at medium speed to the nearest garage. During such a trip, be sure to monitor the coolant temperature and the engine overheat warning light. If necessary, stop for a while to allow the engine to cool.
If the fan does not turn on when the engine warms up at the right time, check the thermal switch located on the side of the radiator:
— start the engine and let it run until the fan starts;
- slowly remove the cap from the expansion tank, gradually releasing steam;
— Place the thermometer in the expansion tank. The temperature should be between 92-97 ° C. At this temperature, the fan operates at first speed. At temperatures of 99–105°C the fan operates at second speed. If the fan does not turn on, disconnect both wires from the thermal switch and connect them together. Turn on the ignition. The fan should start immediately. If this happens, replace the thermal switch and then check again.
The fan motor is protected by a fuse that may blow. If the fuse is good, check the fan motor:
— disconnect the wire terminals and install a jumper between the red-black wire terminal and the battery positive;
- connect a jumper between the brown wire terminal and the negative pole AB.
If the fan does not work, replace it. Damaged cables may cause a malfunction.
The engine cooling fan has stopped turning on and the temperature arrow on the instrument panel goes into the red zone. Replaced with new ones: thermostat, pump, temperature sensor on the thermostat, expansion tank cap. The thermostat normally opens to 85 degrees. I checked the integrity of all pipes in the cooling system, but the problem did not go away. The fan is known to be running because when the plug is disconnected from the temperature sensor in the thermostat, the fan starts running. The car is a 2009 model with installed air conditioning and a gas system. What could be the problem? Tell me please!
Comments 47
People, help, the fan doesn’t turn on, I thought about the sensor but didn’t remember everything, it doesn’t turn on either, but when I remove the connector from the sensor it turns on and if I put it back, it doesn’t turn off, what should I do, or maybe the Prioress expander cover is to blame
Could be another relay or fuse
What kind of thread is this?
problem solved! I changed the wire to ground and everything worked)) many thanks to all my friends!
Check and clean regularly: the effect does not last long! not a nail or a rod!
problem solved! I changed the wire to ground and everything worked)) many thanks to all my friends!
Don’t skimp, wear an on-board driver, there are many benefits from it and the Carlson ignition temperature can be set and reset, errors and much more...
And the bad mass is to blame for everything. I also crawled and changed... After changing the mass, the side panel and the tidy show a difference of a couple of degrees between themselves
How can you change the mass?
Yes, disassemble, clean the housing in the area of the battery, ideally transfer the mass from the thermostat eye closest to the starter. Diagnosing a problem with the masses is simple: raise the glass with the glass regulator, the temperature rises along the ordinate?! If your order is overheating, look into the expansion tank! Supposedly I'm boiling and even the thermostat still hasn't fully opened
This is the funniest thing, but still - did you change the fuse?
No, darling, it's worth everything
Alternatively: remove the battery and wait 20 minutes, usually someone resets their ECU this way. Maybe there really is something stuck in the ECU, it's a glitch. In general, it is better to diagnose or connect the diagnostic cable yourself and see the fan on and off status.
what model of diagnostic cable?
It all depends on what kind of ECU it is. It’s difficult to name the year here. Here is either K-LINE or ELM-327.
Look at the pinout of your ECU and call the wiring from it.
I would try it, but there is no such relay K-1 in the cabin. wiring harnesses in the engine compartment
If I checked and changed everything, as I wrote in the comments, the wiring and the stuck fan motor remained. Measure the power supply with a multimeter.
The power supply is normal, the fan is working. Could the ecu option be the cause?
Measure the power from the fan to the relay, further from the relay. www.drive2.ru/l/1732487/
There are wiring loops in the engine compartment.
From relay to fan
Contact an electrician if you cannot connect the wiring.
If you remove the block from the sensor, does the fan turn on?
yes the fan turns on
As a result, the chain is fine.
Then change the sensor to a known one before checking - www.drive2.ru/l/1751096/
installed three well-known sensors.
The situation is very complicated, I have studied the entire FAQ and the options for the cause of the failure are starting to run out((
Fuse F1 (30 A) for power supply circuits of the electronic engine management system (ECM) Fuse F2 (60 A) for power supply of the engine cooling fan (power circuit), additional relay (ignition relay), rear window defroster, electrical module controller Fuse F3 (60 A) to power the engine cooling fan (relay control circuit), horn, alarm, ignition switch, instrument panel, interior lighting, brake light, cigarette lighter Alternator power supply circuit fuses F4, F6 (60 A; Electromechanical power steering fuse F5 (50 A
download photo to your mobile
Contents: Operating manual, technical manual, maintenance and repair of Lada Priora VAZ 2170
Electrical circuit malfunctions
If everything is fine with the tank cap and there are no problems with pressure, then the causes of the radiator cooling malfunction should be sought in its electrical circuit.
- The search begins with checking the functionality of the fuse marked F7. To do this, you have to get to the mounting block. Check the quality of the contacts and the presence of traces of oxidation. If everything is good here, we move on. If the contacts are broken, simply clean them, or simply change the fuse. This is a small financial cost.
- The next place to check will be the VAZ 2110 fan switch sensor. You do not have to go to a specialized service station to check the efficiency of the sensor. This is done in a garage: Warm up the engine of your car to above 100 degrees Celsius;
- Turn off the engine, then start the engine again;
- Lift the hood and remove the terminal from the VAZ 2110 fan sensor;
- If after removing the element the fan begins to spin, then the unit is working properly, but there are problems with the sensor;
- When on a VAZ 2110 the cooling system fan does not turn on after disconnecting the terminal, the situation is the opposite - the fan does not work, but the sensor is in good condition.
- Electric motor. It is possible that the radiator fan stopped working precisely because of a faulty electric motor. If all previous manipulations did not produce results, you will have to remove the electric motor. It may have several characteristic failures:
- The commutator brushes are worn out;
- The commutator brushes are stuck;
- A short circuit has occurred in the armature winding (this can be determined by the characteristic unpleasant odor).
- Relay. Maybe the button to turn on the cooling radiator fan on your VAZ 2110 has simply failed. In such a situation:
- The trim on the right side of the console inside the cabin is removed by unscrewing two screws;
Thermostat malfunction
You should also keep an eye on the thermostat. If it does not work as expected, the power unit will not be able to establish the optimal warm mode. To check the functionality of the thermostat, proceed as follows:
Action
If the pipe heats up much earlier, most likely the thermostat is stuck in the position where the Antifreeze is circulating in a large circle. The thermostat is an element that cannot be repaired; it is simply replaced.
Source
General information
On Priora and Kalina there is a fan that acts as the main cooling system. It is necessary to prevent overheating and ensure stable operation of the internal combustion engine (ICE). The main element for cooling the power unit is the sensor. Using its signal, the fan is activated.
In cars, this unit is triggered in cases where the thermal performance of the engine exceeds the norm. After starting the fan, which is located near the engine and is triggered by a signal from the controller, the temperature of the internal combustion engine drops to an acceptable level.
The principle of operation of the cooling system
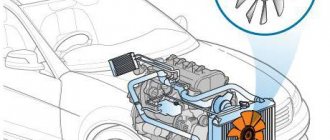
The main task of the cooling system is to ensure optimal temperature conditions for the Priora engine. The vehicle is equipped with a system with forced circulation of coolant. Its main element is the cooling jacket through which the liquid circulates.
To maintain the integrity of the shirt, you should constantly monitor:
If its amount is too low, the system will not be able to properly maintain the thermal regime of the power plant, and it will overheat. Antifreeze heavily diluted with water will not have adequate frost resistance, and in winter the shirt may freeze.
Another important element of the system is the liquid pump. The purpose of the pump is to ensure the circulation of Antifreeze throughout the system. The Priora pump is belt driven from the crankshaft. The condition of the pump also needs to be constantly monitored. If the bearing in it starts to fail, it will jam. The result of wedging will be:
This, in turn, will damage the gas distribution mechanism.
Until the engine reaches the desired temperature, the liquid circulates in a small circle, that is, it moves only along the jacket. When the temperature approaches normal, the liquid will begin to move in a large circle. In addition to the cooling jacket, it also includes a radiator with a fan installed on it. The cooler starts working only when the liquid temperature begins to exceed the permissible limit. For monitoring, a temperature sensor is built into the cooling jacket, also known as a fan switch on sensor.
The thermostat is responsible for which circle the Tosol moves in. Incorrect operation of the thermostat or its jamming will either lead to overheating of the unit or to the fact that it will not be able to reach the optimal thermal conditions.
This system works on a Priora like this: while the power plant is cold, the thermostat is in a position that blocks the channel going to the radiator. The liquid, thanks to the pump, circulates through the cooling jacket. As it warms up, the thermostat begins to open the channel slightly, and liquid begins to flow into the radiator to reduce the temperature of the liquid itself.
In the summer, when idling in a traffic jam, the air flow passing through the radiator is insufficient, and the temperature continues to rise. The fan switch-on sensor monitors this indicator, and if it begins to exceed the permissible limit, it turns on forced cooling of the radiator, which additionally creates an air flow to ensure cooling of the Antifreeze.
The principle of cooling the system on Priora
Like any other car, the Priora’s cooling system is based on fluid circulation through the radiator. The temperature is reduced due to airflow. There are two types of blowing:
- Natural.
- Forced.
The first, of course, is created while the car is moving at cruising speed. But the second one is turning on the fan at the moment of strong heating. It works according to the following scheme:
- Current flows to the fan winding constantly through “+”.
- “The negative contact goes to a relay controlled by the ECU.
- The unit turns the relay to ground based on a signal from its DTOZH sensor.
Attention! The Priora has two coolant temperature sensors! One informs the control computer, and the other only moves the arrow on the instrument panel. These are completely different devices
Features of heat exchange in cars with ECM (electronic engine control system)
The operating temperature of “injection” cars is higher than that of carburetor cars. It is equal to 102-105 degrees. Ordinary water boils when heated this way. Therefore, you can only use antifreeze or antifreeze that has a boiling point of about 115 degrees
This determines the importance of the electronic component of the cooling system
Where is the coolant sensor installed for the ECU on the Priora?
The Priora control unit needs the most accurate and up-to-date information about engine temperature. This is the main selection criterion for installing sensors. Therefore, the temperature ones are installed in the area of the engine cooling jacket itself. They are almost nearby. Only the panel sensor is screwed into the block, and for the computer, it is embedded in the body of the metal thermostat mounted on the cylinder head.
Important! The sensor for the ECU has a two-pin input, unlike the single-pin pointer device for the instrument panel. In the photo above you can clearly see both.
In the photo above you can clearly see both.
Checking the DTO for the Priora ECU
Like any device that is part of the engine control system via a computer, this temperature sensor, in the event of failure, first of all lights up the “Check Anger” alarm lamp on the instrument panel
One important clarification: the computer has a built-in emergency system. program
This means that if the DTOZH fails, the ECU will force the radiator fan into constant operation. So, signs of a malfunctioning cooling system:
program. This means that if the DTOZH fails, the ECU will force the radiator fan into constant operation. So, signs of a malfunctioning cooling system:
- Turning on the “Check” lamp.
- Constant operation of the Priora fan.
- High engine temperature on panel.
It must be remembered that if a signal appears on the panel, you must urgently go to computer diagnostics of the ECU. This will allow you to absolutely accurately determine the cause of the malfunction.
That is, in fact, there are no third-party ways to check these devices. After all, both their “+” and “minus” are connected to the ECU. Diagnostics only. And this is the job of a good diagnostician.
How to replace a damaged DTO for an ECU
It is better to do this on a cooled engine. Although car service specialists can, showing miracles of dexterity, perform this operation on a car that has just stopped by, an ordinary driver should not do this.
So, wait until the engine cools down to an acceptable temperature. Prepare a rag or rags. Remove the air filter housing. This is done using a shaped screwdriver. Loosen the clamp and remove the air duct. Disconnect the harness and remove the housing with rubber pads. Remove the connector from the sensor. Place a rag on the clutch cover, under it. Prepare a new one. Quickly unscrew the non-working temperature sensor with a 19 mm wrench and insert a new one. Tighten well. Do not under any circumstances unscrew the coolant tank cap before the procedure. Then the loss of antifreeze (antifreeze) will be minimal.
Well, then put everything back in place. Check the coolant level and start the engine. When the fan works, the work can be considered completed. Thematic video on replacing the temperature sensor for the ECU on a Priora.
- What is the outer CV joint of the Chery-Amulet car?
- How to change the CV joint boot on a Daewoo Nexia car
- How to change the CV joint boot on a Lanos
- How to change CV joints on a Hyundai Accent
Main types of breakdowns
There are two fairly common malfunctions: When the cooling fan of the priors does not turn on at the required moment. The device constantly works, despite the low heating of the internal combustion engine. In the first situation, we can talk about technical breakdowns of the device itself or the failure of a fuse or relay. In the second case, we can most likely say that the cause of this behavior is a faulty temperature sensor.
Identifying the causes of problems and eliminating them The reasons that contribute to the improper operation of the node are:
- Failure of the cooling fan relay. This problem is diagnosed by simply replacing a faulty part with a known working one.
- The second fairly common reason is problems associated with the electric motor itself. If it malfunctions, the rotor stops rotating the impeller. The functionality of the node can be easily checked. Using two wires, it must be directly connected directly to the battery. If the blades do not spin, then the element must be replaced or repaired. To carry out technical work and in-depth diagnostics of the electric motor, it is best to use the diagram.
- The third reason is the temperature sensor. Its breakdowns and improper operation are a fairly common occurrence. Determine the malfunction using the following method. Disconnect the two contact wires from the sensor and connect them together. If the electric drive starts to spin up, this indicates that the sensor has a malfunction.
- Damage or disturbance in the power circuit. In this case, we are talking about a banal wiring break, lack of ground. It is recommended to use a multimeter for diagnostics.
- Malfunction related to the operation of the thermostat.
- Oxidation and damage to the contact chip connected directly to the fan. In this situation, it is necessary to carefully inspect the connector junction and its contacts. If signs of oxidation are detected, clean them.
- The fuse for the Priora cooling fan has blown. Its burnout occurs as a result of high voltage supplied through the on-board network. Replacement is easy and does not cause effort or material costs.
DIY replacement instructions
If the diagnostics showed that the DTOZH is operational, but signs of a malfunction still appear, then, as we have already said, check the quality of the regulator connection and wiring. If, as a result of the check, it turns out that the device is inoperative, then the coolant temperature sensor will need to be replaced. The replacement procedure itself is not particularly complicated; even a novice car enthusiast can handle it.
As you know, Lada Priora cars go on sale in several modifications - with an 8 or 16 valve engine. Therefore, some car owners may think that the replacement procedure will look different in both cases. But we immediately want to dispel doubts - everything will look almost identical - the thermostat housing is located in the same place on both versions of the engine. The only difference is that you will need to dismantle the line that connects the air filter element to the throttle in advance.
Modernization
If you want to improve the operation of your radiator fan on the VAZ 2109, we offer the appropriate instructions.
To upgrade, you will need to install a second sensor and modify the system somewhat.
- The standard power sensor will be responsible for the operation of the fan at maximum speed.
- An additional sensor will include a reduced speed. It is installed at the top of the cooling system.
Now let’s talk more specifically about how to organize all this.
- Take a temperature sensor whose response temperature is similar to the standard regulator.
- Install it in the upper pipe fitting to the radiator.
- To mount the element, you will need a pair of washers and a nut. Be sure to lubricate the washer with sealant to prevent leakage from the installation hole.
- Buy a resistor to install on the stove fan. It has several outputs, so if desired, you can make several operating speeds.
- It is necessary to make an additional control circuit. Through it, less voltage will be supplied to the motor winding.
- The temperature sensor located in the upper part of the cooling system is responsible for turning it on.
- It is better to do control not by plus, but by weight.
- The system will work through a button in the cabin. To the left of the dashboard there is a grille with two plugs. Cut out one of them and set it to turn off on two modes. You can take the heater switch from a VAZ 2107.
- In the first position the low frequency will be switched on, and in the second – the maximum speed.
- One common wire is fed to the minus.
Such modernization is not provided for by the design of the VAZ 2109. These are modifications made by car enthusiasts. Therefore, installing a second sensor is entirely your personal responsibility.
The fan is an important component of the cooling system of VAZ 2109 injection and carburetor engines. If you wish and have time, you can easily replace or repair it yourself.
For owners of classic cars it becomes one of the important problems. In addition to various nuances that lead to overheating, a non-working radiator fan
almost always, on a hot day, it causes boiling. Why it may not turn on and how to find the reason, you can learn more about this in this publication.
The principle of operation of the DTOZH on Priora: how the fan switching device functions
The design of the element in question is based on a semiconductor element - a thermistor. When the temperature applied to the thermistor changes, the resistance increases or decreases. Below is a cross-section of the design of the temperature sensor, which will help you understand the principle of its operation.
Such an element is connected to the circuit using two contacts. Changes in temperature change the resistance, and as a result, the voltage in the circuit increases or decreases. The ECU records changes in voltage (drop), and depending on its value, makes appropriate decisions about preparing the mixture and adjusting the ignition. A voltage of up to 5V is supplied to the sensor from the controller through a 2 kOhm resistor, and depending on its fluctuations (drops), the electronic unit determines the engine temperature at the corresponding moment in time.
How to make a replacement yourself
Replacement of the Lada Priora DTOZH is carried out only after the preparatory work described above. For this purpose, disconnect the wires from the part along with the terminal and unscrew it. The most convenient way to do this is to use a 19 mm deep socket. As soon as the sensor begins to give in, it is unscrewed and removed manually.
Sequence of actions when replacing a temperature detector:
- Find the negative wire and remove it from the battery;
- A little antifreeze needs to be drained;
- Press out the plastic clips;
- Disconnect the wires;
- Loosen the tension a little and carefully unscrew it;
- Replace the sensor and perform all steps in reverse order.
- Add antifreeze back.
Change this spare part at least once, and it will become clear that the procedure does not present any particular difficulties.
How to change the fan operating mode on Priora and VAZ 2110 16 cl.
Fortunately, we have several options. The most common is flashing the ECM. However, competent work with controller software is the lot of experienced and intelligent diagnosticians, who are worth their weight in gold. You can easily ruin the ECU by inept flashing, and then in the worst case scenario you have to shell out a tidy sum for a new controller. But the problem remains. Therefore, many drivers try to solve the issue of adjusting the temperature of the fan on the VAZ 2110 and Priora using other methods.
Factory setting of fan temperature
The switch-on temperature depends on which ECU is installed and what settings are used in it. In stock, the first fan should turn on at 97 degrees, the second at 104 degrees.
A little more and the fan should turn on. Depends on the settings in the ECU.
You can change the switching parameters using an on-board computer, for example, BC STATE. We don’t have a BC, but we connected it specifically from another machine, and set the response temperature to 95 degrees. By the way, our editorial office has one of the very first Prioras. Here the factory temperature for turning on two fans at once is 104 degrees.
Optimal temperature
After turning off the fan, the temperature should be at this level. If this is not the case, then look at the thermostat; most likely it circulates the liquid in a small circle.
The optimal temperature for turning on the cooling fan depends on the operating conditions of the vehicle. If the main mileage is on the highway, then the factory settings (universal) will be optimal. If you live in a “warm city” and often get stuck in traffic jams, then it is better to lower the switching temperature. It's calmer this way.
An internal combustion engine is a complex mechanism, in order to ensure smooth operation of which a number of conditions must be met. And the temperature regime is no exception. For example, if the temperature is insufficient, this will negatively affect the quality of the formation of the fuel mixture in the cylinders. If, on the contrary, the heating is too strong, then the cylinder-piston group may jam, which in turn leads to the need for lengthy and expensive repairs.
Thus, the normal temperature (operating) for the Lada Priora engine is 85-90 degrees. When the temperature rises to 97-100 degrees, the fan should automatically turn on. If this does not happen, then the problem may lie both in the fan itself and in the sensor for its activation. But first of all, you should check the wire connections.
Radiator Inspection
Photo from the inside. We inspect for fluid leaks and strong dents.
Severely clogged cooling radiator.
If you have any more questions, you can leave them in the comments!
Source
Replacement
Replacement is quite simple if you have a car without air conditioning. In this case, you just need to unscrew a few bolts securing the fan to the radiator and remove it.
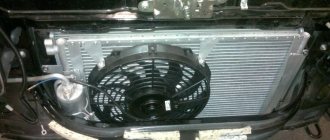
If the Priora is equipped with air conditioning, then you will have to work hard when replacing it, since there is quite a bit of space and you will need to unscrew the radiator itself, move it to the side and only then remove the fan itself.
Sources
- https://avtonomnaya-gazifikaciya.ru/priora/ne-rabotaet-ventilyator-ohlazhdeniya.html
- https://delis-avto.ru/pro-dvigatel/ne-vklyuchaetsya-ventilyator-na-priore-2.html
- https://favorit69.ru/ne-rabotaet-ventilyator-ohlazhdeniya-priora-s-konditsionerom/
- https://enginehack.ru/vse-o-ventilyatore-ohlazhdeniya-lady-priory/
- https://gil-service.ru/dvigatel/kak-proverit-ventilyator-na-priore.html
- https://o-ladagranta.ru/ne-vkljuchaetsja-ventiljator-ohlazhdenija-priora-s/
- https://ilifia-club.ru/dvigatel/ne-vklyuchaetsya-ventilyator-na-priore.html
Step-by-step instructions for replacing the coolant temperature sensor on a Priora
If for some reason you cannot contact specialists for service, then you can do the work yourself.
- Allow the power plant to cool to an acceptable temperature.
- Prepare any rags.
- Remove the housing from the air filter. A shaped screwdriver will come in handy in this case.
- Carefully loosen the clamp and remove the air duct.
- At this stage, disconnect the harness and remove the rubber pads directly from the body.
- Remove the connector from the sensor.
- Now place the prepared rags on the clutch cover and under it.
- As quickly as possible, using a key set to “19”, unscrew the broken sensor and install a new one. Tighten everything as best as possible.
- Do not unscrew the coolant reservoir cap before the replacement procedure. In this case, losses of OX will be minimal.
- Now you can put everything back together in reverse order.
- Check the coolant level.
- Start the engine.
- When the fan works and everything works as expected, without interruptions or leaks, the work is considered completely completed.
We invite you to watch the video on replacing the sensor on a Priora.
Types of engine temperature sensors: what type is used on Priora
It is important to understand that there are two types of engine temperature sensors. They differ in the principle of operation, and you need to know the operating features in order not to make a mistake when choosing such an element for your car. The following types of DTOZH are distinguished:
- With a negative temperature coefficient
(NTC - negative temperature coefficient) - it works as follows: when the temperature rises, the resistance decreases, and vice versa. - With a positive coefficient
(PTC - positive temperature coefficient) - it has the opposite principle of operation. When the temperature increases, the resistance increases.
The most common types are negative temperature devices. It is these sensors that are used on Priora cars.
When the engine is cold, the maximum resistance of the Priora DTOZH thermistor reaches 100.7 kOhm (this value will be at a temperature of -40 degrees). When the engine warms up, the temperature increases, which means the resistance drops. At a high temperature of +130 degrees, the thermistor resistance is about 70 Ohms. These readings are the operating range. When the engine is cold, the voltage drop in the circuit will be large (drops to 18%). As it warms up, it will increase (up to 90%).
This is interesting! If the engine is cold, then the voltage in the circuit will be about 3.4V, and when it warms up, the value decreases to a minimum (0.15V). It is important to know what type of sensor is used on the car in order to diagnose it and check for serviceability or correct operation.
Priora. Radiator fan does not turn on
I assure you that the temperature simply does not reach the temperature at which the fan turns on. The reason, for example, is that the coolant pressure does not hold, for example, the tank cap is faulty.
so Yes. But. what is the temp on the Priora? 101g? On my top ten, the vent is on at 101g, but the lid is a dummy (I threw everything out of it. It stands like a boot so that dirt doesn’t fly) and nothing boils. on grant on at 100 g. I did not disassemble the cover. I just twist it a little and that’s it. I can't wait.
TS, I didn’t add water by accident.
tin. I'm familiar with Bosch 7.0. I changed it because the fan was on at 107. Where did the factory raise that much? did 101
so Yes. But. what is the temp on the Priora? 101g? On my top ten, the vent is on at 101g, but the lid is a dummy (I threw everything out of it. It stands like a boot so that dirt doesn’t fly) and nothing boils. on grant on at 100 g. I did not disassemble the cover. I just twist it a little and that’s it. I can't wait.
TS, I didn’t add water by accident.
Yes, I filled it with water, it was about 50/50 water and antifreeze
So it boils earlier than it should. Drain and antifreeze
, and don’t fill it with antifreeze.
How is antifreeze different from antifreeze?
Well, you’re not educated)) the letters are different!
Oga, one is red semi-dry, and the second blue is blue curaçao
Any car owner wants his “iron horse” to work for decades. That is why we listen to the sound of the engine, try to refuel at trusted gas stations, and buy high-quality oils and antifreeze. Although for a novice car enthusiast, choosing many means to improve the performance of a car is a long journey of trial and error. One of the problems may be the choice between antifreeze and antifreeze, because for the uninitiated citizens these two coolants are one and the same. Let's try to find out if they really are that similar.
Definition Antifreeze is the name given to all coolants without exception, regardless of where and when they were produced.
Antifreeze is a type of antifreeze produced in the USSR. Due to the fact that there was no alternative to antifreeze, very soon the name of the brand became a household name, and for a long time other antifreezes that entered the Soviet and then the Russian market were also called that way. In fact, TOSOL is an abbreviation that stands for “technology of organic synthesis of a separate laboratory.”
Composition Antifreeze, like any other coolant, contains ethylene glycol and water. Antifreeze uses additives based on salts of inorganic acids, for example, phosphates, silicates, nitrates and nitrites.
Antifreeze also contains ethylene glycol and water, glycerin, propylene glycol and alcohol. In other words, antifreeze is ethylene glycol (or propylene glycol), water and additives. It is the additives that are especially valuable in the composition, as they increase the anti-corrosion, anti-cavitation, anti-foam capabilities of antifreeze. Antifreeze contains additives based on salts of organic acids.
Performance characteristics Thanks to antifreeze, a protective layer is formed on the metal surface; as a rule, its thickness does not exceed 0.5 mm, but the disadvantage of such protection is low heat transfer. Because of this, fuel consumption increases, and the engine itself wears out faster. Antifreeze loses its cooling ability after 30-40 thousand kilometers. Due to the fact that antifreeze contains inorganic salts such as phosphates and silicates, the formation of gels and sediments is possible, which can lead to clogging of the radiator. At high temperatures, antifreeze works in the system up to a limit of 105 degrees.
At what temperature should the fan on the Lada Priora operate?
Car : Lada Priora. Asks : Zhenya Bald. The essence of the question : what is the optimal temperature for turning on the engine fan?
I connected via elm to see the switch-on temperature, but I couldn’t find such data in it anywhere. I tried to watch it myself, the fan turns on at 98 degrees. It's kind of scary to drive like that.
Fan nearby. I checked it by hand, it spins well, without vibrations or problems.
Additional block
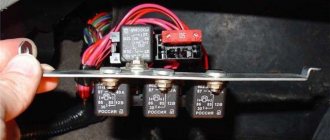
Additional relays are mounted on a bar and located under the dashboard, near the front passenger's feet. To get to them, you need to remove the right tunnel lining. Next to the additional relays is the electronic engine control unit (ECU).
If its connector interferes with access to the relay, disconnect it by first removing the negative terminal from the battery.
Circuit breakers
F1 (15 A) – main relay circuit, starter blocking.
F2 (7.5 A) – power circuit of the electronic control unit (ECU).
F3 (15 A) – electric fuel pump. If the fuel pump has stopped pumping (this can be determined by the absence of a sound when the ignition is turned on), check together with relay K2. There may also be problems with the immobilizer, it blocks the pump, see information about F20. If the wiring, this fuse and the relay are good, most likely the fuel pump itself has failed. To remove it, you need to disconnect the battery, remove the rear seat cushion, unscrew the cover, ring and fuel hoses, then carefully remove the entire fuel pump.
Lada Priora fuses: where are they located, replacement - AutoExpert
These include air conditioning, heated and controlled side mirrors, front airbags, a primitive ABS system, and if we compare the old “ten” modifications, then also electric power steering. Each of these electrical circuits is controlled by a relay and protected by appropriate fuses. All of them are distributed and located in separate blocks.
Relay and fuse blocks
The VAZ-2170 has three relay and fuse blocks:
- main block;
- mounting block;
- additional mounting block.
Luxury "Priors" with air conditioning have another additional block in which relays and fuses are located that are responsible for the operation of climate control equipment.
Main power fuse block
The main unit is located in the engine compartment of the car next to the battery and expansion tank. It is protected from above by a removable plastic casing. The main unit contains only six fuses that are responsible for the operation of the main (power) electrical circuits of the car.
| Fuse designation | Rated current, A | Case color | Electrical circuit |
| F-1 | 30 | Green | Electronic motor controller |
| F-2 | 60 | Blue | Ignition switch relay, power window control module, rear window defroster, radiator fan |
| F-3 | 60 | Blue | Signal, ignition switch, cigarette lighter, hazard warning lights, brake light unit, radiator fan circuit, interior lighting |
| F-4 | 60 | Blue | Electric generator |
| F-5 | 50 | Red | Electric power steering (EPS) |
| F-6 | 60 | Blue | Electric generator circuit |
To replace the fuses in the main unit, you need to disconnect the ground on the battery, remove the cover and replace the faulty part. VAZ-2170 mounting block
Relays and fuses in the cabin
The mounting block is located in the car interior under the dashboard on its left side. It is protected by a removable plastic panel attached to the “torpedo” using three latches. To remove the panel you need to turn each of these latches 900 degrees. After this, the panel will be completely removed.
The location, number, and markings of relays and fuses in the Priora mounting blocks may differ depending on the type of vehicle equipment.
| Relay designation | Purpose |
| In the “Norma” package | |
| K-1 | Radiator fan |
| K-2 | Rear window defroster |
| K-3 | Starter |
| K-4 | Additional relay |
| K-5 | Socket for backup relay |
| K-6 | Windshield wiper and washer motors |
| K-7 | High beam lamps |
| K-8 | Signal |
| K-9 | Alarm |
| K-10, K-11, K-12 | Sockets for backup relays |
| Available in “Lux” and “Lux Plus” configurations | |
| K-1 | Headlight and low beam lamps |
| K-2 | Rear window defroster |
| K-3 | Starter |
| K-4 | Additional relay |
| K-5 | Reserve socket |
| K-6 | Wiper mode switching module |
| K-7 | High beam lamps |
| K-8 | Signal |
| K-9 | Anti-theft alarm (sound signal) |
| K-10 | Fog lamps |
| K-11 | Seat heaters |
| K-12 | Relay for wiper operation mode |
Mounting block fuses
| Fuse designation | Rated current, A | Electrical circuit |
| In the “Norma” package | ||
| F-1 | 25 | Radiator fan |
| F-2 | 25 | Rear window defroster |
| F-3 | 10 | High beam lamp (right) |
| F-4 | 10 | High beam lamp (left) |
| F-5 | 10 | Signal |
| F-6 | 7,5 | Low beam headlight bulb (left) |
| F-7 | 7,5 | Low beam lamp (right) |
| F-8 | 10 | Signal |
| F-9 | 25 | Electric stove fan motor |
| F-10 | 7,5 | Interior lighting, instrument panel lighting, brake light lamps |
| F-11 | 20 | "Windshield wipers" (control) |
| F-12 | 10 | Connector “15” of the instrument panel |
| F-13 | 15 | Cigarette lighter |
| F-14 | 5 | Side lamp (left headlight) |
| F-15 | 5 | Side lamp (right headlight) |
| F-16 | 10 | Connector "15" ABS |
| F-17 | 10 | Left fog lamp |
| F-18 | 10 | Right fog lamp |
| F-19 | 15 | Front seat heater |
| F-20 | 5 | Immobilizer control module |
| F-21 | 7,5 | Fog lights (rear) |
| F-22–F30 | Reserve sockets | |
| F-31 | 30 | Electric package control module |
| F-32 | Reserve socket | |
| Available in “Lux” and “Lux Plus” configurations | ||
| F-1 | Reserve socket | |
| F-2 | 25 | Rear window heater, electrical package module, relay and connector “10” for connecting the rear window heater |
| F-3 | 10 | High beam lamp (right), instrument panel, high beam warning lamp |
| F-4 | 10 | High beam lamp (left) |
| F-5 | 10 | Protection of the mounting block, signal and its relay |
| F-6 | 7,5 | Low beam (left headlight) |
| F-7 | 7,5 | Low beam (right headlight) |
| F-8 | 10 | Anti-theft alarm relay, anti-theft alarm horn |
| F-9 | Reserve socket | |
| F-10 | 10 | Brake light switch, brake light lamps, connector "20", interior lighting |
| F-11 | 20 | Windshield wiper mode switching module relay, wiper mode switch, connector “53A”, rear window heater relay, rear window wiper motor (for VAZ-2171, 2172), connector “25” of the front airbag control module |
| F-12 | 10 | Connector “21” of the instrument cluster, connector “9” of block X2 of the dashboard, connector “1” of block X2 of the electric power steering control module, reversing headlight lamps, parking sensor control module |
| F-13 | 15 | Cigarette lighter |
| F-14 | 5 | Left side light, trunk light, warning light for license plate light, connector “12” of block X2 of the glass unit control module |
| F-15 | 5 | Right side light, glove box light |
| F-16 | 10 | Hydraulic unit of the ABS system |
| F-17 | 10 | Fog lamp (left headlight) |
| F-18 | 10 | Fog lamp (right headlight) |
| F-19 | 15 | Heated front seats relay |
| F-20 | 10 | Side and low beam relay, heater fan relay, lighting control relay, windshield wiper control module, climate system control module |
| F-21 | 5 | Connector “30” of the light alarm switch, connector “16” of the diagnostic block, clock, connector “14” of the automatic climate control unit |
| F-22 | 20 | Wiper motor, wiper motor relay, wiper control module relay |
| F-23 | 7,5 | Connector “20” of the wiper control module |
| F-24 - F-30 | Backup fuse sockets | |
| F-31 | 30 | Connector “2” of block X1 of the electrical package module, threshold illumination lamps |
| F-32 | Reserve fuse socket |
To remove the mounting block from its seat, you only need a screwdriver with a Phillips bit. She needs to unscrew the screw securing the block, then, pulling it towards you, disengage it from the fastening hooks.
Before replacing relays and fuses, you must disconnect the negative terminal from the battery. To remove the main unit, you will need to disconnect all terminals with wires connected to it, having previously marked their location.
Additional mounting block
The additional VAZ-2170 mounting block is located behind the panel of the right tunnel trim on the left leg side of the front passenger. To get to it, you need to unscrew the screws securing the cladding and remove it.
The additional mounting block contains three fuses and two relays.
| Designation | Rated current, A | Purpose of protection |
| K-1 | Ignition relay (main relay) | |
| K-2 | Fuel pump relay | |
| F-1 | 15 | Starter and main relay interlock circuits |
| F-2 | 7,5 | Motor controller circuit |
| F-3 | 15 | Fuel pump |
To replace fuses and relays in the additional unit, there is no need to remove it from its mounting location. To remove the relay, use an “8” key to unscrew the corresponding nut securing it.
Before carrying out work to replace relays, fuses or the entire unit, it is strongly recommended to disconnect the ground wire from the battery, and also disconnect the electronic engine controller wiring harness block from the additional mounting block connector.
Priora knock sensor
A knock sensor is a device that detects the knock levels of internal combustion engine processes. The installation location of such a device is the cylinder block. Maintaining it makes it possible to obtain high power, as well as achieve good fuel economy without causing damage to the engine.
The detonation process is the main defect of an internal combustion engine, since the force is considerable and it is impossible to ignore it. Among several different devices that are used as performance optimizations, the knock sensor is used to prevent knocking fuel combustions. Fuel detonation can be controlled thanks to the main indicator - the manifestation of high-pitched and ringing metallic sounds, which, according to indicators, are sometimes mistaken for the clicking sounds of the cylinder-piston group. If the process is strong enough, with faulty knock prevention systems the engine begins to fail.
[Closed] Solved: Radiator fan does not turn on (Page 1 of 2)
To post a reply you must log in or register.
1 Topic from Goodfree 2014-09-09 13:12:37
- Goodfree
- New member
- Inactive
- Registration: 2014-06-18
- Messages: 82Thanks: 8
- Auto: 21102
Topic: Resolved: Radiator fan won't turn on
The bottom line is that the fan does not turn on. Manually (via a button and pulling out the chip from the sensor in the thermostat) - everything works great. What could be the reason? I installed a new sensor, but is there any point in checking the fan relay? (under the cladding on the right). After all, it seems to work, but not through the ECU signal.
2 Reply from igorek 2014-09-09 13:38:47
- igorek
- Brother-in-law
- Inactive
- From: Bryansk region g Starodub
- Registration: 2013-05-05
- Messages: 416Thanks: 191
- Car: VAZ-21102 1.5i-8V Bosch MP7.0H
Re: Resolved: Radiator fan does not turn on
Goodfree, It’s clear that it’s not included, what doesn’t suit you? ileger than the switch but on the verge of boiling away the tasol? there is little information, there are a lot of problems with this malfunction, there is no pressure in the system, the thermostat is not working. When the chip is disconnected, it turns on. This means that the circuit and control of the cooling fan are working properly, look for the cause in the thermostat in the expansion tank cap. It is also possible that the temperature sensor on the instrument panel is lying. misleading.
3 Reply from Aleksandr.21124 2014-09-09 15:24:40
- Aleksandr.21124
- Brother-in-law
- Inactive
- Registration: 2014-08-11
- Messages: 392Thanks: 169
- Car: VAZ 21124
Re: Resolved: Radiator fan does not turn on
The fan relay costs a pretty penny. Under the cladding on the right there are three of them. The problem may be a bad mass. Unscrew and clean all contacts connecting the ground to the body,
behind the left headlight
Weight under the gas pedal on the right bolt (weight of the shield)
4 Reply from Goodfree 2014-09-10 08:02:27
- Goodfree
- New member
- Inactive
- Registration: 2014-06-18
- Messages: 82Thanks: 8
- Auto: 21102
Re: Resolved: Radiator fan does not turn on
The cover is new, the sensor is new. How does the thermostat operate and the fan turn on?
5 Reply from igorek 2014-09-10 11:12:57
- igorek
- Brother-in-law
- Inactive
- From: Bryansk region g Starodub
- Registration: 2013-05-05
- Messages: 416Thanks: 191
- Car: VAZ-21102 1.5i-8V Bosch MP7.0H
Re: Resolved: Radiator fan does not turn on
How does the thermostat operate and the fan turn on? Gudfree, on the stability of the engine temperature and the timely switching on of the cooling fan, let’s put it this way.
6 Reply from Goodfree 2014-09-10 12:12:32 (2014-09-10 12:13:07 edited by Gudfree)
- Goodfree
- New member
- Inactive
- Registration: 2014-06-18
- Messages: 82Thanks: 8
- Auto: 21102
Re: Resolved: Radiator fan does not turn on
Misprinted: How does the operation of the thermostat depend on turning on the fan?
7 Reply from Patroclus 2014-09-10 13:21:21
- Patroclus
- Connoisseur
- Inactive
- From: RUSSIA
- Registration: 2014-07-05
- Messages: 637Thanks: 104
- Car: Lada Priora 2171 Wagon: VESTA
Causes of cooling fan breakdowns on Lada Priora
In order to diagnose the above problems, we do not need special skills or professional tools. You can test all these procedures in the garage or on the street. The main thing is to know where to look and what to do. There are two fairly common faults:
- the cooling fan of the priors does not turn on at the required moment;
- the device constantly works, despite the low heating of the internal combustion engine.
In the first case, it is obvious that the reason is a breakdown of the device itself, or a failure of a fuse or relay. In the second case, most likely the temperature sensor is faulty.
Troubleshooting and Troubleshooting
The main reasons for fan failure are:
- Failure of the cooling fan relay. This problem is diagnosed by simply replacing a potentially faulty part with a working one.
- Problems with the electric motor itself. If it malfunctions, the rotor stops rotating the impeller. The functionality of the node can be easily checked. Connect the fan directly to the battery. If the blades do not spin, then the element must be replaced or repaired. To carry out technical work and detailed diagnostics of the electric motor, use the diagram.
- Temperature sensor. If the fan does not turn on when the engine temperature is 90% or more, then most likely the problem is there. The malfunction is determined as follows: disconnect the two contact wires from the sensor and connect them together. If the electric drive starts to spin up, this indicates that the sensor has failed.
- Damage or break in the circuit. In this case, we are talking about a banal wiring break, lack of ground. It is recommended to use a multimeter for diagnostics.
- Malfunction related to the operation of the thermostat. The cooling fan on the Priora does not turn on at temperatures of 110, 115, 120 degrees? It is worth taking measures that would not be difficult to do in a garage environment. Although this can be done right on the street...
If you solved the problem with turning on the cooling fan on Priora in some other way, then please write in the comments.
