Brands and years (approximately): some models after 2002 with control systems BOSCH MP7.0 Euro-3, BOSCH M7.9.7, January-7.2
Typical location: in the cabin under the dashboard on the driver's side.
Line CAN-High, J-2284
K-line diagnostics (ISO 9141-2 and ISO/DIS 14230-4)
Line CAN-Low, J-2284
L-line diagnostics (ISO 9141-2 and ISO/DIS 14230-4)
Power supply +12V from battery
Location of the VAZ diagnostic connector
Installation of alarms, immobilizers, secret locks and other electronic and mechanical devices to protect the car, as well as diagnostics, installation of video and audio equipment, installation of parking sensors, xenon lights, repair of remote controls and much more!
+371 29675090 Sergey
There are currently 348 guests and not a single registered user on the site
Source
Location of diagnostic connectors April 2, 2022 Rating:
Reading time
Difficulty of the material:
To connect a car scanner and perform computer diagnostics, you need to know the location of the OBD2 diagnostic connector. To select equipment, additional information on pinout and type is required.
For Chevy Niva, the type of connector depends on the year of manufacture:
Where is the diagnostic connector located on a Chevrolet Niva?
Regardless of the year of manufacture, the diagnostic block for the Chevrolet Niva is located next to the ignition switch, partially covered by the steering column cover. The location is indicated on the diagram by number 3 .
You can see the position in more detail in the photo. The electronic control unit is located under the glove compartment, near the front passenger's feet.
How to use
Before purchasing an adapter, make sure it is compatible with your car. After purchasing the adapter, it is important to correctly connect the scanner to the connector. As a rule, the OBD 2 connector is located in the passenger compartment under the dashboard. Models before 2006 usually have a 12 pin connector (GM), and to connect the scanner you will need a 16 pin adapter.
Information on the location of the connectors is presented in the table and photo below.
Location of diagnostic connectors and recommended auto scanners:
| No. | Brand VAZ | Connector location | Suitable and recommended scanners + program |
| 1 | 2105, 2107 (with injector) | On the left side of the steering column | VAG-Adapter + Adapter 12 pin + OpenDiag Mobile |
| 2 | 2108, 2109 | Below the storage shelf, in the center. | |
| 3 | 2113, 2114, 2115 | In the cigarette lighter area, approximately 10-12 cm lower. | Scan Tool Pro + 12 pin adapter + OpenDiag Mobile |
| 4 | 2110, 2111, 2112 | On the right side in relation to the steering column, under the dashboard. | |
| 5 | Lada Priora, Kalina, | In the opening located behind the glove compartment. | Scan Tool Pro 2022 + OpenDiag Mobile |
| 6 | Lada Vesta | Located under the steering column on the left, on the left near the handle for opening the hood, under the mounting block | |
| 7 | Lada Largus | Inside the glove compartment on the back wall and closed with a protective cap | |
| 8 | Lada Granta | Right above the cigarette lighter. |
OBD 1 pinout
Description:
OBD1 (GM12) connector is rectangular in shape, consists of 12 contacts.
Brands and years:
All injection models, except for some models after 2002, which have an OBD-II connector.
Access and location:
Pinout:
Example in the photo:
Conclusions and their purpose:
| Conclusion | Color | Purpose |
| A | Weight | |
| B | L-line diagnostics (not always routed) | |
| D | CO potentiometer (not always diluted) | |
| G | Fuel pump control | |
| H | Power supply +12V (not always wired) | |
| M | K-line diagnostics |
Results
A competent diagnostic exercise of the ECU will allow you to identify and correct problems that have arisen in the operation of the on-board computer. To do this correctly, carefully study the type of pinout, select a scanner to read the information and display it on the PC screen.
By adhering to the above tips and instructions, the motorist will be able to complete the process successfully. If errors occur again, the owner of a Chevy Niva will not have to contact a car service center and overpay for diagnostics.
OBD 2 pinout
Description:
The OBD2 connector is trapezoidal and consists of 16 pins.
Brands and years:
Gasoline passenger cars and light commercial vehicles manufactured or imported into the United States since 1996 (US CARB and EPA legislation) and in Europe (EOBD) since 2000-2001 (European Union Directive 98/69EG) and Asia (mainly since 1998). ).
Access and location:
Pinout:
Example in the photo:
Conclusions and their purpose:
| № | Color | Purpose |
| 2 | J1850 Bus + | |
| 4 | Body grounding | |
| 5 | Signal Ground | |
| 6 | Line CAN-High, J-2284 | |
| 7 | K-line diagnostics (ISO 9141-2 and ISO/DIS 14230-4) | |
| 10 | J1850 Bus- | |
| 14 | Line CAN-Low, J-2284 | |
| 15 | L-line diagnostics (ISO 9141-2 and ISO/DIS 14230-4) | |
| 16 | Power supply +12V from battery |
Diagnostic connector pins for used protocols
Pins 4, 5, 7, 15, 16 - ISO 9141-2.
Pins 2, 4, 5, 10, 16 - J1850 PWM.
Pins 2, 4, 5, 16 (without 10) - J1850 VPW.
The ISO 9141-2 protocol is identified by the presence of pin 7 and the absence of pins 2 and/or 10 on the diagnostic connector.
If pin 7 is missing, the system uses the SAE J1850 VPW (Variable Pulse Width Modulation) or SAE J1850 PWM (Pulse Width Modulation) protocol.
All three data exchange protocols operate via a standard OBD-II J1962 connector cable.
Realities
Let's look at the ELM adapter from a purely technical perspective. Its function is simple - it is a translator between the car's ECU and your smartphone or tablet. But translators are different, I declare this responsibly, as a person who speaks German. There are general translators, there is a technical language, there is a diplomatic language, and there is the pinnacle of the art of translation - simultaneous translation. The Chinese wireless version of the ELM adapter represents a high school student who got a C in English and thinks that he knows the language. It would be appropriate to recall an anecdote on this topic. *The Georgian went swimming and began to drown. I either didn’t know the word “help” or forgot it. A man is walking along the shore. The Georgian shouts: uh, dear, help, I’m swimming for the last time!!!* This is approximately the same information given by the vast majority of Chinese “Elms”. The Chinese are deceiving consumers twice. First point: a real original ELM 327 chip costs about $20. This doesn't look like 400 rubles. The second point is that all electronics that end up on Ali and other similar sites are shamelessly cut down to cost 400 rubles, or even better, 300, or even better, even cheaper.
Additional Information
On some Chevrolet Niva models there is a 12-pin block, this is due to the fact that these models are equipped with other control units of older models. Modern car scanners are mainly based on the OBD2 connector, so to connect to 12 PINs you will need a special adapter purchased or made independently.
The correct connection diagram for a 12 PIN block with a 16 PIN adapter
Deciphering error codes
The first character is a letter and indicates a fault block:
- B - body;
- C - suspension;
- P — engine (ECM, gearbox);
- U - data exchange bus.
The second character is a number, code type:
- 0 — SAE (standard);
- 1.2 - OEM (factory);
- 3 - reserved.
The third character is a number, system:
- 1, 2 - fuel system;
- 3 - ignition system;
- 4 — reduction of exhaust gas toxicity;
- 5 - idle;
- 6 - ECU or its circuits;
- 7, 8 — transmission (automatic transmission).
The fourth and fifth characters are numbers, the error code itself.
Selecting equipment for diagnosing Niva Chevrolet
Searching for an OBD connector is associated with the need to connect equipment to it: adapter, scanner, etc.
The Chevrolet Niva has several nuances regarding the compatibility of auto scanners and software. For example, one of the main conditions for a connector is the ability to connect a K-Line format connector. Installation with a standard VAZ connector and OBD II standard is also possible.
To study these issues, it is recommended that you read the relevant articles and sections of the site:
Source
Installation
- Turn off the ignition. We connect the adapter to the OBD2 connector and see that the red LED on it lights up. There is food.
- Turn on the ignition. On your smartphone, turn on the search for Bluetooth devices. As a rule, the *OBD2* device is displayed.
- We launch the program for working with the ECU. I personally am used to using a fairly simple Russian program called Car Scanner. The program icon is a “check engine” symbol in a blue square.
- The adapter may ask for a password. Typically 1234. There is a connection with a smartphone, a connection with the car's ECU. When asked to choose a car manufacturer, we select the general OBD protocol. And here it is, happiness. You can see the current data and, most importantly, why all this was needed - see and erase errors.
Did you like the article? Share with your friends!
We diagnose a Chevrolet Niva ourselves - where is the diagnostic connector located?
For self-diagnosis of a Chevrolet Niva, you need an ELM327 and an Android . You can also carry out diagnostics using a wired adapter and a laptop. But in this article we will talk specifically about using the mobile diagnostic option.
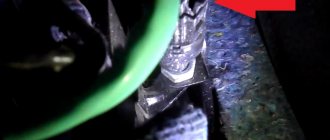
The location of the connector is indicated by an arrow.
Types of diagnostic cords for data transmission
The NPP NTS cord is equipped with KR2 adapters with a triple core, in which 2 wires are separated for connection to the battery using crocodiles and an additional signal cable connected to the contact block. If you need to extend the wire yourself, remember that the maximum length should be no more than 15 meters so as not to create unnecessary interference.
And, undoubtedly, the most convenient to use is the model with a built-in Kline type adapter. It allows easy connection to a laptop and is compatible with many special applications for car diagnostics.
What is needed for diagnosis
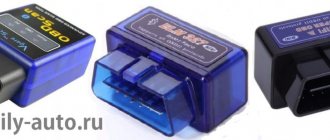
Adapter ELM327 version 1.5 bluetooth connection.
It is advisable to buy an adapter that costs at least 500 rubles. Since cheaper versions come with a 1.2 chip, which cannot always connect to the Chevrolet Niva. It all depends on the version of the ECU.
Where is the diagnostic connector located?
Unlike other AVTOVAZ models, the diagnostic connector is located in a convenient location - next to the ignition key. Check out the photo below.
The arrow marks the connector in which the adapter is already installed.
Chevrolet Niva GL. Bumblebee › Logbook › Scanner ELM327 OBD2 mini (ver. 1.5) Bluetooth
Almost a month ago (02/26/17) I received a package from China with this very scanner, but I still couldn’t test it because the phone was sent in for repair, which eventually resulted in a replacement for a new one, and my wife’s phone was used under this I didn’t want to topic, but that’s a completely different story))
And so, finally, yesterday I received a new phone and after installing the necessary software, I installed the OpenDiag
And while the car was warming up in the morning, I checked the scanner. By the way, the phone immediately caught the scanner, and then it was immediately reflected in the program. There were no problems pairing them. I guessed the PIN code from the scanner the second time: it turned out to be not 0000, but
1234
.
Actually, the set from China looks like this:
It is inserted into the OBD connector to the right of the steering wheel:
When I plug it in, it lights up a pretty bright green and then glows a barely noticeable red until you connect it to the phone. After pairing is established, it lights up in different colors - red, blue, green...
The program displays data on the phone screen: both dynamic (changing every second) and static. Let's take some screenshots:
Regarding versions: which one should I take, 1.5 or 2.1? I recommend 1.5, i.e. yes - it’s older, but... Version 2.1 is just a stripped-down version of 1.5 - the Chinese simply removed a large number of (I don’t know where exactly to put the emphasis) protocols. For the Chevrolet Niva, version 1.5 fits exactly. I won’t talk about 2.1 - I haven’t tried it.
Well, and of course, the question of price. The vast majority of all these scanners are Chinese replicas/fakes/copies. An original scanner with a patented ELM327 chip costs from 4.5-5000 rubles. And then, it’s quite possible for us to get a Chinese toy for that kind of money. For this money you can already buy a good on-board computer! My scanner cost me 235 rubles and 2 weeks of delivery. I specifically took the Bluetooth version.
Actually, I will gradually try different programs. If one of them stands out (in a good way) from the rest, I’ll definitely make another post on this scanner!
Good luck on the roads and beyond))
PS: well, and with the beginning of Maslenitsa: all believers and just pancake lovers like me)))
UPD. 11:50 02/21/2017 I ran to the car at lunch and tried the Torque Pro (OBD 2 & Car) program v1.8.154 (from here). But I tried it only at idle and slightly accelerating in place (up to 2000 rpm).
Source
Diagnostic algorithm
On your phone you need to download and install the program: “ OpenDiag ”. It's free.
Error message.
It is emphasized what to press.
Select "errors".
How to find out the ECU version
If you don’t know what ECU you have, there is, of course, the option of removing the glove compartment and reading the markings.
No similar programs appeared on the iPhone? My whole family has apples, I’ll have to take one of my friends to the garage
I have never done such a diagnosis on my VAZ, although I have had it for more than five years. With such an adapter and program, there is no need to go to the station.
I have a modern smartphone based on Android, so downloading the OpenDiag program and diagnosing the car should not be a problem.
Source
Electrical diagram of the VAZ 21214 car
Another modern modification of the domestic NIVA is the VAZ-21214. A high-quality color wiring diagram contains wiring indicating all components and elements - headlights, fans, switches and various sensors. The car's fuse and relay box is provided separately, with a detailed explanation of the purpose of each fuse link. All diagrams are taken from open sources and are provided for your viewing completely free of charge. By clicking on the picture below, the VAZ-21214 (NIVA) electrical equipment diagram will open in high resolution.
Symbols on the diagram
1. Left front light. 2. Headlights. 3. Coolant temperature sensor. 4. Sound signal. 5. Throttle position sensor. 6. Mass air flow sensor. 7. Electromagnetic valve for adsorber purge. 8. Injectors. 9. Right front lamp. 10. Side direction indicators. 11. Rechargeable battery. 12. Electric heater motor. 13. Additional resistor for the heater motor. 14. Differential lock warning lamp switch.15. Windshield wiper relay. 16. Starter 21214. 17.
Windshield wiper motor.18. Generator VAZ-21214. 19. Windshield washer motor.20. Ignition module. 21. Spark plugs.22. Controller. 23. Idle speed control. 24. APS status indicator. 25. Temperature indicator sensor.26. Oil pressure warning light sensor. 27. Socket for portable lamp(*). 28. Brake fluid level warning lamp switch. 29. Diagnostic block. 30. Relay for turning on the heated rear window. 31. Headlight high beam relay. 32.
Relay for low beam headlights. 33. Electric fuel pump with fuel level sensor. 34. Starter activation relay. 35. Additional fuse block.36. Main fuse block. 37. Relay-breaker for direction indicators and hazard warning lights. 38. Reversing light switch. 39. Brake light switch. 40. Cigarette lighter VAZ-21214. 41. External lighting switch.42. Illumination lamps for heater control levers. 43. Rear fog light switch. 44. Rear window heating switch. 45.
Heater motor switch. 46. Rear window wiper and washer switch. 47. Hazard switch. 48. Ignition switch. 49. Instrument lighting switch. 50. Windshield wiper switch. 51. Windshield washer switch. 52. Horn switch. 53. Turn signal switch. 54. Headlight switch. 55. Electric fuel pump relay. 56. Vehicle speed sensor. 57. Lamp switches located in the door pillars. 58. Interior lamps.
59. Rear window washer motor. 60. Instrument cluster. 61. Parking brake warning lamp switch. 62. Main relay. 63. Tail lights. 64. License plate lights. 65. Rear window wiper motor. 66. Rear window heating element. 67. Crankshaft position sensor. 68. Knock sensor. 69. VAZ oxygen sensor. 70. Electric fan relay. 71. Electric fans. 72. Injection system fuse block. 73. To the interior lamp. 74.
To the dome light switch in the driver's door. 75. APS control unit.
ELECTRICAL CONNECTION DIAGRAM FOR FRONT WIRING HARNESS 21214-3724010-44
IGNITION SYSTEM WIRING HARNESS CONNECTION DIAGRAM 21214-3724026-44
INSTRUMENT PANEL WIRING HARNESS CONNECTION DIAGRAM 21214-3724030-44
REAR HARNESS DIAGRAM 21214-3724210-44
Auto fuse box
Recently, the rear fog lamp switch has a more complex device than shown in the diagram. An additional relay may be used. New VAZ-21214 models are equipped with windshield wipers and headlight washers. Their connection diagram is similar to the VAZ-21213.
CAR ELECTRONICS REPAIR
Wiring diagram of the VAZ Niva, the part responsible for powering the head optics
- 1 – main lighting device;
- 2 – fuse box;
- 3 – headlight switching regulator;
- 4 – part of turning off the ignition;
- 5 – headlight switches;
- 6 – designation in the instrument cluster of the area responsible for turning on the high beam;
- K4/5 – protective relays for turning on the high- and low-range modes of the head optics;
- A – terminal pins going to the circuit’s power source.
( 1 rating, average 5 out of 5 )
Niva sensors
As you know, the first Russian SUV Niva was born back in the days of the Soviet Union. At that time, in the USSR they did not even think about an electronic engine control system; the entire process of operation of the internal combustion engine was mechanical. The engine was supplied with fuel through a carburetor. At present, the Niva still continues to be produced, but with its ancestors, the modern Niva has only the body left and it has undergone minor modifications.
The carburetor was replaced with an injector, the interior was changed and the appearance of the car was transformed, but still the Niva remained Niva. The legendary Niva cross-country ability did not deteriorate after these modifications, but became much more comfortable.
In this article we will talk about the sensors of the engine control system in the injection Niva, namely, it describes in detail each of the sensors, where it is located and what function it is responsible for, as well as the signs of sensor malfunction are described in detail.
Electronic engine control unit (ECU)
An ECU is a kind of computer in a car; it is in this device that the entire operation of the internal combustion engine is corrected. All sensors that are installed in the car transmit readings specifically to this unit, and based on the readings, it makes changes to the operation of the engine, which affects both the engine speed and its consumption.
Symptoms of ECU malfunction:
There can be a huge number of signs of malfunction of this unit, because signs of failure of one sensor may even indicate failure of the unit.
Mass air flow sensor (MAF)
This sensor is located near the Niva air filter box. Air flows through this sensor, which is necessary to form the air-fuel mixture. The sensor records the amount of air passing through it and sends signals to the electronic engine control unit (ECU).
Signs of a DMRV malfunction:
The Niva DPKV is installed in a special hole in the oil pump drive cover. This sensor is responsible for setting the ignition timing.
The sensor takes readings from the crankshaft pulley, which has teeth and in one of the places there is “caries”, that is, several pulley teeth are missing. It is “caries” that the DPKV understands in what position the crankshaft is.
The sensor itself resembles an inductive coil, which generates impulses when the crankshaft rotates and transmits them to the computer.
If the sensors fail, the car will not start.
Signs of DPKV malfunction:
DTOZH on Niva is installed in the cylinder head outlet pipe. The coolant temperature sensor is a fairly simple element in its design. The sensor is based on a thermistor, which changes its resistance as the temperature changes.
One of the functions of the sensor is to start the electric engine cooling fans when the coolant temperature threshold is reached. The sensor is also responsible for starting the engine in cold weather; according to the coolant temperature readings, the electronic control unit forms the fuel mixture necessary for more proper warming up of the car engine. This can be replaced by the presence of high warm-up speeds at the moment of starting the internal combustion engine.
Signs of DTOZh malfunction:
The TPS is installed on the throttle itself and is a potentiometer. This sensor reads readings from the throttle position and transmits them to the ECU. The damper opens access to air, thereby increasing engine speed. When the damper opens, the sensor sends a signal to the control unit to increase the fuel supply, which is necessary to form a working air-fuel mixture.
The sensor that most often fails is an unreliable element of the system. Subsequently, they abandoned it and switched to an electronic throttle.
Signs of a malfunction of the TPS:
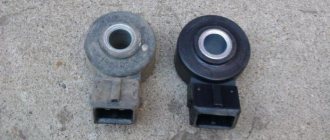
The knock sensor is installed on the right side of the vehicle's cylinder block. A DD is needed to catch detonations in the engine and adjust the fuel mixture. The sensor itself is made on the principle of a piezoelectric element and, in the presence of vibrations in the engine, transmits impulses to the ECU, which in turn adjusts the fuel mixture.
Signs of DD malfunction:
The oil pressure sensor is located on the right side of the cylinder block and is screwed into the oil line fitting. This sensor is necessary to monitor the oil pressure in the engine. As you know, operating a car with low oil pressure in the internal combustion engine can damage it. When the oil pressure in the internal combustion engine decreases, the sensor closes the contact and sends a signal to the Niva instrument panel, lighting up the oil pressure indicator in the form of a red oil can.
Signs of DDM malfunction:
This sensor is located, just like the TPS, on the Niva’s throttle valve. The essence of the sensor's operation is to open and close the channels through which air flows to operate at idle speed. The IAC is involved in the operation of the internal combustion engine only at idle; when the speed increases, the regulator is switched off. IAC is a kind of DC motor with worm gear. Quite often the sensor fails. Subsequently, this sensor was abandoned in favor of an electronic throttle.
Signs of IAC malfunction:
The phase sensor, also known as the camshaft position sensor, is installed in the cylinder head plug. Designed for phased fuel injection. Reads readings from the camshaft and transmits them to the computer; these readings are necessary for accurate distribution of the fuel mixture between the cylinders.
Signs of DF malfunction:
The brake pedal sensor is installed on the pedal assembly under the Niva's steering column. In cars without the E-GAZ system, it is only responsible for turning the brake lights on and off. In cars that have an electronic throttle and therefore an electronic gas pedal, this sensor affects the operation of the pedal. If the brake sensor breaks down, the gas pedal stops working.
Signs of malfunction:
The speed sensor of the Niva car is installed in the transfer case. The function of the sensor is to transmit vehicle speed readings. The sensor also forms the fuel mixture; when the car is moving at neutral speed, you can notice that the speed is slightly higher than when the car is running at XX while standing still. Increased speed when driving is necessary to avoid dips when turning on the speed and sharp acceleration.
Signs of DS malfunction:
An oxygen sensor, also known as a lambda probe, is installed in the exhaust system of a car. In some versions of cars, two sensors are installed before the catalyst and after the catalyst. Two sensors are installed in Niva with EURO-4 standards. The sensor captures exhaust gases and transmits readings to the ECU. If there is a large amount of unburned gasoline in the exhaust gases or, on the contrary, a small amount, then the DC makes changes to adjust the fuel mixture.
Signs of DC malfunction:
The ignition module is installed on the left side of the engine on a bracket. This sensor is involved in the formation of ignition. It is this that produces the high-voltage voltage necessary to create a spark in the combustion chamber of the internal combustion engine. The module has two coils, they are also autotransformers, which produce a spark in pairs, each coil for two cylinders. If one of the coils fails, two cylinders fail at once.
Signs of malfunction of the MH:
Self-diagnosis
If it is not possible to check with a special device, then this can be done using self-diagnosis, which will help to quickly identify all problems associated with the operation of the car. To do this, press the odometer button and turn on the ignition. The speedometer needle will begin to rise to the top; by pressing again, information about the firmware will appear on the screen, and by pressing again, all existing errors will appear.
Let's take a closer look at the Chevrolet Niva error codes with decoding:
During self-diagnosis, error 8 and error 14 often appear, the first informs about problems in the brake system, and the second is related to fuel consumption, quite often this is a system glitch, but in any case you need to replace the sensor responsible for these mechanisms, or reset the memory by resetting the battery terminals.
As practice shows, knowing how to perform an independent check is very useful, since this knowledge helps to quickly identify a malfunction and eliminate it in a timely manner.


