If the sensor is provided in the car system, then it should work. The reason for incorrect readings of the device responsible for measuring the temperature outside can be either problems with the car’s wiring or a breakdown of the car itself. Let's figure out what the outside air temperature sensor in a VAZ-2114 car affects.
Installation of external air t* sensor (ADTV)
Installing an outside air temperature sensor.
The automotive world is improving and developing rapidly every year, bringing unique innovations to the characteristics of the car, providing comfort and convenience to its owner. So the AvtoVAZ company equipped its latest models of VAZ-2110 cars with additional on-board computers - DTVV. But the next model of the VAZ-2115 car was equipped with a VDO dashboard, which already came with 2 windows, which made it possible to display the temperature regime directly on the instrument panel itself.
Today, the following options for installing DTVV on the VAZ-2110 car model are known and quite successfully used:
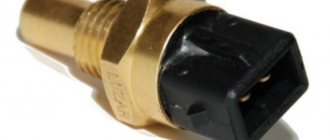
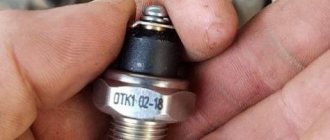
- • First of all, you need to figure out which air temperature sensor is the most optimal in this case. Among the popular devices is DTVV, catalog number 2115-3828210-03 (price range 200-250 rubles).
- • To make sure that it is working properly, you can use a simple technique (test): by heating or cooling the sensor itself, its resistance values will also change in accordance with the instructions supplied with it.
So, the primary question that arises when installing the sensor is:
Where should the DTVV be located?
In accordance with the instructions, the DTVV must be isolated from dampness and direct exposure to sunlight must be minimized. Also, the accuracy of the sensor readings is negatively affected by heat from the engine compartment. As an exception, it is allowed that the flow of oncoming air directly impacts the sensor itself.
Having compared all the conditions, a suitable location for the sensor is the front of the car (behind the front bumper in the center), as well as near the towing eye (in the bumper or slightly above the bumper on the left in the direction of travel).
You should know that if you install the DTVV in the rear of the car, the temperature readings will differ significantly from the actual temperature. Because the warm air coming from the engine is directed towards the rear of the engine.
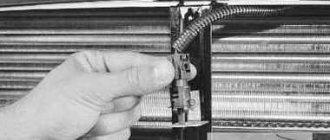
The sensor is equipped with 2 contacts: one goes to ground, and the second signals temperature changes. It is advisable to make such information contact into the car interior through the corresponding hole near the fuse box.
Having carried out the above steps, you can proceed to connecting the DTVV to the VAZ-2110 trip computer.
Having selected the desired model of on-board computer, it is recommended to carefully study all the documentation related to its connection.
The manufacturer equips VAZ-2110 cars with an on-board computer of the MK-2112 brand or AMK-211001 brand.
Based on the instructions in the instructions, the second contact of the DTVV should be connected to contact C4 on the MK block. As for the wire extending from contact C4, it must be removed and reliably insulated.
If there is no DTVV or if the circuit is broken, the following symbol “- -” will appear on the on-board computer display.
When connecting the sensor to on-board computers such as State, Multitronics and Gamma, it is recommended to adhere to the attached diagram included in the kit. To eliminate errors in temperature readings, a temperature calibration function was provided, but, unfortunately, not all models of on-board computers have it.
Second option: connecting DTVV to a VDO panel with 2 displays.
Mostly luxury VAZ-2115 models have a VDO instrument panel with 2 displays. The connection process is as follows: the wire coming from the sensor must be connected to the red block X2, which is located on the instrument panel in socket No. 1.
If this socket already contains another wire, then these wires must be combined. If the display of the VDO panel shows -40, then you need to pay attention to the integrity of the circuit between the sensor and the panel (if there are any breaks).
Another interesting nuance: when connecting the DTVV, it is simultaneously possible to create an original backlight for the VDO panel, as well as change the color of the screens.
Source
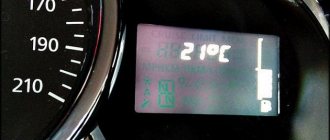
Lada Granta displays temperature data on the instrument panel
As you know, AVTOVAZ removed the internal combustion engine temperature scale from the panel on the new Grants and Kalinas and left only the overheating light, but if it lights up, then this is already the beginning of the end.
Therefore, in luxury trim levels, the coolant temperature display was added to the on-board computer readings, and for all others, only a collective farm is assumed in the form of installing additional screens in place of button covers or external On-board computers.
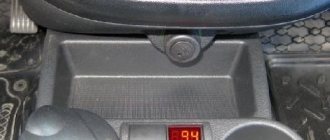
To fix this problem, you can update the dashboard firmware of Lada Granta and Kalina 2 cars.
First, we find out what version of the firmware is embedded in the instrument panel.
For this:
- With the ignition off, press the daily mileage reset button on the panel and, without releasing it, turn on the ignition, the service mode of the panel is activated, in which all the indicators light up and the arrows begin to move
- release the button and press again. Numbers will appear on the display, this is the software version
Now let's decipher them
The first numbers (2190 or 2192) indicate the car model (Granta or Kalina 2). This is followed by the numbers 00, 20 or 40, which stand for “standard”, “norm” or “lux”, respectively.
Now, using the table below, you can see if it is possible to flash your panel so that it displays the temperature.
FIRMWARE VERSIONS OF INSTRUMENT PANELS LADA GRANT AND KALINA 2
| Equipment | Firmware version | DTNV | DTOZH | What is needed for firmware | Note |
| Granta Standard | 015 | No | No | Changing the display and working with a soldering iron | Old board |
| 029-040 | No | No | Changing the display and working with a soldering iron | Updated board | |
| Granta Norma | 053, 060, 076, 087 | No | No | Work with a soldering iron or use modified firmware 2190-20_092_for_076 | |
| 090, 091 | Yes | No | Suitable 092 and 009 or 012 from Kalina | ||
| 092-095 | Yes | Yes | |||
| Granta Lux | 032, 038, 042 | Yes | No | Firmware 046 is suitable | |
| 046 | Yes | Yes | Shows the transmission number | ||
| 047 | Yes | Yes | |||
| Kalina Norma | 007 | Yes | No | Suitable firmware 009 or 012 | |
| 014 | Yes | Yes | Added on/off gear shift sound | ||
| Kalina Lux | 009 | Yes | Yes | Firmware 012 is suitable | |
| 012 | Yes | Yes | Shows the transmission number | ||
| 014 | Yes | Yes |
- Here is an example of firmware for the Grants Norma panel. Initially, the panel is sewn with firmware 090
- We take out the panel, remove the back cover, and connect the programmer to a special connector on the panel board.
- We upload the new firmware and go try it in the car. As you can see, the version has been updated and now firmware 092 is installed
- And using the buttons on the right switch we switch the on-board computer readings and see that the temperature display has appeared.
Source: https://avtosfera74.ru/lada-granta-temperatury-na-panel-priborov/
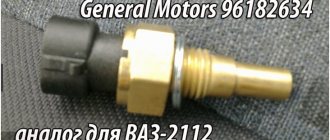
External temperature sensor VAZ 2112 16 valves where is it located
- To the beginning of the forum
- Forum Rules
- Old design
- FAQ
- Search
- Users
Good Hour everyone! —- I decided to use the option of the standard computer (already included in the “luxury” (hehe) package of 2112 2000) computer and start determining the temperature outside during the flight. The only question is: how. on the website https://lada112.h11.ru/help/datchik_t.html it seems to be written, I read it on the forum, but I still don’t understand:
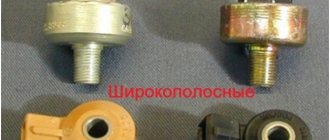
1 - Is the sensor from 2115 suitable (I’ve only seen this one in R..b stores, etc.)? If this is him, then, fidimo, you need a special chip, because... it has some needles sticking out, not wires, as you can understand on the above-mentioned site.
2 - Under the hood on the right (near the corrugated air intake) I found an unused chip (standard, not suitable for sensor 2115) - this is not the standard wiring.
I realized that you are from Moscow. Link www.autoelectro.ru This is in Chertanovo. They make the BC Pravda Navigator there. Separately, I bought a temperature sensor there with wires and chips for 100 rubles. Two wires are connected to the standard BC connector, one to the diagnostic block. The sensor itself is sealed and it is recommended to attach it to the towing eye.
Thank you. Only I already have BC installed. The only sensor with other wiring is needed, apparently.
But still on the topic: what kind of chip is hanging out (maybe something important has moved away, but I don’t know?!), maybe it has already been routed to the sensor. - And your sensor is different from the “fifteenth”.
Tell me how to stretch the wire from the BC to the temperature sensor to the bumper?
Unfortunately, or maybe fortunately