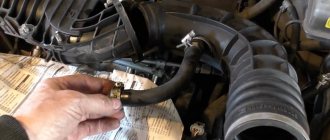
Statistics show that problems with the throttle position sensor often occur on VAZ 2114, 2110, 2112, Kalina, Niva Chevrolet, Priora cars. As a rule, this is indicated by error code p0120, but not always (this point is discussed in detail below). By the way, other cars are also not insured against such a breakdown.
Code p0120 means that there is a problem in the electrical circuit between the TPS and the ECU, but it does not indicate a malfunction of the device itself. Therefore, next we will talk about the signs and causes of TPS malfunction, which are typical for all cars with an injection power system.
How to check the VAZ throttle position sensor using a multimeter? TPS test!
TPS - The throttle position sensor is a fairly simple device. Regardless of the car model, all TPS have a common structure and properties. It is connected with three wires and is located after the air intake on the throttle valve. Let's consider such a sensor using the example of a VAZ car. I'll show you how to test your throttle position sensor using a multimeter. How to identify a malfunction of the TPS, what the TPS affects in the operation of the car, how to replace it and where to be located.
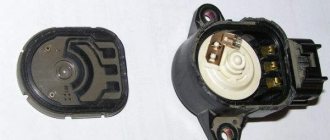
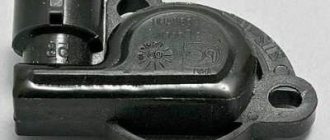
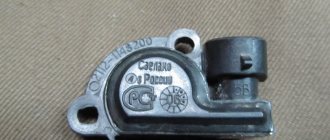
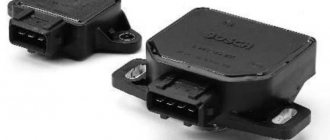
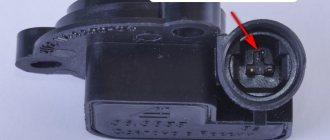
Various throttle position sensors
Purpose and principle of operation
In the “fourteenth”, the gasoline supply is adjusted in a radically different way than in earlier models. Under the hood of this car, the driver will not be able to detect the thrust of the mechanical accelerator drive, since electronics are responsible for the fuel supply.
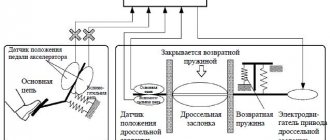
All regulatory processes are controlled by the control unit. The ECU receives data read by various sensors. The throttle sensor on the VAZ-2114 is installed on the same axis as the throttle valve itself. This principle eliminates the connection between the accelerator and the throttle valve.
The manufacturer guarantees a minimum sensor service life of 50 thousand km. Currently, contactless mechanisms are on sale, the design of which excludes the presence of a movable slider. Such devices can operate for an unlimited amount of time.
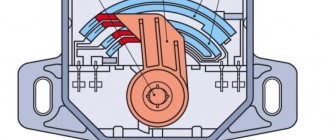
How does this device work? Everything is extremely simple. The sensor itself is a variable resistor. The mechanism is connected to the ECU by a connector from which three wires come, followed by connecting them to two fixed and one moving contacts of the potentiometer.
There is also provision for connecting one fixed contact to ground, and the second one carries voltage. The operation of the TPS is closely coupled with the idle sensor to control the operation of the engine at idle speed. How to determine the performance of the device and eliminate any deviations in its operation?
Symptoms of a malfunctioning throttle position sensor.
Next, I will list possible problems in the operation of the car and how to detect that your TPS is not working.
- Perhaps the most obvious and striking example of detecting a malfunction is the appearance of the Check Engine signal (in Russian, simply “check”).
- The on-board computer will also help to diagnose a breakdown; for this you need to analyze the fuel consumption. If it has increased, then the problem may also be with the TPS sensor.
- The following types of breakdowns can be diagnosed visually or auditorily.
For example, when starting the engine, the speed immediately jumps as if the gas pedal is pressed, or, on the contrary, the engine starts hard and stalls. - Engine speed fluctuates at idle. The engine spontaneously begins to increase speed and then reduce it.
- During the trip, the car does not respond or reacts poorly to pressing the gas pedal, or vice versa, when pressed slightly, the car accelerates significantly.
DPKV
This sensor tells the ECU the current position of the crankshaft. It is inductive, that is, when the above node rotates, it produces certain impulses, the frequency of which allows the computer to make the necessary calculation. If the signal is lost, the power unit stops. That is, its malfunction will not even allow you to get to a car service center. Otherwise, it breaks very rarely.
In this situation, the ECU will show an error code - 0335. However, this does not always mean that it is the DPKV that has become unusable. Sometimes the same combination appears if the mass air flow sensor is not working properly.
How to check the throttle position sensor on a VAZ with a multimeter?
As I said above, we will carry out all the work on a VAZ car, if you have a different car, then the situation will not be much different. First, you need to find the throttle position sensor itself in the engine compartment. On a VAZ 2110 car it is located after the air intake on the side of the car interior.
Photo engine VAZ 2110
Pay attention to the area outlined in a red rectangle.
Side view of the throttle position sensor Wire pinout
First TPS test
The first step is to check with a multimeter whether there is current at these two terminals. Since perhaps the wire was simply broken due to this and the sensor itself does not work. When the ignition is turned on, the multimeter should show a voltage of about 5V, a spread in the range of 0.5V is allowed.
As you can see in the photo above there is electricity on the wire.
The sensor can be diagnosed without removing it, but if you do not have the appropriate connector, it will be extremely difficult to find it using the probes of a multimeter. However, we can carry out the first test without removing the sensor. To do this, remove the terminal from the battery, disconnect the chip with wires from the sensor and plug a small wire into the pin of the wire responsible for transmitting the signal to the on-board computer, after which we put the chip back on the sensor. For the VAZ family of cars it looks like this.
Connecting an additional wire
We connect one multimeter probe to the free end of the additional wire, and the second probe to the battery negative. We put the terminals on the battery and turn on the ignition. No need to start the car!
Switch the multimeter to DC measurement mode. Next, with the help of a second person, you need to smoothly press the gas pedal all the way or pull the throttle cable yourself and monitor the multimeter readings.
The voltage when the throttle is fully closed should be about 0 - 0.5V, when fully open it should be about 5V. During the process of opening and closing the throttle, the multimeter readings should not jump or skip. When the damper is smoothly opened and closed, the readings should also change smoothly.
If the multimeter shows voltage surges, then the sensor is faulty.
Checking the throttle position sensor with a multimeter
Second TPS test
The throttle position sensor can also be checked with a multimeter by measuring its resistance. The multimeter must be switched to resistance measurement mode. Since there is no way to connect to it, the sensor must be removed.
Photo of the throttle position sensor mounting.
We unscrew the two bolts with a Phillips screwdriver, disconnect the wire and remove the sensor. Using additional wires, you need to connect to the negative terminal of the sensor with one multimeter probe and connect the second probe to the signal wire terminal. Then begin to smoothly turn the sensor mount on the throttle valve, thereby simulating the opening and closing of the valve.
For a VAZ car in a fully closed position, the resistance is 1.5 kilo-ohms, in a fully open position it is 7.5 kilo-ohms. For other cars the parameters are similar. The most important thing is that there are no jumps during the testing process. Resistance indicators should also change smoothly.
If the multimeter shows infinity or several times higher than the resistance reading, or there are jumps in this resistance, then the sensor is faulty.
Cleaning methods
There are two ways to clean the throttle valve for a VAZ 2114 car:
Each of them deserves separate consideration.
Surface cleaning
The easiest way that does not require virtually any knowledge in the field of car repair and disassembly. There is no need to disassemble the damper itself, because this option is preferred by almost all beginners who are just beginning to learn the joys of self-repair.
Unfortunately, this method does not give the desired effect, since cleaning consists of removing dirt from surfaces. We recommend that you arm yourself with the almighty WD40. If it is not available, an alternative is regular gasoline, alcohol or carburetor cleaner. Plus you will need dry rags and a brush.
The procedure for superficial cleaning of the throttle valve is as follows:
- Remove the corrugation from the throttle valve;
- Treat interior surfaces with your chosen cleaning product. Better than WD40;
- Go over the knot with a brush. Just don’t use metal ones;
- Wipe off any accumulated dirt with a dry cloth;
- Carry out similar activities on the reverse side of the damper;
- Reinstall all removed items.
Let’s say right away that this method cannot be called effective. It’s not called superficial for nothing. This tells us that all the internal components of the unit will still remain dirty. Therefore, the symptoms are unlikely to disappear.
In most cases, you will not be able to fix the problem without deep cleaning. Plus, it is still recommended to check the throttle position sensor on the VAZ 2114, since the reason for the violation of the proportions of the air-fuel mixture may lie in it.
From a set of materials and tools you will need:
- The almighty WD40;
- Crosshead screwdriver;
- Dry rags;
- Throttle valve gasket (for 1.5 liter engine);
- Receiver O-ring (for a 1.6-liter engine);
- Spanners;
- Two M13 bolts;
- Ear cotton swabs.
A fairly inexpensive set, each item from which will be useful to you. Therefore, it is better to immediately collect everything you need and get to work.
- Remove the entire throttle assembly. To do this, remove the corrugation from the filter, turn off the antifreeze pipe (here you will need M13 bolts to close the pipes). There is no need to drain the antifreeze, as many recommend. Just try to disconnect the pipes as quickly as possible and plug the holes with bolts.
- Now the adsorber pipe is removed.
- You have completed the most difficult stage, so it will be easier further. Remove the assembly fasteners, disconnect the cable from the gas pedal. This will allow you to remove the throttle body.
- After removing the unit, disassemble it into parts. The first are two sensors - TPS and IAC. They must be thoroughly cleaned using the products indicated in the previous section. If you don't have WD40, use alternative solutions.
- Rinse the damper thoroughly from all sides, blow out the holes, which will allow all internal components to dry properly.
- Now all you have to do is assemble the assembly in reverse order. This is not difficult to do if there are no problems with disassembly.
- Don't forget the gaskets or rings. There is no point in cleaning them from dirt, so immediately replace the old ones with new ones. Do not confuse which element is suitable for which VAZ 2114 engine size. Many people manage to put the ring where the gasket should be, or vice versa.
How to adjust the throttle position sensor after replacement?
I’ll make a reservation right away that the TPS for VAZ family cars is not adjustable, but you can adjust the degree of throttle valve closure. To do this, there is a special bolt that can either be tightened or unscrewed, thereby limiting the stroke.
Adjusting the throttle position sensor.
If in your case such adjustment is possible, then after replacing the sensor you need to connect one multimeter probe to the pin of the signal wire, and the second probe to the negative of the battery.
Switch the multimeter to voltage measurement mode. By turning the TPS, achieve a minimum voltage reading of 0 or about 0 volts. Then you need to tighten the sensor mounting bolts.
If you changed the throttle position sensor, then after all manipulations you need to disconnect the battery terminals for 15-20 minutes. This will clear errors in the on-board computer and the car will be ready for use.
Examination
Checking the operation of the resistor can be carried out exclusively using a multimeter or a special device like ELM-327, however, the first option is the simplest and most common.
Checking the power circuit condition
First of all, it is recommended to check the condition of the power circuit, since this is where breakdowns and malfunctions are most often observed.
To do this, it will be necessary to put the device into a state of changing the constant voltage with a limit of 20 Volts, then remove the connector from the sensor and turn on the ignition on the car. After this, all that remains is to connect the tongs to the device and obtain certain information on the voltage status (it must be at least 5 Volts).
Checking the functionality of the sensors
Here it is already assumed that data is obtained by rotating the central part of the sensor. To do this, you will need to put the device into a state of resistance change, and then connect it to the sensor terminals.
When rotating the internal part, it will be possible to obtain certain readings, which should change quite smoothly, without any jumps. If so, then the performance status is good.
Sensor layout
The sensors under the hood of the VAZ 2115 are located as follows.
1. Phase sensor; 2. Coolant temperature sensor; 3. Knock sensor; 4. Oil pressure sensor; 5. Oxygen sensor; 6. Crankshaft position sensor; 7. Speed sensor; 8. Idle speed sensor; 9. Mass air flow sensor; 10-11. Gasoline level sensor; 12. Antifreeze level sensor; 13. Throttle position sensor
Step-by-step instruction
All repairs are divided into two stages - disassembly and cleaning. The cleaning time depends on the degree of contamination of the damper and the general wear of the engine. There is no need to use great physical force here; each stage can be done alone without outside help.
What you need for washing
Repairs must be carried out after the engine has cooled down. To remove the throttle assembly, you will need two screwdrivers, as well as a 13mm socket wrench. Almost every car enthusiast has these tools. Any cleaning agent is suitable for working with the damper itself, the main thing is that it removes oil and soot well. For better cleaning, we recommend using cotton swabs; they will help you reach the most difficult to reach places.
Cotton swabs will help to better clean the damper from dirt
When disassembling the mechanism, it may turn out that some consumables are no longer suitable for further use. Therefore, it is better to purchase a throttle valve gasket or a receiver O-ring in advance, depending on the engine size.
Removing the throttle assembly and cleaning it
The throttle assembly must be removed in the following sequence:
- Having opened the hood, remove the plastic cover that covers the top of the engine.
- Remove the rubber vent hose. If there is a large amount of dirt, remove it with a regular rag. Remove the ventilation hose using a screwdriver
- Before removing the mechanism itself, we will need to relieve the pressure from the cooling system. To do this, remove the hoses with antifreeze liquid, having previously wrung out several clamps.Remove the hoses with antifreeze liquid, having previously wrung out the clamps
- To protect the holes from dust during repairs, it is better to immediately cover them with small plugs.
- To gain access to the valve itself, you will need to remove another hose that ventilates the fuel tank.
- Now you can remove the damper by first unscrewing the two fastening bolts and disconnecting the cable that connects the part to the accelerator pedal. We remove the damper by first unscrewing the two bolts
For further work, you need to decide which cleaning method you will use. For minor contamination, choose the simpler and faster surface cleaner. If the mechanism is covered with a large layer of dirt, and some elements are coked, then a complete cleaning is suitable. Surface cleaning does not require further disassembly of the mechanism. It is enough to remove oil deposits from internal and external surfaces with a rag and cotton swabs. We recommend using gasoline or thinner as cleaning agents.
When completely flushed, we will need to replace the gasket or o-ring. To disassemble the tool, take a small screwdriver and a 13mm wrench to unscrew two more bolts. After cleaning, mechanics recommend blowing out all the holes with a stream of compressed air - this will remove excess moisture and small dust particles.
What does the throttle valve look like before and after cleaning?
When disassembling the throttle assembly, we recommend paying special attention to the idle speed sensor. The efficiency of fuel use and the smooth movement of the vehicle depend on its correct operation.
To clean it, it is better to use WD 40 and thin cotton swabs. We remove dirt from the case and thoroughly clean the contacts of the device.
Throttle sensor malfunctions
Malfunctions of the throttle sensor lead to unstable operation of the car engine. That the TPS is not working correctly can be understood by the following signs: unstable idle, decreased car dynamics, increased fuel consumption and other similar troubles. The main sign that the throttle position sensor is faulty is jumping speed. And the main reason for this is wear on the contact tracks of the throttle valve sensor. However, there are a number of others.
Checking the throttle position sensor is quite simple, and even a novice car enthusiast can do it. To do this, you only need an electronic multimeter capable of measuring DC voltage. If a sensor fails, repairing it is most often impossible, and the device is simply replaced with a new one.
When cleaning is necessary
In addition to mileage, there are additional signs that will indicate the need to clean or replace the throttle valve:
- The decrease in speed from high to low when releasing the gas pedal occurs jerkily. The revolutions may immediately drop by 300-400.
- In winter, the engine has difficulty starting, and the smell of gasoline can be felt in enclosed spaces.
- During startup, not all cylinders are immediately put into operation; a “triple” effect appears. While the car is moving, slight twitching is felt, especially when accelerating.
Contamination of the damper occurs due to the ingress of combustion product residues - oils, fuel, soot - onto it. As a result, a coking process occurs, which leads to jamming of parts and loss of smooth movement. Due to the narrowing of the gap, the amount of air that enters the cylinder also decreases. This, in turn, leads to a loss of engine power.
Signs of a malfunctioning throttle position sensor
Before moving on to describing the symptoms of a TPS failure, it makes sense to briefly dwell on the question of what the throttle position sensor affects. It is necessary to understand that the main function of this sensor is to determine the angle at which the damper is rotated. The ignition timing, fuel consumption, engine power, and dynamic characteristics of the car depend on this. Information from the sensor enters the electronic engine control unit, and based on it, the computer sends commands about the amount of fuel supplied and the ignition timing, which contributes to the formation of an optimal air-fuel mixture.
Accordingly, malfunctions of the throttle position sensor are expressed in the following external signs:
- Unstable, “floating” idle speed.
- The engine stalls while changing gears, or after changing from any gear to neutral speed.
- The engine may stall randomly when idling.
- While driving there are “dips” and jerks, in particular during acceleration.
- The engine power is noticeably reduced, and the dynamic characteristics of the car drop. This is very noticeable in terms of acceleration dynamics, problems when driving the car uphill, and/or when it is heavily loaded or towing a trailer.
- The Check Engine light on the dashboard activates (lights up). When scanning errors from the ECU memory, the diagnostic tool shows error p0120 or another related to the throttle position sensor and its malfunction.
- In some cases, there is increased fuel consumption by the car.
It is worth noting here that the signs listed above may also indicate problems with other engine components, in particular, a malfunction of the throttle valve. However, during the diagnostic process, it makes sense to also check the TPS sensor.
Device
1 - Shaft;
2 - Housing; 3 - Connector; 4 - Contacts; 5 - Resistor; 6 - Ring; 7 — Spring stopper; 8 - Spring; 9 - Cover; This component of the system is a fairly simple electrical resistor, which changes the resistance when the axis is rotated.
The sensor is located on the damper shaft and, when it opens, performs the function of turning together with the damper. Due to the fact that the design is quite primitive and unreliable, the sensor often fails, resulting in certain problems with the formation of the fuel mixture. So, in most cases, the problem is the rubbing of the tracks, but the possibility of other problems with the condition of the resistor cannot be ruled out.
Causes of TPS malfunction
There are two types of throttle position sensors - contact (film-resistive) and non-contact (magnetoresistive). Most often, it is the contact sensors that fail. Their work is based on the movement of a special slider along resistive tracks. Over time, they wear out, which is why the sensor begins to provide incorrect information to the ECU. So, the reasons for the failure of a film-resistive sensor may be:
- Loss of contact on the slider. This can be caused either simply by physical wear or by a broken tip. The resistive layer may simply wear out, causing the electrical contact to also disappear.
- The linear voltage at the sensor output does not increase. This situation may be caused by the fact that the base coating has worn off almost to the base in the place where the slider begins to move.
- Wear of the slider drive gears.
- Broken sensor wires. These can be both power and signal wires.
- A short circuit has occurred in the electrical and/or signal circuit of the throttle position sensor.
As for magnetoresistive sensors, they do not have a coating of resistive tracks, so their breakdowns are mainly reduced to the breakage of wires or the occurrence of a short circuit in their circuit. And the testing methods for one and the other type of sensor are similar.
In any case, repairing a failed sensor is hardly possible, so after performing the diagnostics, you simply need to replace it with a new one. In this case, it is advisable to use a non-contact throttle position sensor, since such a unit has a much longer service life, although it is more expensive.
How to Determine a Malfunctioning Throttle Sensor
Checking the TPS itself is simple, and all you need is an electronic multimeter capable of measuring DC voltage. So, to check the TPS malfunction, you need to follow the algorithm below:
- Turn on the car's ignition.
- Disconnect the chip from the sensor contacts and use a multimeter to make sure that the sensor is receiving power. If there is power, continue checking. Otherwise, it is necessary to “ring” the supply wires in order to find the break point or another reason why the voltage to the sensor is not suitable.
- Set the negative probe of the multimeter to ground, and the positive probe to the output contact of the sensor, from which information goes to the electronic control unit.
- When the throttle is closed (corresponds to the accelerator pedal being fully depressed), the voltage at the sensor output contact should not exceed 0.7 Volts. If you open the throttle completely (fully depress the accelerator pedal), then the corresponding value should be at least 4 Volts.
- Next, you need to manually open the damper (rotate the sector) and at the same time monitor the multimeter readings. They should rise smoothly. If the corresponding value rises abruptly, this indicates that there are worn spots in the resistive tracks, and such a sensor must be replaced with a new one.
Owners of domestic VAZs are often faced with the problem of TPS malfunction due to the poor quality of the wires (in particular, their insulation) with which these cars are standardly equipped from the factory. Therefore, it is recommended to replace them with higher quality ones, for example, produced by PES/SKK CJSC.
And, of course, it is necessary to perform a check using the OBDII diagnostic tool. A popular scanner that works with most cars is a special scanner. It will help you find out exactly the error number and see the operating parameters of the throttle valve, and will also determine whether the car still has problems, possibly in other systems.
Error codes 2135 and 0223
The most common error associated with the throttle position sensor is code P0120 and stands for “Throttle position/pedal position sensor/switch “A” circuit malfunction.” Another possible error p2135 is called “Mismatch of readings from sensors No. 1 and No. 2 of the throttle position.” The following codes may also indicate incorrect operation of the remote control or its sensor: P0120, P0122, P0123, P0220, P0223, P0222. After replacing the sensor with a new one, it is necessary to erase the error information from the ECU memory.
In the diagnostic application, the scanner will make it possible to see the data coming from the sensor in real time. When moving the damper, you need to look at the readings in volts and the percentage of its opening. If the damper is in good condition, the sensor should produce smooth values (without any jumps) from 03 to 4.7V or 0 - 100% with the damper fully closed or open. It is most convenient to view the operation of the TPS in graphical form. Sharp dips will indicate wear of the resistive layer on the sensor tracks.
Conclusion
A malfunctioning throttle position sensor is not a critical failure, but it needs to be diagnosed and corrected as quickly as possible. Otherwise, the engine will operate under significant loads, which will lead to a reduction in its overall service life. Most often, the TPS fails simply due to simple wear and tear and cannot be restored. Therefore, you just need to replace it with a new one.
Sources
- etlib.ru/blog/1151-neispravnosti-datchika-drosselnoj-zaslonki
- vazweb.ru/desyatka/datchiki-vaz-2115.html
- zen.yandex.ru/media/id/5de55a29e6e8ef00ae121022/kak-proverit-datchik-polojeniia-drosselnoi-zaslonki-vaz-pri-pomosci-multimetra-dpdz-test-5ea6ba94f8f6467e3250f1bc
- drive2.ru/l/504936422478709044/
