I hope the topic will be useful, the camshaft does not fail very often, if not rarely, the factory camshaft can go through a couple of major repairs.
Replacing the camshaft on a VAZ 2106 with your own hands
First, a little theory, or rather, indications that indicate a malfunction of the camshaft, wear of its journals and bed. Determining whether the camshaft or something else is knocking in the engine is not particularly easy, but it is possible. Usually the camshaft knocks dullly and strongly; the frequency of the knock varies with engine speed. You can listen to the engine through the valve cover using a wooden stick or a medical stethoscope. But often, if you are not an experienced mechanic, it is not so easy to distinguish the knock of a camshaft from the knock of a spun valve. Therefore, the surest way to diagnose a camshaft is to remove it from the engine, wash it, and inspect it. Thus it turns out:
- A faulty camshaft makes a dull knock, like being hit with a hammer.
- If the camshaft is worn, it is impossible to adjust the valve clearances, since when the crankshaft is turned, the camshaft occupies different positions all the time
- The most reliable way to diagnose a camshaft malfunction is to remove it from the car, wash it in gasoline and directly diagnose: you need to hold the camshaft with your left hand and hit the bed with your right, if you hear even the slightest knocking, then the camshaft is worn out. Just make sure that the camshaft does not move in bed, as when it hits the limiter, the camshaft will make a quiet knock.
- The camshaft affects the pressure in the lubrication system; the larger the gaps between the bed and the shaft, the lower the pressure, and, accordingly, the worse the lubrication of other parts.
I would also like to advise that no matter how good the rockers (valve levers) are, they also need to be replaced, because uneven output will lead to rapid wear of the camshaft. I also recommend that you pay attention to the condition of the tensioner shoe; it can be seen when the camshaft is removed, since replacing it is a rather labor-intensive process. The process of replacing the camshaft also involves adjusting the valve clearances, so keep this in mind. Well, let's begin.
Torque and sequence of tightening the camshaft bed
Why is it necessary to properly tighten the beds of camshafts and other parts of the cylinder head? Correct tightening determines the normal functioning of all components and assemblies. In order to properly tighten threaded connections, a standard tightening pattern and a torque wrench are used.
Before installing the bolts in place, they must be thoroughly washed and lubricated with silicone grease. To properly tighten the bolts you need to know the sequence. The sequence starts from the middle part and gradually moves to the edges. It is best to familiarize yourself with the process via video.
How to replace a camshaft
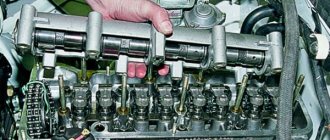
- At the initial stage, you need to disconnect all pipes, sensors, inlet, outlet, injectors, etc. from the block head. The main task is to remove the valve cover.
- Next you will need to remove the camshaft rocker arms with the axles. The rocker arms must be removed together with the hydraulic compensator plungers. Moreover, if there is no need to replace the rocker arms, they do not need to be removed.
- The next step involves removing the phase sensor. After dismantling, you should go to the camshaft itself and remove its toothed pulley.
- After removing the pulley, the camshaft can be removed from the bed. It is important that sharp edges do not damage fragile bearings. It is also necessary to inspect and troubleshoot the camshaft bed.
- Having removed the camshaft, you should troubleshoot it, inspect it and assess the degree of wear, which will allow you to accurately determine the need to replace it.
- It is important to pay attention to the screen mounting threads, support cams, and support journals.
If the defects are minor (small scratches), they can be sanded. At the same time, it is important that the dimensions of the processed parts do not change, since deviations will lead to phase failures and other problems. Using a micrometer, you need to measure the height of the camshaft cam profile (the distance between the top and the back of the cam). This indicator is then compared with a table of minimum acceptable indicators. If the indicators deviate from the acceptable values, the shaft must be replaced. It is also recommended to replace the valve rocker arms. - Having completed the troubleshooting or immediately decided on a replacement, you can install a repaired or new camshaft. Reassembly is carried out in the reverse order of removing the shaft.
Please note that after installation and assembly, you need to install the phase sensor correctly. To do this, remove the old sealant from the sensor housing and cylinder head, and then apply a fresh layer. Next, the sensor is installed, after which you need to wait until the sealant has completely dried.
We also recommend reading the article about which is better, a timing chain or a timing belt. From this article you will learn about the advantages and disadvantages of different types of timing drive, as well as which type of drive is better, chain or belt.
In general, at this stage, the installation of camshafts can be considered complete. However, that's not all. It is also important after installing the camshaft to adjust and tension its drive.
Having completed all the adjustments, you can start the engine, assessing the quality of the engine. Noises, knocks, engine vibrations, etc. are not allowed. In general, it is important to ensure that the timing belt is working properly.
Consequences of improper tightening
- Oil leakage (due to the formation of a gap or a loose connection).
- Air getting inside the cylinder head.
- Malfunction of the engine or cylinder head.
- Ingress of water, dirt, dust.
No sealants are used when installing the gasket (including no lubricants - grease, cyatim)! The task is to degrease the metal. The cylinder head gasket itself must be new.
All these factors can adversely affect the operation of the cylinder head and main power unit.
Source
Approximate cost of replacement at a car service center
As you can see, replacing the camshaft is done with your own hands, in a home garage. You don't need any special equipment. On the other hand, this is an intervention in the engine design, which, if unsuccessful, can damage the power unit. One of the signs of malfunction is that after replacing the camshaft, the engine begins to trip. Therefore, in order to avoid major repairs and large expenses, many car owners trust the procedure to car services.
The price of replacing a camshaft starts at approximately 4,000 rubles. If you only need to replace the oil seal, the service station will charge the same amount. Replacing the shaft sensor costs 500 rubles. Replacing the timing chain of a passenger car equipped with a 4-cylinder engine is usually estimated at 6-7 thousand rubles. On SUVs and crossovers, this procedure costs more - 10-11 thousand rubles.
The camshaft is most often installed in the upper part of the cylinder head, but there are also systems with a lower location. The latter option is found mainly on old cars or cars with weak engines. The upper location of the element, on the contrary, is the calling card of powerful internal combustion engines with high operating speeds.
Tightening the camshaft bed on a 16 valve VAZ-2112: order and torque
Many motorists have heard that it is necessary to correctly tighten the threaded connections on the 16-valve VAZ-2112 engine, but they have never done it themselves. Thus, the tightening torque is determined by the manufacturer and is indicated in the service repair manuals.
Video about installing camshafts and split gears on a 16 valve engine
The video will tell you how to properly tighten the threaded connections on the camshaft beds
Tightening scheme
Using a large screwdriver, the chain tensioner is removed, then the camshaft gear is placed in its original place. The bolt and washer are tightened. The latter is controlled with pliers.
Next, the thermal clearance of the valves is adjusted. Assembly is carried out in reverse order.
Video 2: replacing the timing tensioner.
Torque and sequence of tightening the camshaft bed
Camshaft cover tightening sequence
Correct tightening of the camshaft bed, as well as other parts of the cylinder head, determines the normal functioning of all components and assemblies. So, in order to tighten threaded connections, a standard tightening pattern and a torque wrench are used.
Before installing the bolts in place, they must be washed thoroughly and lubricated with silicone grease.
In order to properly tighten the bolts, you need to know the sequence. It starts from the middle part and gradually moves directly to the edges. The detailed sequence can be seen in the photo below.
Tightening diagram for each camshaft bed bolt with numbering
As for the tightening force itself, it is 8.0-10.0 Nm . After the bed is installed on the block head, the connection bolts are tightened by hand or without much force using a ratchet with a head.
We tighten all the bolts by hand, but do not tighten them
When all the bolts are in place, you need to take a torque wrench and tighten them according to the standards in the order indicated above.
Torque wrench for tightening threaded connections
In what cases is it necessary to tighten the camshaft bed?
The bolts are tightened. Marked with arrows
Tightening the camshaft bed will be necessary if it was previously dismantled for restoration and repair work. So, in what cases will you need to remove the bed, let’s look at it in more detail:
- Replacing camshafts, lifters or valve seals.
- Overhaul of the block head.
- Engine repair operations.
- Replacement of individual elements of the cylinder head.
Indications for replacing the camshaft
The condition of the camshaft must be monitored regularly and carefully. Its malfunction can also cause large-scale damage to the engine of a Japanese car itself. Usually the camshaft begins to “mope” with a dull knock when the engine starts. On cold engines, noise can be heard in the valve cover area.
Experienced drivers understand the inner voice of their car, quickly identify the rumbling of the engine and “left”, uncharacteristic noises. They are able to immediately distinguish the quiet and even sound of the camshaft, which changes frequency depending on the engine speed. If a part is faulty, this is accompanied by dull tapping sounds reminiscent of hammer blows.
malfunctions also indicate:
- deterioration in the smooth running of the machine;
- drop in engine power;
- unstable operation at idle speed;
- strong vibration of the motor;
- Difficult to start in cold weather.
Particular attention is paid to the camshaft seals - they should not have ruptures, cracks or abrasions. The integrity of the drive must also be inspected. However, it is difficult to determine camshaft wear by indirect signs. It is much easier to do this on a removed part, inspecting it visually from all sides. There should be no potholes, scuffs, or aluminum leaks from the bearings anywhere. A sign of undoubted wear is grooves and irregularities on the surfaces of the rocker arms and cams.
Checking camshaft wear
When dismantled, the camshaft can also be listened to. To do this, you need to hold it parallel to the ground with one hand, and tap on top with the other. There should be no knocking. A mandatory condition: the camshaft should not “walk” on the bed! Otherwise, clinging to the limiter, it will inevitably create noise, which can be mistaken for a malfunction.
High-quality camshafts are rarely damaged prematurely. But Chinese products or those repackaged in this country have a hardness 1.5 times lower than that of the original ones. A good shaft is made from forged steel.
What is a cylinder head?
In order to carry out any manipulations with this unit, it is necessary to understand the purpose and operating principle of the device. The cylinder head on the VAZ-2112 model we are considering is made of two options: cast iron, aluminum. Essentially, to put it bluntly, this is the engine cover.
One of the most important components of a vehicle, which is responsible for:
- combustion of gasoline in the engine;
- removal of exhaust gases during the combustion process.
Secondary functions performed by the cylinder head:
- the functional option is carried out thanks to the work of support washers, valve bushings and other parts located in the head;
- thanks to the hole in it, the chain tensioner and the drive of the pulley distributor are installed.
The abbreviation cylinder head is used more often in the terminology of automotive components, since there is not always time to pronounce long and complex names. But it is clear that you need to know all the decryptions. Especially if it is an internal combustion engine (internal combustion engine) and cylinder head (cylinder head).
Therefore, the tension moment must always be adjusted and not carelessly, but correctly, otherwise its functionality will be impaired.
First of all, this is necessary to avoid moisture accumulation at the junction of components in the block and their connections. Thanks to this protection, condensate collects on a special plane to allow liquid to leak out of the engine.
Camshaft VAZ 2106
The camshaft is an integral part in the design of the gas distribution mechanism (GRM) of any engine. It is made in the form of a cylinder on which necks and cams are located.
Description
On the sixth model Zhiguli, the timing mechanism shaft is installed in the cylinder head (cylinder head) of the engine. This arrangement allows you to repair and change the part, as well as adjust the valve clearances without any difficulties. The shaft is accessible after removing the valve cover. The camshaft (CV) is assigned the role of controlling the opening and closing of valves in the engine cylinders - at the right moment it admits the fuel-air mixture into the cylinder and releases exhaust gases. A gear is installed on the camshaft, which is connected to the crankshaft sprocket through a chain. This design ensures simultaneous rotation of both shafts.
On the camshaft there are cams and journals, by means of which the shaft is held on supports
Since the crankshaft and camshaft have gears of different sizes, the rotation speed of the latter is halved. A complete operating cycle in a power unit occurs in one revolution of the camshaft and two revolutions of the crankshaft . The valves in the cylinder head open in a certain order under the influence of the corresponding cams on the pushers, i.e., when the camshaft rotates, the cam presses on the pusher and transmits force to the valve, pressed by the springs. In this case, the valve opens and admits the fuel-air mixture or releases exhaust gases. As the cam rotates further, the valve closes.
The cylinder head consists of the following parts: 1 - cylinder head; 2 — exhaust valve; 3 — oil deflector cap; 4 — valve lever; 5 — camshaft bearing housing; 6 - camshaft; 7 — adjusting bolt; 8—bolt lock nut; A - gap between the lever and the camshaft cam
More about the design of the VAZ 2106 engine: https://bumper.guru/klassicheskie-modeli-vaz/poleznoe/ne-zavoditsya-vaz-2106.html
Options
The “six” camshaft has the following characteristics:
- phase width - 232˚;
- intake valve lift height - 9.5 mm;
- intake valve lag - 40˚;
- exhaust valve advance is 42˚.
On the sixth model Zhiguli, the timing mechanism has eight valves, i.e. two for each cylinder, the number of cams is equal to the number of valves.
Which camshaft is better to install
Only one gas distribution shaft is suitable for the VAZ 2106 - from the Niva. The part is installed in order to increase the power and dynamic performance of the car. It is possible to achieve the desired results, albeit small ones, by increasing the width of the phases and the lift height of the intake valves. After installing the RV from Niva, these parameters will have values of 283˚ and 10.7 mm. Thus, the intake valve will be open for a longer time and raised to a greater height relative to the seat, which will ensure that more fuel enters the cylinders.
When replacing the standard camshaft with a part from a VAZ 21213, the engine parameters will not change dramatically. You can install a “sports” shaft intended for tuning, but it is not cheap - 4-10 thousand rubles.
To improve the dynamic performance of the car, a “sports” camshaft is installed
Table: main parameters of “sports” camshafts for “classics”
Process Features
Each engine has its own torque, as does the pin tightening pattern. The indicator of this moment is influenced not only by the type of engine, but also by other factors that you need to know if you decide to carry out this procedure yourself.
- how well the pin holes are lubricated and the very condition of the elements;
- the quality of the bolts plays a big role - bad or old ones may not survive tightening;
- if the thread or the pin itself is deformed, it is better not to tighten it. Because after a short period of time, all elements that do not meet operating standards will fail.
The most urgent need for the tensioning procedure occurs when dismantling the cylinder head, as well as when reinstalling it.
Some car enthusiasts tighten very elongated bolts in 4 stages. In this case, at the second step the torque is 70-85 N*m, which is absolutely unacceptable when working with a Lada Priora engine with 16 valves.
The correct sequence of tightening the keys is very important. Only in this case will the head correctly perform its primary and secondary functions.
Before installation, be sure to clean all threaded bushing holes. Then all the bushings are placed in place, and a gasket is placed on top. All metal elements must be free of grease.
No sealants or other lubricating oils are used during gasket installation.
Signs of Camshaft Wear
The operation of the camshaft is associated with constant exposure to high loads, as a result of which the part gradually wears out and requires replacement. The need for repair arises when characteristic symptoms appear:
- knocking when the engine is running under load;
- reduction in power indicators.
There are a number of reasons why the RV fails:
- natural wear and tear;
- low-quality motor oil;
- low oil pressure in the lubrication system;
- insufficient oil level or so-called oil starvation;
- engine operation at high temperatures, which leads to deterioration of the lubricant properties;
- mechanical damage (wear or broken chain).
The main malfunctions that impair the performance of the camshaft are scuffing on the working surfaces (journals and cams) and deterioration of the limiter.
Over time, the camshaft's cams and journals wear out.
Knock
It is quite problematic to determine from the sounds coming from the engine compartment that the problem is related specifically to the camshaft, but it is still possible. The knocking sound of the engine resembles the dull blows of a hammer, which become more frequent as the engine speed increases. However, the best way to diagnose a shaft is to dismantle, disassemble and troubleshoot it. During inspection, the shaft should not move in the housing relative to the axis, otherwise a dull sound will be produced when hitting the limiter.
Video: reasons for the longitudinal play of the VAZ camshaft
Power reduction
The drop in power on classic Zhiguli cars is a phenomenon caused by wear of the camshaft and rockers. With proper engine operation (timely oil changes, monitoring its level and pressure), the problem only appears over long vehicle runs. When the cams wear out, the required phase width and valve lift at the intake are no longer ensured.
When the shaft and rockers wear out, the motor power may decrease several times
Deformation
The RV can become deformed under extreme heat, which is caused by problems in the cooling and lubrication systems. At first, the problem may manifest itself as a knocking sound. Therefore, if there is a suspicion of this breakdown, for example, the motor has overheated, then it is recommended to diagnose the shaft in order to avoid more serious troubles with the engine timing belt.
Procedure for installation and dismantling
The cylinder block is the basis for mounting the head, which is held on by 10 screws. Unscrewing is carried out with a special socket wrench - “ten”.
The photo shows the correct folding order:
- Top right corner.
- Bottom right corner.
- Top left corner.
- Bottom left corner.
- Top second from left.
- Top second from the right.
- Second bottom from the right.
- Second bottom from the left.
- Top in the middle.
- Bottom in the middle.
Installation and dismantling procedure
The part called the cylinder head is attached to the cylinder block with 10 screws. They are unscrewed with a 10mm socket wrench. The procedure for dismantling the cylinder head is shown in the first photo.
Reversal sequence (1-10)
The standard screw length is 93 mm. If the screw has been pulled out to at least 95 mm, it is replaced with a new one (AvtoVAZ requirement).
During installation, a different scheme is used (photo 2). Each screw is lubricated with machine oil, otherwise the efforts will be reduced to nothing.
The order of tightening the head is indicated in this photo
Tightening torque for cylinder head cover bolts
For VAZ-2112, the cylinder head tightening torque is standardized:
- First pass – the force is 20 N*m;
- Each screw is turned 90 degrees to the right;
- Wait 20 minutes, then turn the screws another 90 degrees.
At first the effort is very small. But at “step 3” it will be difficult to cope with the work. Use the lever.
Why are guide bushings needed?
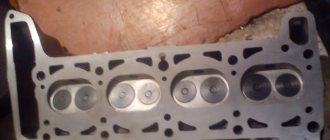
Before installing the cylinder head, perform the following steps: clean the threaded holes, as well as all holes for the bushings (photo 1). Each bushing is installed in place, and only then a gasket is placed on top.
Everything is ready to install the cylinder head
Metal parts adjacent to the gasket must be degreased. We looked at the cylinder head tightening diagram, but the cylinder head itself must be installed correctly:
- We place the cylinder head on the cylinder block;
- By moving the part in different directions, we ensure that the bushings fit into the recesses.
After “step 2” the screws can be tightened.
Sealant
No sealing compounds are used when installing the gasket! Solidol, CIATIM and other lubricants are not even needed. The main thing is that the metal must be degreased. And the cylinder head gasket must be new.
Hi all.
Last fall I noticed drops of oil in cylinder 4 and leaks around the entire perimeter of the valve cover.
I've been through the winter and it's time to fix the problem. I change everything together as usual. What we need:
1) Anaerobic sealant “Locktite” 20 ml - 150 rubles 2) Camshaft oil seal BRT (cat. number 21080-1005034-00) 2 pieces - 240 rubles per pair 3) Camshaft plugs 2 pieces (cat. number 21120-1003290- 00) - 100r pair 4) Crankcase ventilation pipes for engine 21126 (21126-1014240-00 (E-gas) - thin long, 21124-1014058-00 upper small, 21120-1014056-00) lower large - 3 pieces - 250r set 5) Filter “Knecht” KL23of - 150r 6) Carburetor cleaner - 150r 7) Intake manifold and throttle gaskets - 150r BRT set Oil dipstick seal (cat number 21120-1009078-00) - 30r 9) Torque wrench
Engines ZMZ-402 and ZMZ-4021
Bolt for fastening the cover of the timing gears 11-16 (1.1-1.6) Nut for fastening the cover of the timing gears 12-18 (1.2-1.8) Nut for fastening the cover of the pusher box 12-18 (1.2-1.8 ) Cylinder head mounting nut 85-90 (8.5-9.0) Cylinder head rear cover mounting bolt 11-16 (1.1-1.6) Connecting rod cover mounting bolt nut 68-75 (6.8- 7.5) Flywheel mounting nut 78-83 (7.8-8.3) Crankshaft pulley mounting bolt 11-16 (1.1-1.6) Crankshaft pinch bolt (ratchet) 170-220 (17-22 ) Bolt for fastening the thrust flange of the camshaft 11-16 (1.1-1.6) Bolt for fastening the camshaft gear 55-60 (5.5-6.0) Nut for fastening the rocker arm axle rack 35-40 (3.5- 4.0) Bolt securing the rocker cover 4.5-8.0 (0.45-0.8) Nut securing the exhaust manifold to the intake pipe 44-56 (4.4-5.6) Nut securing the intake pipe and exhaust manifold to the block head 40-56 (4.0-5.6) Oil sump mounting nut 12-15 (1.2-1.5) Oil pump mounting nut 18-25 (1.8-2.5) Drive mounting bolt ignition distributor 6.0-8.0 (0.6-0.8) Main bearing cover mounting nut 100-110 (10-11) Oil filter mounting nut 12-18 (1.2-1.8) Fuel filter mounting bolt pump 12-18 (1.2-1.8) Fine fuel filter mounting nut 12-18 (1.2-1.8) Water pump mounting nut 18-25 (1.8-2.5) Pulley mounting bolt water pump 12-18 (1.2-1.8) Clutch housing mounting bolt 28-36 (2.8-3.6) Clutch housing mounting nut 40-56 (4.0-5.6) Pressure plate mounting bolt clutch 20-25 (2.0-2.5) Generator bracket mounting nut 44-62 (4.4-6.2)
Generator mounting nut 44-56 (4.4-5.6) Spark plug 30-40 (3.0-4.0) Fan mounting bolt 14-18 (1.4-1.8)
Torque and sequence of tightening the camshaft bed
Camshaft cover tightening sequence
Correct tightening of the camshaft bed, as well as other parts of the cylinder head, determines the normal functioning of all components and assemblies. So, in order to tighten threaded connections, a standard tightening pattern and a torque wrench are used.
Before installing the bolts in place, they must be washed thoroughly and lubricated with silicone grease.
In order to properly tighten the bolts, you need to know the sequence. It starts from the middle part and gradually moves directly to the edges. The detailed sequence can be seen in the photo below.
Tightening diagram for each camshaft bed bolt with numbering
As for the tightening force itself, it is 8.0-10.0 Nm . After the bed is installed on the block head, the connection bolts are tightened by hand or without much force using a ratchet with a head.
We tighten all the bolts by hand, but do not tighten them
When all the bolts are in place, you need to take a torque wrench and tighten them according to the standards in the order indicated above.
Torque wrench for tightening threaded connections
In what cases is it necessary to tighten the camshaft bed?
The bolts are tightened. Marked with arrows
Tightening the camshaft bed will be necessary if it was previously dismantled for restoration and repair work. So, in what cases will you need to remove the bed, let’s look at it in more detail:
- Replacing camshafts, lifters or valve seals.
- Overhaul of the block head.
- Engine repair operations.
- Replacement of individual elements of the cylinder head.
Consequences of improper bed tightening
The consequences of improperly tightening the camshaft bed include the following:
- Oil leakage due to a gap or loose connection.
- Passing air inside the cylinder head.
- Malfunction of the engine or cylinder head.
- Ingress of foreign objects (water, dirt, dust).
All these factors can negatively affect the performance of the cylinder head and main power unit.
Replacing with a new or restoring the old camshaft
Damage is always analyzed. Based on scratches and burrs on the bearing journals, cracks and deformations, experts determine the degree of wear. The area where the node sits in bed must be examined. The dimensions of the necks and body supports are measured using a micrometer. If the damage is severe and the deviations in diameters are large, it is not advisable to carry out repairs. In this case, it will be difficult to restore the part, it will cost much more.
When the defects are minor - for example, the wear of the shaft is weakly expressed, scratches on the surface under the seals are small, repairs are carried out. In this case, grinding the surfaces and installing new oil seals with a small axial cross-section will help greatly.
One of the most common problems with camshafts is worn camshafts. This defect usually manifests itself with a characteristic knocking sound inside the engine when starting “cold”. If you ignore the initial symptoms, the problem will get worse. The noise will increase, a metallic clang will appear not only at the start-up stage, but also during the movement.
Camshaft cam
The causes of early cam wear are:
- oil filter clogged;
- refueling with low-quality auto scrap;
- frequent overheating of the power plant - the metal of the cams begins to “lead” from this;
- low lubrication level;
- incorrectly set valve clearance;
- Incorrectly set phases of the gas distribution system.
The second common malfunction is defects in the support journals. These include nicks, scratches, and various abrasions. Supporting elements also bend, crack, and change their original shape. Minor types of violations are caused by natural wear or poor-quality composition of the engine oil. They can be easily eliminated by grinding and simultaneously cleaning the internal parts of a car engine - cylinders, pistons, rings. At the same time, the oil pump and the internal combustion engine cooling system are thoroughly diagnosed, and their incorrect operation is corrected.
The curvature of the support journals is determined not visually, but using special equipment. There is an acceptable degree of curvature, which is determined by 0.05 mm (for passenger cars).
Significant defects cannot be ground, so the camshaft is replaced with a new one. However, it is extremely important to be able to identify the cause that led to the wear. Otherwise, the problem will repeat. As a rule, cams and bearings often break and wear out prematurely under extreme conditions. When a car is used more than normal, it gets into accidents and various collisions.
