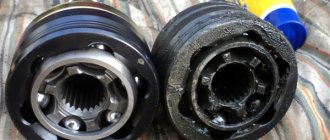
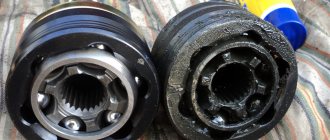
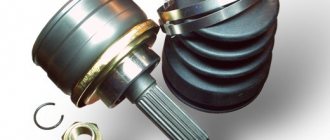
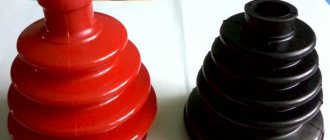
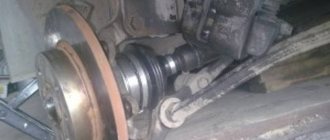
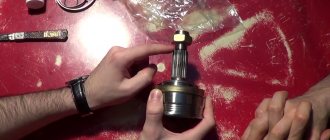
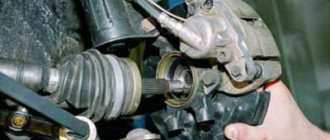
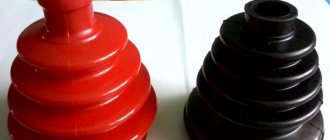
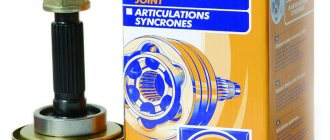
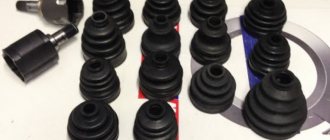
The transmission of torque to the drive wheel of the car from the gearbox is carried out through a constant velocity joint - CV joint. In appearance it resembles a grenade, which is what gave the knot its name. Maintaining the unit in good condition and timely replacement of a grenade on a VAZ 2112 that has developed defects is necessary for reliable operation of the vehicle and increasing its service life.
There are two types of grenades mounted on a VAZ 2112 car:
- Internal, which transmits torque from the transmission to the shaft.
- External, engaging with the wheel hub.
On a car, the external element most often fails, so in most cases it is enough to only replace the external grenade of the VAZ 2112.
Replacing CV joints VAZ 2110, 2111, 2112
The main reason for replacing a VAZ 2110, 2111 or 2112 CV joint is damage to the boot. In this case, dirt, chemicals, dust, moisture, sand get on the grenade (as this part is often called in everyday life), and it quickly loses its functionality. You can tell that the linkage is out of order when there is a characteristic crunching sound when turning when accelerating. In this case, the car must be urgently taken for repairs. Replacing the CV joint on a VAZ 2110 and other models with your own hands is quite affordable. But initially you need to understand that the work requires care and precision. How to fix it will be described below, but first it is advisable to familiarize yourself with the structure of this unit.
What are the types of CV joint defects?
Replacing a CV joint on a VAZ 2110 involves a preliminary study of the problem: what defect has occurred, so as not to harm the condition of the structure. In practice, there are situations when replacing the internal CV joint of a VAZ 2110 does not bring the expected results, or problems arise during the operation of the new part.
Among the main defects are:
- Unsatisfactory quality of the material from which the parts are made.
- Defective design or counterfeit.
- Low quality components or lack of lubricant. As a result, the grenade quickly receives mechanical damage and breaks.
- The outer CV joint boot of the VAZ 2110 needs to be replaced if debris and dirt gets inside the mechanism.
In the case where the VAZ 2110 internal or external CV joint has not been replaced before, it is recommended to watch a video on the topic and understand the proposed operating instructions.
Required spare parts
Each car is equipped with two grenades: internal and external. The first joint transmits rotation to the shaft from the gearbox, the second – to the hub from the shaft. Depending on the scope of the repair, you may need:
- internal hinge (article 302315, 2108-2215056);
- external CV joint (article 3107K, 2110-2215012);
- front wheel drive shaft (article 2110-2215070, 21100221507000);
- cover (article 2110-2215068, 21100221506800, 2108-2215068);
- buffer (article 2108-2215073-01);
- hinge clamp (article 2108-2215086);
- internal hinge retaining ring (article 2108-2215104, 21080221510400, 2121-2215084);
- thrust ring (article 2121-2215082);
- clamp (article 2108-2215034Ч, T-00040, 2108-2215036, 2108-2215034-31, 2108-2215034);
- protective ring (article 2108-3103060, 21080310306000).
Tools required for repairs.
To remove and install the VAZ 2110, 2111, 2112 CV joint, you will need the following tools:
- jack;
- keys for 17 and 19;
- pliers
- heads for 13, 14, 15, 16, 17 and 30;
- mount;
- knob;
- wheel wrench;
- lubricant;
- rags.
Do-it-yourself repairs are well justified by saving time and money. Since the price of work on replacing the CV joint of a VAZ 2110 and other models in a car service is: for an external one - 1100 rubles, for an internal one - 1300 rubles. Tariffs are valid as of 02/15/2019. And this is comparable to the cost of the parts themselves.
Order of Operations
If there is no inspection hole or overpass, you need to prepare a place for repairs. Raise the car with a jack, put on the handbrake, provide the work area with good lighting, and support the wheels with clamps.
Replacing the inner CV joint of the VAZ 2110 and other models is carried out in the same way as the outer joint. They are both located on the shaft drive, which you need to get to first:
- On the crankcase protection, two nuts are unscrewed at the front and rear.
- You need to drain the oil from the box - 40 percent of the total volume.
- When replacing the right CV joint on a VAZ 2110, the wheel bolts come off on the right; if the left one is changed, the wheel bolts come off on the left.
- The outer hinge fasteners are completely unscrewed.
- Now you still need to jack up the car and remove the wheel.
At this stage, two hub bolts securing the grenade become accessible; they need to be removed.
- The hub needs to be separated from the rods, this is done with a pry bar.
- The stand is pulled forward and the CV joint pin is removed from the hub.
- The shaft drive is removed and set aside.
Now you need to remove the inner grenade from the box. With the hood open, you need to insert a pry bar between these elements. Then the tool jerks the hinge towards the box. The grenade should move. If this does not happen, the operation is repeated again. If the CV joint moves, then both hinges and the shaft can be removed from the wheel arch area. - You need to remove the covers from the grenades; to do this, use pliers or special pliers to open the small and large clamps.
- The boot must be inspected for integrity. If the cover is damaged, it must be replaced. If the boot is in good condition, you can simply move it away.
Use a hammer to remove the inner hinge. They need to hit the clip hard. The grenade should fly off. The same action must be performed on the other side.The rings are removed from the shaft drive, new ones are installed in their place and the boot is put on.
- The new grenade is also installed using a hammer. It and the boot need to be lubricated.
- The covers are secured to the hinge and shaft with clamps.
- A nut is screwed onto the grenade, then the hinge is driven into the box.
- Further operations are similar to the first, but are performed in reverse order.
Installation of CV joints at the final stage in detail
Please note the following notes:
- install a plastic plug on the end of the shaft;
- the retaining ring is installed before mounting the hinge;
- Before installing a new CV joint, the installation site is generously treated with lubricant to ensure a tight fit;
- After installing the drive, the hinge must “sit” tightly on the gear until it is completely fixed, which is done with a hammer.
Carrying out this replacement of a functional element of a VAZ shaft with your own hands does not require experience in car repair. The replacement can be carried out following the video instructions. If you are not confident in your abilities, contact a specialist to ensure that the hinge is installed reliably.
Replacing the internal grenade of a VAZ 2112 - how to do it yourself?
Replacing CV joints on a VAZ 2112
Rear-wheel drive cars are being replaced by cars with front-wheel drive. In this regard, the crosspieces are replaced by hinges of equal angular velocities, which are called grenades. This article is instructions for replacing the internal grenade on a VAZ 2112 car and other cars from this family. Here you will find a video describing the process, as well as photos of some of the process steps. So, let's begin:
- Tool for the job
Replacing the outer and inner CV joints of Lada Kalina: photo, video
CV joint (constant velocity joint - approx.) or popularly just a “grenade”, is designed to transmit torque to the wheels of a car. CV joints can be internal or external, and the devices themselves are quite simple in technical terms and consist of a ball bearing that rotates transversely to its axis.
In the video, replacing CV joints on a Lada Kalina:
Failure of the CV joint on the Lada Kalina is a very common occurrence, and the main reason for its failure is torn anthers. Because, together with dust and water falling under them, the lubricant turns into thick mud, and it is no longer able to fully perform its functions.
Replacing the outer CV joint
In the process of replacing the outer CV joint
The work of replacing an outer or inner CV joint is not very difficult and can be done by any motorist who has at least once repaired a car with his own hands. And in order for the repair to be easier and faster, you need to prepare the following tools:
- Socket heads for “17” and “30”.
- Driver or ratchet.
- Extension for the wrench.
- Jack.
- Wheel chocks.
- Hammer.
- Vise.
Step-by-step disassembly procedure
After you are convinced of the malfunction of one or another CV joint, you can begin to work.
- First of all, we tear off the mounting bolts from the wheel and the hub nut, then we set the wheel chocks under the rear wheels. (To make it easier to tear off the nuts, it is better to use an extension for the wrench - approx.).
- We put the car on a jack and hang the wheel.
- We remove the wheel and, for greater reliability, place it under the car next to the jack.
- Now that this picture appears before you, all that remains is to unscrew the 2 bolts that secure the ball joint to the steering knuckle. Unscrew the bolts marked with a red marker on both sides.
- When unscrewing the ball joint, apply force and use a wrench extension.
- Turn the steering wheel as far as possible to the side and slightly pull the steering knuckle with the stand and remove the outer part of the hub along with the CV joint (For convenience, you can make several gentle blows with a hammer - approx.).
Dismantled CV joint - The next step is to dismantle the old boot and clamps. You shouldn't use them again; it's better to take a set of new ones.
- Next, you need to remove the CV joint itself. If you have a special removable device, then use it. If not, then you will have to knock it out of place with a hammer. Without causing strong blows, the CV joint will move out of place
- Hit the CV joint with a hammer, rotating it along the axle shaft. After some effort, the CV joint should give way.
If the internal CV joint is supposed to be replaced, then work 1 to 6 should be performed as well, after which, using a pry bar, we remove it from the gearbox and take out the entire assembly.
We take the inner CV joint assembled with the axle shaft to a vice where we clamp it and dismantle it.
- After the “bare” axle shaft appeared before us, the work on removing the CV joint can be considered completed.
Step-by-step assembly procedure
Work on assembling all parts should be carried out in the same order as removal, however, there are some nuances in these works.
- First of all, we put the new boot on the axle shaft; this may cause some difficulties. To make the task easier, the axle shaft can be coated with lubricant.
- Then add lubricant to the CV joint. New lubricant added to CV joint
- And the remains are in the dustbin.
- Now you need to use a hammer and a block to install the grenade on the axle shaft, using gentle blows we mount it in place.
- After it is fixed, we remove the air from the boot and secure it with clamps.
- Next, when everything is installed, all that remains is to put on the steering knuckle, fix the new hub nut and put on the wheel.
Tighten all the nuts and lower the car from the jack.
All work on changing the CV joint, if the work is carried out correctly, will not take more than 1.5-2 hours. You can check the quality of the work performed immediately after the repair. If you start driving with the wheels turned to the side and there is no crackling, squeaking or noise, it means that the repair was carried out correctly and the car can be safely operated further.
Signs of CV joint failure
The first signs of a faulty grenade are crunching sounds in the area of the front wheel on turned out wheels when starting to move. When the fault is severe, noise appears at less significant loads.
The anther begins to “repair”
Selection of CV joints
CV joint in original packaging. Usually inside the package is a pomegranate produced by VIS
There is no consensus among car owners regarding the choice of one or another brand of constant velocity joint, but clear leaders stand out:
- VIS.
- GNK. Original packaging of GNK CV joint
Inside the GNK CV joint package - boot, CV joint, clampsGNK outer CV joint installed
- GLO.
Causes of constant velocity joint failure
What can cause the failure of this element of the car:
- Poor quality boot is the first reason and the most important. If the boot on a grenade is made of low-quality material, it will quickly wear out, and all sorts of debris will begin to get inside the grenade.
- Loosening the boot clamp also allows sand and dust to get inside the CV joint.
- Other defects of the boot (see How to replace the boot and CV joint on a VAZ 2112), such as a cut of the clamp, rupture of the boot or its stretching, also lead to bad consequences.
- An insufficient amount of lubricant, or, even worse, its absence in the constant velocity joint housing, leads to rapid wear of the bearing and, as a result, wear of the entire part.
Advice! When repairing your car, especially if you have to crawl under the car, do not be lazy and pay attention to the condition of the axle shaft boots. If you notice at least one of the defects listed above, replacing the CV joint on a VAZ 2112 is simply necessary!
Determining the need to replace the internal grenade
Before any repair, it is important to make sure that there is a fault. And now we’ll do this with the CV joint:
VAZ 2112 internal CV joint - torn boot
- Often, a malfunction can be determined by the sound emanating from the suspected component of the car.
- A joint malfunction is detected while driving or starting the car.
- Of course, sounds can come from a faulty ball joint, from a shock absorber strut, or from the engine. Let's learn how to determine what kind of sound should come from the CV joint and when it appears.
- The sound of a faulty grenade is the grinding of metal on metal, similar to a crunch, breaking of metal, or a stone hitting a bearing or other drive mechanism.
- When can this sound be heard? If such a sound appears when turning, it means that you need to change the outer grenade, not the inner one.
Advice! Although external grenades fail much more often than internal ones, when repairing external ones, be sure to check the others for functionality. Lubricants should also be added if necessary.
- On a VAZ 2112, the internal CV joints make a sound when driving straight, and especially when the car starts to move.
Why does the CV joint fail? Principle and working conditions
A torn boot is the cause of all troubles with grenades
So:
- A car's wheel is its dirtiest part. The wheel is constantly in contact with the road, and the road is not always asphalt, but often dirt or sand.
- The outer grenade usually wears out much faster than the inner one, since it is closer to the wheel and is more subject to overload when driving on uneven surfaces.
- Anther breakage. One of the reasons for grenade failure is a violation of the integrity of the boot. This usually happens due to a torn boot clamp, a cut of its fastening, or a cut in the boot itself.
- It also happens that the boot loses its rubber properties over time and stretches. Then it does not fit tightly to the axle shaft.
- For all these reasons, dust gets inside the outer CV joint, and even worse, sand and dirt.
- If harmful substances get inside the grenade, the bearing fails - it collapses or jams.
If you notice a torn grenade boot, this means that on a VAZ 2112, replacing the CV joint is simply necessary for its further safe operation.
Grenade replacement
Tool for the job
What is needed to ensure that the replacement of the VAZ 2112 CV joint takes place as quickly and efficiently as possible:
- Sockets and spanners
- 30mm head (not available in some sets)
- WD-40 or similar product
- Hammer
- Collar - the longer the better
- Pliers
- Jack
- Screwdriver
- Vise
- Gasoline and brush for cleaning surfaces
- Metal brush
- Attachment (bronze, copper)
- Metal brush
- Can't do without a partner
- And, of course, a CV joint complete with lubricant (if it is missing, you should purchase it - the price is reasonable)
Removing the axle shaft (wheel drive)
Removing the axle shaft from the hub
- The first stage is standard. We drive the car into the pit, put wheel chocks, put the car in handbrake and neutral, pray (optional) and go!
- When the internal grenade is changed, the oil is necessarily drained from the variable gearbox housing! To do this, unscrew the required plug, place a container for oil, wait for the drain to finish and screw the plug back.
- We remove the cap, if there is one, put a friend behind the wheel and ask him to press the brake hard.
- At this time we take a 30mm head and a larger knob. Using this tool, unscrew the hub nut, which is located in the middle of the wheel.
- The tightening force of the nut is large, therefore, the longer the knob, the easier it will be to unscrew it.
- After unscrewing the nut, the car should be raised with a jack. Raise the car and remove the wheel. Be sure to place a stand under the car in the form of, for example, hemp. Do not work on a vehicle that is on a jack!
- Unscrew the wheel bolts and remove the wheel from the car.
- We completely unscrew the hub nut, remove the metal washer and spray the splined connection of the hub with the outer grenade with WD-40 rust cleaner.
- In order to remove the axle shaft from the car, it is necessary to free the hub. Using the required wrench or socket, unscrew the two bolts securing the VAZ 2112 ball joint to the hub.
- After this, using a bronze or copper adapter, in order not to damage the thread on the outer grenade, we try to dislodge it (the grenade) from engagement with the hub, adding a rust preventative to make it easier.
- When the parts are disengaged, you can move the shock absorber strut to the side and remove the axle shaft (remember, you need to drain the oil, otherwise it will simply leak onto the floor).
How to determine if a hinge is faulty? Diagnostics
At any service station, before repairs, they carry out diagnostics of the unit that is going to be repaired. Let's do it ourselves:
- Are there any strange sounds while driving your favorite car? One possibility could be a faulty CV joint.
- Most often, a CV joint in need of repair manifests itself during turns (not necessarily sharp ones). When turning the car, a sound comes from the hood, similar to metal jamming, the sound of metal breaking, metal grinding on metal.
- If such sounds appear even when driving straight, then the CV joint definitely needs to be changed!
Advice! Do not ignore sounds that occur when operating the vehicle. In some cases, this can cost the lives of the driver and passengers.
- After sounds similar to a malfunctioning grenade appear, it is necessary to diagnose the front chassis of the car in a pit or overpass, or, as a last resort, just in the garage.
- To do this, you need to lift the car using a jack. Raise the side from which the sound was heard. Don't forget to put wheel chocks under the rear wheels of the car.
- When the wheel can rotate freely, you should rotate it around its axis and listen for sound. If the sound does not appear, then you should turn the wheel in the direction of the turn at which it occurred.
- When sound appears, it will become clear that it is faulty and requires replacement as soon as possible.
- If the sound still does not appear, then check the other side (the other wheel) in the same way. By the way, if the sound appears, check it anyway - you may have to change both grenades.
After diagnosing the constant velocity joints, you can begin replacing them.
What will you need?
Here is a short list of what is needed to replace a grenade on a VAZ 2112:
- Partner
- A set of sockets or spanners (you will still have to find a 30 socket)
- Rust remover (WD-40 or equivalent)
- Long collar
- Pre-purchased CV joint (average price) and lubricant for it (usually included)
- Hammer
- Pliers
- Flat screwdriver
- Vise
- Petrol
- Brush (a regular paint brush will do)
- Rags
- Copper or bronze tip
- Metal brush
In some cases, you may additionally need the following:
- Oil container
- Plug in the gearbox
- Watering can

