Print this article Font size 16
Initially, CV joints were positioned as elements with a very long service life. Manufacturers even assured that they could last as long as the car itself.
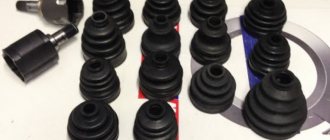
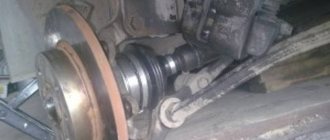
Photo of CV joint for VAZ 2114
But in reality, everything is not as colorful as it is described. A grenade has a life limit. What grenades, you ask. The grenade is the CV joint. People often use the concept of “grenade”. This can be explained very simply - the CV joint looks like a grenade. That's all. Therefore, do not be confused if you hear “grenade” when talking about CV joints. It is the same.
Location
It will be impossible to replace the CV joint on a VAZ 2114 if you do not know where exactly these elements are located. Their location is easy to determine - on both sides of the front suspension at the bottom of the car. They are oblong elements and fit into the hub of each wheel.
CV joint location
That is, getting to the node is not difficult, but this will require certain conditions.
The most important thing is that the replacement procedure is not complicated, which allows you to do the work yourself. But let’s say right away that if you don’t have the time, desire, or are simply not confident in your own skills, it’s better to entrust the repair to specialists. You will spend extra money on this, but you will be sure of the result.
Signs of failure of the outer grenade (CV joint)
There are two options here:
- signs that your grenade has already broken
- signs that the grenade will soon come out and break .
This is interesting: Peugeot 206: Do-it-yourself replacement of spark plugs on a car
How to understand that a grenade will break soon
Of course, the first sign of a malfunction of the external grenade is a crackling sound . If you hear a crackling noise while driving with the steering wheel turned, it is definitely a CV joint. The greater the angle of rotation of the wheel and the harder you press on the gas, the louder the clicks. Another sign that does not always appear is vibration on the steering wheel at speeds greater than 80 km/h. The vibration is only slightly similar to the vibration from an unbalanced wheel. It usually manifests itself as a slight twitching of the steering wheel.
How to understand that the outer CV joint is broken
If the CV joint breaks, the car will stop moving. In any gear engaged, press the gas, the speed increases, but the car does not move.
How to understand that it is the outer CV joint that has broken, and not the internal one or the clutch in general (the first signs of failure are similar to the signs of a clutch failure)? First of all, start the car and put it in any gear. Next, open the hood and look in turn at each of the shafts going from the box to the wheels (one short, the other long). If any shaft is spinning, it means that the CV joint has broken on this side.
I recommend not just visually looking at the shaft, but touching it with some long, hard object, such as a stick. The main thing is that there is nothing on it that can wrap around the shaft !!! When you touch the shaft with a stick, if it is spinning, you will feel a slight vibration. This is usually done in the dark, because it is difficult to understand whether a cylindrical object is spinning, especially in the dark.
When replacement is required
If while driving your car you hear noise coming from the front of the car, be sure to check the condition of the boot. Quite often, replacing the outer CV joint boot of a VAZ 2114 becomes a daily task for service center employees.
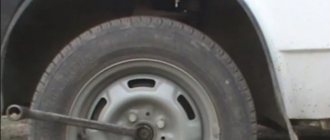
To check, just turn the wheels in any direction and look under it. If cracks or complete damage are detected on the boot, the outer CV joint of the VAZ 2114 will definitely need to be replaced.
The presence of damage indicates that dirt has gotten inside the element. Much or little of it is no longer so important. Contamination leads to disruption of the functionality of the device.
In such situations, when the CV joint is damaged, it is strongly not recommended to continue driving under your own power. This is dangerous for you, your car and other road users. Ignoring this recommendation entails even more expensive repairs, since by the time you get to the garage or car service center, you will damage a number of other components and elements of the car.
Instructions for disassembling the unit
Before removing the wheel from the side of the faulty unit, it is necessary to loosen the hub nut using a 30 mm socket, having first pulled the metal boot out of the socket. Further steps according to the instructions:
- Use a wheel wrench to loosen the wheel bolts, jack up the car and remove the wheel. Unscrew the hub nut completely and remove the washer with a screwdriver. If your vehicle has engine oil pan protection installed, it will need to be removed. Some experts recommend draining some of the oil from the gearbox (1.5-2 liters) before removing the drive so that it does not start flowing through the spline hole when the unit is removed.
- Loosen and unscrew the tie rod ball pin nut and use a puller to press the pin out of the socket in the front suspension strut. Having turned the entire assembly by hand for convenience, unscrew the 2 bolts securing the ball joint. Holding the brake disc with both hands, carefully pull the CV joint shaft out of the mating splined part of the hub and move it to the side.
- The second end of the VAZ 14 CV joint must be removed from the splined part in the gearbox, being in the inspection ditch. To do this, you will need to place a mounting spade between the box body and the grenade, and then with a sharp jerk pull the assembly out of the socket, using the pry bar as a lever. If the part does not give in, it is allowed to tear it out of place with gentle blows of a hammer on the mounting blade. Before pulling it out, it is advisable to place a container under the gearbox, as some oil may leak out. Then the entire assembly is removed manually. A vice will be required for subsequent disassembly.
Dismantling the CV joint VAZ 2114
The assembly shaft is securely clamped in a vice closer to the outer grenade if the outer CV joint is being replaced. Here you should check the condition of the boot. If there are no cracks or damage, and the rubber continues to remain elastic, then you only need to unlock one clamp that holds the boot on the grenade body.
Then it is turned outward or simply moved so that it does not interfere. Next, holding the slotted part of the grenade with one hand, apply gentle blows with a hammer along its edge from the inside. In the case when the grenade needs to be replaced, there is nothing special to worry about; you can safely hit it until it comes off the shaft splines. The boot on which defects are found is turned back out, the second clamp is loosened and the part is removed from the shaft. The inner CV joint is disassembled in exactly the same way as the outer one, you just need to clamp the shaft in a vice near the grenade itself.
What to choose?
To replace the inner or outer CV joint on a VAZ 2114, a new element will be required. To be fair, we note that the most suitable and high-quality CV joints for the VAZ 2114 model are produced by the manufacturer, that is, AvtoVAZ.
But here comes the most important disappointment - they are not for sale. The only option is to go to a specialized VAZ official car service center. But from the point of view of financial costs, it is not the most reasonable decision.
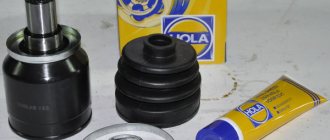
In addition, there is now a fairly wide range of analogues on the market. Judging by the reviews of VAZ 2114 owners, special attention should be paid to CV joints produced by such companies as:
- Hola;
- GKN;
- Kraft.
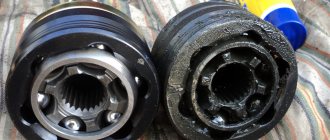
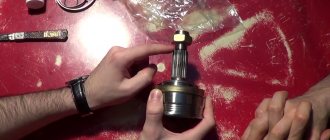
Photo of GKN CV joint for VAZ 2114
Installation
1. Replace the retaining ring of the splined shank of the inner joint housing with a new one.
2. Apply grease to the spline and smooth surfaces of the shank.
3. Carefully insert the shank into the oil seal, trying not to damage the working edge of the oil seal with the shaft splines. At the same time, we direct the locking ring with the gap upward.
4. We vigorously insert the drive into the gearbox and make sure that the retaining ring of the inner joint shank is securely fixed and the drive does not move out of the gearbox housing.
Replacement
Armed with new CV joints, also collect a set of necessary tools and materials. It will include:
- Set of heads;
- Spanners;
- Shoes;
- Dry rags;
- Grease for CV joints;
- Jack;
- Anthers.
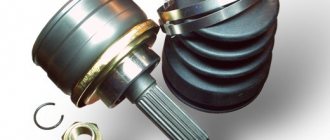
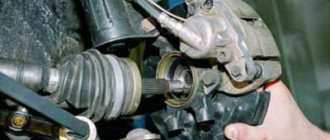
CV joint arrangement diagram
Now let's get down to work on replacing the CV joints:
- Determine the location where the repairs will be carried out. This could be an overpass, a garage with an inspection hole, or a room with a car lift.
- Stop the engine and apply the handbrake. Use chocks to block the wheels.
- Using a wheel wrench, remove the wheel bolts.
- Raise the required part of the car with a jack.
- Loosen the nut in the center of the CV joint. Keep an eye on the puck so you don't lose it. It is not included with the new CV joint.
- Armed with 13mm wrenches, unscrew the fasteners of the upper part of the ball joint. It is not necessary to perform a similar procedure with the lower part, since it will not interfere with the repair process.
- Using a pry bar, slightly rip the grooves off the support and move them aside.
- Knock the hub off the CV joint splines. To do this you will need a hammer and some kind of wooden stand.
- Remove the old damaged CV joint.
- Check for damage to the stem.
- Remove any remaining lubricant from the rod using a dry rag.
- Place a new grenade in the new location. This assembly should include a CV joint, boot, clamps, nuts, and retaining rings.
- When assembling the unit, do not forget to use high-quality lubricants. There shouldn’t be too much of it, but you shouldn’t feel too sorry either.
- Reassemble the parts in reverse order.
- By changing the CV joints, you can simultaneously check the condition of the brake pads. If they are in a sufficiently worn condition, it is advised to replace them at the same time. Anyway, you have already dismantled the knot.
- After completing the repair, check the car in action.
- It’s not uncommon for craftsmen without much experience to leave behind supposedly unnecessary parts after reassembly. Please note that everything that remains after assembly, and that is not the released elements that you replaced with new ones, has its place in the design of the car. Therefore, check where exactly these “extra” elements come from and install them in their rightful place.
Advice from experienced motorists
Experience is an invaluable thing that can be useful to you in the process of operating and repairing a car. But if you don’t have your own yet, you can use the experience and skills of experienced motorists. They have repeatedly faced situations similar to yours. Failure of a CV joint is definitely no exception.
There are some useful tips on this matter that are worth listening to.
- If you hear a characteristic crunch while driving in a straight line, it means the CV joint has failed. If this crunching noise is heard only when turning, then the problem lies in a faulty joint.
- Before installing a new CV joint, treat the grenade landing site with lubricant. This significantly extends its service life.
- To adjust the CV joint and seat it properly, use wooden attachments. If this is not done, the risk of damaging the new element is very high.
- The boot should be installed as tightly and efficiently as possible. If you don't do this, dirt and dust will soon get there. These components will quickly render it unusable, and repair work will have to be carried out again.
- The lock nut on the hub is tightened with a special torque tool. Moreover, tightening is carried out strictly with the parameters specified in the instruction manual for your VAZ 2114 modification.
- During a routine inspection of the technical condition of your car, be sure to pay attention to the condition of the clamps and rubber elements to ensure their integrity. Such seemingly insignificant components can lead to serious consequences and significant financial costs.
- The purchase of spare parts, including CV joints, should be made only from trusted sellers, certified distributors. If you buy a bad, low-quality part, just trying to save money, you will have to pay even more to eliminate the consequences that the use of such elements led to.
The CV joint is an important component of any car, and replacing it even on your own is not particularly difficult.