Gasoline engines can be equipped with a carburetor or fuel injection system. In the case of a carburetor, it is well known that during operation this system requires periodic adjustment of the idle speed. As for the injector, such a power system operates under the control of the ECU, meaning that there is no need for additional configuration.
However, in practice the situation is somewhat different, since quite often it becomes necessary to adjust the idle speed on the injector. Problems manifest themselves in the form of unstable operation of the internal combustion engine at idle, the speed fluctuates, the engine may stall after starting, overuse fuel if the idle speed is too high, etc.
Next, we will talk about how to adjust engine idle speed on an injection and carburetor engine, and also consider the features and nuances of setting idle speed on engines with the specified fuel supply systems.
How to adjust idle speed on a carburetor
Let's start with a simpler dosing system. The main advantage of a carburetor is deservedly considered the ability to quickly service the device with your own hands, using a minimal set of available tools.
To adjust the idle speed in this case, you will need to have several wrenches and screwdrivers. The main task will be to set the speed when the engine is able to operate stably, while the crankshaft speed will be the minimum possible for stable operation of the unit.
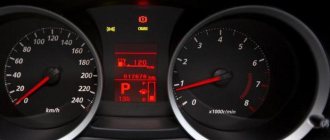
Let's look at adjustment using the Solex carburetor as an example. First of all, it is advisable to have a tachometer, which will help determine the crankshaft speed. On some cars, such a device may not be structurally present, while on others it is included as standard and is located on the dashboard.
If there is no tachometer, it is best to connect a separate device, which will allow you to set the speed more accurately. In some cases, you can set the idle speed without a tachometer, focusing only on the operation of the internal combustion engine in this mode based on external signs. The downside is that it is usually not possible to set XX as accurately as possible. You will also need to have a flathead screwdriver for adjustment. A screwdriver will be needed to turn the fuel mixture quality screw.
- So, before starting manipulations with the carburetor, the engine must be warmed up to operating temperature.
- Then you need to press the “choke” all the way, the air damper should be in the fully open position.
- Next, the engine is turned off, after which, on cars without a tachometer, you should connect the external device according to the instructions and recommendations.
In some cases, you can use a multimeter tester. The positive output is connected to output K on the ignition coil, the negative output is connected to ground.
- Now you can start the engine, after which you need to turn on the dimensions, high beams, set the maximum speed of the interior heater fan, electric heated windows, etc. In other words, energy consumers need to be involved. After this, you can proceed to adjusting the idle speed on the carburetor.
As a rule, for most systems of this type, the idle speed is 750 - 800 rpm. It turns out that it is necessary to set the idle speed within the specified limits, and the internal combustion engine must operate stably.
To do this, on the Solex you need to rotate the adjusting screw, which is responsible for the amount of the fuel-air mixture. Upon completion, the crankshaft should rotate at a frequency of 750 - 800 rpm. However, in many cases the adjustment does not end there.
The fact is that if you adjust XX only with the mixture quantity screw, then in some cases it is not possible to set the desired speed. For this reason, additional adjustment of the mixture quality screw is necessary.
There may be a separate plastic plug on the specified screw, which will need to be removed. This can be done by piercing the plug with an awl, after which a metal hook is inserted into the hole for removal. You can also screw a self-tapping screw into the plug, and then remove the element without much difficulty.
Before starting adjustments with the XX quality screw, you should also check the correct ignition setting (ignition timing, ignition timing), the condition of the spark plugs and spark plug armor wires. You will also need to eliminate the possibility of third-party air leaks. At the same time, you need to be prepared for the fact that adjustments will need to be repeated several times until the desired result is obtained.
The whole process looks like this:
- At the very beginning, you should rotate the quality screw with a flat-head screwdriver so that the crankshaft speed increases to the maximum. To do this, you need to carefully turn the screw clockwise or counterclockwise. The main thing is to find the position of the screw when the XX speed is maximum. This can be determined by the tachometer or by ear (in the absence of instruments for determining the crankshaft rotation speed).
- Now you can begin to turn the mixture amount screw, ensuring that the speed is at around 900 rpm. Tightening the screw clockwise causes the throttle valve of the first chamber of the carburetor to open slightly, resulting in an increase in engine speed.
If you unscrew the screw counterclockwise, then the damper closes and the speed will decrease. It turns out that you need to find a position for the mixture quantity adjustment screw at which the speed is at around 900 rpm.
- Having set the speed, we move on to the quality screw. The specified screw is tightened so as to obtain 750-800 rpm. If you cannot immediately achieve the desired indicator, you should repeat the setup procedure from the very beginning.
Let us add that when installing a non-standard carburetor on the engine or in case of carburetor repair (cleaning, replacing screws, jets), before making adjustments, you should first completely tighten the quality screw clockwise, and then release it back 3 or 4 turns. Only after this can you proceed to further settings.
Additional recommendations for setting XX on the carburetor
After the setup process has been completed, you should check the operation of the engine not only at idle, but also taking into account other modes. This means that the set of revolutions when you sharply or smoothly press the gas pedal should occur smoothly, without failures or failures. Also, the engine should not stall after the accelerator pedal is sharply released.
Any failures or pauses are a reason to repeat the settings. The first step is to return to adjusting the quality of the mixture, enriching the mixture with the quality screw. With this enrichment, you can raise the speed to 900 rpm. It is worth noting that high-quality and accurate tuning can reduce the overall toxicity of exhaust gases from a carburetor internal combustion engine.
We also recommend reading the article on how to fully adjust a Solex carburetor. From this article you will learn about the features of adjustments of the specified carburetor model, selection of jets, adjustments of the accelerator pump, transition modes, setting up the second chamber, etc.
In a number of cases, a situation arises when it is not possible to adjust the idle speed using the mixture quality and quantity screws (there is no obvious clear reaction of the engine to the rotation of the screws, or the indicated reactions are completely absent). This indicates a problem when fuel enters the carburetor chamber and the engine is running, but the mixture does not flow through the idle system.
This problem can occur when the carburetor solenoid valve is not fully tightened. The valve plug may also not be installed securely enough. As a result, fuel passes by the idle jet, which is installed in this valve or its plug. The XX jet may also be selected incorrectly, have a hole that is too large, etc.
To check this, you will need to disconnect the wire from the solenoid valve with the engine running. Normally the engine should stall. If this does not happen and the motor continues to operate, then the valve itself needs diagnostics. If no problems with the valve are identified, then you will need to set the fuel level in the float chamber and also check the needle valve. Then the carburetor adjustment should be repeated.
Adjusting the injection engine and idling
On engines with a fuel injection system, as a rule, malfunctions do not appear immediately and tend to progress gradually. Typically, the driver notices that the car begins to respond to the gas pedal with delays, the speed jumps at idle, gasoline consumption increases, the engine loses power, the power unit may not operate smoothly in different modes, etc.
Various malfunctions can lead to such symptoms, so it is necessary to carry out computer diagnostics of the engine, check the ECM sensors, eliminate air leaks and general problems with mixture formation (lean and rich mixture), dirty injectors and other reasons. If no other deviations are detected, the injector needs to be adjusted. Let's start with adjusting the idle speed on an injection engine.
First of all, you need to start by checking the idle air control (IAC). This controller is a stepper motor with a special conical needle. The task of the IAC is to regulate the air supply under the control of the ECU to maintain idle speed. IAC malfunctions become a common cause of floating engine speed at idle.
To adjust the idle speed on the injector:
- disconnect the battery terminals and dismantle the idle air control;
- then the IAC mounting hole is cleaned using compressed air;
- Now you can disassemble the XX regulator, after which its guide bushing is checked. If the bushing is worn out, the element needs to be replaced;
- you also need to check the needle. No wear, damage or other defects are allowed. If deviations are detected, the IAC needle should be replaced;
- then, using a tester, the regulator windings are checked, and if necessary, the contacts are cleaned;
- At the end of the diagnostic and cleaning process, the device is put back, after which the engine operation at idle and other modes is assessed.
Let us add that a number of problems with idle speed can also arise after cleaning the throttle valve, which on many cars not only needs to be cleaned correctly, but also trained. If you don't know how to clean and adjust the throttle valve, we recommend reading about it in our separate article.
We also note that the injector adjustments and the operation of the power system can be influenced programmatically, that is, by connecting diagnostic equipment with special preinstalled programs to the ECM via the OBD connector. Once connected, you can evaluate many parameters of the operation of engine systems in real time, read, decipher and reset possible errors.
We also recommend reading the article about why high idle speeds occur. From this article you will learn the reasons for the increase in idle speed, as well as what methods can be used to eliminate this malfunction.
Deeper modifications are also possible on the injector, which involve making a number of changes to the ECU firmware. This procedure is well known as engine chip tuning. This setting allows you to change the factory firmware, adapt the control unit to a specific driver and his needs (set the speed to XX, change fuel maps and influence mixture formation, ignition, etc.).
Injection fuel supply to the engine is a rather complex mechanical and electronic system, so you need to think several times before adjusting this system yourself.
Where the failure occurs, which is expressed in “floating” idle speed, is not so easy to figure out. These could be mechanical problems, these could be problems with the on-board computer, these could be problems with the sensors that are part of the injection system.
One thing is for sure, that adjusting the idle speed on the injector by simply twisting the adjusting screw will not do anything. On the contrary, without the appropriate knowledge and skills, you can only do harm. Since the causes of idle speed failure are not eliminated, but only create the opportunity to temporarily eliminate the malfunction.
Moreover, you can turn the adjusting screw only if certain conditions related to the electronics of each car model are met. Such conditions are specified in the instructions for the car. Otherwise, the on-board computer settings may fail.
The reason for the “floating” idle speed is inadequate air supply to the system. The control unit, based on sensor readings, sends signals to the actuators, trying to bring the system to normal operation. It turns out that sometimes a large amount of fuel is supplied to the cylinders, sometimes a small one. It remains to determine where the additional air leak comes from. There can be several reasons for air intake, including failure of the air supply sensor.
Perhaps the reason for interruptions in engine speed lies in damage to the rubber tubes through which air is supplied. To determine damage, you need to pinch the tubes one by one with the engine running. If the engine operating mode changes while a certain tube is pinched, then you need to disconnect it, cover the end with your finger and find the place of the leak.
If the tube is undamaged, then you should move further along the air access chain. It is likely that the reason is in the starter units, speed control units, and valves.
If, when the tubes are pinched, there is no change in engine speed, then you need to close the hole located on the air duct. If the speed normalizes, then it is likely that there are problems with the valve sticking due to contamination of the latter.
You can try to eliminate these problems by injecting a special liquid into the hole. After this, the car must remain unstarted for 15 minutes. After this, you need to re-inject, let the car sit for 15 minutes and start the engine. If the problem does not disappear, you need to go to the block to increase engine speed. Perhaps the valve in it has become unusable. Quite often, such units are not dismountable and the only way to eliminate the problem is to replace it.
By the method of elimination, by pinching all the tubes, you can find possible mechanical causes of speed failures. But this method will not give anything if the reason lies in the injection control electronics. In this case, a normal and complete diagnosis can be done at the appropriate car service center. Proper adjustment of the idle speed on the injector is also the prerogative of specialists. Only qualified craftsmen will be able to solve this problem by eliminating any problems.
Idle speed refers to the operation of the power unit in neutral gear, that is, when the engine runs “idling” without providing forward motion of the vehicle. The need for this arises quite often, especially when starting the engine after a long period of inactivity, when it needs to be warmed up a little to ensure the penetration of lubricant into all channels and components.
While the car is moving, the engine output, that is, the rotation speed of the crankshaft, is regulated by the driver by pressing the accelerator pedal. In principle, the same could be done with the operation of the power unit at idle speed, but this is extremely inconvenient, which is why the very concept of idle speed arose - a mode in which the engine operates at minimum speed and does not stall. Adjusting the idle speed is done differently on engines with an injection system and a carburetor: in the first case, the on-board computer paired with the idle regulator is responsible for this, in the second - the carburetor itself. But from time to time their settings get lost, which leads to the need to adjust the idle speed manually - if this is not done, the engine will operate unstably in idle mode or even stall.
What's the result?
As you can see, independent modifications and adjustments to the carburetor are quite possible in a garage. As for the injector, an ordinary car owner without sufficient experience can only check the IAC with his own hands and clean the device, diagnose some ECM sensors, and also read and reset errors if there is an OBD2 adapter.
Please note that any attempts by unprofessional tampering with the ECU firmware can lead to both failure of the controller and consequences for the engine itself. For this reason, adjustment and tuning of the injector should be carried out only in special cases, entrusting the work exclusively to qualified specialists.
Why do you need to clean the throttle valve periodically? How to clean the throttle valve, training and adaptation of the throttle valve after cleaning, useful tips.
Why the engine may have high idle speed. The main reasons for high idle speed on an injection engine and engines with a carburetor.
The engine stalls at idle: what to check. Possible causes of malfunction on engines with a carburetor, injector, and diesel power plants.
At idle the speed “floats”: why does this happen? The main malfunctions associated with idle speed on gasoline and diesel engines.
Floating engine idle speed when cold. Basic malfunctions, symptoms and identification of breakdowns. Unstable idling of the diesel engine.
Causes of vibration and unstable operation of a diesel engine in idle mode. Possible causes and fault diagnosis.
Why is idle adjustment required?
On different machines, different numbers are considered normal indicators of the number of engine revolutions at idle, but on average it is 650-900 revolutions/minute. An increase to 1500-1800 rpm is already considered a malfunction, which leads to increased fuel consumption. Reducing idle below 600 rpm causes the engine to stop working, which is even worse, since every stop of the car (and often even prolonged gear changes) leads to the engine stalling. The malfunction is also such a phenomenon as “floating” idle revolutions, when they sharply increase to 1600 and then decrease to 800 revolutions
In fuel-injected cars, the idle mode is provided by the ECU-IAC tandem. It is the on-board computer, guided by data received from sensors, that controls the process of supplying air to the combustion chamber. If there is a need to increase/decrease the engine power, it sends the appropriate command to the actuator, which accordingly changes the volume of air flow directed into the combustion chamber.
Ideally, this system is self-sufficient, but during operation problems arise that lead to malfunctions - as a result, the ECU receives unreliable information and controls the operation of the motor accordingly.
Note that on injection cars, the design of the injection system may vary, therefore the set of reasons leading to malfunctions of the power unit at XX may be different.
The reasons for the engine not operating correctly at idle may be caused by malfunctions in the following units:
- throttle valve;
- a system that ensures engine operation at “warm-up” speeds;
- idle channel;
- regulator XX.
At idle, the throttle valve is closed, the engine runs without its participation. But if the cable, which is the connecting link between the accelerator pedal and the remote control, is too tight, has creases, has soured, or there are other problems in this chain, the effect of pressing the gas pedal without the driver’s participation will occur. In other words, the engine will run at idle at higher speeds until the fault is corrected.
In modern cars, increased crankshaft rotation speeds at idle when the engine is not warmed up are provided by a special device that works in conjunction with a temperature sensor, determining whether the power unit is warmed up enough to lower its rotation speed by reducing the air supply. A malfunction in the operation of the temperature sensor itself, as well as the actuator of this system, will lead to the engine stalling in cold mode.
Engine temperature sensor
The idle channel is present on almost all injection cars. It represents an alternative route for delivering air to the compressor chamber and bypasses the main one, since during idle the throttle valve is closed. Its clogging is another reason for the reduction in the number of revolutions of the power unit at idle.
Finally, the cause of unstable operation of the motor without load may be a malfunction of the XX sensor. The principle of operation of the idle air regulator installed in the above-mentioned channel is to ensure a change in the gap between the combustion chamber and the intake valve through the translational movement of the rod. The latter, in turn, operates under the control of an on-board computer, which sends the appropriate commands to the regulator. Simply put, the tasks of the IAC are as follows:
- ensure a smooth transition to idle mode when releasing the accelerator pedal;
- increase in speed when starting a cold engine;
- increasing the air supply if the load on the engine has increased during the XX century (when turning on the car air conditioner, powerful media player, lighting devices, heated seats/mirrors).
A malfunction of the IAC also causes problems with the operation of the motor in this mode.
If we talk about carburetor power units, then things are even worse here, since no automation is provided here, and all adjustments are made directly on the carburetor itself. A special adjusting screw is responsible for this, the rotation of which allows you to increase/decrease the air supply, respectively, leaning or enriching the fuel-air mixture. A misaligned setting of this screw often causes unstable engine operation at idle.
The second common cause of such problems may be the air damper, which for a number of reasons may not open completely.
Finally, the flap of the first chamber can lead to floating speed of the SA at idle - its mechanical defect or an incorrectly configured drive will cause it to not close completely.
On carburetor cars, the reason for the increase/decrease in idle speed can also be a malfunction of the float movement mechanism, which leads to an increase/decrease in the fuel level in the float chamber with corresponding consequences.
In any case, deviations in the operation of the vehicle engine at idle should not be ignored, however, the procedure for adjusting the speed of the power unit varies greatly for injection and carburetor cars.
Conclusion.
If the engine is not running stable at idle speed, during surges, or if high speeds persist for a long time, you should first carry out diagnostics for air leaks.
So, the reasons characteristic for increasing injector idle speed are as follows:
- TPDZ;
- XX regulator;
- engine temperature sensor;
- the mechanism for opening and closing the throttle valve (gas pedal cable if the gas is mechanical);
- intake air intake.
Gasoline engines can be equipped with a carburetor or fuel injection system. In the case of a carburetor, it is well known that during operation this system requires periodic adjustment of the idle speed. As for the injector, such a power system operates under the control of the ECU, meaning that there is no need for additional configuration.
However, in practice the situation is somewhat different, since quite often it becomes necessary to adjust the idle speed on the injector. Problems manifest themselves in the form of unstable operation of the internal combustion engine at idle, the speed fluctuates, the engine may stall after starting, overuse fuel if the idle speed is too high, etc.
Next, we will talk about how to adjust engine idle speed on an injection and carburetor engine, and also consider the features and nuances of setting idle speed on engines with the specified fuel supply systems.
Read in this article
Adjusting XX on the carburetor
Owners of cars with a carburetor dosage of the air-fuel mixture have probably more than once encountered the need to perform the process of adjusting this device. Strictly speaking, there is nothing complicated in this procedure, and this is one of the few advantages of a carburetor over an injector.
Before you start adjusting the idle speed, prepare the minimum required set of tools (you will need a screwdriver and wrenches, the specific sizes of which depend on the type and model of the carburetor). The principle of adjustment is to set the number of idle revolutions at which stable operation of the power unit at minimum crankshaft speeds will be ensured.
Since the vast majority of carburetor cars operated in our country are AvtoVAZ products, it makes sense to consider the features of adjusting the idle speed on Solex carburetors - they are installed on these cars.
Having a tachometer will be of great help, with the help of which it is convenient to monitor the actual rotation speed of the HF, but not all models have this device installed as standard. In particular, on younger models, which are currently not produced, there is no tachometer (“penny” family -2101/21011/21013).
However, in this case there is a way out - connecting an external device to the on-board electrical network. In principle, many drivers do not look at the tachometer readings, guided by hearing and other external signs when determining the required crankshaft speed. However, it is possible to set the idle speed most accurately only on cars with a tachometer.
So, the procedure for adjusting the idle level on a carburetor engine is performed in the following sequence:
- we start the engine and let it warm up until it reaches operating temperature (in no case should you adjust the carburetor on a cold power unit);
- press the choke button all the way: when making adjustments, the correct position of the air damper is completely open;
- if the car is not equipped with a tachometer, turn off the engine and connect an external device (how to do this can be easily found on the Internet). Motorists who are knowledgeable in electrical engineering can use a multimeter instead of a tachometer. It is connected quite simply - with the negative terminal to ground, the positive terminal to the ignition coil (output “K”);
- we start the car engine again, turn on the headlights, and then the high beams, turn on all electrical appliances in the car (electric heating, if any, heater at maximum speed, etc.), after which we proceed to working with the carburetor;
- as we have already said, on a hot engine at idle, the normal HF rotation speed is in the range of 700-850 - these are the numbers that you should focus on (taking into account the fact that the power unit must operate steadily and not stall);
- To do this, use a flat-tip screwdriver to rotate the adjusting screw in one direction or another, achieving the specified number of revolutions.
In most cases this is sufficient, but sometimes the adjustment process requires additional steps. The reason is that by turning only the screw for the amount of air-fuel mixture, it is not always possible to achieve stable operation of the engine at minimum speed. Then you need to try to “play” with the mixture quality screw.
Checking the mass fuel flow sensor
To check this element, you need a digital voltmeter with a measurement limit of 2 V. The voltmeter is connected to the signal terminals of the mass air flow sensor when the ignition is on. In particular, on a VAZ these are terminals 1 and 3. The voltage value of a working element should be in the range of 0.99–1.01 V. A voltage of more than 1.05 V indicates its failure. In this case, interruptions in engine operation in all modes are possible.
The sensor in question cannot be repaired. If moisture gets on it when washing the sensitive element, it is guaranteed to disable it.
Adjusting the XX on the injector
On cars equipped with injection engines, the fuel supply system is considered more reliable, but there are problems here too. But they, as a rule, do not arise suddenly, progressing as the machine is used. The most common manifestations of malfunctions of this kind are delays in the response of the vehicle to a recessed accelerator pedal, jumping speed when operating in idle mode, loss of throttle response, increased fuel consumption, and the inability of the engine to operate normally in certain modes.
The bad thing is that such symptoms are typical for a large number of malfunctions relating to a wide variety of car components, so the easiest way to localize the cause of unstable operation of the power unit is to carry out computer diagnostics, which can eliminate most of the malfunctions - from inoperability of ECM sensors to contamination of injectors, from improper formation of the fuel mixture before air leaks.
If the diagnostics do not reveal faulty components and assemblies, it makes sense to configure the XX.
So, we provide an approximate algorithm of actions that explains how to adjust the idle speed on an injection engine.
We start by checking the functionality of the idle speed sensor (which would be more correctly called a regulator). This device is a combination of a miniature stepper motor with an actuator in the form of a rod with a cone-shaped tip. IAC adjustment is carried out as follows:
- disconnect the positive terminal of the battery;
- dismantle the IAC (as a rule, it is attached to the motor housing with two screws);
- We thoroughly clean the sensor mounting hole using a compressor;
- We disassemble the IAC, which will allow us to assess the condition of the guide rod. It may be deformed or worn. In this case, it is easier to change the sensor itself than to bother with its repair;
- It is also necessary to check the cone needle - it should not have visible signs of damage. If there are defects, the regulator must also be replaced;
- using a multimeter, check that there is no damage to the coil winding of the XX sensor. It may be necessary to clean the contact group;
- We assemble the device and install it in its original place, start the engine and check its operation in all modes, including, of course, idle.
In other words, there is no need to manually adjust anything - the on-board computer independently makes all the necessary adjustments after each disconnection of the positive terminal of the battery (or disconnection of the supply voltage from the IAC).
However, quite often poor engine performance at idle is not the cause of failure of the regulator itself, but rather malfunctions in the functioning of the software. By the way, many parameters that affect the operation of the engine life support system can be adjusted by software. This is done through the use of a special device - an autoscanner. Knowing how the idle speed control installed on an injection power unit works, you can independently change some of its characteristics by first diagnosing the car with a scanner connected to the computer using a standard OBD connector.
If diagnostics show that everything is fine with the regulator, the reason may be software incompatibility with a specific IAC model. If replacing the latter with the correct option does not solve the problem, you will have to flash the BC. This procedure is called chip tuning among specialists. In theory, if such a procedure is performed by professionals, it should not only solve the problem of unstable engine operation at idle, but also adapt the operation of the ECU to a specific car owner. It is not recommended to reflash the on-board computer yourself - this can lead to many new problems, and it is far from certain that the old ones will be fixed.
The best prices and conditions for the purchase of new cars
Diagnosis of IAC
Ideally, diagnostics of the regulator should be carried out on a stand that can reproduce the pulses of the on-board computer. In practice, this is expensive; low-cost verification methods are used. In any case, the algorithm of actions at the initial stage is the same:
- the handbrake is applied, anti-recoil devices - shoes - are installed under the wheels;
- disconnect the “-” terminal from the battery;
- knowing where the TPS and MAF sensors are located, the location of the IAC is determined;
- the valve is disconnected from the on-board computer (the plug is pulled out of the connector).
Valve removal
Further steps differ for different verification methods.
Manual check
The simplest method for checking IAC in an electronic intake distribution system is manual diagnostics (an assistant will be required):
- the IAC plug is disconnected from the connector;
- two screws are unscrewed and the device is dismantled;
- the regulator is reconnected to the ECU, but remains in the hands of the master;
- The assistant starts the engine, at this time the rod should be completely retracted into the coils, then, having received an impulse from the computer, extend a certain distance.
Manual IAC check
In other words, the functionality of the stem is checked, the owner makes sure that this part is not bent or jammed inside the valve. However, this does not provide a 100% guarantee that this IAC modification fully complies with the controller ECU firmware. The needle extends, but by an unknown amount. In the first case, the connector is checked, in the second - the plug; the markings are only on the plug.
In the classic version of checking “from simple to complex,” this stage is the initial stage; then you should check the integrity of the wires and coils, the condition of the bypass channel, and needle wear. Only after these steps can you assemble a homemade stand with a pulsed voltage supply for comprehensive diagnostics of IAC.
Diagnostics with a multimeter
At this stage, you will need an IAC tester, which is checked with this device in two modes:
- ohmmeter - when connecting contacts C – D and A – B with the multimeter probes, the resistance should have a value of 40 – 80 Ohms, D – C and A – D should be equal to infinity;
- with a voltmeter - when the ignition is turned on, the voltage reaches 12 - 20 V.
proverka-testerom
Attention: the IAC adjustment is performed automatically by the on-board computer after each connection of the device plug to the connector. After dismantling, it is recommended to lubricate the bypass channel with WD-40 spray to clean it. This measure is preventive, even in the absence of contamination of the bypass channel, in the gap of which the regulator is located.
Pulse testing on a homemade stand
Since the stand costs 1,500 - 1,800 rubles, and the regulator 300 - 500 rubles, purchasing the device is not economically profitable for the average user. A simple circuit without microchips is shown below:
- it uses 6 V charging from any mobile device;
- plug blocks are commercially available;
- First you need to disconnect the IAC from the on-board controller, then check the stroke of the rod;
- a bright glow of the lamp in the diagram indicates a malfunction of the rod itself;
- If the lamp burns at the incandescent level, the unit is considered to be in good condition.
Diagram of the device for checking IAC
Using a cleaning agent will restore the functionality of the rod, but only if it is clogged. If this part is bent, the entire regulator will need to be replaced.

