This article with video instructions tells how to replace the pump on a VAZ-2115 car with your own hands.
A water pump is a mechanism for circulating fluid in a car's cooling system. Failure of the pump (pump) to work can lead to a change in the temperature regime inside the motor and lead to more serious damage. To avoid this, it is recommended to carry out regular preventative checks and visual inspection of the engine in order to identify faults and timely replace the pump.
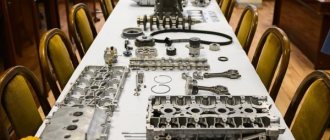
Water pump design
The design of the water pump in passenger cars is essentially the same, this especially applies to Russian car models. So there is no need to look for the location of the pump, knowing that it operates from the timing belt and is located next to the radiator.
Technically, the pump looks like this: a shaft with an impeller mounted on it is fixed in the cover, the rotation of which leads to the movement (circulation) of liquid in the engine cooling system. On the opposite side of the shaft there is a drive pulley. By means of a timing belt drive and a drive wheel (pulley), energy from engine rotation is supplied to the shaft. In turn, the shaft drives the impeller.
A seal (oil seal) is mounted in the space between the impeller and the housing, damage to which leads to problems with the water pump. Leakage of liquids (antifreeze, antifreeze) through a poor-quality (damaged) oil seal to the bearings causes the lubricant to be washed out, resulting in faster wear, leading to pump jamming, and subsequently to rupture of the timing belt and bending of the valves.
As a result, the entire engine cooling structure stops functioning, overheats and fails. This entails significant financial costs and labor-intensive, expensive work than a conventional water pump replacement.
Tools for replacing the pump on a VAZ:
- car keys for 10, 17 and 19;
- head number 10;
- flat screwdriver.
Pump malfunctions
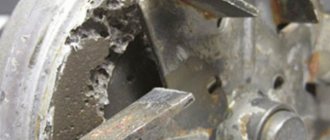
As a rule, the main breakdowns of a water pump include pump leakage, destruction of the impeller, wear and jamming of the drive shaft bearing. The most serious problem is a malfunction when the pump jams. In this case, there is a high probability of timing belt breakage and valve bending.
If the pump impeller is destroyed, the pump's performance drops and the engine begins to overheat. Often, destruction of the impeller occurs due to untimely replacement of antifreeze, severe contamination of the cooling system, natural wear, etc.
As for pump leaks, in this case the coolant level in the system may gradually or intensively decrease. If the seal is broken, and depending on the intensity of the leak, antifreeze can get onto the timing belt and damage the drive. Also, a decrease in coolant level can lead to overheating of the engine.
Detailed instructions for replacing the pump on a VAZ-2115
Replacing a water pump is a fairly simple operation, provided you follow the instructions properly and have the tools prepared in advance.
- The car is driven into a viewing hole. Before starting repairs, the engine is given one to two hours to cool down. The protection is removed from the crankcase, using keys 17-19, the protective casing is removed.
- The hood rises.
- Coolant (antifreeze, antifreeze) drains through the open valve located on the left side of the radiator.
- Unscrew the bolt on the cylinder block. Through the resulting hole we drain the coolant from the engine. It will be a little easier if you loosen the clamp on the radiator pipe and drain everything into a basin, and then add a new one, thereby completely replacing the fluid.
- Using a 10mm wrench, unscrew the three bolts that secure the outer casing of the timing belt. Using a 17 key, we tear off the bolt of the toothed pulley (the main thing here is not to lose the key, having set the marks in advance).
- Using the same wrench (17), unscrew the belt tensioner roller nut.
- Remove the belt tensioner.
- We move the belt on top of the standing toothed pulley and pump, moving it towards the radiator.
- We unscrew the bolt holding the toothed pulley and remove it (again paying attention to the safety of the key, it is better to remove it and put it aside). Using a small ratchet and a 10mm socket, unscrew the required number of bolts and nut holding the rear belt cover.
- We remove the protection.
- Use a flat screwdriver to carefully lift the pump and remove it.
- In the cylinder block we remove possible remnants of the old oil seal.
- We clean the future installation site of the new water pump. It is very important to thoroughly clean the area in the cylinder block, because if this is neglected, the pump will be installed unevenly (crooked) at the end of the work, which will lead to new leaks in the future. That is, all the work will go down the drain.
- We lubricate the new seal on both sides with a special automotive sealant and return it to the pump seat.
- We install the new pump in place so that the marking on it is on top.
- We install the parts obtained during disassembly in the reverse order.
Replacement
In principle, the work of repairing a pump is not difficult. To do this you will need a minimum number of tools:
- Keyset(10,17,19);
- Head for 10;
- Slotted screwdriver.
It is most convenient to carry out all manipulations in the inspection hole; you should also not carry out work on a hot engine.
The replacement process itself occurs as follows:
- Remove the crankcase protection. Otherwise, it will interfere with our further actions;
- Drain the antifreeze. To do this, open the valve on the radiator. Find the drain bolt on the engine and unscrew it. Sometimes it's easier. Simply unscrew the pipe clamp and drain the liquid through it;
- When using the “10” key, unscrew 3 bolts securing the timing case;
- We set the tags;
- When using the “17” key, the camshaft pulley mounting screw breaks off. To do this, jam the pulley with a screwdriver. Be careful not to lose the key;
- Unscrew the belt tensioner and remove it;
- The belt is removed from the upper pulley and from the pump;
- Remove the camshaft pulley. Usually it can be removed without problems; in extreme cases, you can lightly tap it on the back side with a hammer;
- Unscrew the protective cover and then remove it;
- The rear casing nuts also secure the pump. Therefore, to remove it, it is now enough to simply pry off the edge with a slotted screwdriver. Next, the pump is carefully removed;
- We clean what is left of the gasket from the cylinder block. The better you clean the pump landing area, the better. The slightest piece of the old gasket will lead to uneven installation of the new unit and fluid leakage;
- The new gasket is lubricated with sealant; this must be done on both sides. Carefully install it in place;
- Reinstall the pump. Pay attention to the inscription. It should be at the top;
- We install the removed parts.
After assembly, wait a couple of hours for the sealant to cure. Then start the car and drive on a flat road. Correct assembly will be indicated by the absence of extraneous sounds and the smell of antifreeze.
Conclusion
. The cooling system is extremely important for the proper operation of the engine. Therefore, in case of any malfunctions, the problem should be resolved as quickly as possible. Replacing the pump on VAZ 2114 and 2115 is the most frequently required work. In principle, this process should not cause any difficulties. Most importantly, do not forget to align the timing belt to the marks before replacing it. This will make assembly easier.
Results of the work carried out
After the work is completed and the time allotted for the sealant to harden, we start the car (VAZ-2115) and conduct a test drive a short distance, preferably on an uneven section of the road. If you don’t smell antifreeze in the car’s interior, and there are no extraneous noises or knocking coming from the engine, then the work to replace the cooling system pump has been carried out efficiently.
Thus, you have gained experience in replacing the water pump of your own car 2115 and saved about one thousand rubles, which would have been required when replacing it at a service station.
What is a pump for?
Using a liquid pump, forced circulation of antifreeze is ensured through the circuits of the cooling system. With the help of this simple mechanism, the elements of the piston group and cylinder head are cooled much better. The service life of the liquid pump on a VAZ-2115 car can be almost anything; it depends on many factors. The maximum service life can be just over 100,000 km.
The pump consists of a lightweight aluminum body and flange. In the inner part there is a bearing, which is mounted on the shaft. To prevent antifreeze from leaking out, a seal is installed in the housing. There is an impeller on the inside of the shaft, with its help antifreeze is pumped through the cooling system. On the outside there is a gear drive for the liquid pump.
How to install a pump on a VAZ 2113, 2114, 2115
VAZ 2114 and VAZ 2115 are considered a kind of “star” of AVTOVAZ in the early 2000s. These models are truly distinguished by their unpretentiousness and durability. Every owner who closely monitors his four-wheeled friend understands how important it is to provide timely care for the mechanisms. To maintain engine operation in normal mode, it is enough to change the oil on time and monitor the cooling system. However, if changing the oil usually does not present any difficulties for drivers, working with the cooling system and, in particular, with the pump can cause some difficulties.
Why does antifreeze leak out of the expansion tank? We solve the problem without a service station
Increased pressure or temperature in the cooling system and, as a result, knocks the antifreeze out of the expansion tank, and the car is covered in a cloud of steam. The situation is unfortunately familiar to many motorists. Regardless of the car brand, the principle of cooling the propulsion system is the same for everyone. Typical malfunctions are also similar. Antifreeze leaks from the expansion tank for many reasons, and most of them are directly related to the cooling system, but can also be caused by a violation of the vehicle’s operating conditions. Signs and consequences Signs of a malfunction in cooling equipment that manifests itself in the expansion tank: Both situations mean changes in the normal functioning of the system and primarily indicate a violation of the tightness state, which causes squeezing out of the coolant. Malfunctions and their causes The design of the expansion tank is simple. This is a plastic container in which a sensor is installed to detect changes in the nominal coolant level. The container is hermetically sealed with a lid with a pressure regulator valve, which is activated when the pressure in the system exceeds the standard one. Depressurization caused by the tank can only occur in two cases - either the tank material has cracked or the valve on the lid has failed and air begins to flow into the system .The problem can be much more serious if the breakdown occurred due to a burnt-out gasket under the cylinder head (cylinder head). It is not always possible to determine such a malfunction by eye, because burnout could pierce the gasket both outside and inside the cylinder head. Here we recommend reading our article - “Symptoms of a broken cylinder head gasket.” The next reason may be a malfunction of the pump, which caused the circulation processes in the system to stop, which also occurs when the circuit depressurizes and air locks form. A thermostat failure also leads to a change in the physical condition of the coolant, its temperature rises, and as a result, the pressure rises and knocks the coolant out through the check valve of the tank. To add to the problem, the antifreeze may also boil. Troubleshooting Troubleshooting must begin with an analysis of the characteristics of its manifestation. When the coolant in the distribution tank behaves normally at idle, and when the speed increases, it begins to rise and spill out, then we can speak with confidence about such causes of failure as:
- loss of tightness in the pressure relief valve;
- thermostat failure;
- pump breakdown;
- pipe rupture.
When the cylinder head gasket breaks, antifreeze will be knocked out even at idle, regardless of the engine operating mode. The easiest way to determine such a breakdown is to look at the smoke from the exhaust pipe. If smoke comes with white steam, you can be sure that antifreeze is seeping into the cylinder head. If liquid drips from the pipe, then the most advanced motorists taste it. If the water tastes sweet, then it is antifreeze; if it tastes bitter, it is antifreeze; the taste is neutral - ordinary condensation. The reasons for the situation when antifreeze is knocked out of the expansion tank may be a breakdown of any unit involved in engine cooling. If this is damage to the cover or the pressure relief valve built into it, then you can fix such a breakdown yourself by replacing the cover with a working one. Replacing the thermostat and pump in a garage can also be done, but will require special knowledge and skills. But replacing the cylinder head gasket definitely needs to be entrusted to a specialist.
Why do you need a pump in a car?
Speaking about engine operation, one cannot help but appreciate the functionality of the cooling system. After all, it is thanks to its high-quality work that it becomes possible to operate the engine in any weather and in any mode.
The engine is a very complex component of any car. Constant friction of the pistons leads to the fact that the engine parts quickly heat up, this can lead to their “jamming”. There is only one way to prevent engine overheating - by constantly maintaining the standard temperature. It is for this purpose that the cooling system was created in the machine.
Coolant is poured into the expansion tank (on VAZ 2114, VAZ 2115 cars, both antifreeze and antifreeze can be used with the same success). From the tank, the liquid flows through tubes into the water pump (its second name is a pump), and from there into the radiator and to the cylinder block. It is the circulation of liquids that ensures high-quality and timely cooling of the engine.
The standard product in a metal case is equipped with an impeller to create antifreeze pressure in the system
The water pump is set in motion after the power unit is started. On VAZ 2114, 2115 it is located in the timing system, that is, the pump impeller is driven by the timing belt. The impeller rotates the blades, due to which the antifreeze begins to circulate throughout the system. If there were no pump, then there would be no point in the entire cooling system.
The pump serves one single purpose - to create the necessary pressure in the system for uninterrupted circulation of antifreeze.
Troubleshooting
Since the water pump on the VAZ 2114/15 is completely covered by a plastic casing of the gas distribution mechanism, it is impossible to visually determine malfunctions. The main signs of problems with the water pump are as follows.
- While the engine is running, extraneous sounds (humming or grinding) can be heard from the timing belt, which can be produced by a faulty pump bearing. However, a similar hum may appear if the timing belt is tightened after replacement, as well as if the tension roller is heavily worn.
- Traces of antifreeze were found on the timing case, under the car after parking, or on the underbody.
- A sharp increase in engine temperature while driving is a consequence of the loss of most of the coolant. This can happen due to a breakdown of the radiator or the final failure of the pump.
As a result of bearing jamming, the gear and pump shaft become distorted, which can cause the timing belt to break.
- If the engine stalls while driving and the temperature sensor needle rises to the maximum, most likely the water pump shaft is jammed and problems appear in the gas distribution mechanism.
If the water pump seal leaks antifreeze, traces of it are visible on the cylinder block
To make a more accurate diagnosis, you should do the following.
- Using a 10mm wrench, unscrew the three fastening bolts and remove the protective plastic casing.
The three mounting bolts are unscrewed and the protective casing is removed.
- Using a nut, loosen the belt tension roller.
- Use your hands to check for play on the water pump shaft. If the gear is loose, the pump must be replaced.
- The presence of traces of antifreeze under the casing is most often a consequence of oil seal wear.
- Difficult shaft rotation indicates bearing wear.
Almost always, diagnosing the water pump is done when replacing the timing belt. According to the technical documentation for VAZ 2114/15 cars on 8V engines, the belt should be changed every 60 thousand km, on 16V engines - every 45 thousand km.
Replacing the pump on a VAZ 2114 (8 valves)
Replacing the water pump is a rare procedure that any car will need sooner or later. The design of the pump is a very simple device, which is why it breaks down infrequently. However, over time or due to aggressive driving style, any unit can fail.
How to check the pump
On VAZ 2114,2115 it is very easy to identify a faulty water pump. You do not need to have any special knowledge, since there are only three signs that you need to pay attention to.
Engine overheating
If even in the winter, when driving short distances, the fan cannot cope with cooling, then this sign may indicate that not everything is in order with the pump. If the gauge needle at the engine temperature is constantly above the operating mark of 90 degrees, then it’s time to carry out checking work:
- Start the engine and warm it up to operating temperature.
- Turn on the stove.
- If cold air immediately begins to flow from the stove, then the circulation in the cooling system does not work normally.
- It is necessary to replace the pump, as the malfunction is associated with damage to the impeller.
The appearance of fumes and heat from under the hood is a clear sign of severe engine overheating
Timing belt wears unevenly
When examining the hydraulic distribution mechanism of a VAZ 2114, VAZ 2115, you may notice uneven wear on the belt. Indeed, due to the fact that the pump is directly driven by the timing belt, it wears unevenly (for example, only on one side) - this symptom also indicates a breakdown of the water pump.
You will need to remove the belt to verify the reality of your guesses. Due to wear of the pump bearings, it can become loose and therefore quickly break. While the pump itself can still perform its function normally for some time.
Ideally, the timing belt should wear evenly on both sides
Pump leaking
If the water pump sits on the car for a very long time, then sooner or later the oil seal will wear out so much that it will begin to leak. An antifreeze leak in the timing belt under the pump is one of the signs of a pump malfunction. When a few drops are released per day, the situation cannot be considered critical: the pump generally copes with its job, providing high-quality cooling of the engine. However, if a large amount of antifreeze leaks from under the pump, you need to change the pump urgently.
Abundant leakage indicates a loss of sealing of the pump and its failure.
In some cases, leaks can occur both due to wear of the oil seal, and due to improper installation of the gasket when replacing the pump.
How to check the pump
The first signs that indicate the need to check the water pump include:
- extraneous noise when the pump rotates;
- engine overheating for no other apparent reason;
- decrease in coolant level and leakage in the pump area, the interior smells of antifreeze;
At the same time, you should not delay diagnostics, since ignoring individual symptoms can lead to more serious consequences (broken timing belt, critical overheating, etc.).
If a visual external inspection reveals no problems with the pump, then you will need:
- Start the engine and warm it up to operating temperature, then clamp the upper radiator hose with your hand. The circulation of fluid in the system will indicate that, at a minimum, the pump is working.
- You can also remove the timing belt cover and then inspect the oil seal. If there are no dark spots or drips, then the pump’s tightness is normal.
Please note that these testing methods are superficial and do not provide a complete guarantee that the pump is fully operational. For example, a pump 2115 or a pump 2114, as well as on any other car, can be completely dry and run quietly. In this case, bearing play in such a pump is still present, and the impeller inside can be partially destroyed. As a result, there is a risk of bearing jamming or rapid leakage through the seal.
It is also important to understand that a damaged impeller does not allow the pump to pump coolant normally, which leads to overheating. To exclude such hidden faults, for a detailed check the pump must be removed from the car, after which the shaft and bearing are checked for play, the condition of the oil seal, pulley, etc. is assessed.
For this reason, even if it is working properly, replacing the pump is recommended every 60-80 thousand km. mileage At the same time, experienced specialists recommend always changing the pump along with the timing belt (after 40-50 thousand km). It is also important to use high-quality spare parts from reputable manufacturers. Otherwise, the water pump may fail after 20-30 thousand km. mileage
In a situation where you need a high-quality VAZ 2114 pump, the price of such a spare part may seem somewhat overpriced. However, the cost of such a pump is completely justified, especially when you consider the cost of repairing the engine in the event of a broken timing belt. The main thing is to purchase an original product, since fakes of dubious quality are often found on the market.
Preparing the tools
Regardless of what specific problem arose on your car, the only solution to fix it is to replace the pump. This work on a VAZ 2114, VAZ 2115 can be done independently, since the convenient design of the machine makes it possible to carry out all stages of work without special skills.
First you will need to prepare a simple tool:
- wrenches 10, 17 and 19;
- socket head 10;
- flat screwdriver with a thin blade.
Without this tubular socket wrench it will be impossible to unscrew the hard-to-reach bolts on the pump mount
Purchase rules
When purchasing a spare part, visually inspect it, evaluate the condition of the metal and connections. Visually compare several options from different manufacturers for the quality of rotation of the blades and the clearly set angle on the side where the pump is attached to the engine block. Because an unevenly located pump will lead to belt wear. Below, we have selected the most popular models of water pumps, which are characterized by stable and long-lasting operation.
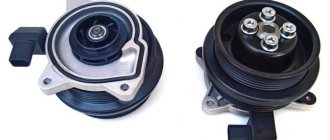
Choosing a pump (which is better for VAZ-2114)
- Gates.
- Luzar.
- TZA.
- HEPU.
Pump from TZA
Pump from Luzar
Pump from HEPU series R 620-625
pay attention to how to determine the originality of the product.
It is very difficult to definitively answer the question of which manufacturer or company is better, because a large number of devices have both negative and positive reviews. Therefore, you should make your choice from the most popular models among car enthusiasts.
How to change the pump
The procedure for working on a VAZ 2114, 2115 with an 8-valve engine is determined as follows:
- Remove the protective cover from the timing belt.
- Slightly loosen the tensioner roller.
- Slightly reduce the tension on the alternator belt, and then remove the alternator belt and timing belt.
- Disconnect all hoses from the pump (antifreeze may leak out, so it is recommended to place a container under the pump in advance or cover the area with a rag).
- Drain the antifreeze from the system (just unscrew the cap from the radiator so that the liquid flows out in 10 minutes).
- Disconnect the pump protective cover and pull out the pump.
- After dismantling, be sure to clean the flange surfaces from smudges and dirt, and also remove the remnants of the old rubber gasket.
- Next, you will need to perform all work on installing the new pump in reverse order.
It is necessary to change the rubber gasket even if it shows no signs of wear or damage. To ensure reliable sealing, it is recommended to coat both the pump mounting location and its junction with the cylinder block with a heat-resistant sealant.
It is recommended to ensure that the new and old pumps are completely identical.
What happens if the pump fails?
Pump wedge, resulting in timing belt break
Inspection of the pump must be carried out regularly, since the entire circulation of coolant in the system depends on its condition. It is brought into working condition mechanically, that is, with the help of a timing belt, which is also connected to the generator. Accordingly, if it breaks down, the movement of the coolant stops and the antifreeze begins to boil in the tank. Not only does the car engine overheat very quickly, but problems may also occur with the transmission of voltage to the system.
Checking the functionality of the water pump on the VAZ-2114
If you have doubts about the fact that the pump is faulty, and an external inspection for the presence of coolant leaks did not produce any results, you can do the following:
- Place your hand on the upper hose of the radiator while the vehicle is running.
- Next, squeeze it with a little force and try to feel the pulsation of the movement of the liquid.
- If this is the case, it means that the fluid is circulating and does not need to be replaced.
If during such a test you still do not feel anything and one of the signs described below is present, then this will be the most important reason to check and replace the pump.
How to change pipes on a pump
Replacing the pipe on the water pump is advisable in cases where the hose is swollen or has small cracks through which antifreeze leaks out. A significant disadvantage of changing the pipes is that they are located below the pump - that is, you will have to jack up the body and crawl underneath.
The old pipes are removed after the antifreeze has been drained and the pump itself has been dismantled. It is important to clean the landing site from dust, dirt and coolant leaks. Then connect new pipes to the new pump, installing a new gasket at the junction. It is recommended to use heat-resistant sealant to ensure reliable connections.
Before installing new pipes, it is necessary to drain the antifreeze from the cooling system.
Recommendations
Although the pump on a VAZ 2114 is relatively easy to change (by the way, the pump on a VAZ 2115, 2114 or 2113 is changed in the same way), it is important to thoroughly clean the pump seat when replacing. The fact is that installation on old sealant will lead to an insufficiently tight fit. As a result, water pump leaks occur immediately or a little later, which will require repeated removal of the pump.
It is imperative that after installing a new pump, you need to give the new sealant time to completely harden. Only after hardening can antifreeze be poured into the system. A common mistake is to install the pump and immediately pour fresh coolant into the system.
We also recommend reading the article on how to check the pump without removing it from the car. From this article you will learn about the available ways to check the pump on a car.
After the new pump has been installed and antifreeze has been poured into the system, you should start the engine and warm up the engine to operating temperatures. Next, you should inspect the pump installation site for stains and drips.
You also need to conduct a test drive after replacement, and it is better to drive on uneven roads at medium speed. If no knocks are heard, the engine temperature is normal, and during a subsequent visual inspection there are no leaks in the pump area, replacing the VAZ 2114 pump with your own hands can be considered correct and completed successfully.
How to install an additional pump on a VAZ 2114, 2115
Experienced VAZ owners know that the “fourteenth” and “fifteenth” are ideal for conducting a variety of experiments on installing this or that equipment. For example, if the standard heating on a VAZ 2114 through the stove is not enough for the owner, then you can install a second (additional pump). The essence of this procedure is that the pump will pump antifreeze in a small circle, thus providing better engine cooling and maintaining the temperature in the cabin in winter.
A second water pump keeps the cooling system running at peak efficiency.
Installing an additional pump takes a maximum of 10 minutes, but the procedure will increase slightly in time due to the fact that you will have to drain the antifreeze from the system.
You will need to purchase the following spare parts in advance:
- water pump (for models 2114 and 2115, the ideal solution is a pump manufactured by Bosch 0 392 020 034);
- elements of electrical equipment;
- several hoses of different lengths (depending on the diameter of the small circle) with clamps;
- fastening for the pump.
Assembling the structure
In this case, you will already need some experience in independently servicing a VAZ. So, to install an additional pump, you need to:
- Assemble this unit itself from three parts - a pump and two pipes (the shortest hose works for the outlet, the longer one for the suction of antifreeze).
- Next, drain the coolant from the system.
- Near the bottom of the car, feel for two hoses coming from the stove, remove the one that works for the outlet.
- Instead, connect the assembled unit.
- After this, attach the pump itself to the crankcase of the manual gearbox. It is better to use brackets and screws for this.
The final stage is pouring new antifreeze.
To mount the pump, you can use any type of fastener, the main thing is to ensure the reliability of the connection
Work stages and materials
In general, the entire repair can be divided into the following stages:
- Preparatory part. This can include preparing tools and places for repairs.
- Draining the coolant system.
- Dismantling an old device that has become unusable.
- Purchase and installation of a new coolant pump
To replace the pump on a VAZ-2115 with your own hands, you will need the following tools and materials:
- Socket and open-end wrenches.
- Sockets and ratchet.
- Jack, supports, wheel chocks.
- Cone-shaped pliers.
- Screwdriver.
- Capacity of at least 10 liters.
- Clean rags.
You will also need a sealant. But it must be used carefully, in small quantities.
Replacing the pump on a VAZ 2114, VAZ 2115 (16 valves)
The procedure for replacing the water pump on 8 and 16 valve engines will be slightly different. The fact is that on a VAZ 2114 with 8 valves there is only one crankshaft pulley, and on cars with a 16-valve engine there are two. That is, the designs of cars with different types of engines are somewhat different from each other.
In this regard, you need to be extremely careful: pumps for VAZ with 8 or 16 valves cannot be considered interchangeable. That is, when purchasing a new water pump, you should make sure that it is suitable specifically for your type of VAZ engine.
Water pump replacement procedure
First you will need to remove the plastic timing belt protection cover, but this is not as easy as on a VAZ with 8 valves:
- In order to remove the casing, you will need to remove the pulleys from both crankshafts.
- And you also need to disconnect two timing rollers - support and tension.
- It is impossible to remove the pump without dismantling the pulleys and rollers.
- You will also need to remove the right front wheel. It is recommended to use a jack to raise the body to the desired height. This is the only way to get to the bolted connections that secure the timing case to the engine.
Next, you can be guided by the diagram that is given for 8-valve engines.
The work of replacing the water pump on a VAZ 2114 and VAZ 2115 is not particularly difficult. The main thing is to carefully approach each stage of the procedure and work only with serviceable tools. Replacing a pump yourself is a job that does not require special training.
Diagnostics
Replacing the pump on VAZ 2114 and 2115 may be required in a variety of situations. At the same time, it is extremely important to promptly determine that the problem is in the pump. The first and main sign of problems with the pump is increased heating of the engine. When such a phenomenon occurs, a simple diagnosis can be made. To do this, start and warm up the engine. Then we touch the pipe that comes from the pump; if it is working properly, then you will feel the movement of liquid at your fingertips. Otherwise, you will have to change this unit.
In addition to this, there is another pump breakdown, which first warns of failure. This is bearing wear. At first, a howling or knocking sound will be heard when the pump operates. After a while the bearing will simply jam. To prevent this from happening, it is necessary to respond to such sounds in a timely manner. Everything is clear with the howling, just open the hood and it will become clear what is howling: the generator or the pump. Knocking is more difficult. People often confuse the knocking noise of the pump and the camshaft. You will probably be able to determine the cause of the knocking only by removing the pump.
It is recommended to regularly inspect the pump for leaks. If there are visible leaks of coolant, the gasket under the pump, as well as that located between the halves of its body, should be replaced.
Why do you need a pump in a car?
The pump promotes the movement of fluid (antifreeze or antifreeze) in the cooling system. There is a shaft inside the mechanism. An impeller is attached there, and when it rotates, circulation occurs.
On the opposite side, a pulley is attached to the shaft. The system is activated by the rotation of the part in the gas distribution mechanism (GRM). When the pump becomes unusable (most often jams), the car engine may overheat. In case of some breakdowns, antifreeze begins to leak from the device.
In cars, a centrifugal type water pump is most often used. This option is characterized by its simplicity of design and durability.
Which pump to choose?
Before you change the pump on a VAZ 2114 with your own hands, you need to start looking for a new spare part. It's better to opt for the original. Most car enthusiasts advise installing it, since the concept of price and quality of the product is superior to its competitors.
The part can be found by article number: 21114-1307010-82 . When purchasing, look carefully to see if it is printed on the box, since there are Chinese analogues on the market made to resemble the original. The cost of a high-quality element is about 1,200 rubles, and analogues of poor quality are much cheaper.
Another brand that can be recommended for purchase is Marel . The company produces spare parts not only for domestic cars, but also for foreign cars. At the same time, it has positive reviews from many car owners. The price of the part is about 1300 rubles . You can also focus on one of the most reliable but expensive brands - Valeo . The mechanism runs 50% more than domestic ones, but has prices of about 3,000 rubles . Another disadvantage will be the large number of Chinese fakes.
How to determine pump wear
Experienced motorists will easily notice wear and tear on the water pump. It is difficult for beginners to identify a faulty part. Signs of wear are described below.
Engine overheating
When the engine temperature on the dashboard is above 90 degrees, the pump is faulty, especially if overheating occurs in winter.
This symptom, accompanied by a light on the dashboard, indicates a faulty part. Antifreeze boils and steam comes out of the radiator. The car cannot be driven.
To verify the source of the malfunction, you must:
- Warm up the engine to 90 degrees.
- Set the stove control panel to hot air and turn it on.
If the pump is working properly, heat should flow. If cold air comes out at the operating temperature of the engine, this is a sign of a broken impeller. The pump needs to be replaced.
Uneven timing belt wear
The mechanism is started by the timing belt. If there is a problem, the neoprene product may wear unevenly. You can verify this by removing the belt and inspecting the product. On one side there will be more wear.
The problem is related to the exhaustion of the life of the pump bearings. The part itself may still work properly.
Uneven wear may be due to a bent fastener. You can check for misalignment by holding a ruler or other flat object to the belt.
Leakage
The most common pump problem faced by VAZ 2114 owners is a leak. It can come from under the oil seal, impeller or housing. Liquid will be observed on the device body, mounts or engine protection.
If you notice drops that accumulate for a long time, the problem is not critical and does not need to be fixed urgently. If there is a lot of fluid, intervention is necessary.
Sometimes antifreeze leaks after replacing the pump. This means the gasket is installed incorrectly.
Another indicator of a pump malfunction is the smell of antifreeze in the cabin. It may also indicate other faults.
Attention! The listed signs indicate not only a pump malfunction, but also a malfunction of the cooling system, which is recommended to be checked.
The water pump is a non-repairable part of a car. If it breaks, only replacement will help.
Pump selection
Repairing the cooling pump on a VAZ 2114-15 does not make much sense. Its design does not involve replacement of parts. Of course you can change the bearing. But it will probably have to be repaired again soon. Therefore, the easiest way is to purchase a new part, install it, and forget about it for a long time. Fortunately, the cost of spare parts is low. It can range from 600 to 1000 rubles. Moreover, cost is not always an indicator.
Try to purchase parts only from trusted stores. When purchasing, always check the completeness and presence of holograms.
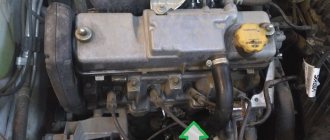
Dismantling
Before starting work, you need to understand where the part is located. The water pump is located on the left side of the engine compartment, under the camshaft pulley, so when it jams, the timing belt flies off.
The removal process is simple; the engine must cool down before doing this.
In a vehicle with an 8-valve engine, the following actions are required:
- Disconnect the terminal from the battery.
Disconnecting the terminal from the battery
- Remove the timing case (held on by 3 bolts).
Removing the timing case
- Place a mark on the camshaft so that it aligns with the mark on the engine. You need to jack up the car and slowly turn the right front wheel, having previously installed 4th gear.
- Move the timing belt. The product needs to be loosened; the tension roller will need to be removed.
- Unscrew the ignition module mounting bolts without disconnecting the contacts. This is necessary to get to the antifreeze or antifreeze drain plug.
- Prepare a container where the liquid will flow and a hose.
- Unscrew the plug with a key set to “13”. Place the hose, which should be directed into the container.
- When the pressure becomes weak, the lid can be screwed back on. There is no point in draining all the liquid; to make the process easier, you can leave a little.
- Then remove the container.
- Remove the thin pipe. The part is connected to the throttle valve heating unit.
- Remove all heating pipes.
- Wedge the camshaft gear teeth with a screwdriver and unscrew the fastening bolt.
- Remove the pulley.
Pulley removal
- Remove the metal casing (secured with 5 bolts).
- Unscrew the pump. Using a wooden block, tap the device body and dismantle it.
- Clean the sealant from the seating area.
Attention! During the replacement process, it is recommended to check the timing belt and pulley. If the condition of the parts is poor, they must be replaced along with the pump.
Before installing a new pump, you need to check the old one for play. Check the tightness of the oil seal. If there is no play or leaks, the old pump can be reinstalled.
Installation of the Grants thermostat on VAZ 2110, 2112
| It is no secret that the production of VAZ cars of the tenth family in Russia has already been completed. However, nothing prevents owners from improving their cars by replacing outdated parts with more modern ones, from foreign cars or VAZs of the latest years of production. An example of this would be replacing a VAZ 2110 thermostat with a Lada Granta thermostat. |
Will need to buy
- Thermostat Lada Granta (catalog number: 21900-1306010-00), price 640 rub.
- Gasket for the thermostat (same as standard), price 8 rubles.
- Lower radiator pipe for Lada Granta (1 self-tightening clamp included), price 440 rub.
- M8 studs, approximately 85mm long, price 20r.
- Washer for temperature sensor.
- ABRO sealant, clamps.
- Antifreeze.
Replacing the thermostat
- Remove the hoses by unscrewing the clamps (don’t forget about the throttle assembly).
- Unscrew the thermostat mounting bolts (see replacing the thermostat).
- Remove the studs and lower pipe.
- Install a new pipe and tighten the clamp.
- Plug the hose coming from the throttle valve using an M10 bolt and tighten it with a clamp.
- Screw in new thermostat studs.
- Secure the Granta thermostat.
- Connect the hoses. Cut the hose from the stove in place (by about 5 cm). Reinstall the temperature sensor.
Conclusion
- faster engine warm-up, especially while driving.
- the cabin became noticeably warmer
- more stable temperature conditions in different operating modes (during traffic jams, using the stove, in winter on the highway and in the city).
xn--2111-43da1a8c.xn--p1ai
Replacing the pump on VAZ 2113, 2114, 2115
When replacing a new part, a high-temperature sealant must be applied to the flange and the gasket that must be installed in the socket.
A new pump for a VAZ 2115 car is mounted as follows:
- Screw the bolts and tighten them onto the pump flange.
- Install a metal casing. Tighten the fastening bolts.
- Install the camshaft pulley. Tighten the bolt.
Installing the camshaft pulley
- Install the tension roller and timing belt.
Installing the tension roller and timing belt.
- Use pliers to adjust the tension level of the product, which should not turn sideways by more than 90 degrees.
- Install the protective cover of the timing mechanism made of plastic.
- Fill with coolant until it begins to flow out of the removed throttle body pipe.
- Install the pipe, tighten the fastener.
- Fill with antifreeze or antifreeze to the required volume.
After replacing it yourself, you need to start the engine and warm it up. Then it will be clear whether the pump is working properly or not.
Since 2011, some modifications of the VAZ-2113 and 2114 have had 16-valve engines installed. The pump changes on them in the same way, but there are some differences:
- It is necessary to remove two camshaft gears.
- The support roller needs to be removed.
- To get the protective cover, you need to remove the wheel.
The 16-valve modification of the “fourteenth” model is demanding in terms of correct marking.
Attention! Water pumps for engines injector 8 and 16 valves are different.
Replacing the thermostat on Priora 2170. How to do it
- 1. Insert the key and start the engine;
- 2. Next, wait for the car engine to warm up to operating condition 80-90°C;
- 3. And lastly, we touch the lower radiator fitting, it is necessary that it remains completely cold. This can be explained by the fact that the thermostat damper is located in the shutter position, and therefore the antifreeze does not circulate through the pipe. Accordingly, this allows the engine to instantly warm up; the liquid circulates continuously and almost instantly increases the temperature of the engine. After the antifreeze heats up to 90-100°C, the damper slowly opens and liquid begins to circulate. After the damper is open and the antifreeze (antifreeze) has flowed in a large circle, the pipe located below gradually heats up, or rather becomes warm. If you find that your tube has heated up at a temperature of 75-85°C, the thermostat needs to be replaced. But there are exceptions - for example, a hot pipe may be due to a malfunction of the water pump, so you can check that too.
- 1. Initially, you need to pour out the antifreeze. This is possible by opening the cap on the radiator;
- 2. Use a pentagon to loosen the clamps; they are attached from the water pipes to the thermostat, then pull them out;
- 3. Using a Phillips screwdriver, unscrew the bolts that secure the thermostat and pull it out;
- 4. Unscrew the mounting bolts and remove the cap from the thermostat;
- 5. Next, pull out the rubber ring (gasket) and look for cracks (worn); if necessary, replace the ring;
- 6. Pull out the mod, using pliers, lightly squeeze and rotate the spring, pushing the plate out of the hook with the grooves.
- 7. Before installing a new mod, check its functionality. This is possible at home. To check, you need to pour water into a pan and dip the thermostat into it. When the water is heated to a temperature of 92°C, the thermostat rod will begin to move; if the water boils and the rod remains motionless, the sensitive element must be replaced immediately;
- 8. To assemble the thermostat, repeat all steps in order from seventh to first. Fill the engine expansion tank by pouring antifreeze into the cooling system until fluid begins to flow from the hose pulled out of the throttle body. After that, insert the hose into its place and put on the clamp;
- 9. Pour antifreeze until the liquid level reaches the “maximum” mark, which is marked on the wall of the expansion tank (after starting the engine, the antifreeze will squeeze out the remaining air and the level in the tank will decrease slightly). Screw on the tank cap. To avoid air accumulation in the system, when pouring liquid, squeeze the hose with your hand;
- 10. Start the engine and leave it to warm up, that is, until the fan turns on. As a result, turn off the engine and check the antifreeze level. The liquid should remain at the level between the “minimum” and “maximum” prints. While the engine is running, monitor the antifreeze temperature sensor. A week after the repair, look under the hood and check its level. As the liquid in the tank decreases, add antifreeze.
AutoFlit.ru
Replacing pipes
When replacing the pump, pay attention to the condition of the pipes. If there are cracks or damage resulting in coolant leakage, the product must be replaced. It is recommended to do this when the pump is removed; there is no need to drain the antifreeze a second time.
The main disadvantage of the replacement is that the hoses are located low; to get there, you need to lift the car.
Replacement process:
- Drain the coolant.
- Remove the water pump.
- Clean the seats.
- When installing at a joint, install a new gasket using high-temperature sealant.
Requirements for the VAZ-2115 pump
When buying a pump for the VAZ-2115, follow the selection rules:
Move the pulley slightly along the body - there should be no active movement of the shaft in a quality part. Movement relative to the axis is allowed, but it is difficult to feel such rotation with your hands. Holding the device in your hands, twist it by taking the pulley. The component should rotate smoothly, without jerking, and no special effort is required
No jamming is a good sign that the water pump is working. Look from the side - perhaps the bearing is locking, your task is to select a pump with minimal indicators of the punch hitting the screw part. Pay attention to the design features of the domestically produced oil seal. To do this, evaluate the appearance from the pulley to the shaft: if it is empty, it is better to put the unit aside; a dark dot is visible - feel free to take it; there is a marking “M 9” or “M 5”, do not refuse such a device.
Replacing the water pump (Pump) on VAZ 2113, VAZ 2114, VAZ 2115
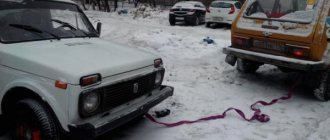
Welcome! Water pump - popularly called simply a pump, it is responsible for circulating liquid throughout the entire cooling system, and if this pump fails, the liquid will stop circulating or will circulate, but will do so very slowly and reluctantly, therefore the car’s engine will begin to quickly heat up and will no longer maintain an operating temperature of 90°C, but will constantly overheat, which will have a very bad effect on it, in addition, the pump may also jam when the car is moving or even when it is standing still but with the engine running, the pump jamming is very scary, for 8 valve cars it’s not, but for 16 valve cars it’s really very scary, because when the pump jams (no matter how many valves your engine has), the timing belt either breaks or simply flies off, and if it breaks, it can bend the valves, damage the pistons, scratch the cylinder walls, etc., but for 8 valve cars this is not scary (Not for all 8 valve cars this is not scary, because there are also models on which the valves oppression when the belt breaks, for example on the 21081 engine which was installed on the entire Samara family), on them the belt will either fly off or it will break (Then until you replace the pump, you will not be able to drive the car and on top of all this, a new belt you will have to buy it, so just in case, take the pump with you and a new belt, otherwise you never know what will happen on the road, and if you are still far from home, then for any reason you will need to change the pump or drag the car to a service center or to the house for tug).
Note! To carry out the procedure for replacing this item, you will need to take the following set of tools, namely: A set of all kinds of keys, screwdrivers, a rag, an extension cord with socket heads, a wrench, and for small things you can stock up on a bucket, for example (Small), in which you will put all the screws and nuts, otherwise when performing work, small nuts sometimes get lost and therefore we recommend that you put them all in one place!
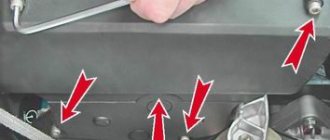
Where is the water pump (Pump) located? On cars of the classic family, the pump is located next to the generator and when it fails (When it gets jammed, for example), the generator belt breaks and no current flows to the battery, and also because the pump is jammed, the liquid does not circulate through the cooling system and in connection with this, the car begins to get very hot, but as for front-wheel drive cars, in fact it doesn’t even matter what kind of car it is, VAZ 2110 or VAZ 2114, on all of them the pump is located in the same place (Indicated in the photo below with a red arrow , the camshaft pulley is indicated in blue for clarity) and it is no longer driven by the generator belt, but by the timing belt, and if suddenly the pump jams, then the first thing the belt either breaks or flies off, the entire car is immobilized (the engine in this case will work at idle), but with regards to classic cars (We are just disassembling them as an example), then with a jammed pump and an immobilized generator on the car, it will be possible to continue driving, it’s just that soon either the battery will run out or the car will boil.
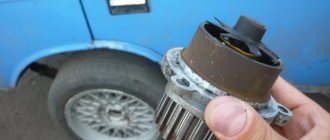
When do you need to change the water pump (Pump)? Over time, it begins to make noise, and so much noise that you yourself will immediately hear and understand that something is wrong with the engine, but the pump does not always make a lot of noise, sometimes it can even work quietly and at one moment jam, but this is not always the case, in general the pump jams only in the case when the lubricant from the bearings that are located inside the pump is all gone, in addition to noise, there are also several signs that the pump needs to be replaced, for example, if you grab it with your hands and shake it, then it may have play that shouldn’t exist (This is the kind of play that appears from time to time, and with it the pump becomes much louder) or another sign, if you see that liquid is leaking through the pump (This means the pump seal no longer holds), then this is a clear sign that it needs in replacement and if you put off this replacement, then soon all the liquid will pour out of the system or you will simply have to add it very often, we would like to introduce you to one interesting video that clearly shows how the pump has become unusable and is noisy due to this, By the way, if you hold it with your hand (this is even in the video), you can feel a backlash, which, as we said earlier, should absolutely not be there.
Note! You can also remove the pump and check it in full detail, but it’s up to you to decide whether to do this or not, because removing the pump from the car takes a lot of time (If this is not the first time you’ve done the job, then you’ll get it done quickly), and the coolant will have to be drained, and therefore if you are still not sure about the pump and decide to remove it, then immediately replace it with a new one so as not to remove it again in the near future, but although if it is in normal condition, then you can install it back ( We’ll also tell you how to troubleshoot a pump in the article; we’ll tell you right away what the word troubleshooting means if you don’t already know, and this means a kind of check, looking for defective parts in certain systems)!
Signs of breakdown
There are several main signs of a pump malfunction that you can easily check with your own hands. We invite you to familiarize yourself with them in the corresponding table.
| Malfunction | Verification method |
| Engine overheats | To check, turn on the stove. If the air enters cold, then coolant does not circulate in the system. The pump needs replacing. Most often, failure is associated with a violation of the integrity of the impeller. |
| Timing belt wears unevenly | The belt becomes loose due to wear of the bushings and bearings. To check the water pump, you will have to dismantle it and examine its current condition. |
| Coolant leaks | This problem occurs when the water pump operates for a long time. The gasket may be worn out or it was simply installed incorrectly during a previous repair. |
Regardless of what kind of problem you have to face, the only correct solution is to replace the water pump. It’s quite possible to do this kind of work with your own hands. To do this, you will need a little time, tools and a new high-quality pump that is suitable specifically for your VAZ 2114.
Coolant leak
One of the most obvious signs of pump failure is a coolant leak. The problem is quite easy to detect: antifreeze can leak from under the seals, from the pump housing or its impeller. Antifreeze will be visible on the pump. In addition, the liquid may even begin to flow to the ground after it has filled the entire space under the hood. If, after stopping the car, you begin to smell antifreeze outside or in the cabin, this is the first signal to check the serviceability of the water pump.
How to diagnose
Before you begin troubleshooting, you must remove the plastic cover that covers the gas distribution mechanism. But you can recognize some signs that indicate problems with the pump:
- Extraneous sounds when the engine is running. Usually they indicate that the pump bearing has become unusable. But you need to make sure that the source of the sound is the pump. Since if there is excessive wear, the tension roller can also signal a breakdown in a similar way.
- During long-term parking, traces of coolant appear on the timing belt side.
- In the case when the engine temperature rises sharply while driving, we can say that there is a shortage of fluid inside the system. This can occur due to a malfunction of the radiator, pipes, or liquid pump.
- One of the most popular faults is drive pulley misalignment. In this case, the timing belt begins to run against the outer edge of the tension roller. A small groove will appear on the outside of the belt. In this case, it is necessary to replace the VAZ-2115 8 valve pump (injector) as quickly as possible.
How to remove a fluid pump
To dismantle you will have to perform the following steps:
- Remove the bolts that secure the timing case. Remove this cover.
- On the camshaft gear, you need to align the mark with the protrusion, which is located on the left side of the engine housing. To do this, you need to use a jack to raise the right side of the car, then, with fifth speed engaged, rotate the wheel to align the marks.
- Be sure to align the marks before removing the drive belt. This will make further assembly easier.
- Using a key set to “17” you need to unscrew the nut that secures the tension roller. After this, you need to remove the belt and put it aside. The roller also needs to be dismantled. If you do not plan to replace the timing belt, there is no need to remove the crankshaft pulley.
- After this, you need to disconnect the negative terminal of the battery.
- Now remove the ignition module; there is no need to disconnect the wires.
- Unscrew the bolt that is located in the engine cooling jacket. Drain the liquid. Be sure to unscrew the cap of the expansion tank; without this, the liquid will not pour out.
- Next, you need to completely remove the metal casing. To do this, unscrew the 5 bolts securing it.
- The pump is secured to the engine block with three bolts. They must be unscrewed using a key to “10”. It is first necessary to tap the housing to facilitate dismantling the unit.
The pump seat on the engine must be thoroughly cleaned so that there are no traces of sealant or old gasket left there. It is advisable to replace the timing belt and pump on the VAZ-2115 at the same time. This will make repairs easier.