Contents of delivery
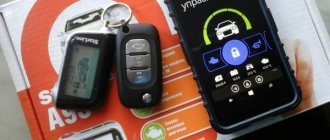
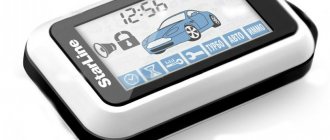
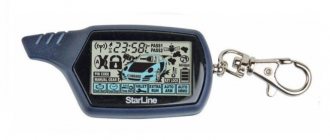
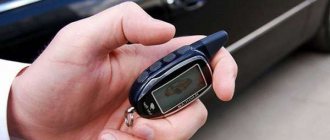
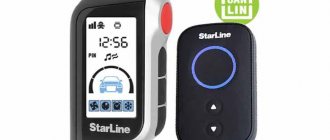
StarLine alarms, with the exception of those with the ECO prefix, come with two key fobs: the main one with an LCD display and an additional one, which has three keys. Moreover, unlike most alarms, the additional one works with feedback, which is due to the very essence of the dialogue protocol: when an alarm is triggered, the alarm first transmits information to the main key fob, and not finding it, communicates with the additional one, and it sounds an alarm sound.
The batteries in them are different: the most energy-intensive and frequently used main key fob uses a standard “pinky” AAA battery, which lasts for a month. This is due to the fact that the alarm regularly tries to communicate with the key fob, even if nothing happens - and these regular reception and transmission sessions reduce the battery life. Therefore, when purchasing a StarLine alarm, buy a pair of nickel batteries with a charger: these costs will be recouped by not having to regularly buy batteries.
If desired, the owner buys additional key fobs (the second main one if other family members use the car). The alarm memory has space for four key fobs of any type. At the same time, you need to understand that when you start the process of recording key fob codes, the previously registered ones will be erased, that is, it is impossible to “add” another one - the entire set is registered at once.
Registration of key fobs, BLE tags and smartphones
To register new key fobs, BLE tag key fobs and smartphones, use the “Device registration” mode. To prevent unauthorized addition of new components, switching to the device registration mode is carried out only from the “Disarmed” mode. If the “Trip Prohibition” function or the “Dangerous Parking” mode is activated, then before starting device registration, enter the owner’s authorization code to completely disarm the complex. BLE tag fobs and smartphones must be registered in one cycle. When registering new BLE tags and smartphones, all previous BLE tags and smartphones will be deleted from memory. They need to be registered again. In total, up to 5 devices can be registered in the complex. When registering new primary and additional key fobs, all previous key fobs will be deleted from memory. They need to be registered again. In total, up to 4 key fobs can be registered in the complex.
Entering device registration mode
All device registration steps must be completed without long pauses between them.
- Disarm the complex.
- Turn off the ignition (if it was on).
- Press the service button 7 times.
- Turn on the ignition. There will be 7 LED signals on the service button and 7 siren signals.
- Entry into registration mode will be confirmed by 2 LED signals and a siren.
Registration of main and additional key fobs
- Briefly press buttons 1 and 2 of the key fob.
- After 3 seconds, successful registration will be confirmed by a short beep from the key fob, 2 LED signals and a siren. If the key fob is not registered, then 4 beeps from the key fob will follow.
- Follow steps 1, 2 for each key fob.
This is interesting: How to set the warm-up time on the Tomahawk
How to register?
To do this you need to prepare all the key rings:
- After disarming the car, with the ignition off, quickly press the Valet service button seven times.
- Turn on the ignition - the alarm emits seven signals, confirming that it has entered the code programming mode.
- Quickly press buttons 1 and 2 on the first key fob of the set at the same time.
- The car and the key fob will give a single signal.
- With a pause of no more than five seconds, perform the same operation with the second and so on.
- Turn off the ignition.
- The car gives three light signals, confirming the end of the procedure.
A common mistake is the delay between registering two key fobs for more than five seconds, so they must be at hand.
8. Locking and unlocking key fob buttons
While the key fob is in your pocket or bag, its buttons can be blocked to prevent accidental pressing. To do this, press keys 2 and 4 together. If everything is done correctly, the “BLOCK” indication will appear on the screen. To unlock the Starline A92 key fob, you also need to simultaneously press two buttons, but already 1 and 4.
Key fob repair
Although the company uses impact-resistant plastic, the need to replace the case or glass of the key fob may arise. It is difficult to find individual original parts - the manufacturer itself sells complete keychains, but you can find them on Aliexpress if you wish. And taking into account the fact that the Chinese have long and fruitfully collected clones of StarLine alarm systems (for some time now they have been officially sold in Russia under the Red Scorpio brand, and even the printing of instructions and booklets is the same (!)), and outright fakes, spare parts for key fobs StarLine is represented in abundance on Asian trading platforms.
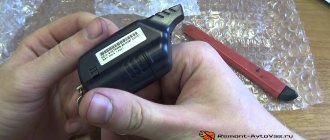
To disassemble the main key fob, remove the battery by sliding the battery compartment latch, then remove the small Phillips head screw. In addition, the halves of the case are held in place by latches: carefully prying the back cover off from the side of the ring (it’s convenient to use a guitar pick, a thin metal plate), remove the cover from a pair of latches, and then continue to unclip them around the perimeter.
After this, we remove the internals - the main board, the transceiver board and the display. At the same time, it is worth noting the quality of soldering of microbuttons - if in cheap alarm systems they are soldered by the body to the board at two points, then in StarLine they are soldered at four points, so they are less likely to be pressed through, coming off the board.
But you won’t be able to simply replace the display on this key fob - the cable is fixed to the board, and without experience with such installation, success in replacement is very doubtful. It is better to replace a broken screen in a workshop - there are many similar offers on the market. A faulty key fob often causes the alarm to not open the car doors.
3. Symbols and icons
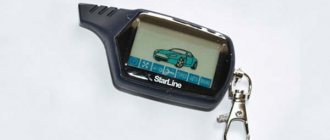
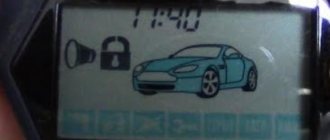
The convenience of the main Starline A92 key fob lies primarily in the presence of a liquid crystal display. It displays the current state of the alarm and the car, i.e. the car owner can see which modes and functions are activated, which sensors are triggered, etc.
You can check the time at any time and also check the engine temperature.
To understand and quickly determine the alarm status, you need to know what each icon means. They are divided into two categories: the first is an indication of modes and functions, the second is an indication of the alarm and vehicle status.
Flip key fob
Many owners don't like to carry a heavy key fob on their key ring. It is generally not recommended to do this, since it significantly reduces the security of the car: having stolen or taken away the keys, the thief immediately gets the opportunity not to look for the alarm in the cabin, but simply turn it off or switch it to service mode. But recently there has been a fashion for embedding key fobs into a car key - on the Internet you will find offers for the sale of flip keys for various alarm systems, including for StarLine A93.
From the point of view of car security, this is more stupid than wearing a key fob on a chain. You should resort to this solution only if you are fully using the alarm capabilities - two-stage validation must be configured (entering a secret code using the car’s standard keys).
To convert the alarm key fob into a flip key, you will also need to disassemble the body of the car's standard key - you will have to remove the standard immobilizer chip from it so that the car can be started normally with a new key. We also disassemble the alarm key fob as described above.
First we replace the glass from the alarm key fob into the new key fob if the purchased key has just a slot instead. We carefully separate the glass from the panel using a thin knife. After this we rearrange the discharge blade. Next, we insert the boards removed from the key fob into the case and check whether the microbuttons on the board match the rubber buttons in the key. We find a free space for the immobilizer chip - it is desirable that it be as close as possible to the very tip of the key and be oriented in the same way as in the standard one. To secure the chip we use a glue gun. All that remains is to close the cover of the key fob, insert the battery, and check the operation of the buttons.
Checking the serviceability of the key fob
If the key fob fails, you need to find out which device is faulty. The alarm may not turn off or turn on either due to a breakdown of the remote control or failure of components located on the car. To check the functions of the communicator, you can use a spare device. If the system operates from signals from an additional device, the key fob is damaged. When the “signaling” does not communicate with additional remote controls, the problem lies in the main unit of the system or the transceiver module.
To check the key fob, you can do the following:
- Visually inspect the device for cracks.
- Remove the battery and replace it with a new one.
- Before installing the element, check the condition of the contacts in the key fob. If there is a coating of rust, oxides or electrolyte from the battery on the surface, you will need to disassemble the remote control and clean the elements. After this, you can install a fresh battery and check the operation of the device.
- If the remote control does not work, then the reason should be sought in damaged elements on the printed circuit board. During operation, contact tracks may come off, buttons may fall through (a common problem with Starline remote controls), and elements may burn out. The key fob will have to be sent to a workshop for repair or purchased a new one.
The author of the video, Dmitry DOBRY, registers key fobs for Starline systems and explains his actions.
How to set up a key fob - basic functions
In terms of the set of functions, both the main and additional StarLine A93 key fobs are similar, except for the fact that all combinations with the “4” button on the additional one are impossible due to its physical absence. A number of functions are activated by different combinations of buttons on different types of key fobs.
There are three types of button presses used for control - short, long and double. A long press is carried out until a signal is given, in other cases it lasts about a second. A double tap is two short presses of a button within a period of no more than a second. If the combination involves sequential pressing of different buttons, then the first of them is long (until the sound signal), the second is short.
Something else useful for you:
Basic settings of the Starline key fob:
- arming: short press button 1;
- disarming: short press button 2.
In both cases, the car gives light and sound signals; in case of an alarming event, a siren sounds in security mode.
If we put the car on security, but it should not give signals (for example, at night under the neighbors’ windows), then use other combinations:
- Setting: sequentially (see above) press 1 and 1 on the main key fob or double press 1 on the additional one.
- Removal: press 2 and 2 sequentially on the main key fob or press 2 twice on the additional one.
Video:StarLine A63, A93 basic control functions
In this case, however, when an alarm is triggered in security mode, light and sound signals are still given. You can arm the car in reduced volume mode only from the main key fob by sequentially pressing buttons 1 and 2. How to turn off loud alarm sounds without disarming the car? This is done the same way on both key fobs - briefly press button 2. The main thing is not to accidentally press it a second time, as this will disarm the car!
It is worth remembering one more combination that controls the anti-robbery mode - this mode is useful only if you do not wear the key fob on the same ring as the car keys. When the anti-robbery mode is activated, the alarm will begin to activate interlocking circuits at random but decreasing intervals, preventing the robber from getting far. On the main key fob, “anti-robbery” is activated by pressing 1 and 3 for a long time until a sound signal is heard, on the additional one - in the same way, but buttons 1 and 2 are used. The anti-robbery mode can only be turned off forcibly, while pressing the same combination of buttons. The use of a PIN code will additionally increase security (in this case, the “PIN CODE” icon will be activated on the key fob display - the anti-robbery mode will turn off only after entering the code.
2. Options for pressing key fob buttons
The buttons on the Starline A92 key fob can be pressed for different durations and a different number of times. This determines what command the security alarm remote control will give. The operating instructions for the key fob contain a table that contains all the commands for controlling the security functions, engine, equipment, and service functions. In total, there are 4 types of clicks for key fobs:
- Short-term – 1 time, quickly, in just 0.5 s.
- Long - you need to hold down the button until the key fob emits a melodic signal.
- Double – 2 short presses one after another.
- Sequential - first the key is pressed for a long time, and then briefly, and this can be either one or different buttons.
Types of Starline alarm key fobs
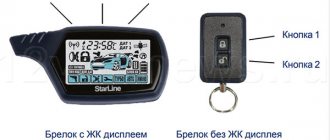
It is known that in reality there are main keychains and additional ones. The main one, as you can easily see, is always equipped with a display. Some key fobs use feedback, but not all:
- The main key fob (for any signaling) is always equipped with a feedback module;
- Additional ones (if they have 2 buttons) – too.
But additional key fobs with 3 or 4 buttons are never equipped with a feedback module. For clarity, here is an image of these devices:
No one will buy a keychain that differs in shape from the one used normally. And yet, mistakes in selection are not excluded.
Let's say the new acquisition turned out to be unsuitable (you came to exactly this conclusion). Then check if the new battery is actually being used. Often communication with the alarm is not established not because of incompatibility, but because the battery is low. This advice is trivial, but often neglected.
1. Possibilities of an additional key fob
The second Starline A92 key fob is recommended by the manufacturer for use when the main remote control cannot be used. Its capabilities are not so wide; they allow you to use only part of the functions.
The additional key fob only transmits commands, but does not receive a return signal. Therefore, it cannot display the status of the vehicle and the alarm itself.
The maximum range of the additional key fob is 15 m, but you need to take into account that it can vary depending on where the transceiver is installed, the car itself and its owner. Weather conditions and the presence of radio frequency interference also play a role.
The key fob is powered by one CR2450 battery.
List of compatible Starline key fobs
It is better to purchase a key fob made by Starline and suitable for the alarm system used. But it is not always possible to fulfill this requirement. Objective reasons may be:
- The alarm has been discontinued;
- Sellers in your region do not carry one of the Starline alarm models (and key fobs for it);
- An unlikely option - they offer only non-original products, the user is not happy with this, but there is an opportunity to buy the original from another signaling system.
What is better to buy, let the user decide. We, in turn, provide information about compatibility (data taken from the official website).
Compatibility of Starline alarm key fobs
There should have been some kind of list containing in each line models that were compatible with each other. But in reality, everything is somewhat more complicated. Please note the following: BX signals and BX Dialog are not the same thing (substitute a number for X).
All “Dialogue” keychains, main and additional, are equipped with feedback. We hope everything is clear here.
Here is a list of things you can be sure of being compatible:
- Key fobs E60, B64, D64 are compatible with each other (main and additional);
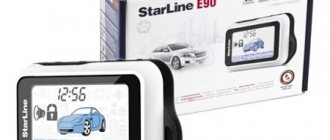
- E90, B94, D94 - the same as in the first case (everything is compatible);
- StarLine A4 and StarLine A2 – similar (any key fob is compatible);
- StarLine A4, A2 and 24V – only one-sided key fobs are compatible with each other (without feedback);
- For alarms B6 and B9, only one-way key fobs will be compatible;
- B6 Dialog and A61 – any key fobs are compatible;
- B9 Dialog and A91 - similar.
Transceiver with call button
The Starline company, as we see, in the fourth generation switched to using the same type of transceivers.
They may look different in appearance, but compatibility does not suffer from this. It is a pity that such principles were not relevant earlier. Then, there would be no problems with the choice of equipment.
Transceivers are also compatible
The transceiver is a small box with an antenna that is connected to the signaling unit. Without an “antenna,” of course, nothing works. The following Starline “antennas” are interchangeable:
- A4, A2 and 24V (if there is no call button on the case);
- A9, A6, A8, B9, B6;
- C4, C9, C6;
- B6 Dialog, B9 Dialog and here – A61, A91;
- A62, A92, B62, B92;
- All fourth generation (E90, E60, A64, ... D94).
Various tips for choosing
Additional equipment for signaling of the specified brand can be produced by third-party companies. The prices for such products are lower than the cost of the originals. Ask yourself the question, what is the benefit of buying non-original products? It seems that its only advantage is its low price. Well, the quality, if the cost is low, can hardly be better than what is provided in the original version.
Chinese devices differ in the following:
- The operating distance is significantly lower than it should be;
- There is feedback in the key fob, but it displays the state of the car incorrectly (or does not display it at all);
- From the second point it follows that the car can be opened, but the owner will never know about it.
If it were not for point “2”, everything would be quite acceptable. And so, it is possible that the product of Chinese industry will have to be modified. But the result, as you understand, is not guaranteed in such cases. Make a choice.
Registration of BLE tags
- Remove the battery from the tag.
- Hold down the tag button and install the battery. The tag LED will light red.
- Release the button and watch for a series of red flashes for 10 seconds.
- Successful registration will be confirmed by a green flash, 2 LED beeps and a siren. If the tag is not registered, the LED will turn red.
- Repeat steps 1-3 for the remaining marks.
Smartphone registration
Download the StarLine Key mobile application from the Google Play or App Store.
Register your smartphone using the StarLine mobile application Key:
- turn on Bluetooth in your smartphone settings;
- click the “Start Search” button;
- for smartphones on the Android platform, enter the code “000000”; on the iOS platform, click the “Create pair” button (no code required).
If several registered smartphones are in sight at the same time, the complex will only work with the one that connects to it first.
Removing a smartphone from the memory of the security system
A previously recorded smartphone in the complex’s memory will be automatically deleted after registering a new smartphone or tag.
Be sure to remove the complex from the list of paired Bluetooth devices on your smartphone.
Exiting device registration mode
The device registration mode is exited automatically after 5 minutes or when the ignition is turned off. Exit from the “Device Registration” mode will be confirmed by siren and LED signals: 2 times and the number of signals corresponding to the total number of registered key fobs, BLE key fobs and smartphones. After registration is completed, an SMS message with a list of registered devices will be sent to the owner’s phone.
See how to register a key fob for an alarm system
We register a new key fob in your car alarm
Unfortunately, we often have to deal with the fact that the alarm key fob fails, breaks, moisture penetrates into it, etc. It’s easy to solve this problem - we suggest you buy additional key fobs for your Starline alarm system. All Starline key fobs are original and compatible with the alarm systems for which they are intended. Our specialist will quickly configure the key fob to work correctly with your system. You can also buy StarLine key fobs from discontinued models.
Malfunctions and their elimination
Experts name several main reasons why remote controls may fail:
- Battery low. In this case, you need to replace it.
- Fall or mechanical impact. In this case, it is necessary to remove the housing to assess the extent of the damage. You may need to repair the Starline car alarm key fob circuit.
- Water ingress. The remote control should be disassembled as soon as possible and dried away from heat sources.
- Hardware failures.
If you cannot identify the cause of the malfunction, you should contact a specialist. You may need to replace some parts in the key fob.
- Mechanical anti-theft device
- Setting up a JVC radio
- Car radio JVC KD X153
- Setting the time on the Starline A93 key fob
How to assemble a StarLine switch key
On all Starline A91 or A93 systems, the assembly process is the same:
- The purchase package usually includes double-sided tape. With its help, the old glass is glued to the new front panel of the remote control. If necessary, you can use a small amount of glue;
- The old main board is inserted into the remote control seats. You can make the fixation more reliable using double-sided tape;
- the key blade is installed on the seat;
- a release button and a spring are mounted;
- the remote control buttons are inserted into their places;
- Next, insert the upper part of the housing into the spring and turn it counterclockwise twice and assemble the key fob;
- screw the lock at the back;
- insert the housing onto the latches and tighten the rear screw, the one under the nutrient element;
- we check the tightening torques and build quality;
- install the battery and back cover.
The switch key is now ready for use.
How to start a car with a StarLine key
Now the key fob doubles as the original ignition key. To start the car using the Starline A94 switchblade, you just need to press the button - then the spring will put the blade into working condition. After this, you need to install it in the ignition switch and turn it clockwise until the engine starts.
Instructions for the Starline A91 alarm key fob
Setting up the service functions of the complex
The list of possible states and functions of the a91 complex includes:
- Impact sensor sensitivity coordination;
- Coordination of executive functionality of accompanying sensors;
- Closing/opening doors from a distance;
- Activation of search and monitoring of the temperature regime of the power unit;
- Service settings via VALET mode;
- Call from inside the car;
- Locking the remote control keys;
- Monitoring the condition of the vehicle’s actuators and the interior temperature;
- Control of the number of control pagers.
Table: management of service modes
| Target | Action | Standard | Pager information | Complex information |
| Shock sensor correction | · Clicking on key No. 1 disables the initial circuit. · Pressing button No. 1 twice turns off the controller. · Activation by two clicks on key No. 1. | Security is on | · Disabling the primary circuit - one signal, two zones - three sounds; · The screen displays information about the inactive first level or two at the same time: | Disabling the primary circuit - 1 sound, two - a block of three signals |
| Control of additional sensors | · Deactivation of the primary circuit additional. sensor by two clicks on button No. 2. ·The next two clicks turn off the controller. · Turn on by two consecutive clicks on key No. 2. | · Facility security is on; ·A backup control unit is installed. | · Deactivation of the primary circuit - one beep; · On the screen there is information that both circuits are not working: | Disabling the primary circuit - the dimensions will blink twice, when completely deactivated - three times |
| Search mode. Temperature level | Two clicks on button No. 3 | Any | Thermometer icon, temperature value: | The dimensions will blink several times |
| Valet service |
| Security is not active |
| Dimensions flash once when activated, twice when disabled |
| Control key lock | Press buttons No. 1 and No. 3 simultaneously | Any |
| — |
| Interior temperature and engine heating temperature |
| Service not active |
| — |
Table: programming and activation of the turbo timer
| Manipulation | Information from the machine | Information from the key fob |
| Parking brake engages | ||
| Activating the turbo timer function | ||
| Remove the key from the ignition, leave the car, closing the doors |
|
|
| Click on the first button |
|
|
| Setting the function | ||
| Key number 3 before notification | — | The dial icon is highlighted on the screen: |
| Using button No. 3, cursor to the “Turbo” icon | — | — |
| Click on button No. 1 | 1 indicator light |
|
