In this article, auto electrician Alexey Molotov answers the question “How to set the time a94 on a starline key fob?”
How to independently set the time on the StarLine alarm key fob?
If you have an alarm model StarLine B9 / B91 / A91:
Enter the function menu of the main key fob:
The functions menu of the main key fob allows you to: set the current time. Hold button 3 until:
1 melodic signal, 1 short signal, 2 short signals. After this, the clock digits of the current time will flash, then we perform the following operations:
using button 1 - increase the readings, using button 2 - decrease the readings.
Likewise with the minutes:
Briefly press button 3 to go to setting the minutes of the current time:
The minute digits of the current time are flashing: button 1 — increases the readings, button 2 — decreases the readings.
If you do not press the key fob buttons within 5 seconds, you will automatically exit from the key fob functions programming menu.
If you have an alarm model StarLine E90 / E91 / B94/ D94:
To enter the key fob function programming menu, press and hold button 4 until one long beep and then 2 short beeps.
Next, a long beep will sound, followed by 2 short beeps. The first menu function appears on the display. By short pressing buttons 1 or 4, select the required function: F-1 – setting the current date and time.
To set the date and time, select function F - 1 and press button 4 for a long time, up to 2 short signals.
Selecting a setting parameter (year, month, day, hours, minutes) is carried out by short pressing buttons 4 (forward) or 1 (backward).
Setting the required parameter value is carried out by short pressing buttons 2 (increase readings) or 3 (decrease readings) year, month, day, hours, minutes.
If there are no button presses within 8 seconds, the key fob functions programming menu will automatically exit.
The key fob functions programming menu can also be exited by long pressing button 1 (2 short beeps from the key fob will follow)
Setting up and adjusting the StarLine alarm system, installation and repair of the StarLine alarm system in Novosibirsk.
our phone number in Novosibirsk:
SERVICES ARE CERTIFIED!
On the AVANCAR website you can always get very detailed information about the new StarLine anti-theft systems, about the various types of services we provide, find useful information in the form of articles and tests, reviews of new car electronics, security systems, and comfort. Where is the high-quality installation of car alarms in Novosibirsk? Read reviews about us and the products we offer. Buy Starline at a discount. Anti-theft system for a car - install an anti-theft system in Novosibirsk Black Bug
Setting the clock, timer and alarm clock of the Starline car alarm is necessary for accurate activation of functions by time. For example, to use remote automatic engine start. You can set the time on the Starline key fob yourself using the user manual.
Instructions for setting the time
Reasons for settings failure
What happens if you don't set the clock?
Comments and Reviews
Timed engine start
Automatic starting of the engine by time is carried out in two ways: by alarm clock or timer.
Setting autorun on alarm clock
To set up autostart on an alarm clock you need to:
- Enter the programming menu.
- Press button 2 (to activate cursor selection of functions) and hold until two short beeps and one long beep sound.
- Moving the cursor over the icons by clicking on keys 2 and 3, set it to the clock icon.
- Press the first key on the key fob. External lighting devices should blink once, and the remote control will emit a melodic signal.
- Over the next 5 sec. The communicator display will show the duration of time before the engine warms up. The fact that the option is activated will be indicated by the bell and dial icons located on the key fob screen.
Video: setting up autorun on alarm clock
Shot by user Alex Sila
Setting automatic start by timer
Programming engine autostart using a timer on the Starline A93 key fob:
- Press button 2 or 3 and hold for 3-4 seconds. This will allow the user to enter cursor function selection mode. A quick click on key 2 moves the cursor to the left, and on button 3 moves the cursor to the right.
- Place the cursor on the hourglass icon and briefly press button 1. The system will respond with one melodic sound signal and a short light alert.
- The default autorun value will appear on the key fob screen. Typically this is 4H, which means that the ignition will automatically turn on every 4 hours.
- To change this indicator, you need to click on key 1. Each click on the button increases the auto-start period by 2 hours, that is, up to 6, 8, 12, etc.
- You can save time settings with auto-start by clicking on button 1. In addition, all changes made are saved in the device’s memory in automatic mode. To do this, you must stop any work with the remote control for 4 seconds.
- After successfully setting the parameters for automatic engine ignition using a timer, the key fob will emit two short beeps, and the hourglass icon will light up in the upper left corner of the screen. 5 seconds after entering new autostart values, the system will turn on and warm up the engine.
Programming table
To realize the full potential of the system and make the Starline B94 alarm system as convenient as possible, you need to set all functions according to the desired parameters. To do this, you will need to enter programming mode. The process is carried out as follows:
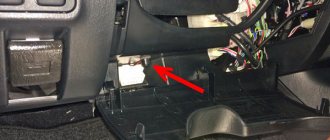
- turn off the ignition, and then press the Valet service button 5 times. This key is located by installers in hidden places that only the car owner knows about. As a rule, these are places around the steering column, near the pedal assembly, between the front seats, inside the side pockets or under the front panel (near the fuse box);
- turn on the ignition. To indicate the success of the procedure, the car will blink its headlights 5 times and emit 5 beeps;
- by pressing buttons 2 and 3 on the key fob, the corresponding programming table is selected;
- Use the same keys to select the desired function. After this, the desired value is set from the remote control;
Detailed programming tables are presented at the link: Page for reference
Download the operating instructions for the Starline A93 alarm system
You can download a detailed manual for managing the Starline A93 car alarm using the following link:
| Long press on K4 (3-4 seconds) | One long melodic and two short beeps. The clock will start flashing | Short press on keys 2 (increase time value) or 3 (decrease) | |
| Setting the minutes | |||
| Short press on K4 | The minutes are flashing | Quick click on key 2 (increase) or 3 (decrease) | |
| Setting an alarm | |||
| Setting the alarm clock | |||
| Quick press on K4 | The alarm clock indicators are flashing | Briefly press button 2 (increase) or 3 (decrease) | |
| Setting the alarm minutes | |||
| Brief click on K4 | The alarm minutes are flashing | Quickly press buttons 2 (increase) or 3 (decrease) | |
| Turning the alarm on/off | |||
| Short press on K4 | Alarm icon flashing | Briefly click on button 2 (on) or 3 (off) | |
| Setting the timer | |||
| Setting the Timer Clock | |||
| Quick press on K4 | Timer clock values are flashing | Short press on key 2 (increase) or 3 (decrease) | |
| Setting the Timer Minutes | |||
| Short click on K4 | The minutes of the timer are flashing | Quickly press button 2 (increase) or 3 (decrease) | |
| Turning the timer on/off | |||
| Brief press on K4 | The timer icon is flashing | Briefly press key 2 (on) or 3 (off) | |
| Setting the volume and type of alerts | |||
| Selecting the signal volume | |||
| Quick click on K4 | Siren icon flashing | Short click on key 2 – select the signal volume. Quickly press button 3 to turn on silent mode | |
| Selecting the signal type | |||
| Short click on K4 | Icons “1” or “2” are flashing | Briefly click on key 2 – “Trill” signal. Short press on button 3 – “Siren” signal | |
| Manuals in Russian for operation and installation of alarm systems | |||
| Operating instructions StarLine A93 | |||
Specifications
The Starline A94 model operates on a radio carrier frequency in the range from 433.05 to 434.79 MHz. There are 128 radio channels for controlling the security complex. The main key fob operates within a radius of 0.8-2 km from the antenna.
The additional communicator operates at a distance of no more than 15 m.
Operating temperature range - -50…+85ºС. A 3-axis integral type accelerometer is used as a tilt and shock sensor. The supply voltage for the security system is 9-18 V. In security mode, the car alarm consumes no more than 23 mA of current. Similar models from the manufacturer are A94s, B94.
Possible causes of failure and their elimination
Reasons for resetting the clock:
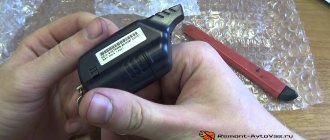
- The battery has run out. Modern StarLine key fobs themselves notify the user when the battery capacity drops to a critical level. At this moment, an icon in the form of an empty battery appears on the pager display, and the device itself emits characteristic sound signals. To replace the battery, you need to turn the remote control upside down, carefully remove the battery compartment cover and insert a new battery. This device runs on AAA batteries with a voltage of 1.5 V (pinty batteries).
- Battery replacement. After replacing the old battery with a new one, all configured time, date, alarm and timer parameters are automatically reset. Therefore, after each battery replacement, the car owner needs to re-enter the “Functions Menu” and adjust all values.
- Software failure. To resolve this problem, it is recommended to use the function of resetting all settings to factory settings, and then re-enter the necessary parameters. If this does not lead to the desired result, you need to flash the device.
- Mechanical damage. If the case is destroyed, cracks appear on the display, or part of the board breaks, the element will need to be replaced with a new one. Malfunctions such as keys sticking, defects or cracks appearing on them can also cause the key fob to malfunction. The problem will require, depending on the degree of damage, a solution in the form of replacing the button or resoldering it.
- Short circuit. For this to happen, even a small amount of liquid gets on the control panel, for example, raindrops or a spilled drink. As a result, some important parts of the pager may burn out - the system board, transistor, diode, etc. To return the device to working condition, it is necessary to replace the non-working part with a new one.
- Manufacturing defect. Such a key fob initially works with errors, the number of which will increase during operation. Therefore, if a manufacturing defect is suspected, it is necessary to replace the faulty key fob with one that works under the warranty card.
Reset to factory settings
Instructions for resetting the key fob to factory settings:
- Find the Valet button, which is usually located in hidden places in the car. Most often, the service key is installed under the dashboard, in the glove compartment, near the steering wheel, next to the gearshift lever or in the fuse hatch.
- Turn on the ignition and with the engine running, click on the service button 9 times (you need to press it briefly). Each press should last no more than half a second.
- Turn off the engine and wait until the system responds with 9 short beeps. They will indicate successful entry into factory reset mode.
- Press the service button once and wait for the siren to respond.
- Click on button 1 on the alarm key fob. The key fob will respond with a single sound signal, which notifies the car owner that all indicators have been reset to factory settings.
- To exit the reset mode, turn on the car engine. The system will respond with 5 light signals.
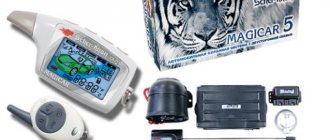
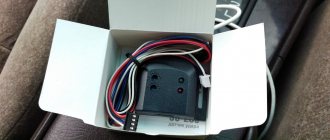
Equipment
The Starline B94 alarm system comes in a special package that facilitates installation of the system on almost all modern cars. Master installers have at their disposal:
- central unit responsible for managing and processing commands;
- main remote control with feedback, equipped with an LCD display with simple icons and four buttons;
- spare key fob without feedback and without display;
- signal receiver;
- alarm LED mounted on the car body or windshield;
- Valet service button;
- cables in the quantity required for installation. The kit includes all the necessary connectors;
- motor temperature sensor;
- tilt and shock sensor;
- alarm operating and installation manual;
- GSM module with a special SIM card;
- relay R2;
- sound siren block.
The Starline D94 security system is offered in many cities of Russia and is available for purchase to every car owner. The kit includes:
- installation manual, instructions and operation (three separate brochures);
- alarm head unit processing commands;
- main system control panel with feedback. The key fob has an LCD display, and there are four buttons on the body to control various functions;
- spare key fob, also with feedback, but without a liquid crystal display;
- signal transceiver;
- hood and door switches;
- red LED attached to the windshield;
- Valet button to enter the programming mode and system settings;
- a set of cables sufficient for connection;
- motor temperature sensor;
- relay R2 and blocking relay;
- sound siren to notify of burglary attempts;
- optional GSM-GPS module;
- standard immobilizer crawler;
- spare housings for the remote control.
Despite the fact that the Starline D94 keychain can withstand a fall from a height of more than two meters, it can still be damaged. As a rule, owners order covers that can provide additional protection. But if a breakdown occurs, the set includes two additional cases of different colors. This will help not only fix the remote control, but also emphasize your own individuality.
Why is it necessary and what will happen if you don’t set the clock?
If you correctly program the communicator to remotely start the internal combustion engine using an alarm clock, then the engine will start at a specific time.
If the time indicators on the key fob are set incorrectly, this will lead to the fact that automatic start by time will not work correctly. Accordingly, if a trip is necessary, the engine will not be warmed up, which will lead to early wear of the starter mechanism as a result of high loads.
There will also be a problem with the alarm function used to remind you of an event.
Car alarms have long been firmly established among car owners. Today they are multifunctional systems. Starline has a wide range of options. What this security complex is, what its capabilities are and how to configure them is described below.
Error codes
If a malfunction occurs and some functions are not performed correctly by the system, an error code is displayed on the key fob. There are several main categories, the presence of which will help determine the root of the problem.
R99. The signal about this malfunction is not an error per se. This code notifies you about the time that the engine will run during autostart or after turning on the turbo timer. A reading of 99 indicates that the engine will run without shutting down.
OS7. This indication indicates that the engine has had four automatic starting attempts (each time with a longer starter running time) but the procedure was unsuccessful. It is necessary to set the correct parameters for autostart (starter operating time, engine type, etc.), check the CAN bus connection to the tachometer, generator or battery (depending on the type of connection). Check the functionality of the standard immobilizer crawler.
The error indicates that the software neutralization procedure was performed incorrectly. To fix it, you need to check all the fulfillment conditions, as well as the functionality of the handbrake switch and doors.
U9N/L9N. A malfunction that indicates problems with the connection to the key fob. A breakdown in dialogue communication can occur due to a malfunction of the connection cable with the antenna, a breakdown of the antenna itself, or a disconnection of the alarm power contact (plus or ground).
Hi/Lo. Engine temperature sensor error. It is necessary to check the wires for oxidation, as well as the serviceability of the sensor itself.
SIA. Problems with Slave mode. First, you can change the battery (perhaps it is causing incorrect communication). The check is also carried out by disabling the Super-Slave mode.
Key fob functions
The Starline A94 system has step-by-step configuration of tasks, including the following.
- door lock control;
- adjusting the sensitivity of shock or tilt sensors;
- hood lock control.
- pre-heater, which brings the engine to a predetermined temperature;
- activation of headlights when starting to move;
- function of returning the steering column and driver's seat to their original position.
Motor starting options:
- turning off the wipers or audio system when starting the engine;
- the start of heating the glass or seat after the engine is running;
- automatic reactivation in case of difficulties with starting.
- folding rear view mirrors;
- moving the hatch to the “closed” position;
- dimming of headlights (formation of a “light path”).
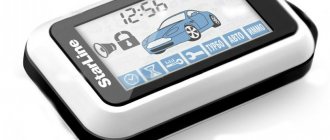
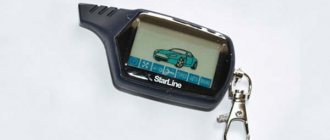
Setting the time on the Starline A94 key fob
The control panel has a liquid crystal screen with a lot of icons. The Starline key fob displays the current time. Setting the clock for the A94 modification works like this.
- We hold down the fourth key for a long time and wait for three consecutive signals.
- After the clock indicators blink, we proceed to setting the time. Using keys two or three you can increase or decrease the effective value.
- Press the fourth button again and proceed to setting the minutes in the same way.
- The current indicator is recorded automatically; you just don’t need to press anything for more than eight seconds.
How to register the Starline A94 key fob
When installing the system, it is necessary to “show” the car the existing remote controls. Linking the Starline A94 key fob goes like this.
- Turn off the ignition and press the Valet service button seven times.
- Turn on the ignition. We hear seven beeps from the car, which will also blink its headlights 7 times.
- Simultaneously press the first and second keys of the Starline key fob. One beep will sound.
- Repeat for all remote controls (no more than five). The binding interval is no more than 5 seconds.
- Turn off the ignition. Three flashes of side lights indicate that the operation was successful.
How to enable autostart on Starline A94
Automatic engine start is an important function of the Starline alarm system. On the A94 model it is set like this:
- Long press button one of the key fob, and then briefly press the third key;
- Place the cursor on the fan icon and press button 3.
The standard program is triggered and the countdown to autostart begins, starting from ten minutes. Additionally, you can set the option to start the motor according to temperature or at a designated time.
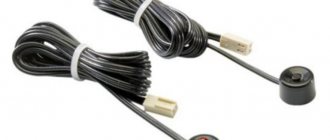
Tilt sensor
This element is part of the Starline A94 anti-theft system. The sensor detects the angle of the car and turns on the siren after changing its position. This helps when trying to transport the car on a trailer or tow truck. A notification is sent to the owner's remote control. It is recommended to mount the tilt sensor in the central part of the model.
The Starline alarm key fob displays not only useful system information, but also the time, which can be manually adjusted.
How to install the system?
Before installing the A94 Slave or A94 2CAN anti-theft installation, you must carefully read the instructions for use.
The installation procedure is as follows:
- First, the control module is installed. The central processor performs one of the main signaling options; with its help, signals from the remote control are sent to the limit switches, which leads to activation and deactivation of the protection mode. It is necessary to think about the installation location of the control module; it is advisable to position it so that a potential attacker does not find the device. The unit can be installed in the passenger compartment or trunk, but it must be taken into account that exposure to moisture and high temperatures on its structure will lead to damage to the device. Therefore, place the module in a dry place, for example, under the trim or behind the dashboard. To do this, disassemble part of the lining around the steering column and remove the shield. If there is free space behind it, then install the block here and securely fix it with screws or bolts. It is important that the device is not affected by vibrations while driving, otherwise the module will quickly become unusable.
- Then install the siren. It should be located in the engine compartment, but the device should not be placed in close proximity to the power unit. Regular exposure to high temperatures will cause it to break. The siren should be placed with its horn in the direction of travel of the car, sideways or upwards. It is not recommended to point it downwards, since in wet weather dirt can get on it from under the bottom. The siren must also be securely fixed.
- Shock and tilt sensors are being installed. Their installation must be done inside the car. Moisture and high temperatures should also not affect the device, otherwise it will break. The impact controller is installed in the central part of the body; it must record impacts on the car equally from all sides. The temperature sensor is mounted on the branch pipe of the cooling system of the power unit in accordance with the requirements specified in the operating manual.
- A blocking relay is installed, which is placed in the lock; for this purpose, the circuit included in the kit is used. The element is designed to block the ignition system in the event of a car break-in.
- Switches are placed on the hood, doors and trunk. To install them in the doors you will have to disassemble the lining.
- A signal transceiver is mounted on the windshield of the car, also called an antenna adapter. The device must be placed on glass to ensure a good signal transmission range. When installing the antenna, keep in mind that its location next to metal parts of the body will lead to interference in the transmission and reception of pulses. Therefore, it is advisable to install the transceiver at least 5 cm from the metal.
- Then the indicator light is installed. It will signal that the car is armed. It is advisable to place the diode in the area of the windshield; its blinking will be a warning to the criminal that the car is protected.
- Then the wires are laid. Electrical circuits must be stretched from the siren, limit switches, sensors and transceiver to the control module. The wires from the siren are pulled into the cabin through a special technological hole. All electrical circuits must be laid under the plastic lining of the interior so that they do not fray or wear out. Otherwise, the functionality of the anti-theft system will be impaired.
Installation of the control module
Installing a siren in the engine compartment
Alarm wiring connection
Connection diagram Starline A94
The procedure for connecting all contacts is carried out in accordance with the diagrams specified in the Starline A94 operating instructions, photos in Russian are given below.
Photo gallery “Installation and connection of alarm systems”
Installation diagram
Connection diagram
Possible reasons for time settings failure
If you find that your Starline key fob no longer displays the time correctly, then you should check the condition of the battery. This is quite easy to do, thanks to the built-in low battery indicator function. When the battery loses the energy necessary for high-quality operation, a corresponding picture appears on the display, accompanied by a sound signal. And although this reason is extremely rare, especially for Starline, it is necessary to check any possible options.
The second reason could be changing the battery. After installing a new battery, the time is automatically reset.
Be careful, replacing the battery inevitably entails resetting the anti-burglary protection, so the first thing you should do is not set a new indicator, but set the car to the Starline alarm system.
Another reason is incorrectly adjusted clock indicators or incorrect procedure for setting.
Debugg
Regardless of the conditions that caused the crash or reset, you will have to restore the watch. This can be done in two ways:
- Classic. The time is set using service commands on the alarm key fob;
- Radical. Replace the battery at zero hours zero minutes. The temporary values will be reset to zero and the countdown will begin from the specified point.
Setting new indicators on the Starline alarm display has common principles for most models. They are carried out using a specific algorithm of actions, which can be divided into three types, depending on the generation of the Starline alarm and some of its features.
Price
The price of the Starline B94 alarm system depends on the city where the offer is made. Below is a table giving a general idea of the price of the set in different cities.
| Starline B94 | |
| City | Minimum price, rub. |
| Moscow | 15 750-35 000 |
| Saint Petersburg | 18 250-34 300 |
| Ekaterinburg | 17 200-27 800 |
| Volgograd | 16 400-23 500 |
Making settings for series E, D, B
Starline car alarms marked E90, E91, D and B94 allow you to set the time period by performing the following actions:
Press the fourth button on the control panel and hold it until three signals count down - one long and two short. After this, 4 menu functions will appear on the screen. Select the one you are looking for by pressing the fourth key again. You can set the date and time using the first function. It is designated F-1. After this, hold down the fourth button again, wait for two signals and start setting the time using the first two service keys.
Making settings for the A series
Setting the necessary parameters on the Starline Series A alarm system depends on the model number.
Starline a94 and a92 provide for the presence of four service keys, which determine the features of the commands produced.
You can set the time parameters on these devices by long pressing the fourth key. After three consecutive beeps, the hour digits will flash, and changing the values will be possible using the second and third keys. To set the minutes, press the fourth button again and repeat the steps described.
Starline a91 and a61 have a simplified appearance and are content with the presence of three service buttons.
To carry out this procedure on the key fobs of these models, you will need to press and hold the third button with the image of an asterisk until three characteristic signals occur. After this, you can adjust the hours and minutes. The opening and closing keys of the lock allow you to decrease or increase the numbers, and the asterisk button allows you to move between hours and minutes.
Autostart on Starline A94: which buttons to press
Some rules must be followed:
- the box must be switched to neutral or parking mode;
- handbrake installed;
- the exact time is set on the key fob;
- turn on the alarm, and then, pressing the fourth button, move to the clock symbol and press the three key.
What happens if you don't configure it?
The least that can happen in this case is that you will lose additional information. More than that, such autorun parameters as starting by alarm clock, by a given interval or by timer, for models a91 and b9, will be lost.
The consequences of this may be an unheated engine and increased collection time, failure of the starter due to high loads during standard starting in the cold season, as well as the need to replace the battery if the vehicle is not used for a long time at low temperatures.
Safety precautions
One of the main nuances of safe maintenance of the anti-theft system is to prevent the battery from being disconnected when the security mode is activated. This can lead to blocking of the car's power unit. To subsequently start the engine, the motor will have to be unlocked.
If the installation procedure for the Starline A94 system is carried out independently, then during installation it is imperative to disconnect the battery. This will prevent power surges and damage to electronic devices.