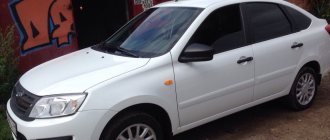
Car owners who love innovation and change always make attempts to improve their cars, and Kalina is no exception. They install spoilers, increase engine power, and modify the interior. Car headlights can greatly change the appearance of a vehicle. But before you start tuning the lighting system, you need to find out the characteristics of the standard Kalina lights. This will allow you to understand what replacement options exist and whether it is worth changing anything at all.
Characteristics of standard Kalina headlights of different configurations and models
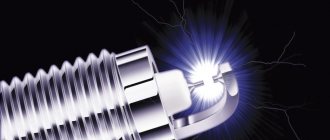
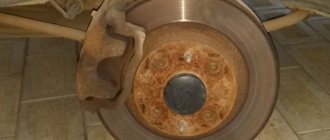
Car headlights are devices that are designed to illuminate the road at night or when visibility is insufficient due to bad weather conditions. Headlamp structure (see photo):
- Frame.
- The wire.
- Glass.
- Lamps.
- Reflector.
- Decorative insert.
- Headlight plugs.
The block headlight on Kalina includes three sections:
- low beam;
- high beam and side lights;
- direction indicators.
When you turn on the low beam, only the low beam lamps light up, when you turn on the high beam, the low and high beam lamps come on. Front direction indicator sections
| Number in photo | Name | EEC | Power, W |
| 1 | Low beam light | H7 | 55 |
| 2 | High beam light | H1 | 55 |
| 3 | Front turn signal lamp | PY21W | 21 |
| 4 | Side light bulb | W5W | 5 |
The difference between the headlights in different versions of Kalina:
- sedan, hatchback and cross – rectangular glass with a bend in the upper part;
- station wagon – elongated headlights with increased area;
- sport - has an increased area to illuminate a larger section of the road.
In the “Lux” configuration, the headlights received a modified design and increased brightness.
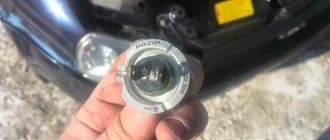
The manufacturer installed two and Bosch headlights on Kalina. Information about the manufacturer can be found by inspecting the product. If the AL index is marked on the glass, it means the manufacturer is Bosch.
It produces low beam lamps from polycarbonate without a cap. JSC "Avtosvet" also produces products from polycarbonate, but its distinctive feature is the presence of a low-beam lamp cap. The elements have proven themselves to work well, but like many other devices, they can also fail.
Comments
Guests cannot leave comments on the site, please log in.
Products for LADA at the best price
A selection of accessories for LADA from AliExpress
What the Kalina headlight is, what its functions are, how replacement and repair are carried out - such questions arouse the interest of motorists. A machine is a well-coordinated mechanism with thousands of parts. And it is difficult to name the main or secondary one.
In particular, the headlight unit provides directional light and illuminates the route and the surrounding area at night, which is very important for traffic safety.
Possible problems and methods for solving them
The fact that the Lada Kalina headlights stop working is due to many factors that the driver cannot influence. These are exposure to moisture, metal fatigue, and a combination of minor deformations that have appeared over years of operation. The most common problem that owners of this car face is the breakdown of the high or low beam.
A similar nuisance can occur while driving. Driving such a car in the dark is unsafe and can endanger the health of the driver, passengers and pedestrians. It is advisable to repair the breakdown immediately, in the field. Fortunately, in most cases the problem is resolved within 10 minutes.
conclusions
The installation and repair of the Lada Kalina headlight is quite simple and dismantling and installing the element will not take much time. Of course, if the housing is destroyed, the entire element will need to be replaced. As experience shows, if the fastening elements, the so-called “ears”, break, the headlight does not change, and the damaged part is simply “soldered”. It's much cheaper than replacing an entire element.
It is important to remove the headlight correctly if you decide to replace it with a new version, adjust the light, or to improve its decorative properties. From the factory, Lada Kalina is equipped with two types of headlights from different manufacturers: Avtosvet CJSC and Bosch. Regardless of the type of device, they are attached according to the same principle. There is only one difference in lighting technology: Bosch is marked with the letters AL and is made of polycarbonate, while “Avtosvet” has a cap on the low beam lamp.
The low beam lamp on Kalina burned out
The first step is to check the integrity of the low beam lamp. The design of the headlights on Kalina requires the presence of high and low beam lamps, the performance of which does not depend on each other. It is likely that if the low beam has disappeared and the high beam is present, the problem is a burnt out light bulb.
To replace the lamp you need:
- remove the protective cover from the headlight housing by pulling one of its petals;
- disconnect the wires from the lamp;
- disengage the spring clip and move it away from the light bulb;
- remove the low beam lamp from the Lada Kalina headlight housing.
Installing a new headlight is carried out in the reverse order. If the high beams do not work, the procedure is similar:
- disconnect the wire block from the lamp;
- remove the latch by squeezing its ends;
- remove the lamp and install a new one.
Lada Kalina lamps are halogen and should not be handled with bare hands. Failure to comply with this recommendation may result in darkening of the light and rapid failure of the product. You need to use gloves (they often come with the lamps). If you don't have gloves at hand, you can use a napkin or dry cloth.
How to replace headlight bulbs
- The protective cover, which is made of rubber, is removed from the entire car headlight; you just need to pull one of the 3 tabs.
- Disconnect the wiring from the light bulb.
- Remove the spring clip, disengage it from the 2 hooks, and also separate it from the body.
- The new light bulb is installed by performing all the steps in reverse order.
If the light bulb is halogen, there is a risk of damaging the glass bulbs if you touch them with your hands. When heated, the headlight glass begins to darken, but a clean rag made of natural material, which must be moistened with alcohol, will help get rid of the marks.
How to replace Kalina marker lamps:
- remove the protective cover from the headlights;
- disconnect the light bulb socket;
- remove the lamp from the socket and then install a new one.
How to replace turn signal lamps:
- turn the turn signal socket to the left by 45°, and then remove it from the headlight housing;
- press on the car headlight glass and then scroll all the way to the left. Then replace the light bulb with a new one.
How to replace bulbs in rear headlights:
- the cartridge is removed to the left;
- You need to press the light bulb and scroll to the left, then it will come out freely. Insert a new one, performing all the steps exactly the opposite.
Owners love to do headlight tuning: they paint the mask, tint or attach eyelashes, and create angel eyes. It comes out unusual and original. Such tuning will make the car noticeable on the track.
Many car owners have thought about the design and design of the Lada Kalina headlights. In fact, the design features of this element are quite simple. Since 2004, Kalina has been equipped with monoblock headlights.
Video about replacing headlight glass on a Lada Kalina. In the process, the headlight is completely disassembled:
The video material will tell you how to replace the headlight glass, design features, as well as the stages of dismantling the element.
The video story will tell you how to disassemble the headlight, features and elements of the device
Other causes of breakdowns
The reasons for the loss of light may be a broken wire, loose contact of connectors, breakdown of controls, etc. If the problem cannot be visually detected, it is recommended to test the wiring to identify network breaks. Calling did not bring results - contact an auto electrician. Neglecting the problem can aggravate the situation and lead to breakdown of other electrical elements in the network, then repairs will cost much more.
Kalina's headlight glass may fog up, which leads to a decrease in light brightness. If frequent fogging is observed, there is a high probability of depressurization of the headlight housing. It is recommended to remove it and thoroughly coat the joints with sealant.
Reasons and methods for replacing light elements on Kalina
You may need to replace the headlight on a car of this model for a number of reasons. Impacts to the body from other drivers or animals, careless driving on uneven roads, rough repairs of parts under the hood can damage the integrity of the fasteners. Light elements become loose and can fall out at the most unsafe moment on the road. Headlights that do not fit well in the grooves must be replaced.
Replacement is a simple process if you approach it responsibly and without nerves. For an experienced master, this operation takes about 3 hours. But even if you have never encountered such a situation before, these instructions will help you replace the headlight without any problems.
The entire process of removing the Kalina headlight can be divided into 5 main stages:
- unscrewing the bolts from the crankcase protection;
- removing the license plate (will allow you to get to the lower radiator grille);
- removing the lower and upper radiator grilles;
- unscrewing the front bumper (you will have to remove a large number of bolts and screws);
- removing the bumper amplifier (it interferes with dismantling and putting back the headlight).
When the screws holding the headlight on top and bottom are unscrewed, you should remove its housing, first carefully clamping all the wires. During repairs, it is recommended to inspect the inside of the bumper and the metal underneath for signs of corrosion. If such formations exist, you need to clean them and coat them with a rust converter.
After carrying out these operations, reassembly follows. During the process, you need to monitor the position of the rear, front, left and right illuminator - the headlight should fit into the connector without effort.
Removing the headlight without removing the bumper
Not every driver has enough knowledge and experience to remove the bumper on their own the first time. Also, this stage takes a lot of time, so there is another way to remove the headlights from Kalina. The approach under consideration requires the following actions.
- Get rid of the coolant unit and air filter housing for a while.
- Use a screwdriver to remove the PTF plug.
- Find the lower fastener for the lighting element and unscrew the bolt in this area. After the manipulation, insert your hand into the PTF hole.
- Find the bolts on the top of the light block structure and remove them using a size 8 wrench. You can find them not far from the radiator.
- The element is secured to the wing of the car by a screw, which should also be unscrewed using a Phillips screwdriver of the appropriate size.
- Try to carefully move the part that is located closer to the radiator closer to the engine by rotating the block light. Remove the lower fasteners from the seats.
- Use a short socket to remove the bolts and lower headlight mountings.
- A slight pull towards you will allow you to remove the flashlight. Make sure that the paintwork is intact, as the light will now be very close to the fender and bumper.
Rules for adjusting light
After installing the headlight, you need to adjust the luminous flux. You can do this yourself or by contacting a specialist. When making adjustments yourself, you should direct the light from the headlight to the wall with the markings. There should be 5 meters between the car and the wall.
We measure the distance from the ground to the car headlight (H), draw a vertical line on the wall parallel to the center of the car, then draw a horizontal line equal to the height H+10 cm. Set the Kalina headlight adjustment switch to position 0 and turn on the lamps. Using the adjustment screws, we adjust the luminous flux as shown in the figure.
Replacing a headlight on a Kalina with a little skill and patience is a simple process, although it takes several hours. Basic recommendations: put screws and bolts in one place to prevent their loss, check the functionality of the lamps before assembly, do not be nervous.
Notes:
Adjusting the position of the headlights must be done every 20 thousand km or as needed. On the Lada Kalina, this adjustment operation is not carried out often, since deviations from the norm rarely occur (in most cases, due to road accidents).
Checking and adjusting the headlights of the Lada Kalina VAZ 1118 is carried out with a fully filled fuel tank, a set of tools and a spare wheel.
1. First check the air pressure on all tires of the car with a pressure gauge. If necessary, bring it to normal.
2. Place the Lada Kalina car perpendicular to a smooth wall (for example, a garage) at a distance of 5 m. Place an additional weight weighing 75 kg on the driver’s seat.
3. Mark the screen on the wall as shown in the headlight adjustment diagram.
4. Draw a vertical center line O on the screen, lying in the plane of symmetry of the car (the distance from it to the center of the left and right headlights should be equal). To the left and right of it, draw two more symmetrical lines A and B , which should coincide with the centers of the left and right headlights.
5. At a height h corresponding to the distance of the centers of the headlights from the ground, draw a horizontal line 1, and 75 mm below it - line 2 .
6. Turn on the low beam headlights on the Lada Kalina car by turning the headlight range control of the Lada Kalina 1118 to position “0” (this position corresponds to the load of the Lada Kalina car with one driver).
7. Closing each headlight in turn, check that the light limit corresponds to the adjustment diagram previously marked on the screen. The boundary must follow line 2. The inclined segments must begin at the intersection points.
Bi-xenon installation
With their own hands, car enthusiasts can install bilens into the lighting device. The first step will be acquiring the necessary elements. Attention should be paid only to those products that can easily fit into the cavity of the Kalina headlight. For example, if you buy a G-5 kit, you will have to cut the lenses.
Work begins with dismantling and disassembling the headlight. Then, using a file, they cut the seat in the shape of a cone, due to which the lens will fit into the body by about a centimeter. It is necessary to remove the cap so that it does not block the flow of light, and then mount the lens in the prepared place. The element is secured using factory fasteners.
After installing the lenses, the car owner needs to stop by the stand to adjust the luminous flux and position of the lamps in accordance with the current GOST.
Is it possible to repair a hydraulic corrector?
Manufacturers of correctors for the Lada Granta did not provide for the possibility of restoring the device. It is assumed that the driver should make a change. However, it is possible to repair the hydraulic corrector yourself, although it eliminates the problem only for a while. It is impossible to achieve full functionality, however, the lampshades are installed in the working position and secured in it.
The choice between an electric corrector or a hydraulic regulator is based on several parameters:
- cost – hydraulics will cost much less than an electric corrector;
- operating conditions - when the car often finds itself in situations with sudden temperature changes, it is worth paying more, but getting a reliable adjustment system;
- car model - not all cars allow you to connect an electric corrector, however, it is possible to install one on a Lada.
Step by Step Actions
The first step is to assess the general condition and find the cause of the problem. If the tubes are damaged - cracks or breaks are noticeable, the connecting elements must be replaced. When the crack is located near the corrector, the tube is bitten off; if the damage site is not nearby, the entire length is replaced. Next, the system is pumped with antifreeze:
- The corrector plug is removed.
- The actuator rod extends.
- Using a syringe, antifreeze is introduced into the system, the entry of air is strictly excluded.
- Instead of a plug, a self-tapping screw without a sharp part is installed.
If there is no adjustment because the rod is damaged or broken off, extension is carried out.
Angel eyes
Aesthetic appearance, attractive design and functionality – these are the distinctive features of this type of tuning. It was first introduced on BMW cars. Such an improvement can be carried out on Kalina. To create the effect you will need:
- transparent plastic rod;
- pliers, wire cutters or metal saw;
- construction hair dryer;
- soldering iron;
- insulating tape;
- 220 Ohm resistors;
- 3.5-volt LEDs (4 pcs.);
- wires and connectors.
First you need to choose the length of the rod. This can be done by measuring the circumference of the illuminator with a thread or using the formula 3.14xD, where D is the diameter of the headlight. The rod needs to be heated with a hair dryer or boiled so that it becomes soft. Next, you should select a tin can or other round container, the diameter of which coincides with the diameter of the headlight. Wrap the rod around this container so that it takes the shape of a circle.
Now you need to solder the resistors to the LED legs. Only 4 LEDs are required (2 for each headlight). When soldering, polarity must be observed, otherwise the homemade product will not work. After this, connect the element to the power source. If the diodes light up, it means everything was done correctly.
The third stage is cutting. The circumference of the rod must be evenly cut, the depth of which does not exceed 1/3 of the diameter of the thickness of the rod. This is necessary for the formation of radiant light.
Next comes the installation of homemade angel eyes in the headlight. The rod must be positioned so that the diodes are not conspicuous. The rings do not require fasteners - they are pressed against the glass.
The Lada Kalina headlights have a fairly simple structure, and if necessary, any car owner can carry out their own repairs. Maintenance and timely troubleshooting are the key to long-term operation of the machine’s lighting equipment.
DIY car repair and maintenance
This is us showing the top where the bumper is attached, also four self-tapping screws for a shaped screwdriver - everything is convenient and fast.
2 self-tapping screws - all for a shaped screwdriver - are located at the bottom of the amplifier.
There are two 10mm bolts at the bottom on both sides of the radiator frame, as we can see, they are marked with red circles - we unscrew everything very conveniently here with a curly screwdriver.
And here there are two ten-point bolts, and one self-tapping screw, the same thing for a figured screwdriver, attached to the wing, since everything is sufficiently provided for, no great intelligence is required.
Headlight design for Lada Kalina
Headlight unit installed on a car
Like most new generation cars, VAZ 1117-1119 models are equipped with headlights of a simple design . Let's look at what elements are included in this node:
- Outer glass that protects the light bulbs and prevents water and dirt from getting inside.
- A plastic case to which all the main elements are attached.
- The rubber seal between the glass and the body provides good water and dirt resistance.
- Lamps for signaling turns, as well as low and high beam.
- There is a plastic reflector installed inside the case, which has a mirror surface and reflects the light of the bulbs.
Each headlight unit is equipped with light bulbs, which are well, one might say tightly, fixed in the housing, which ensures their resistance to vibration.
Headlight diagram with explanation
Dismantling and repair
In the event of a minor traffic accident, when the headlight housing is not damaged, only the glass can be replaced. To do this you will have to dismantle the element. How to do it?
- Remove the front bumper.
- Disconnect the connectors of the wires supplying power to the headlight.
- Unscrew the lower fasteners.
Unscrew the lower headlight mount
Unscrew the top fastenings of the headlight unit
After installing the headlight in place, be sure to re-adjust it so as not to blind oncoming traffic and not “shine into the milk.”
Glass repair will take a maximum of half an hour.
We take out the headlight towards ourselves
So, let's move on to the sequence of actions.
- Carefully remove the rubber seal.
- As practice shows, it is glued and to dismantle it you will have to cut through it with a thin knife.
- When the glass and the body are separated, it is necessary to clean off the old seal and glue residues.
Disconnecting the headlight housing and glass
The repair has been completed and the headlight can be installed in the reverse order.
Design and functions of headlights
The Lada Kalina car has its own headlights. 2 headlights with three sections are installed here, and each performs certain functions:
- for low beam;
- for distant and side lighting;
- to indicate turns.
When the headlights of the Lada Kalina are not adjusted, many inconvenient moments arise while driving both for the driver and for those who may be nearby at that time. After all Kalina's optics are adjusted, it will be able to illuminate the roadside well and will not blind drivers in the oncoming lane.
The design of Kalina's headlights is such that when using low beam, only the corresponding lamps will be turned on. When high beam is needed, both the low and high beam bulbs light up. The front turn signal sections have transparent lenses, and the turn signal bulbs themselves are bright orange.
The headlight unit for Lada Kalina has an electromechanical drive and is easily adjusted thanks to the corrector.
The regulator is located on the instrument panel, connecting to the electric drive, which is installed in the headlights, using wiring.
When assembling cars, the manufacturer uses headlights from such manufacturers as Avtosvet and Bosch. In order to understand exactly which factory made the lighting fixtures for your car, you need to study the headlight unit.
There should be an icon on it. The “AL” symbol indicates that the manufacturer is Bosch (Russia). This means that polycarbonate was used in the production of products. This model of headlights is produced without a cap on the low beam bulbs, while products from Avtosvet are also made of polycarbonate, but have a cap on the low beam bulbs.
You can disassemble the Lada Kalina headlight unit and find that it contains:
- numerous wiring;
- reflectors and glass;
- plugs and inserts, so-called headlight masks;
- lamps.
Designers are trying to improve the performance of headlights. For Kalina, these products are made using glass, they are neon, and their light transmittance is lower, although this model showed very good results when traveling. Kalina-2 has plastic lights.