If the car engine overheats or the antifreeze temperature does not reach operating temperature, the thermostat may be a possible cause of these malfunctions. There is no difference when replacing the thermostat on Lada cars (Granta, Kalina, Priora, Vesta, Largus, Niva or XRAY) with 8 and 16 valve engines, all actions are performed in the same way.
You will need : drain the coolant, prepare a flathead screwdriver, a Phillips screwdriver, a set of wrenches and silicone sealant.
Procedure:
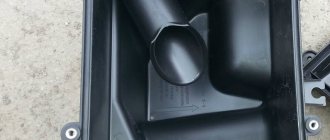
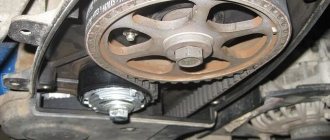
- Remove the engine air filter housing by disconnecting the hose and the connector with the MAF wires.
- Loosen all thermostat hose clamps (their number may vary depending on the thermostat model).
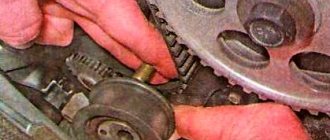
- Remove the thermostat assembly by unscrewing the two screws securing it and removing the ground connector and the connector with wires from the temperature sensor.
The thermostat is installed in the reverse order, after first cleaning the seat from dirt and applying sealant. The whole process is also shown in the video:
Let us remind you that it is better to check it before installing the thermostat. If this is not the problem, check the cooling system according to the diagram.
As you know, modern cars use a special liquid to cool the power plant. The versatility of this option allows you to simultaneously provide interior heating in winter.
In order for this system to work properly, a special device called a thermostat is also installed in it. In another way, it is also called a coolant temperature regulator. One of its functions is to help the engine warm up as quickly as possible and maintain it in the required condition.
In this article we will talk about how the thermostat of a Grant car is converted to a higher response threshold (92 degrees). In addition, we will tell you about the principle of operation of this device and about possible problems that arise in it.
What he really is?
This is a part that plays a big role in the supply of coolant so that the engine does not overheat and its main function is not impaired. During the cold season, due to external factors, the surface of the machine is cooled to very low levels. The thermostat comes to the rescue: it normalizes it, closing the valve flap and allowing the temperature to rise to the designated level.
The 8-valve Lada Kalina is equipped with a coolant controller, which is not electronic. The unit operates on the laws of physics. These conditions simplify the task for car enthusiasts, because not all car owners understand the principle of operation of the electronics in the car.
It is easy to understand the functionality and operation of the device - inside there is a heat-sensitive part that is triggered when heated, gradually starting to melt. This process provokes the opening of the valve flap, through which the coolant enters the large circle.
Reviews
| № | Positive |
| 1. | Vasily: I’ve been actively using the car for a year and a half, there are no complaints, the cooling system works stably. I added antifreeze several times because the level was below average, but this is not so critical. |
| 2. | Gennady: after buying the car, I immediately drained the original antifreeze from the interior and filled it with imported antifreeze. The heater operates at full power, the cabin is always warm, and the engine does not overheat. |
| 3. | Vladlen : at 45,000 km the rubber fluid supply pipe burst, replaced it with a new one. I didn’t contact the service center, I handled it myself. |
| 4. | Kirill: in two years of using the car there were no major breakdowns, and minor ones were fixed on my own without the help of a service station. |
| 5. | Dmitry: at 50,000 km, I replaced all the original clamps on the cooling system pipes, since the old ones had lost their tightness and the liquid began to leak. There are no comments about the stove heater. |
| 6. | Denis: mileage 85,000 km, just now replaced the thermostat with a new one. I think that the resource is more than sufficient, as for a domestic car. |
| 7. | Ivan: in three years, I replaced the antifreeze once with a new one, and changed the rubber seal on the body. I am satisfied with the quality of workmanship, there are no particular complaints. |
| Negative | |
| 1. | Victor: low-quality parts, at 45,000 km I replaced the thermostat with a new one, the old one jammed. The antifreeze did not circulate in a large circle due to a malfunction. |
| 2. | Ivan: My regulator lasted for a year and a half, after which the spring jammed. I think that the resource is too small, even for a domestic car. |
| 3. | Vladimir: A year has passed since I bought the car, and I already regret the purchase. Crude assembly, many defects that the manufacturer does not eliminate. |
Adjusting the new thermostat
Replacing the thermostat VAZ-2107
First, the antifreeze is drained from the cooled engine. Using a slotted screwdriver with a thin blade or pliers, loosen the clamp securing the hose supplying antifreeze from the radiator to the thermostat pipe. Disconnect this hose.
Use a Phillips screwdriver or an 8 mm socket wrench to loosen the clamps securing the hoses to the pipes of the cylinder block and pump. Remove the thermostat along with the hoses.
Disconnect the hoses from the thermostat pipes and put them on the new thermostat. Instead of the tape clamps that were on the hoses, they put on worm-drive clamps without tightening them.
The lower pipe of the thermostat is connected to the hose from the radiator. Connect the remaining hoses. All clamps are tightened. Fill in coolant. Start the engine and check for antifreeze leaks and the operation of the new thermostat.
Home →
Device → Cooling, heating and ventilation system → Thermostat →
Purpose of the thermostat on the VAZ 2106
The thermostat must control the degree of heating of the coolant and react in a timely manner when the antifreeze temperature becomes too high or, conversely, too low.
The device can direct coolant through either a small or large cooling circle, thereby preventing the engine from overheating, or, conversely, helping it quickly warm up after a long period of inactivity. All this makes the thermostat the most important element of the VAZ 2106 cooling system.
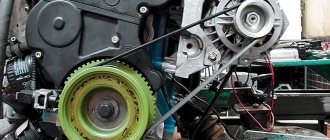
Thermostat location
The thermostat in the VAZ 2106 is located to the right of the engine, where the pipes for discharging coolant from the main radiator are located. To see the thermostat, simply open the hood of the car. The convenient location of this part is a big plus when it becomes necessary to replace it.
Principle of operation
As mentioned above, the main task of the thermostat is to maintain the engine temperature within specified limits. When the engine needs to warm up, the thermostat blocks the main radiator until the engine reaches the optimal temperature. This simple measure can significantly extend the life of the engine and reduce wear on its components. The thermostat has a master valve. When the coolant reaches a temperature of 70 °C, the valve opens (it should be noted here that the opening temperature of the main valve can be higher - up to 90 °C, and this depends both on the design of the thermostat and on the thermal filler that is in it used).
The second important element of the thermostat is a special compression cylinder made of brass, inside of which there is a small piece of technical wax. When the antifreeze in the system reaches 80 °C, the wax in the cylinder melts. As it expands, it presses on the long rod connected to the main thermostat valve. The rod extends from the cylinder and opens the valve. And when the antifreeze cools, the wax in the cylinder begins to harden, and its expansion coefficient decreases. As a result, the pressure on the rod weakens and the thermostatic valve closes.
By opening the valve here we mean moving its leaf by only 0.1 mm. This is the initial opening value, which consistently increases by 0.1 mm as the antifreeze temperature rises by two to three degrees. When the coolant temperature rises by 20 °C, the thermostat valve opens fully. The full opening temperature can vary from 90 to 102 °C depending on the manufacturer and design of the thermostat.
general information
There are single-valve, two-stage and two-valve thermostats, as well as electronically controlled devices. Grant is equipped with thermostats Luzar LT0191 and Luzar LT0190 (cost from 450 rubles for the first and from 800 rubles for the second), FENOX TS034E7 (cost from 800 rubles), VAZ-2123 (article 2123-1306010, cost from 650 rubles). It is worth mentioning such devices as GATE VAZ-2101 (article TN14580, cost - from 350 rubles), GATE VAZ-2121 (article TN15380, estimated cost - from 500 rubles), VAZ-2110 (article 21082-1306010, cost - from 600 rubles) and other devices. They are located between the engine and the radiator, but it is definitely worth considering that there are differences in the location of thermostats on Grants with eight- and sixteen-valve engines.
Their main task is to prevent antifreeze from moving through the radiator until the car engine warms up to the required temperatures. As a result, if the car engine does not heat up, the coolant (coolant) does not move in a large circle. Typically, the thermostat is activated when the engine reaches a temperature of 80-95 ° C. Among other things, the thermostat helps reduce the amount of harmful emissions entering the atmosphere and minimize engine wear.
The thermoelement inside the device is made of brass, has a cylindrical shape and is filled with artificial wax. When the engine reaches a temperature of around 82°C, this substance begins to melt, causing it to expand. In this case, the valve is set in motion, opens, after which antifreeze begins to circulate through the car’s radiator. Turning off the engine causes the paraffin wax to harden inside the thermostat and closes the damper.
Below we will talk in more detail about possible malfunctions of thermostats, give instructions for replacing and checking them, and also share a method for refining and updating this part, allowing you to increase its response threshold to 92C.
Checking at home
Sometimes the electric motor turns on too late, when the antifreeze temperature is already high. This may be caused by a malfunction of the valve in the radiator cap or abnormal parameters of the switch on sensor. You can check the device’s response temperature at home using a multimeter and thermometer.
After disconnecting the electrical connector, the sensor is unscrewed with a key. To avoid burns, remove the device only from a cold engine, after draining the antifreeze. When reinstalling, it is advisable to use a new sealing copper washer and not apply too much force when tightening.
The switching temperature is engraved on the end; it can be from 92 to 95 degrees. To check, you need to connect the multimeter in resistance measurement mode and immerse the threaded part in a container of water.
While heating the water and monitoring the readings of the multimeter, we use a thermometer to record the moment it turns on, and when it cools down, the temperature it turns off. Standardly, these are 92 and 87 degrees; with significant deviations, late operation is especially critical, the device requires replacement.
To improve cooling, it is possible to install a double fan from Niva. There are two modifications for placement: after the radiator or in front of it.
On the VAZ 2110, any of the options can be installed with minimal modifications to the fasteners on site. When electric motors are connected in parallel, the current consumption increases to 40 amperes, which requires replacement of the wiring.
Monitor the engine temperature. If you notice overheating too late, then in addition to boiling of the antifreeze and a forced stop, more serious consequences are possible: deformation of the cylinder head, jamming of the camshaft. If there are defects in the operation of the cooling system fan of the VAZ 2110, the faults can be diagnosed independently by checking the thermostat, electric motor, relay, and switch sensor.
Sources
- https://aveni-r.ru/datchik-temperatury-vaz-21083-skhema.html
- https://vazweb.ru/desyatka/ohlazhdenie/datchik-vklyucheniya-ventilyatora.html
How does it work
Specifically in Grant, the thermostat is located between the power plant and the radiator. The main task of the unit in question is to prevent the circulation of antifreeze until the engine warms up to the required temperature. If the engine remains cold, the coolant does not move.
Ideally, the thermostat operates after the temperature of the power plant reaches 80-95 degrees. All this allows, among other things, to reduce the volume of emissions harmful to the environment and minimize engine wear.
By the way, checking the functionality of the thermostat is relatively easy. It must be placed in a container with boiling water. If the element is working properly, its valve will open approximately 20 millimeters.
Lada 2107 Uzi › Logbook › Replacing the thermostat and cooling system pipes
Hi all. I actually wanted to replace the pipes in a couple of months at least.
It started with the fact that charging began to go poorly. It goes, then the arrow falls on the white one. Last Sunday I decided to climb in and change the brushes (for some reason I was sure that they were).
I went out on the bark, removed the battery, I looked, and the generator was wet. I touch the pre-start boiler, and antifreeze runs through it. I wasn't even upset, seriously.
I started looking for where in NSC, on Sunday, at 4 o’clock in the afternoon, I could get silicone pipes.
I visited all the stores in the area. Either to order, or simply not.
I remembered that I recently came across a store where there were different tuners for jigs. I called. -Eat? -Eat! I got ready and went. I took new clamps, sealant, and pipes, respectively.
Just a couple of days before, a new faucet was installed, the old one began to sweat a little, and began to simply collapse. When you touch it, crumbs from the alloy remain on your fingers. I really liked the quality. It opens as easily as possible, no special effort is required.
On Sunday I only managed to drain the antifreeze, remove the pipes, and remove the generator.
Since Monday, I spent every fucking evening until 11:00 p.m. in the car. From 8 to 18 at work, immediately after repairs.
Yes, as I suspected, the brushes were very worn. Just tough. There's not one in the photo at all. It is there, I pressed it, and it went inside, for good... It was about a quarter the size of the one that was still in place.
I will make another post about repairing the generator, because the problems with it are not over yet. It's completely gross...)
I really hate digging around with a stove and a beard. Damn you crawl up, you break your arm in 10 places to unscrew the damn bolt or nut. But you have to do it. I installed the faucet, nothing special, it’s a common thing, but annoying.
And only on Thursday we got around to the pipes. While walking home from work, I thought about changing everything. I bought a bunch of thermostats. Lately the fan has been humming for a very long time and turning on frequently.
One pipe had to be cut and adjusted, everything turned out great
Degreased, applied sealant, conditioned, installed, tightened. Nothing special)
Looks much more interesting. There are no changes. I hope that they will live happily ever after, without all this.
PRICE: Pipes 1490 RUR Thermostat 450 RUR Sealant with clamps about 500 RUR
Changed the brushes, it's called)
Now there is a problem with the generator, either from the quality of spare parts, or from crooked hands. I'll make a separate post when I figure this out.
PS Before this I wrote that the gearbox howls. I rented it and found it through a man I knew, a very good specialist. The man was involved in auto racing at one time; he had his own team from the factory. I spent my entire youth spinning iron. I'm really confident in him. He told and explained everything. The gearbox was removed and taken to him. He gave me a replacement for the duration of the repair.
Source
Some important tips
Before replacing the element we are interested in, experts advise allowing the engine to cool completely after operation. And after the old thermostat has been removed, you should definitely check the new device for serviceability. This is done like this:
- lower the thermostat into water heated to a temperature of about 80 degrees;
- raise the water temperature by another 10 degrees (you need to stir the liquid);
- observe the “behavior” of the new device: if you notice that the rod begins to extend from the silicone element, this means that the thermostat is operational.
And do not forget to pour liquid into the cooling system (into the reservoir) after finishing the work.
Home →
Maintenance and Repair → Repair →
Gates and Phoebe thermostats
Renault Logan thermostats are presented in two different ones and “febi”.
First, let's look at the product in the video:
As you can see in the video, its opening temperature is 88 degrees Celsius.
The response temperature of the “febi” thermoelement is 89 degrees, which is one degree higher.
When roughly determining the diameter of the products, using a regular school ruler, we find that the diameter of the “gates” thermostat is approximately 48 mm, and “febi” - 50 mm. As can be seen from the measurements, the products have different outer diameters. Accordingly, the diameter of the rubber sealing gaskets is different.
Rubber gaskets for thermocouples
Externally, rubber gaskets also differ. So the “gates” gasket is rectangular in section, but oval.
Also shown in the video is a RENAULT rubber gasket from CORTECO (023603H). The gasket is offered as a repair gasket. Let's try to combine it with our products.
As you can see from the video, the gasket apparently fits the thermostat from . However, if you compress it in diameter, then an “extra” piece of gasket appears in one place, in the form of a gap. This “speaks” that after installing the thermostat, antifreeze will flow into this gap.
Then we install the rubber gasket on the second product. It is immediately noticeable that the gasket is too big for the febi and the thermostat will not work correctly because the coolant will freely pass past the gasket.
When installing the “original” gaskets from the thermostat kit, they fit tightly, without any gaps.
Gates products with an outer diameter of 48 mm will not fit Russian-assembled Logan, since a thermostat with an outer diameter of 50 mm is installed there.
How to check the health of the thermostat
To check the serviceability of the VAZ-2112 16-valve thermostat, do the following:
- start the car and warm it up to the desired temperature;
- open the car hood and inspect the appearance of the pipe;
- If the thermostat is working properly, the pipe will be warm to the touch.
Otherwise, that is, if the temperature of the pipe is not warm, the thermostat will need to be replaced immediately.
Under normal home conditions, you can check the part for serviceability in another way. To do this, prepare a container with liquid in which to place the thermostat. The vessel is heated on a gas burner, they look at the temperature indicators and control at what moment the part begins to open.
It should be noted that in the operating position, a serviceable element that controls engine heating should open at a temperature of 88 degrees. As soon as the temperature in the engine rises to this level, the lid opens and the coolant begins to move in a large circle. Thanks to this, the VAZ-2112 car does not overheat, it will continue to function normally at any speed.
Replacing it with a new part will help restore proper operation of the engine and prevent it from overheating.
Sequencing
- We place the car on a platform with a slight slope back.
- We unscrew the 8 bolts around the perimeter of the oil pan protection and dismantle it.
- We unscrew the expansion tank cap and remove the vacuum.
- We unscrew the drain plug and grind the antifreeze waste into the container. Total 2.7 - 3.0 liters. Provided the consistency is clean, it can be reused.
We grind the waste into the container - Loosen the clamps and remove the two rubber pipes from the regulator fittings.
Two rubber pipes - Disconnect the negative terminal and unscrew the two nuts securing the regulator body to the cylinder block.
- Unscrew the screws of the cover and remove it.
- Using pliers, we recess the metal spring and remove the plate - valve from the regulator cavity.
- We carry out troubleshooting of elements and assess their condition. We replace worn out elements with new ones.
- We assemble the cooling system mechanism in reverse order. We first apply sealant to the flanges to prevent liquid leakage.
Note to the driver! You can check the serviceability of the old thermostat in the following way: put it in a container of water and heat it over low heat. When 85 - 90°C is reached, the rod should move upward, simulating the opening of the valve.
Sensor check
Checking the functionality of this sensor is not difficult. But before you do it, it is advisable to check the integrity of the wiring going to it. You can also check the voltage coming from the control unit. To do this, you need to disconnect the chip with wires from the sensor and connect it to a voltmeter. After this, start the engine and measure the voltage supplied to the sensor; it should correspond to 5 V. If the voltage is normal, check the sensor for resistance.
To remove, check and replace the sensor you will not need much:
- Key to 19;
- Multimeter;
- Container for draining coolant;
- Electric kettle;
- Thermometer;
Before removing the element, you need to partially drain the liquid from the system. It is not necessary to drain it all, since it is located at the top of the engine; it is enough to drain it to a level below the position of the sensor.
Then the chip with wiring is disconnected from the sensor. Using the 19 key, it turns out of its seat.
Video: Checking the coolant temperature sensor
Check the sensor using an electric kettle with a thermometer and a multimeter set to resistance measurement mode. You can check in two ways.
- In the first method, the working part of the sensor is immersed in an electric kettle with cold water, and a thermometer is also placed there. You can only use an electronic thermometer that can measure high temperatures. A multimeter is connected to the sensor itself and the electric kettle is connected to the network. As the water temperature rises, the sensor resistance will drop. So, at a water temperature of +15 C, the resistance should be 4450 Ohms. At +40 C, the multimeter reading should be 1459 Ohms. The water needs to be heated to a temperature of 100 C. At this value, the resistance is minimal - 177 Ohms. If the values differ, it means that the sensor is providing incorrect information.
- The second method is suitable if you do not have a thermometer. To measure resistance, the sensor is immersed in water after it has boiled. In this case, the water temperature will approach 100 C, approximately 95-97 degrees. This is quite enough for taking measurements. After lowering the working part of the sensor, there is a resistance on it, which should be slightly more than 177 Ohms. If the difference is large, the sensor is faulty.
Signs of breakdown
However, the thermostat is a fairly simple element and is not immune to failure. Typically, after starting a cold engine, the lower hose coming from the radiator does not heat up for some time, but after the coolant temperature exceeds 85 ° C (± 2 ° C), it begins to heat up quickly (provided the thermostat is fully turned on in working order). It is this aspect that will accurately indicate to the car owner the moment the coolant begins to circulate.
In cases where the valve does not open, the coolant stops circulating and the engine begins to overheat. Overheating also causes the valve to not open completely. On the other hand, a delay in valve closure creates conditions for a longer engine warm-up, especially in the cold season.
As a rule, thermostat failure is caused by the following reasons:
- unstable engine (triple action often leads to valve damage);
- wear of the rubber seal;
- corrosion (which is the most common cause of breakdowns);
- antifreeze gets into the thermostat;
- wax leaks out of the device;
- the valve is mechanically damaged.
Most often, a malfunction of the thermostat leads to the impossibility of further movement in the car, and therefore the faulty part must be replaced immediately.
Design and functional properties
The materials for the manufacture of parts of the body and filling of the thermostat of the VAZ 2106 car are brass and copper. The working process of the thermostat is as follows:
- A spherical piece of wax is placed in the cylinder of the device, which begins to melt when the engine reaches a temperature mark of 82 ° C.
- Having a significant coefficient of expansion, the wax begins to press on the end of the rod connected to the inlet valve.
- When the valve opens, coolant begins to circulate through the heat removal lines of the engine, cooling it.
- As the temperature drops, the wax begins to harden and shrink, which leads to a decrease in pressure on the rod, which returns to its place under the action of the return spring.
Problems with the thermostat arise when the engine is operated in incorrect operating modes: frequent overheating, prolonged driving with engine hyperthermia, or mechanical deformation of the thermostatic device.
If the valve jams in the closed position, severe overheating of the power plant occurs even at negative ambient temperatures. When the valve is partially opened, overheating still occurs, but under gentle operating conditions this will not lead to the engine boiling.
Checking the thermostat (VAZ 2101-2107)"
thermostat
Belmag, for Lada, Tsrab = 85 degrees. Checking the operation of valves without temperature control. At the end…
When the shut-off valve of the car thermostat is in the fully open position, the engine cannot warm up to the temperature required for normal operation. In this case, the wear of parts of the crank and gas distribution mechanisms increases, the required degree of expansion of the cylinder-piston group is not achieved, which leads to insufficient sealing of the combustion chamber and a decrease in the degree of compression.
How to replace a LADA “Granta” thermostat with 8 and 16 valves
The Granta thermostat is a key part of the engine cooling system. ensuring the optimal temperature of the coolant and the power unit itself. Thermostat malfunctions can lead to overheating and breakdown of the car engine, so it is advisable for owners to know how to check and replace the LADA Granta thermostat.
Features of the LADA Granta cooling system
As in previous LADA models, upon reaching a certain temperature, the thermostat switches the coolant flow from a small to a large circuit. The small circuit includes:
- cylinder water jacket;
- water pump;
- interior heater.
The difference is that the heater radiator is connected to a small circuit in series and not in parallel. This forces all the coolant to pass through it, improving the heating of the cabin. The thermostat opening temperature is 85 degrees. Upon reaching this mark, the valve opens and the liquid begins to circulate through a large circuit into which.
In addition to the small circuit elements, a cooling radiator is included. The advantage of the modernized cooling system is that antifreeze from the engine jacket falls directly onto the thermostat thermocouple without mixing in its housing. This allows the element to respond to the actual engine temperature, opening on time and preventing overheating.
The manufacturer has set the permissible thermostat opening range to 85–7 degrees. That is, it can open at both 78 and 93 degrees. According to the official letter from the manufacturer, sent to dealers, the operating temperature of the Grant engine may be 10 degrees lower than that of previous VAZ models. This does not mean that the engine is “underheated” and does not lead to an increase in fuel consumption, deterioration of lubrication and a decrease in engine life. However, owners of the LADA Grant often change the thermostat to a new one, with an opening temperature closer to 90 degrees, or modify the standard thermostat by changing the thermal element.
When is it necessary to replace the LADA Granta thermostat?
The thermostat should be changed if it does not close a large circuit even when the engine is hot or opens at temperatures above 92 degrees. In the first case, the engine does not warm up enough, which impairs the combustion of the air-fuel mixture and the circulation of oil through the oil channels. When opening late, at best, the cooling fan often turns on; at worst, the crankshaft bearings fail or the engine head becomes deformed, which requires complex, expensive repairs. The design of the LADA Granta thermostat does not provide for its repair, so the failed part must be replaced with a new one.
You can verify that the thermostat is working without removing it from the car by feeling the temperature of the pipes of the large cooling circuit or the bottom of the radiator. They should be cold until the engine reaches operating temperature. After the engine warms up, the thermostat opens and the elements of the large circuit should heat up.
How to change the thermostat of LADA “Granta”
The LADA Granta is equipped with power units with 6 and 8 timing valves. The location of the thermostat in these models is different, and accordingly, the replacement procedure is also different.
To replace the thermostat on the eight-valve Granta version you need:
- Phillips screwdriver;
- socket wrenches for 10 and 13;
- crosshead screwdriver;
- key T30;
- container for coolant.
Replacing the LADA Granta thermostat (8 valve) is performed as follows:
- install the LADA Granta on a site that has a slope so that the front part is higher than the rear;
- unscrew the bolts securing the engine protection and remove it;
- place a container for coolant under the radiator;
- remove the cap covering the expansion tank;
- Unscrew the drain plug on the radiator;
- drain the coolant into a container;
- tighten the drain plug on the radiator;
- press the latch and disconnect the wiring block from the coolant temperature sensor;
- loosen the clamp securing the rear hose to the thermostat cover pipe;
- remove the hose from the pipe;
- loosen the clamp securing the front hose to the thermostat cover pipe;
- remove the front hose from the pipe;
- unscrew the nut holding the ground wire to the thermostat mounting stud;
- remove the washer and the ground wire tip from the stud;
- unscrew the two nuts securing the thermostat to the engine, remove and set aside the washers;
- pull the thermostat housing off the studs;
- remove the thermostat gasket;
Important: when removing or replacing the thermostat, the sealing gasket must be replaced with a new one!
- unscrew the three bolts holding the thermostat cover;
- remove the cover;
- press out the thermostat fixing plate, overcoming the resistance of the spring;
- turn the plate, remove it from the grooves and pull it out;
- remove the spring;
- pull the thermostat out of the housing.
The new thermostat is installed in the housing in place of the old one; further operations should be performed in the reverse order of removing the part.
Tip: before installing the hoses on the pipes, you should lubricate the latter with a thin layer of sealant, this will prevent possible leakage of coolant.
After installing the thermostat, it is necessary to fill the cooling system with antifreeze (coolant), start and warm up the engine, making sure that air pockets are removed from the cooling circuits.
To replace the thermostat on the sixteen-valve Granta version, you will need:
- crosshead screwdriver;
- key to 10;
- hex key 5;
- container for coolant.
The car must be placed on a level area, preferably with a slight slope, so that the front part is raised relative to the rear. Before replacing the thermostat, drain the coolant from the system. To do this, you need to remove the engine protection, open the expansion tank cap, place a container for coolant under the radiator and drain the latter by unscrewing the radiator drain plug. After the liquid has been drained, you can tighten the drain plug and begin replacing the thermostat. Removing the LADA “Granta” thermostat (16 valves) is performed as follows:
- loosen the clamps of the hoses supplying coolant to the thermostat cover;
- disconnect the hoses from the thermostat cover;
- Unscrew the bolts securing the thermostat cover;
- remove the thermostat cover from its seat;
- remove the sealing ring from the groove in the thermostat cover (it must be replaced with a new one);
- push down and rotate the plate that secures the thermostat in the lid;
- remove the plate and thermostat from the cover.
Checking the Thermostat
The problems described above can appear at any time. To avoid engine overheating and damage, you need to know how to check the thermostat directly on the car and after dismantling it at home.
It is important to know that after starting the engine, the thermostat is still closed and the coolant flows through a small circuit (through the cooling jacket and the stove). This allows the power unit to quickly reach the desired temperature. As soon as the required level is reached, the valve opens and coolant flows through the main radiator
As soon as the required level is reached, the valve opens and coolant flows through the main radiator.
Understanding this principle is very important when checking the thermostat. Therefore, we invite you to familiarize yourself with the diagram. Therefore, we invite you to familiarize yourself with the diagram
Therefore, we invite you to familiarize yourself with the diagram.
Let's consider two diagnostic options.
Without dismantling
The easiest way is not to remove the unit, but to check it directly on the car. The main condition is a cold engine.
The diagnostic process begins with starting the power unit and warming it up for 2-3 minutes at idle.
This time is not enough for the engine to warm up and the coolant to circulate in a large circle, so the radiator is not yet connected to the general cooling system.
To check that the system is working correctly, touch the pipe that goes to the top of the main radiator with your hand.
The pipe should be cold, which signals the passage of coolant in a small circle (only through the engine and stove).
Therefore, the valve of the device under test is in the closed position (as it should be at this stage).
Continue to monitor engine cooling system performance. As soon as the coolant warms up to 90 degrees Celsius (can be controlled by the sensor), touch the inlet pipe. The thermostat should be open at this moment.
In this case, the coolant is directed in a maximum circle (encompassing the radiator). In such a situation, the pipe that extends from the radiator will be well heated.
By the way, the lower pipe of the cooling system, extending from the radiator, will also be hot.
If the condition described above is not met, then we can talk about a breakdown of the thermostat and its incorrect operation (for example, the valve could be jammed). In such a situation, you need to check it and replace it if necessary.
The second option is also possible, when after starting the engine the tube leading to the radiator warms up almost immediately.
One of the reasons is the valve jamming in the open position and, as a result, the coolant moving in a large circle at once.
The result in this case is obvious - the power unit will not operate in normal mode due to the impossibility of reaching normal temperature conditions.
Such a malfunction is not dangerous for the engine, but can lead to increased fuel consumption.
Situations are possible when the valve “hangs” in the middle position, that is, it does not close or open fully. The problem is diagnosed by the long warm-up of the power unit.
It is more difficult to determine a malfunction in “field” conditions.
In this case, checking the thermostat can only be done by dismantling it.
Checking the functionality of the thermostat by removing
If it is not possible to determine the breakdown without dismantling, then proceed as follows:
- pour the antifreeze into a container prepared in advance. In this case, first install the vessel, and then unscrew the drain plug. To speed up the process of coolant release, unscrew the cap on the expansion tank;
- If there is no such plug, then place a container under the lower part of the radiator pipe. loosen the clamp that holds the pipe to the radiator and remove the pipe itself. Wait until the coolant is completely drained into the container, and then proceed to dismantle the thermostat;
- dismantle the outlet pipe;
- take the thermostat and go to the kitchen. There you will need a stove, a saucepan (or any other metal container) and water. Pour in the liquid and set the pan to heat. Then place the assembly in water so that the body part does not touch the walls of the container itself;
- install a special thermometer in the water and monitor changes in its readings, as well as the actions of the valve itself;
- as soon as the desired temperature is reached, the unit should operate and open. This is possible thanks to the precise operation of the device’s working substance (artificial wax). When heated, the wax expands and allows the valve to operate. If it still does not work at the required temperature, then we can draw conclusions about the unsuitability of the entire assembly (we will talk about the operation temperature below);
- remove the thermostat from the water and let it cool. If the node worked earlier, it should close after a while. Again, if this does not happen, then it needs to be changed.
Thermostat. Replacing the thermoelement with “Behr” 87gr. (1 hour) — Lada Granta, 1.6 l., 2015 on DRIVE2
Start.
Since the beginning of the purchase of Grants, when driving at speed, the engine temperature remained 79-80 degrees all the time.
Sometimes it even showed a value of 78 g. True, only for a few seconds. Many grant providers confirm such a constantly low temperature of the thermostat.
This temperature is really too low. Fuel consumption at a constantly lowered operating temperature of the engine will be slightly higher than normal: for example, the on-board computer will consider that the engine is not warm enough and the fuel mixture needs to be richer.
This is not very critical for the engine, but for its normal efficient operation a higher constant temperature regime is required. And it is better, of course, without such significant surges as constant temperature changes over a fairly large amplitude: in fact, from 79 to 102 degrees. In a traffic jam, When fully warmed up, the temperature constantly exceeded a hundred.
And only at 102 degrees did the radiator cooling fan turn on, which turned off at 98 degrees.
- And so on in a circle until we accelerate: 102 - 98, 102 - 98.
Full size
Thermostat housing for Lada Granta
I read various recipes from grant providers for replacing the thermostat to correct the situation. But thermoelements from different companies often differ greatly from each other in their main external dimensions.
For example, thermoelements that have a larger than required diameter of their locking plate, or a smaller diameter of the thrust rod, and its shorter length than required.
So.
On Grant, an 85-degree thermoelement is installed in the thermostat housing from the factory, with characteristic longitudinal recesses along the body.
Full size
Thermocouple "BEHR" 85g.
— — — — — — — — — — — — — — — — — — — — — — — — — — — — — — — — — — — — —“Behr Thermot-tronik GmbH (BTT) is a wholly owned subsidiary of MAHLE Behr GmbH & Co. KG, and within the group MAHLE is a division dealing with thermostats and valves.”
— — — — — — — — — — — — — — — — — — — — — — — — — — — — — — — — — — — — —
Analysis of the question: (85±8.3) ºС = from 77ºС to 93ºС.
In general, I was very surprised why the thermostat, designed for 85 degrees, only holds 79-80 degrees. And many people have this situation.
- (here, for example, is an interesting article on the Internet: carfrance.ru/kakaya-raboc…o-dvigatelya-lada-granta/)
- It's complete nonsense.
When I asked the official dealer where I bought the car with the relevant question, the warranty engineer, having specifically gone to the repair area to see the technicians, returned from them with the answer: “Everything complies with the technical requirements reflected in the “Methodological material on the cooling system of automobile engines.” families of Lada Granta (2190) and Lada Kalina FL (2192, 2194)." The same is said in the "Information letter to AvtoVAZ dealers" - about the operating mode of the Granta thermostat (not verbatim): "... It is considered normal if the operating temperature range of the thermostat does not exceed 8.3 degrees in both directions from the declared value of the thermostat...” That is, if the standard thermostat is 85 degrees. will keep any temperature in the range from 76.7 degrees. up to 93.3g, then this will not be considered a malfunction. An employee of the center even persistently offered to draw this conclusion for me from the methodological material in printed form. I refused.
Then questions arose: a thermocouple with WHAT other threshold should I choose, instead of 85g? -? To 87g-? Or at 92g? And what company? For example:
GATES TH27188G1
GATES TH00391G2TX 4 87DTX 4 92D
VERNET TH4898.87J
VERNET TH4898.92WAHLER 3017.87D2WAHLER 3017.92D2WAHLER 3091.92D This is the entire list of those thermostats that are recommended by Grant owners for replacement instead of the factory Behr thermostat.
It was a little scary that if you choose, for example, the same company Behr, then if the 85th actually holds 80, even 79g. What: the 87th will hold - 82gr.-? And the 92nd will always give only 87 degrees -? And if the 92nd still maintains its 92 degrees -?
Then in the summer the engine, especially with an automatic transmission, especially with the air conditioning on, I think, will be a little hot.
* WAHLER = The stem is much shorter and narrower! The thinnest in diameter and the shortest of all. As I understand, the rubberized plate is only at 92 degrees. Not rubberized - at 87 degrees. If not for the stock, it would be most suitable as a substitute. Many people bet.
* GATES = TE body is slightly smaller in diameter. The stem is shorter! The diameter seems to be the same as the original one.
The plate diameter is 0.5mm smaller: 28.5mm than the original Behr: 29.0mm.
* VERNET = The diameter of the TE body is even smaller by 2.5 mm than that of GATES. The TEs are the same: either 87 or 92 g. The fit on the TE under the spring is narrower! The rod is a little thinner and shorter than the original from Behr.
- The plate is 1mm larger in diameter.
- * * *
- Boil test.
After studying the opinions and experience of many grant providers in their Logbooks, who installed what thermostats for themselves, I decided to determine the temperature during a preliminary check of the fuel cell during boiling.
Based on the manufacturer, I came to a conclusion: we need to take the “BEHR” fuel cell, since it has the same basic parameters as the one installed in the Granta thermostat housing from the factory.
This means you can replace it without serious hemorrhoids and any risks.
Full size
Thermostat "BEHR" 87 degrees: Knecht / Mahle TX 4 87D.
BEHR thermocouple 87 g: Knecht/Mahle TX 4 87D, bought without difficulty.
Full size
Thermostat "BEHR" 92 degrees: Knecht / Mahle TX 4 92D.
But finding a 92-degree BEHR thermocouple: Knecht/Mahle TX 4 92D turned out to be not so easy. It turned out that it is quite rare, apparently because it is not very popular.
An acquaintance provided a new original Grant thermostat housing assembly for testing.
Therefore, I was able to compare all three fuel cells: the standard one, from the same case, which is 85g. and two purchased - for 87g. and at 92 degrees. Thermostats at 85 and 87, in spite of everything, as the temperature increased, they showed approximately the same dynamics and opening size. But at 92g.
opened slightly to a much smaller opening. When boiling, I noticed that the thermostat continued to open more and more as the liquid heated up. The more heat, the greater the opening.
It was clearly visible from the BEHR thermoelement that the poor fuel element continued to compress the return spring for another 5-8 seconds after the water had already boiled.
Although, this is logical: the higher the coolant temperature, the larger the passage for the flow of liquid must be opened so that it has time to cool the unit.
Return spring.
The idea arose to try replacing the standard return spring with another, slightly softer one.
Such a spring was found in the LUZAR LT0108 thermostat.
Full size
Thermostat LUZAR LT0108 before opening.
Full size
Opened thermostat LUZAR LT0108.
The spring from the LUZAR thermostat surprisingly turned out to be what I was looking for. The shape is the same: conical. Rod diameter: D = 2.1 mm. (the standard Bekhrovskaya rod has a diameter of 2.4 mm). It has exactly the same end diameters as the standard Granta thermostat spring. 10mm shorter than the standard height, and, indeed, a little softer than the standard one. Exactly what is needed!
In the process of searching for a replacement spring, I also found a spring from a classic radiator cap. But it is too soft, short, and has a cylindrical shape.
And the Vernet thermostat spring is cylindrical in shape, and its diameter does not coincide with either the wide or narrow ends of the standard Behr spring.
In general, I installed the Luzarovskaya spring to check with the 92nd TE, so that it would start moving at its 92 degrees, but then, with a softer spring, it would open to a greater distance, opening a wider passage for the antifreeze... .
But the result of the experiment did not suit me((.
Yes, now the 92nd TE opened more than with the original spring, but still - significantly less than the 85th or 87th TE.
And one more thing: at the same time it closed much more slowly (!), which is already very bad ((! When the temperature drops - the liquid in the engine cools - the thermoelement will not have time to close in time, and I realized that the thermal regulation phases will be completely disrupted.
Since the experiment with using the Luzarovskaya spring during boiling was considered unsuccessful, the option of replacing the spring, in principle, disappeared by itself.
Knecht/Mahle TX 4 92D or Knecht/Mahle TX 4 87D.
vwts.ru/forum/index.php?showtopic=150802&st=580
Full size
BEHR thermostat characteristics table
If you believe the information from a table provided on one forum by one of its users on the characteristics of BEHR fuel cells, then by the number after the letter “S” stamped on the fuel cell body, we can assume
- that in front of us is just some kind of monster,
Full size
The number after the letter S-! ! !
those. For every degree of temperature increase, the rod extends 1 mm! Those. – more sensitive!
Full size
Knecht / Mahle TX 4 92D
It is logical: it maintains a higher temperature = 92 degrees, and when exceeded, it opens more quickly and intensively. After all, it’s very close to a hundred. Unfortunately, I didn’t see anything like that in the pan. By 98 degrees, the opening was more than modest.
Full size
By 98 degrees, the opening value of the TE is 92 degrees. was more than modest ((
As a result, I concluded that this fuel element: at 92 degrees, will be very useful for Lada Granta owners in the colder, northern regions of the Russian Federation (completely ready for installation in the car’s thermostat housing). Thus, I installed a fuel element in my Granta at 87 degrees.
Full size
Purchased BEHR thermostats
Purchased BEHR thermostats differ from those installed in the Grantovsky fuel cell only in that they have a ground, narrowed shank of the thrust rod. Grantovsky has no such thing.
Full size
On the left - Behr with Grants, on the right - purchased Behr
Therefore, the only thing that needs to be done is to modify this shank, making its end back full in area at the end. It’s not according to Feng Shui that the rod, resting, presses with its pin at the end into only one tiny point in the bottom of the blind hole of the thermostat housing with the brave force of its return spring.
Full size
Extension screw with outer diameter 4mm, and with inner hole
Full size
Extension screw on the thermoelement rod
To do this, I found some kind of extension screw on the farm with an outer diameter of also 4 mm, which, most importantly, has an internal hole, even with an M2 thread.
I shortened the length of this very narrow shank a little to the standard length of a regular rod. I sawed off the short shank to the length of the shank, slightly made a recess with a drill like a counter, since the descent to the small shank itself has a conical shape.
Full size
I sawed off a short piece to the length of the shank, made a recess in it with a drill like a mortar
To be sure, I quickly and carefully soldered the short piece to the rod, so that God forbid it would come off during installation and remain inside the thermostat housing.
I planned not to remove the entire housing, but only unscrew the thermostat housing cover and change the fuel element directly on the engine. In the end I did just that.
* * *
Types of thermostats
The VAZ 2106 car was produced for many years. And during this time, engineers made a number of changes to it, including thermostats. Let's look at what thermostats were installed on the VAZ 2106 from the release of the first cars to the present day.
Single valve thermostat
Single-valve thermostats were installed on the very first “sixes” that rolled off the VAZ assembly line. The operating principle of this device has been described in detail above. To date, these devices are considered obsolete, and finding them on sale is not so easy.
Electronic thermostat
An electronic thermostat is the latest and most advanced modification that replaced single-valve devices. Its main advantages are high accuracy and reliability. Electronic thermostats have two operating modes: automatic and manual.
Liquid thermostat
Thermostats are classified not only by design, but also by the type of fillers. Liquid thermostats were the very first to appear. The main component of a liquid thermostat is a small brass cylinder filled with distilled water and alcohol. The operating principle of this device is the same as that of the wax-filled thermostats discussed above.
Solid thermostat
The filler in such thermostats is ceresin. This is a substance similar in consistency to regular wax, which is mixed with copper powder and placed in a copper container. The cylinder has a rubber membrane connected to a rod, also made of dense rubber that is resistant to high temperatures. Ceresin, expanded from heating, presses on the membrane, which, in turn, acts on the rod and valve, ensuring the circulation of antifreeze.
Which thermostat is better
Today, thermostats based on solid fillers are considered the best option for the VAZ 2106, since they have the optimal combination of price and quality. In addition, they can be found in any auto store, unlike liquid single-valve ones, which are practically no longer on sale.
Possibility to do without removing the device
Next, we’ll figure out how to check the thermostat on VAZ cars. Let's start with the "classics". Here are the instructions for the VAZ 2106 car.
- Initially, you need to determine that the coolant level is normal, that the temperature arrow on the instrument panel works, and that the belt driving the antifreeze pump (pump) is tensioned normally.
- Next you need to start the engine and warm it up. If more than five minutes have passed and the temperature needle has not risen above 70 degrees, you should touch the return pipe from the radiator. If it is slightly warm, it means that the coolant immediately enters the large system circuit. Consequently, the valve of the device is constantly open.
- If the engine overheats after five minutes or more, you need to touch the upper radiator hose. Suppose it turns out to be cold - this means that the valve of the device being tested is jammed.
What is a thermostat?
As the name of the device suggests, it does something with temperature. More specifically, it helps switch fluid flows in the cooling system. Moreover, the thermostat, carburetor or injector are at the heart of the gasoline injection system and have the same composition and housing design. When operating any engine, it is necessary to ensure heating of the throttle assembly. And it is present in any injection system: both in the carburetor and in the injector.
The basis of any thermostat is a special plate, which is made of a material called bimetal. It reacts to temperature changes and is capable of deformation because of this. The switching of air flows is based on this effect: the plate moves the valve, which is fixed by springs. Having overcome their force, the plate moves the valve, opening the path for liquid flow to the main radiator to ensure effective cooling.
Where is it located
There are many options for what will happen if the thermostat is constantly open on a large or small circle. This will lead to overheating, antifreeze may be released from the expansion tank, the normal pressure in the cooling system will change, and more.
This unit cannot be allowed to malfunction. It is used on all machines:
- on Kalina;
- on Priora;
- VAZ 2114;
- VAZ Classic;
- Ford Focus;
- VAZ 2110;
- Chevrolet Aveo;
- Gazelle Next;
- VAZ 2107;
- Lada Granta;
- Renault Logan, etc.
To check the serviceability of this element on a car, as well as to detect signs of a dying thermostat, you need to at least roughly understand where it is located.
I can't say it's difficult to do.
It is objectively correct to immediately look at the instruction manual. In the section where the cooling system is described, the location of the required element must be indicated.
At the same time, there is a fairly universal search method that is relevant for almost all domestic cars and many foreign cars.
To find a thermostat you need to do the following:
- open the hood;
- find the thickest pipe;
- this will be the radiator hose;
- it goes from the radiator to the engine;
- the second end of this pipe is connected to the thermostat;
- get to the second end;
- determine the location of the thermostat housing;
- start removing it.
Although I still advise you to first look at the manual, and only then start searching, dismantling and repair work.
LADA 110 and Priora
1 — heater radiator; 2 — coolant drain hose from the heater radiator; 3 — coolant supply hose to the heater radiator; 4 — coolant pump hose; 5 — expansion tank hose; 6 — steam removal hose of the heater radiator; 7 - expansion tank; 8 — liquid level sensor in the expansion tank; 9 — thermostat; 10 — coolant drain hose from the engine radiator; 11 liquid supply hose to the throttle assembly; 12 — steam exhaust hose of the engine radiator; 13 — hose for supplying fluid to the engine radiator; 14 — engine radiator; 15 — radiator drain plug; 16 — electric engine radiator fan; 17 — coolant pump; 18 — supply pipe to the coolant pump; 19 — coolant drain hose from the throttle body
On the old 110, a thermostat 2110-1306010 (“three-hole”) was installed.
The Priora and the new 110 use a thermostat 21082-1306010-10 (“six-hole”) with its classic circuit, similar to the Samara of the latest releases.
On newer models (FL), a system based on the 2190 thermostat is also installed.
There is an additional steam removal hose leading from the heater to the expansion tank.
Signs of a malfunction of the VAZ 2112 thermostat
If the thermostat does not release liquid to a large circle, the car will begin to heat up very much - do not allow it to overheat under any circumstances and replace the thermostat as soon as possible, because if your car’s engine operates at elevated temperatures, the gasket will gradually burn out cylinder head.
There are 5 main signs of a thermostat malfunction:
- The car engine takes a long time to reach operating temperature.
- The engine overheats quickly.
- The engine temperature gauge drops at lower speeds than usual and rises after stopping.
- After several minutes of operation, when the lower pipe is warm, this already indicates a prematurely opened thermostat.
- If the lower hose is cold while the engine temperature is close to boiling, this indicates a stuck thermostat.
When to change: signs of thermal switch failure
Abstract symptoms can indicate the nature of the disease that has befallen the thermostat:
- Stuck in the open position (coolant constantly circulates through the radiator). In cold weather, the engine does not heat up well, and at extreme city speeds the coolant temperature drops. Let's say it's -15°C outside, the coolant at idle has warmed up to 70°C, we're driving on a multi-lane road, moving at a speed of 60 km/h, and the temperature gauge needle is either standing still or going down. Fuel consumption increases noticeably (+ 1-2 liters per 100 km).
- The wedge is in the closed position (antifreeze moves along the jacket and heater radiator, bypassing the main heat exchanger). There will be no cooling and overheating is inevitable in summer. The fact is clearly clarified by the thermometer needle running upward when the cooling fan is on. Additionally, the “brains” indicate a problem in the form of an illuminated Check Engine icon.
- Final stop at an intermediate position. Prolonged heating + overheating in hot weather. Slight increase in appetite (within 1 l/100 km).
- It is impossible to close a large circle tightly, while the rod moves and the full opening occurs. There is no wedge. This is prevented by deposits accumulated as a result of untimely change of antifreeze, mixing coolant of different classes (for example, on a Hyundai Solaris, antifreeze can only be mixed with G11), and the use of cheap or counterfeit fluids. The fact can be revealed in warm weather only through tubes. In winter, pollution will be indicated by a reluctant rise in temperature from 70°C to 90-95°C when driving on the highway, but in the city there will be no problems with warming up. Seeing such a picture, those who like to cover the radiator grille with cardboard often persuade the owner to insulate the front end. This is definitely useful in cold weather.