VAZ cars, despite their age, are still popular among car enthusiasts. Based on the number of shortcomings of domestic cars, owners are forced to resort to improvement and modernization of certain elements of vehicles. This article will talk about tuning the VAZ-2107 stove, since it is the weak link of the vehicle.
It often happens that the standard VAZ 2107 stove cannot cope with severe frosts
Everyone knows how important the heating system of a car is for the comfort of the driver and passengers during cold winter periods. Freezing windows and cold in the car create great discomfort. Let's look at the main options for improving the vehicle's stove.
You can improve the operation of the heating system on the “seven” in the following ways:
- redo side window ventilation;
- modernize the damper;
- modify the foot airflow system to increase its efficiency;
- improve the operation of the rear cabin heating system;
- modify the thermostat;
- improve the functioning of the steam exhaust line;
- install an additional water pump.
User Egor Panther spoke about options for upgrading the heating system in VAZ 2107 cars.
Improved side ventilation
The side ventilation system needs to be modified after purchasing an additional fan. The device is mounted in the left line, which will allow forced air flow to the deflector.
The tuning procedure looks like this:
- At the first stage, the deflector device is dismantled from the main line. To perform this task you need to use a screwdriver. The deflector in the cabin is pryed up and removed; it must be pulled forward. Similar actions are performed on the other side of the stove.
- Dismantling the device is carried out carefully so as not to leave any traces of damage on the center console.
- If the deflector is removed, it is necessary to remove the holding device from the dashboard. This element is mounted in the center console using special antennae. The essence of this modernization is that a classic computer fan is installed to force air flow into the heating system.
- To install the ventilation device, the element must first be fitted to the deflector body. After applying it to the plastic with a marker or pencil, you need to apply markings. Using a utility knife, a cut is made in the plastic on the deflector.
- If the dimensions are marked accurately, the ventilation device will be tightly installed in the housing. This is important, since such installation will prevent the part from loosening while driving.
- After completing the installation of the fan, you need to make sure that its blades rotate normally and nothing interferes with them. If problems arise, the device is adjusted. If necessary, the blades can be trimmed a little.
- To ensure efficient air flow and no backdraft, the entire structure must be sealed. Therefore, using sealant or the remains of plastic that appeared after cutting the deflector, the cracks are clogged.
- If all steps are completed, the ventilation device is installed in the main line area, and then mounted on the body of the deflector element.
- After completing all the installation steps, you need to work with the electrical component. It is recommended to connect the fan electrical circuit to the conductor where the current appears when the ignition is activated. This option is more convenient. It is possible to connect the device to the heating unit control cable.
Damper modernization
Modification of the VAZ 2107 stove, which consists of upgrading the lower damper of the system, is the easiest option to implement. If all actions are performed correctly, the device will not open or close randomly when the car drives over bumps. This will ensure efficient and equal airflow on both glasses.
The upgrade procedure is carried out as follows:
- It is necessary to visually evaluate the housing of the heating unit. In its corner there is a hole of the required diameter to carry out the work. If it is not there, then it is drilled. For this, a drill with a diameter of 6 mm is used.
- A bolt is installed into the hole made from the inside. The valve itself closes.
- After this, using the same drill, a hole is drilled directly into the handle of the device. It is necessary to drill so that the hole is located at the level of the bolt installed earlier. In this case, the length of the screw must be such that when lifting the damper, the element can freely fit into the hole made.
- If everything is done correctly, the bolt is tightened with a nut. It is recommended to use a black part, then it will be difficult to see.
User Nail Poroshin spoke about the features of modifying the air damper thrust.
Rear seat heating system upgrade
To modernize the rear seat heating system, you will need to install an additional “snail”, which can be used from the VAZ 2108:
- First you need to make a housing to fix the “snail”. To perform this task, you need to cut plexiglass.
- Using a regular hairdryer, you need to carefully make bends on the glass so that it turns out as shown in the photo.
- Then, using a hair dryer, you need to carefully change the shape of the case. It is necessary to act carefully, otherwise the “snail” may not fit into the landing site.
- When completing the task, you can remove the device plug using a utility knife. This will reduce the dimensions of the part by approximately 3 cm.
- Then the side walls of the structure are manufactured. For this you can use duralumin or other similar material. The wall thickness should be 1.5 mm.
- The next step is to remove all the cracks. To do this, the joints of the device must be sealed using adhesive-sealant or other means.
- Then you need to work with the channels through which air will flow to the blower openings. It is recommended to make these elements collapsible. For manufacturing it is desirable to use a similar material.
- In order to reduce the amount of resistance and remove turbulence, the turns of the air channels must be smooth. They can be made from duralumin.
- At the next stage, we need to build slots that will be used to warm the feet. We are talking about front airflow - for the driver and passenger. The slots must be equipped with shutters. You can additionally install a variable resistor device, which will be used to regulate the speed of the electric motor. This element can be used instead of a resistor designed to change the brightness of the backlight.
- The main stage in this modernization is the construction of a system for effectively heating the feet of passengers sitting in the rear. To do this, it is necessary to additionally install several longer pipes. The radiator device is quite powerful and its power will be enough to supply air flow back. All connecting points of lines and blowers are sealed to prevent leakage of warm air flow.
Using a hair dryer, a body for the “snail” is made from plexiglass
Removing the snail plug
Modernization of the housing for the production of air channels
We recommend: When, according to the law, should we change summer tires to winter tires in 2022?
Improved foot airflow efficiency
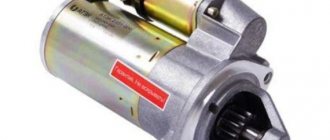
To improve the efficiency of blowing the legs, you will need to replace the standard fan with another; you can use a device from a VAZ 2108.
The upgrade procedure is performed as follows:
- The first stage is performed inside the car. It is necessary to dismantle the lower part of the heating unit. A standard ventilation device is installed here.
- The fan is being dismantled. It will no longer be needed and can be recycled.
- Next, the plastic ridge is cut, which supplies the air flow to the floor of the machine. On “eight” units, the fan motor is larger in size.
- A ventilation device equipped with two blades is dismantled. A knot with five elements will be used instead. Before installing a new device, it is necessary to diagnose the quality of its operation. To do this, the node is connected and checked.
- If the device works correctly, then it is installed instead of the old one. After installation, the unit must be properly fixed. This will prevent the negative impact of vibrations during movements and rapid failure of the device.
- In order for the ventilation unit to function more smoothly, it is necessary to replace the resistor element. This is due to the fact that the device allows for a larger volume of air flow and operates noisier. Therefore, a resistor element is installed, which can be used from a VAZ 2108.
- The buttons, as well as the control components of the ventilation device, must be replaced with new ones. It is allowed to use parts from the VAZ 2108. The standard key from the “seven” is suitable in size and mounting. But it quickly fails as a result of a large difference in current. At this stage, the modernization procedure can be considered complete.
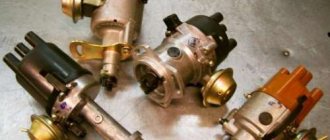
Modification of the thermostat
Thermostat from a Chevrolet Niva car
The procedure for modifying the thermostat on a VAZ 2107 involves replacing the standard device with a part from a Chevrolet Niva:
- First, the refrigerant from the cooling system is drained. The car engine warms up, a container is placed under the heater tap and the liquid is drained.
- The engine compartment is opened, the thermostat with the lines connected to it is dismantled. It is necessary to disconnect the outlet pipe located at the bottom; it goes from the radiator device to the element being replaced. The bypass line is disconnected; it is installed on top, as well as the hose going from the thermostat to the pump. The condition of these pipes is assessed. If they are worn out or damaged, then new ones must be prepared.
- The refrigerant outlet pipe and the copper pipe are disconnected. The last element is unscrewed from the pump; to do this, you need to unscrew two nuts and remove the flange from the studs.
- The lower removed line is taken and the middle part is cut out of it. The length of the segment should be about 7-9 cm.
- A new thermostat device is being installed. Its connection is made using a pipe with a water pump. The hose must be slightly bent in advance.
- Then a thick pipe from a VAZ 2108 is taken and adjusted to the place where the lower standard hose was installed. You need to cut off identical parts from both ends of the element and connect it to a new device. In principle, it is also possible to install a standard line, but this option is simpler.
- The upper hose is being installed; we are talking about a standard pipe.
- Instead of the dismantled line, a plug is made; it went from the heating unit to the water pump. To do this, you will need a copper tube; a connecting flange is soldered off from it. A sealing element is made from rubber, then the surface of the pipe is treated with sealant. The structure is screwed back to the water pump.
- The next step is to connect the pipe that removes the refrigerant from the heating device with the inlet on the thermostat. To complete the task, take a dismantled copper hose, remove the excess part, then bend it a little.
- A bracket is made that will be used to fix the pipe to the exhaust manifold device.
- The outlet line from the heating unit with the hose, which was previously disconnected, is connected. The output from the stove remains the same, but the input will go not to the pump, but to the thermostat.
- The end of the line with the corresponding input is connected to the thermostat device; this will require a shorter and curved pipe. It is used to remove refrigerant from the cylinder head to the heating unit. This element must be adjusted to length in advance. Difficulties may arise when using an aluminum thermostat because the walls of such devices are thicker. This means that the line must be used with a large diameter.
- The thin pipe of the heating system of the intake manifold is fixed to the thinnest outlet of the thermostat. First you need to disconnect the end going to the lower line from the heating device to the water pump. The pipe is measured and, if necessary, the excess part is sawed off. The connection point is treated with sealant. To prevent leakage, the volume of glue must be large.
- Then the junction of the pipes and the thermostat is tightened using clamps. Refrigerant is added to the heating system. The engine is started. If an air lock has formed in the system, it must be removed.
We recommend: How to set the ignition using a strobe?
Valery Imenov spoke in detail about installing a thermostat from a Lada Granta car on classic VAZ models.
Installing an additional pump
Installing another pump on the heating unit will provide better heating of the car interior. Typically this device is installed next to the battery and pipes in the engine compartment. When performing the task, it is necessary to dismantle one line coming from the cylinder block. This pipe is connected to an additional pump. From the cylinder block, the line should go to the front of the water pump, and the outlet pipe will connect to the heating system.
The power supply to the auxiliary pump is taken from the activation key for the rear window heating system. This will allow the device to turn on together with this node. There is one positive conductor coming from the electric motor of the additional water pump. The negative contact is the mass of the device.
To provide power to the pump, do the following:
- The first connector with conductors is dismantled. Several electrical circuits are connected to it. The gray conductor is designed to activate the rear window heating system; this is the main cable.
- The power cable from the water pump is connected through this wire. The cable itself is led out into the engine compartment through a technological hole.
- For better fixation of the conductor, it is recommended to solder the contact element.
- Once the pad installation is complete, the auxiliary water pump is ready for testing and operation.
The Avtopodogrev channel spoke about the installation and features of connecting an additional pump on classic VAZ models.
If necessary, connecting the water device can be done using another method:
- To complete the task, you will need a block from the injectors or a detonation controller. This item can be purchased at any auto store.
- Two conductors are soldered to the ends of the block, and then the cables are installed in a corrugation and wrapped with electrical tape.
- Then an electrical circuit is drawn out to connect the ground; you can use any conductor available on the bracket near the installation site.
- The harness itself is installed upward, the resistor elements of the heating unit are connected to the connector where the positive contact was taken. This will automatically activate the water pump, which draws about 1.5 amps during operation. This connection method allows you not to use additional relays and connect directly to the positive output in the connector.
Many car owners install not “VAZ” pumps, but “foreign-made” pumps on their cars. You can use device model 0392020034 from the manufacturer BOSCH. The productivity of such a pump is 750 liters per hour, but additionally you need to purchase clamps, as well as about 10 meters of corrugation. Before performing the task, be sure to drain the refrigerant from the system.
The difficulty of installing a branded water pump is that the diameters of the hose and fittings of the device do not match. The first is 1.6 cm, and on the pump - 2 cm. Therefore, it is recommended to use more elastic hoses. This will allow you to tighten the line onto the fitting. For better passage, the element can be treated with motor fluid.
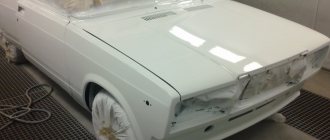
The stove is a wide field for activity and creativity
One of the main complaints made by the owners of the domestic “Seven” is the insufficient power of the car’s heater, which is why even at full engine speed it can be quite cold in the cabin, and condensation or an ice crust forms on the windows. Modification of the VAZ-2107 stove is becoming one of the top priorities for a motorist who wants to increase the level of comfort of the car for the driver and passengers, as well as the quality of glass blowing while driving in the cold season.
Optimizing a VAZ stove turns out to be not so difficult if you have simple tools at hand, as well as access to spare parts from the heater of another car of the same brand, for example, a G8 or Nine, which has more power compared to this version of the car. You don’t even need special skills - it’s enough to know the design of the heater and have a standard set of tools and materials.
Installing a motor from a chisel stove into a stock stove with modifications
I would like to bring to your attention my version of a modification of a classic stove. First, I will say that a serviceable Zhiguli heater copes with its task quite successfully, the car is warm even in severe frost, but at the same time it has a number of significant shortcomings that every classic car owner dreams of getting rid of. This includes strong annoying noise, insufficient airflow of the windshield and side windows, and a low number of heater fan speeds.
It all started with the fact that a fifth assembled stove and an old chisel stove motor with an impeller ended up in my hands “completely free of charge.” This allowed me to experiment slowly while continuing to drive my car with the stock heater.
- Read more about Installing a motor from a chisel stove into a stock stove with modifications
- Login to leave comments
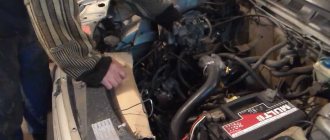
Processing the engine compartment
But one more problem remains - the long time it takes to warm up the interior. And to eliminate it, you need to insulate the engine. This will allow the engine to reach operating temperature faster and cool down more slowly.
But it is not possible to insulate the motor itself; there are a significant number of moving elements on it that cannot be covered. But insulation of the engine compartment is allowed.
First you need to insulate the hood of the VAZ-2107. To do this, you can purchase a special cover from the auto store that is attached to the cover from the inside of the hood.
But many car enthusiasts prefer to do this with improvised materials. But when deciding to treat the hood, you should choose the right insulating materials. They must be non-flammable and not absorb oil. Therefore, it is not recommended to use ordinary fabrics.
The engine compartment can be better insulated by gluing insulating materials onto the shield separating the engine from the passenger compartment. But this can only be done by removing the engine from the car.
We recommend: Replacing the radiator of the VAZ 2109 stove
In addition to the hood, the radiator also needs to be insulated. For this purpose, masks are used that are attached to the radiator grille.
Instead of a mask, you can use a regular cardboard sheet placed between the radiator and the grille. But it is worth considering that you cannot completely close the radiator; heat exchange must still occur. Therefore, a sheet of cardboard should not cover more than 2/3 of the radiator area.
There is no need to take this into account with a mask, since in addition to the grille, there are enough holes in the front end for the air flow to pass to the radiator.
Heater modernization
Every car owner knows that on a VAZ 2107, replacing the heater may be due to its poor performance. But not everyone decides to change the heater - most owners of the “Seven” decide to disassemble, repair, tune and remake the heater as a whole. There are many schemes for tuning and repair, but you need to take into account that it is not so easy to implement them at home. Without any problems, you can seal the joints of the system lines with nozzles with your own hands, and also redistribute the air flows according to need (the author of the video is VAZ 2101-2107 REPAIR AND MAINTENANCE).
However, such a modification of the stove will not improve the microclimate in the cabin. If you want the air in the cabin to be warmer, you will need to increase the air flow with a new radiator, since the factory device will not allow this idea. Fan replacement is also necessary in such cases. The best option would be to install a V8 electric motor.
So, the repair and tuning scheme for the heating system is as follows:
- First you need to know how to remove the stove. You are required to dismantle the lower part of the structure, namely the casing on top of which the fan is installed; the latter can be dismantled.
- After removing the fan, you should carefully cut off one of the so-called ridges that supply air flow to the feet of the front passenger and driver. This is done necessarily, since the electric motor from the “eight” is much longer.
- The impeller is dismantled. Inside this element, it is necessary to increase the diameter of the hole into which the shaft must subsequently be carefully installed. Make sure that the new structure can fit into the installation location as securely as possible.
- Before installing a new fan, diagnose its functionality.
- The resistor should be replaced, since it is thanks to this element that the fan will operate much quieter. As practice shows, it is best to install a resistor from the same “eight”.
- The vent switch should also be replaced. When the heating system is operating, another current will begin to flow to it. Accordingly, over time this button may fail.
Sorry, there are no surveys available at this time.
Reasons for poor-quality heating of the VAZ-2107 interior
To solve the problem, it is necessary to eliminate its original source. Therefore, before we talk about options for improving the heating system of the seven, let’s look at the causes of problems with the heating of the vehicle.
The main reasons for poor-quality heating of the VAZ-2107 interior are most often:
- Leaking heating system faucet;
- Low level of air supply from the deflector;
- Loud operation of the heating system engine;
- Poor quality supply of warm air to the car interior.
Based on the above reasons for stove malfunctions, we can conclude that in order to improve its operation, it is important to modernize the faucet and baffles, troubleshoot the radiator and improve the operation of the fan.
As you can see, not very serious alterations can make it comfortable for passengers and the driver to stay inside the car. It is important that upgrading the stove does not require significant experience and can be carried out independently by the car owner without the help of professionals.
What can you do to solve the blowing problem yourself?
If you are used to repairing a car with your own hands, the best solution would be to perform several steps that will definitely not harm the car. You can do all the diagnostic options described above. This will help determine the cause of the problem. It should be remembered that modern vehicles have non-standard unique blowing systems, which are often difficult to repair. You can do the following research with your own hands:
- find out the direction of air flow in order to understand the meaning of performing some work at a service center or disassembling the car yourself in a specific place for the purpose of repair;
- conduct a study of the operation of the climate control unit and the settings of your equipment, its reaction to changes in settings during operation, as well as complete isolation of the air flow;
- check the cleanliness of the air ducts using various methods that can be found on forums and special websites, make sure that the system is intact and working properly;
- carry out diagnostics of the stove, blower fan and other parts that you can get to, taking into account your experience in car repair and maintenance and troubleshooting;
- change system parts that can be easily replaced without spending a large budget, so you can fix problems without contacting an expensive service center.
The cost of work at a service station can be quite high. So it's better to do some checking yourself. But you shouldn’t go too far in the DIY repair process. It is better to give preference to professional repair work
In this case, it is important to disassemble everything correctly and carefully and carry out high-quality repairs without the chance of the problem returning in the near future.
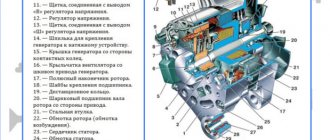
Diagram and design of the heating system in the VAZ-2107
The design of the heating unit on “sevens” with a carburetor engine or injector is identical:
- Blower The line is aimed at blowing the windshield.
- Airflow cover.
- Radiator unit.
- Radiator protective cover.
- Heating unit faucet pull.
- Radiator outlet line.
- Underwater pipe of the radiator assembly.
- Radiator tap. Used to drain refrigerant.
- Blower Designed for blowing air flow through the glass of the right window.
- Nozzle for supplying air flow to the side glass.
- Air duct damper intended for blowing right glass.
- Additional resistor device.
- A cover located on the air flow distribution device.
- Blower damper for heating the windshield.
- Electric fan motor for heating system.
- Impeller of the ventilation device.
- Blower in the internal ventilation system.
- Cover air flow control knob.
- External blower flap control handle to direct air flow to the windshield.
- Bracket for fixing air flow control handles.
- Lever for controlling the blower flaps of the heated glass system.
- Airflow cover control handle.
- Radiator faucet control lever.
- Air flow cover pull.
- The damper rod designed to control the heated windshield.
- Left blower for heating the side window.
- Ventilation nozzles located in the center of the console.
- Nozzle blade.
- Directly the nozzle of the heating system.
- Nozzle handle.
- Toothed pulley of the damper drive device.
- Air inlet seal located at the rear.
- Air supply pipe.
- Front sealing element of the air supply pipe.
- Air supply valve.
- The latch of this hose.
- Damper equipped with a gear sector.
Diagram of the heating unit VAZ 2107
Three levers are used to control the heating system:
- The top one is designed to supply refrigerant to the radiator unit. This slider is connected to the faucet via a cable. It is mounted on the inlet line. In the extreme left position, the device does not work and the heating unit does not heat. If you move it to the right state, it will open and the coolant will enter the radiator device.
- In the middle position, it is possible to control the air flow flaps. If the slider moves to the left state, the air supply from the street is cut off. It will only circulate inside the car. When moving to the far right position, air flows from the street into the car.
- In the lower state, the damper is controlled, which is designed to distribute the air flow among the blowers. In the extreme left position, the flow flows to the side deflectors and to the center, and in the right position - to the windshield.
Each of the listed levers can be set to any state, this will allow for optimal functioning of the heating unit.
Carrying out replacement
The algorithm for performing the work is as follows:
Unscrew the casing that secures the control cable. Remove the end of the cable from the stove faucet. Unscrew the nuts that secure the valve body to the radiator
Please note that antifreeze may leak out at this point, so place a dry cloth on the floor. Remove the old faucet. Remove the adapter that holds the pipe supplying hot antifreeze. Replace all rubber gaskets that are on the faucet. Install the adapter on the new device. Secure the valve to the radiator by tightening the mounting bolts. Install the control cable and ensure that the valve opens and closes completely when moving the lever.
We are taking on the modification of the air ducts of the seven stove
To do this, you will need standard hoses and cuffs, which you can buy at any hardware or plumbing store, in quantities of four to seven hoses and a similar number of cuffs. Before installing them, it is necessary to cut holes corresponding to the diameter of the hoses on both sides and on the bottom of the heater housing.
Cuffs and hoses are inserted into them, the side ones are connected respectively to the side air ducts, and the bottom ones are designed to remove excess heat from the legs in order to protect them from overheating by a direct flow of heated air. To warm the feet of rear seat passengers, you can take longer hoses and direct them, respectively, from the stove towards the rear of the car.
Car air conditioner device
Any car air conditioner consists of the following elements:
- compressor with electromagnetic clutch;
- capacitor;
- receiver;
- evaporator with thermostatic valve;
- main hoses.
Freon gas is used as a refrigerant in the air conditioner. To reduce the friction between moving parts when refueling, a certain amount of special refrigeration oil is added to the gas, which is resistant to low temperatures and completely dissolves in liquid freon.
Compressor
In any refrigeration installation, the compressor is used to create a directed flow of refrigerant. It acts as a pump, liquefying freon and forcing it to circulate throughout the system. A car air conditioning compressor is an electromechanical device. Its design is based on several hollow pistons and a swing washer located on the shaft. It is this washer that makes the pistons move. The shaft is driven into rotation by a special belt from the crankshaft. In addition, the compressor is equipped with an electromagnetic clutch, which engages the pressure disk and the pump drive pulley.
The pistons in the air conditioning compressor are driven by a swashplate
Capacitor
Typically the condenser is installed in the front of the engine compartment next to the main radiator. It is sometimes called an air conditioner radiator because it has a similar design and performs similar functions. The radiator cools the heated antifreeze, and the condenser cools the hot freon. There is an electric fan to force air flow onto the condenser.
The condenser functions as a heat exchanger that cools freon
Receiver
Another name for a receiver is a filter drier. Its role is to clean the refrigerant from moisture and wear products. The receiver consists of:
- a cylindrical body filled with adsorbent;
- filter element;
- inlet and outlet fittings.
The adsorbent used in car dryers is usually silica gel or powdered aluminum oxide.
The receiver simultaneously performs the functions of a filter and a dryer
Evaporator and expansion valve
An evaporator is a device in which the refrigerant changes from a liquid to a gaseous state. It generates and releases cold, that is, it performs functions opposite to those of the radiator. The conversion of liquid refrigerant into gas occurs with the help of a thermostatic valve, which is a throttle of variable cross-section.
In the evaporator, freon changes from liquid to gaseous state
The evaporator is usually installed in the heater module. The intensity of the cold air flow is regulated by switching the operating modes of the built-in fan.
Refrigerant evaporation occurs due to the pressure difference at the inlet and outlet of the thermostatic valveMain hoses
The refrigerant moves from one unit to another through a system of hoses. Depending on the design of the air conditioner and the location of its elements, they may have different lengths and configurations. All hose connections are reinforced with seals.
Main hoses are designed to connect the main components of the air conditioning system
The principle of operation of a car air conditioner
When the air conditioner is turned off, the compressor pulley rotates idle. When turned on, the following happens.
- Power is supplied to the electromagnetic clutch.
- The clutch engages and the pressure plate engages the pulley.
- As a result, the compressor begins to work, the pistons of which compress the gaseous freon and turn it into a liquid state.
- The refrigerant is heated and enters the condenser.
- In the condenser, the freon cools slightly and enters the receiver to remove moisture and wear products.
- From the filter, freon under pressure passes through a thermostatic valve, where it again turns into a gaseous state.
- The refrigerant enters the evaporator, where it boils and evaporates, cooling the internal surfaces of the device.
- The cooled metal of the evaporator reduces the temperature of the air circulating between its tubes and lamellas.
- An electric fan creates a directed flow of cold air.
Sealing the cracks in the front panel of the torpedo air ducts
The main problem with good blowing of side windows is the presence of a large number of cracks in the dashboard air duct system, which should only be sealed, thereby reducing heat loss and significantly increasing the pressure of the air flow for blowing the side windows of the car.
Heater duct routing
You will need silicone or anti-squeak (modelin). We seal around the perimeter all the cracks in the upper and lower parts of the torpedo panel. Also, do not forget to “silicone” all the mounting holes. At this point, you can consider the first stage of work completed.