Good day to all! In this article we will tell you how to replace the Lada Granta fuel filter . This procedure is very simple, so you can do it yourself without trips to a car service center. In addition, by doing the work yourself, you can save additional money, which can be directed in another direction. When do you need to change the fuel filter on a Lada Granta and how often should you do it?
Maintenance regulations require replacing the VAZ Granta fuel filter every 30,000 km. However, it is better to reduce this figure if the car uses low quality fuel. Or the main signs of a clogged fuel filter began to appear, which will be discussed below.
Signs of a clogged fuel filter in Lada Granta
If the fuel filter is clogged, the first thing you will notice is a floating idle speed. The engine will not run smoothly, but intermittently due to lack of fuel. Secondly, starting the engine will be difficult. Most often, you will need to press the gas pedal additionally when starting the engine. Thirdly, you will feel a loss of power. The car will respond more slowly to pressing the gas pedal.
These are the main signs, when they appear, you should first change the fuel filter. So, from words to action.
Which fuel filter should I choose to replace on a Lada Granta?
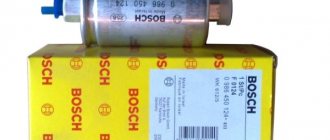
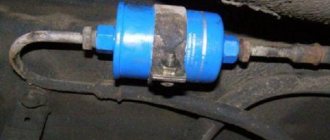
A fuel filter with a fitting (clip) is installed on a Lada Granta car. The fuel filter does not have a thread, i.e. secured using quick-release fasteners. The appearance of the filter is shown in the photo below:
Original filter number:
21230-1117010-82
Using this number you can easily find a list of analogues if you do not want to overpay for the original.
Purpose and types of fuel filters
The Lada Granta car is based on the Lada Kalina. From its predecessor, it inherited a fuel supply system with two filters. Before entering the main fuel filter, gasoline passes through the fuel pump strainer. This two-stage cleaning scheme in fuel systems of injection engines is classic.
The fuel pump mesh acts as a coarse filter. It prevents large particles of dirt from entering the fuel supply system, which can completely or partially block the fuel line and affect the operation of the fuel pump.
The fuel pump mesh is a coarse filter
The mesh filters of the Lada Granta and Lada Kalina cars are completely identical. Externally, they can be identified by the oblique cut of the mesh. Despite the low cost (about 100 rubles), the mesh performs essential functions and prevents serious damage. Interruptions in the fuel supply due to a clogged mesh are the most harmless of the possible problems that low-quality fuel can create.
A distinctive feature of the Lada Granta mesh filter is its oblique cut
Fine dirt particles (less than 10 microns) do not cause much damage to injectors, pistons and cylinders. Larger particles are retained by a fine fuel filter.
Such filters first appeared on the VAZ 2110 with an injection engine and have remained virtually unchanged to this day. The only difference is that instead of fittings and tips with threaded connections, clamping clips are used. The Lada Granta is equipped with exactly these clips with smooth fittings with a diameter of 8 mm for fastenings with clamps. Threaded filters can also be used, but only after replacing the hose tips, which, in turn, does not make any sense.
The Lada Granta car is equipped with a fuel filter with smooth fittings with a diameter of 8 mm for fastenings with clamps
On sale there are fuel filters from various manufacturers costing from 150 to 500 rubles. The difference is significant. Is it worth overpaying?
Fuel filters have two main parameters - screening fineness and performance or throughput. An additional parameter that car owners sometimes pay attention to, but ignore Russian standards, is the surface area of the filter element.
According to experts from the magazine “Behind the Wheel,” there are no filters on the legal spare parts market that are unsuitable for use. All filters retain particles larger than 10 microns, while providing 2 liters of fuel per second. Therefore, there is no need to overpay.
On May 11, 2011, Vladimir Putin took part in testing the car in Tolyatti. The specially prepared car started only on the fifth attempt. Putin responded that he simply was not aware of the “electronic gas pedal” and called the Granta the future “people’s car.” He especially liked that two bags of potatoes could easily fit in the trunk.
The arguments in favor of expensive filters are as follows:
- higher degree of fuel purification. The screening fineness of a standard filter is 10 microns. However, you can find filters on the market that retain particles as small as 5 microns;
- large filter surface area. The larger the area, the more dirt will remain on the filter, and the longer it will last.
The practical value of these arguments is questionable. Is it worth catching particles that are too small if engine designers don't think it's necessary? Is it necessary to delay replacing the fuel filter when it can become completely clogged after just one unsuccessful refueling?
However, in cases where a high degree of purification or long mileage without replacing filters is not a whim, but a necessity, you should pay attention to the technical parameters of the filters, the values of which can be found in manufacturers’ catalogs.
Photo gallery: fuel filters for the Lada Granta from various manufacturers
MANN is a leading supplier of filters for European car manufacturers. SCT filters are a combination of decent quality and reasonable price BIG FILTER is the largest manufacturer of fuel filters in Russia
Video: fuel filter device
Replacing the Lada Granta fuel filter - step-by-step instructions
The fuel filter on the Lada Grant is located next to the fuel tank at the rear of the car. Replacement work is best done in a pit or overpass.
1. Relieve the pressure in the system. There are two ways to go.
1.1 You can pull out the fuel pump fuse, which is located under the front console at the passenger's feet. Then start the car. After 1-2 minutes, the engine will stall because the fuel line will run out of fuel.
1.2. Or you can relieve pressure from the fuel rail by pressing on the valve with a sharp object.
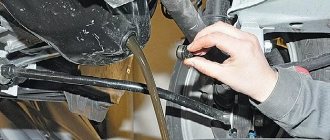
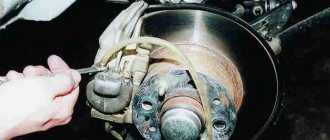
2. Disconnect the fuel supply hoses from the filter. This is done very simply. Just press the lock and pull the hose to the side. Be prepared for the fact that gasoline will remain in the filter and it will inevitably spill. There is no need to be afraid of this, just be careful.
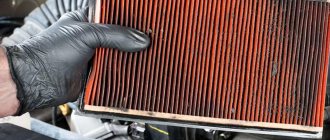
Air filter
According to the regulations, the engine air filter must be changed during each maintenance procedure, therefore, this is every 15 thousand mileage.
The original filter can be found by article number 2112-1109080-82 . If, suddenly, you need an analogue, then you can consider the options from the table.
| Brand | vendor code |
| Goodwill | AG 910 |
| Goodwill | AG 911 |
| BIG Filter | GB-9597C |
Replacement:
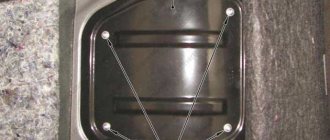
- Under the hood, unscrew the four bolts from the filter protective cover;
- for convenience, you can disconnect the plug from the mass air flow sensor;
- remove the filter protective cover;
- remove the filter (it may rise with the lid or remain in the compartment);
- install a new filter (you can put it in the top cover, or you can put it in the bottom, you should put it where it fits best, since filters from different manufacturers may differ in seals).
Order of Operations
The fuel filter is located at the rear of the car, under the body. To replace, you will need to install the car on a viewing hole or jack it up.
- The gasoline in the fuel line is under pressure. Any work under operating atmospheres, including replacing the fuel filter, will be accompanied by fuel splashing. Before starting work, you need to reduce the pressure in the system. This can be done in 2 ways: raise the rear seat, disconnect the power, or remove the fuel pump fuse F21.
Let's summarize
Based on the above, it is clear that the work does not require qualifications or even serious skills in working with tools. Even a beginner can perform the operation. But, as you know, even the simplest works have their own nuances and tricks. For information on one of them when replacing a fuel filter, watch this video:
Old TF does not require special disposal conditions; it can be sent to a regular trash container.
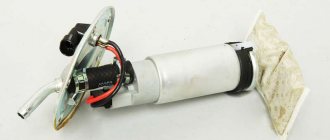
In most cases, the warranty period of vehicle operation occurs without significant failures in the functioning of systems and components. Before the warranty period expires in the Lada Granta model, there is a need to change the fuel filter, which is shown in the photo. The reason for the need to replace this element is low-quality fuel. The fuel filter is used to prevent foreign impurities, various types of unwanted additives and other fuel contaminants from entering the power system.
The filter element protects the injection system and the cylinder-piston group in the engine. As dirt accumulates in the core of the Lada Grant, the throughput deteriorates until a critical moment occurs. Due to its design, the fuel filter cannot be restored and must be replaced with new elements. In this article we will tell you where it is and step by step how to change the filter.
Oil filter
Everything is simple here, the filter is changed along with the oil, which means that it needs to be changed every time (15 thousand mileage).
The original element has article number 21080-1012005-08 . If there is a need to purchase an analogue, then you can consider the following options.
| Brand | vendor code |
| Goodwill | OG 410 HQ |
| JSI | JSM 101 |
| Filtron | OP 520/1 |
The vehicle must be placed on a ramp or lift. The engine must be turned off and cool. The oil change is performed according to the following algorithm:
- remove the filler cap;
- use a wrench (17 for an engine with 16 valves and 12 for an engine with 8 valves) to loosen the drain cover;
- prepare a container and place it under the drainage area;
- Unscrew the drain cap completely;
- disconnect the wires from the sensor and move them further from the filter;
- Unscrew the filter with a special puller;
- After the oil has been completely drained, replace the drain plug;
- install a new filter (tighten);
- return the wires to the sensor;
- add new oil.
How not to make a mistake with your choice?
Replacing a fuel filter is one thing, but first you need to choose the right element. It should be taken into account that different models require the use of filters that differ slightly in their design aspects. Before purchasing and installing a new element, you should carefully determine its applicability specifically to a specific car, including the LADA Granta. The packaging of the part contains information about the compatibility of the filter with the list of car modifications. If the Lada Granta is present in it, then we confidently buy it. When this fact is absent, it is not recommended to resort to unjustified risks, but to find and purchase a “native” filter, especially since its price is very low.
It would also be useful to purchase and replace a Lada Granta air filter in parallel with the fuel filter. This will ensure that a high-quality mixture is supplied to the engine.
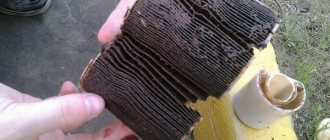
The used LADA Granta filter element cannot be thrown away normally, but requires special disposal. Since during operation it has accumulated a significant amount of chemicals hazardous to health, it should be taken to a collection point for such products.
And so, you learned how to change, and actually where the filter is located in the car. Replacing the fuel filter is not difficult, and the car owner can do it himself.
Cabin filter
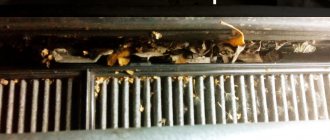
If you refer to the official regulations, the filter is replaced at every service station. This means that it will need to be changed every 15 thousand kilometers or every year (whichever comes first). It is worth noting that for cars that move in difficult conditions, for example, in very dusty conditions, these times are halved.
As you know, many spare parts from Lada are unified, so from the original catalog you can select elements with article numbers from 1118-8122010 to 1118-8122014 series 08.
Suitable good analogues can be seen in the table.
| Brand | vendor code |
| Stellox | 71-10567-SX |
| AMD | FC785C |
| Pilenga | FA-P 1118 |
The replacement itself goes like this:
- unscrew and remove the plastic plug (on the left under the windshield);
- remove the filter protective cover (unscrew two self-tapping screws);
- remove the filter (two plugs at the edges);
- clean the drainage and seat;
- install a new filter (there should be an arrow on the filter, which should point down after installation);
- reassemble all dismantled elements.
