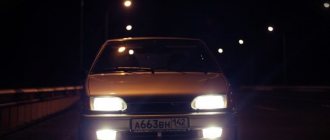
Light on the road means comfort, visibility, safety of the driver, passengers and other road users. At the same time, the very quality of the light characteristics of the car’s front lights depends on two factors of the lighting unit: the diffuser and the reflector. Therefore, the light bulbs on the VAZ 2114 must be of high quality, regardless of the year of production of your particular car.
It is also worth mentioning the aesthetics of the glow of the “eyes” of your car, because this is the first thing that people see when they meet your car for the first time at night. Let's figure out how to choose the right “mirror of the soul” of the iron horse, what nuances you should know about.
Bulbs in the headlights of a VAZ 2114
WORTH KNOWING! Lamps on the VAZ 2114 of the latest series are installed from BOSCH, which gives an incomparable quality of visibility on the road at night compared to earlier domestic analogues.
Lada 2114 Musician in black Logbook LED lights, taillights, room lighting
It’s clear from the title that I replaced some of the light bulbs with LED ones.
Now, in order: Front dimensions I bought light bulbs from MTF (Korea). Base W5W, 12V, 1W. It is written on the box: bipolar, with built-in stabilizer, illumination angle 240 degrees, light 5500K.
I liked the light, maybe not the brightest, but the light is beautiful. We'll see how long these bulbs last.
Tail lights The only changes to the tail lights were the dimensions, stops and reverse. I did not touch the turn signals and rear fog lights. I bought not the cheapest diode light bulbs from an unknown manufacturer with the required base. The diodes shine in all directions. There are white diodes in reverse, and red diodes in the dimensions and stops. The seller said that if you put white ones in the feet, for example, the light will not be red, but with a pink tint. In the end, I listened to him and took the red diodes. I also cut out and stuck pieces of vibration insulation with the foil facing outward so that the light would be reflected and shine brighter. I lubricated all the contacts of the light bulbs and on the board with silicone grease so that they would not oxidize for as long as possible. After all, with such flashlights this is a disease, but when you lubricate it there are no problems. As a result, the light of the dimensions and stops did not become brighter. It became moderately bright, slightly muted, and a little matte or something. The light, as the light bulb seller said, is a rich red color. You can hardly see much of a difference, but the light is subdued and shines in a rich red, which I like. It's a shame the photo camera can't handle that shade. The stops used to be a little late due to the diodes on the spoiler, but now everything is as it should be. In general, you don’t see much of a difference, but the advantages are that the light is a little more interesting, and the stops light up faster. In reverse, the light bulbs were not at all impressive. Just as nothing was illuminated before, these diodes do not illuminate anything either. Only the light became not yellow, but more beautifully white and blue. I don’t know why it’s blue.
Room lighting From what was left in the store of 36mm size, I had to buy expensive ones with decoys and six diodes. The seller said they are not the brightest. The bulbs fit right in because of their square shape, but that’s even a plus, they fit snugly. After turning on the light I was pleased. Pure white, the brightness is just what you need, I don’t think it’s necessary to be brighter. Overall, I was very pleased with them. Let's see how long they last.
MTF W5W bulbs
the size was
size became with MTF
size became with MTF
2 bulbs with white diodes and 4 with red diodes for the rear lights
Shumka with foil is glued and light bulbs are installed
was
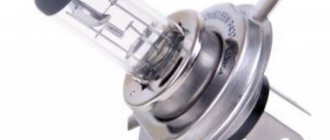
Selecting a lamp for a VAZ-2114 by manufacturer and brand
Lamp type - H4. One lamp combines both high and low beam.
Based on the two components of the headlight design, the lamp is selected at the discretion of the driver. The essence of the H4 lamp, consisting of two filaments, has not changed. A halogen incandescent lamp differs in that the bulb is saturated with bromine or iodine vapor.
The flask is made of quartz glass. This increases the service life and the maximum temperature of the filament. At the same time, the brightness of the headlights increases, which is the most attractive factor in the popularity of the product.
In accordance with European safety requirements, the following products meet the best performance indicators:
OSRAM COOL BLUE INTENCE, no deviations in electrical energy consumption were noted during testing. Low and high beams comply with GOST. Does not blind drivers of oncoming or passing traffic.
In low beam mode, due to the use of a power of 80 W, the superiority remained with IPF SUPERDEAM, but at a long distance the illumination was only 70 meters.
NARVA H4 RANGE POWER left great confidence with excellent results in both modes.
The KOITO WHITE lamp from a Japanese manufacturer, showing high-quality light output, does not affect the technical condition of the wiring or other elements of the headlight. Coupled with excellent luminous flux contours, it provides low and high beam illumination areas. The functionality extends to coverage angle and shadow boundary of the path. The protection factor against glare of oncoming cars is also a significant advantage of the device.
OSRAM COOL BLUE INTENCE lamps IPF SUPERDEAM lamps NARVA H4 RANGE POWER lamps KOITO WHITE lamps
Lada 2115 Worn saddle Logbook Choosing lamps for headlights
Good day everyone! I’ll tell you a little about how I chose lamps for my “saddle”, based on my experience in the field of car lighting. Maybe it will be useful to someone! When choosing lamps for your pet, you need to clearly define what we want from the light of our headlights. Bright light, long life, xenon effect or all-weather option? Have you decided? No? Then look at all the pros and cons of each option!
From the factory, most cars, domestic and foreign, are equipped with Philips + 30% lamps: The lamps meet all the requirements, give a clear light boundary, and if your light is quite satisfactory to you, then there is no point in chasing brightness, install such lamps. In the tests of the magazine “Behind the Wheel” all tests are carried out OUTSIDE THE COMPETITION.
Philips PremiumFor those for whom the standard is not enough, read on!
Lamps with increased luminous flux: For example, Philips +50%, +80%, +100% brightness, or OSRAM +50, +90% brightness. The peculiarity of such lamps is that their spiral is thinner than that of a factory lamp, plus the special composition of the gas in the flask, this gives greater brightness, compared to the standard, at the same power. The disadvantages of such lamps are their service life, which is 30 percent less than factory ones, as well as the high price, for example, Philips H4 55\60W +100% costs 950 rubles per pair. Conclusion: It’s not worth installing such lamps for round-the-clock use!
Lamps with increased brightnessBrightness can also be increased due to greater power. Lamps such as OSRAM 85\80W, or 100\90W. The more power, the brighter the light and this does not affect the service life so much, although they heat up more and burn out, respectively, more often than factory ones. One of the significant disadvantages is that they consume more energy compared to the standard, and there is also a risk of contacts and wires melting. It is better to install such lamps with a special ceramic adapter; it will protect the wiring from melting. And again, it is not recommended to install it for daytime use.
High power lamps
WHAT IS YOUR COLOR? BLUE, WHITE, BLUE? With bright light everything is clear, but what lamps should I put in to make the car stand out from the crowd? Xenon in the dipped beam is now prohibited, but there are lamps with a color reminiscent of xenon. For example Philips Blue Vision, Cristal Vision or Osram cool Blue or Narva 4500K. Such lamps shine beautifully, some claim that they are even brighter than the factory ones, in fact this is a syndrome of wheel caps that give the car an extra 10 hp. the first 300 meters. These lamps shine with white light only because the bulb is covered with a blue coating, sometimes even with dull varnish, and such lamps cannot physically shine brighter - the light transmittance is less! Plus, the white spectrum is only good in dry weather; in fog, rain and snow they are of no use. Conclusion: we install it solely for beauty, we focus on brightness, safety and good visibility in all weather conditions.
Lamps
All-weather lamps. Let's talk about these lamps separately. Such as Osram ALLSEASON. Such lamps shine with a more yellow light and, due to this yellow spectrum, provide good visibility in any weather. The only downside is that during a long trip, the yellow light begins to strain the eyes. I would recommend installing such lamps in PTF.
Osram all-weather lamps
Color difference: left standard Philips right Narva 4500K
Left standard Philips right Osram allseason
For me, of all the listed parameters, brightness and good visibility at night are important. I chose OSRAM H4 85\80W lamps, according to my subjective feelings, they still shine brighter than Philips +100% and have a longer service life. I don’t use low beams during the day, only at night, everything is adjusted, I don’t blind anyone!) ) Good luck to everyone on the roads and bright lights at night!
>Test of H4 halogen lamps
A few final tips
To avoid injury and replace correctly:
- wait a while after turning off the headlights - halogen headlights get very hot and if you don’t wait, you can get burned;
- do not choose too bright headlights - even burnt-out wiring is not as important as the lives that can be crippled by a driver blinded by you;
- Always carry out work with gloves - temperature, cracked glass, unexpected condensation, all this will not harm you if you protect yourself.
- https://vaz-2114.info/kakie-lampochki-stoyat-v-farah-vaz-2114-i-drugih-svetovyh-priborah/
- https://svetilnik.info/avtomobilnyj-svet/lampy-vaz-2114.html
- https://carfrance.ru/kakie-luchshe-lampy-postavit-v-fary-vaz/
- https://remontvazov.com/kakie-lampy-luchshe-postavit-v-fary-vaz-2114
Replacing light bulbs in fog lights of a VAZ 2114
- To make it easier to remove the PTF housing, drive the car onto a pit or a lift;
- Next, move the protective rubber casing from the back of the PTF;
- Get to the headlight power connector and remove the chip from it;
- Having disconnected the wire, loosen the light bulb by squeezing the “legs” with your fingers and removing them from the seat;
- Remove the base along with the lamp and replace the faulty element with a new one.
When installing a new lighting part, do not touch the glass surface, as... Marks left on it will eventually lead to fading or complete burnout of the thread. When installing LEDs and xenon, before starting to operate the vehicle, adjust the tilt of the light beam so as not to dazzle other road users.
How to clean and use what to wipe the reflective part of the optics
- Using a brush for watercolor paints, gently wipe the mirror reflector of the headlight from dust without pressing.
- Take a plate and fill it with distilled water, which you can buy at any car store.
- Add a few drops of dish detergent to the plate.
- Mix everything with a brush. We take a spray bottle and fill it with our solution.
- Apply our solution to the reflector through a spray bottle and wait 1 minute.
- Then we repeat the operation with a brush, smoothly and without pressure we clean the mirror surface.
- We rinse the part with clean distilled water.
- Dry with a household electric hair dryer until completely dry in a horizontal position with the reflector facing down.
Types of lamps
Xenon
Gas discharge xenon lamps
Lamps equipped with xenon are three times brighter than conventional ones. They last ten times longer. Efficient in power consumption, almost two times, which allows the generator to operate in a gentle mode, preserving the engine life. A serious drawback is the inability of xenon to fit into a circuit designed for halogen lamps.
Halogen
Advantages: increased light output, choice of color, long service life, all-encompassing visibility of the road with coverage of the side of the road.
Disadvantages - high heating temperature of the bulb, poor quality of the lamp, inefficient energy consumption, the need for additional service.
How to replace all lamps on a VAZ 2113-VAZ 2115?
Note! Before you start, be sure to keep one thing in mind: under no circumstances should you touch the glass bulb with your fingers, otherwise this could cause your light bulb to fail much faster, so we recommend that you replace the light bulbs with clean gloves, but if If you have already touched the glass flask with your fingers, then before installing the lamp, wipe the entire flask from grease and dirt with a clean rag soaked in alcohol! (This information applies only to the halogen lamp, the small side light lamp and the turn signal lamp do not need to follow this procedure, but we still recommend that you use clean gloves when working with the lamps)
Replacing the low and high beam lamp:
1) As was said earlier, there is only one lamp for the low and high beam, but it is two-filament, so to replace it you will need to first open the hood of the car and then find two bolts on the back of the headlight unit (Bolts are indicated by arrows ) that secure the headlight cover, after these bolts come out, unscrew them completely by hand and then, as shown in the small picture below, remove the plastic cover from the headlight block.
Note! After removing the cover from the headlight unit, you will have to work with electronics, so it is recommended to de-energize the battery when working with it, so that no short circuits occur during operation, and for information on how to de-energize the battery, see the article entitled: “Replacing the battery on a VAZ ", paragraph 1!
2) Now that the car is de-energized, disconnect the wire block from the terminal of the halogen lamp and then take it aside.
3) Then take a closer look at the terminals of the halogen lamp, there will be a spring clamp that holds the light bulb while driving so that it does not fall out of the headlight, so using your hand, fold this spring clamp down, as shown in the small photo below and then pull it lamp leads (For clarity, the leads are indicated by red arrows), remove it from the hole in which it is located.
Note! The new halogen lamp is installed in the headlight unit in the reverse order of removal, but when installing, always remember that you cannot touch the glass bulb with your fingers, otherwise your lamp will quickly burn out and will not work!
Replacing the side light bulb:
This lamp is replaced very simply, in order for you to be able to remove the old lamp, you will first need to open the hood and remove the same plastic cover that was discussed just above, in the section “Replacing the low and high beam lamp”, so first remove this completely roof and simply pulling the wires that fit the side light lamp, pull it out of the hole in which it is located and then, holding the lamp itself with your hand, simply remove it from the hole, thereby you will remove it from the chamber, as shown in the small photo slightly below:
Note! In some cars of the Samara family, the optics are slightly changed, so on some cars there are side light headlights that are held simply by tension, and there are those that are specifically fixed in the chamber, those that are held by tension do not need to be turned anywhere, you just need to pull it by force it will come out (This lamp is shown in the small photo above), but those that are specifically attached to the chamber must be turned counterclockwise and only then removed, so before pulling it, try turning it counterclockwise!
Replacing the turn signal lamp:
1) Replacing this lamp will also not be difficult, so as always, first you will need to open the hood of the car and then find the socket that goes with the lamp and is built into the turn signal itself, so after finding the socket, take it with your hand and turn counterclockwise as shown in the figure below, and after turning the socket, pull it and thereby remove it from the turn signal along with the lamp.
2) And finally, when the socket and the lamp are in your hand, press the light bulb itself and turn it in the same way as the socket counterclockwise and then completely remove the lamp from the socket.
Note! This lamp is installed in the reverse order of removal, but only when installing will you pay attention to the two side slides (One of them is indicated by an arrow in the photo below) that are located on the lamp, so install it in such a way that these slides fit into the grooves on the chamber and then Turning the lamp, make sure that it is fixed with these two side slides!
Sources
Why might the tail light not light up?
Not a single motorist is insured against faulty side lights. It is important to quickly understand what the reason is and carry out repairs. Most often one of the lamps fails, then we can assume the reason for the failure:
The first occurs most often; in this case, it is enough to replace the failed lamp. If the lamp only works if you hit it, then there is a problem with the contacts (although physical impact does not always help). If during testing you find that the light bulb is intact, and there is no oxidation or carbon deposits in the socket, then you need to check the conductors.
Replacing a damaged lamp in the rear headlight unit is carried out according to the instructions:
- turn off the lights and open the trunk;
- remove decorative upholstery;
- squeeze the latches and pull out the flashlight contact panel;
- click on the burnt out lamp and turn it counterclockwise;
- Check the light bulb on the tester and install a new one if necessary.
Assembling the lanterns is carried out in the reverse order. The lamp can also be replaced as an assembly. To do this, it is only important to purchase a high-quality version that is no different from the original. Car enthusiasts often recommend purchasing stock components or paying attention to. We recommend replacing the assembly if there is significant damage to the structure.
Often, taillight lamps do not immediately burn out or refuse to work, but indicate problems with a faint glow. First, clean the group of contacts located in the mounting block, and then, if the fault cannot be corrected, check the groups leading to each lamp.
Process Features
To ensure that the process of dismantling and replacing the lighting component is successful, make sure that there is no condensation in the reflector unit. If you do find moisture in the block, clean the drainage channel, which you can find near the turn signal mount (on the left or right of the car). You can give a few more tips to motorists:
- take into account the interval from the moment the vehicle's lighting system is turned off. Do not start work immediately after turning off the lighting system, as this may cause burns;
- Whatever lamp you replace (xenon or halogen), wear protective gloves;
- Do not replace lighting elements with overly powerful ones, as they can lead to failure of the lighting device.
What is offered by the car market
So, we have found out what is necessary for fog lights to work effectively.
It is from this position that we will consider the lighting devices offered on the market.
Today they can be roughly divided into:
- Built into the bumper;
- Mounted models.
Built-in PTF
The most optimal installation option is to use standard places in the front bumper.
There are several reasons for this:
- Proximity to the road surface, where the concentration of moisture in the fog is lower;
- Maximum fixation of the body, which reduces shaking and shaking during movement.
The main selection criterion is as follows:
- Identicality of the headlight housing to the standard location;
- The presence of an adjustment unit in the housing;
- Ease of maintenance (for example, when replacing a burnt out lamp).
Products like the one shown in the photo above will be useless as they only fit the standard size.
Mounted models
You should also avoid such models, since installing them yourself will require too much effort. But you still won’t be able to ensure their correct adjustment. And the price of such headlights is often too high. (See also the article VAZ 2111 wiring diagram: features.)
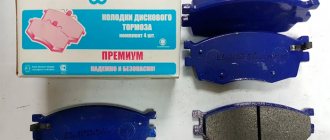
Replacing light bulbs
Replacing low beam lamps on a VAZ 2114 is, in principle, similar to a similar procedure with any other car, since any headlight unit consists of the following components:
- Frame;
- Light diffuser;
- Lamps;
- Reflector.
Despite the external differences, in most cars the principle remains the same.
Replacement process
In order for the light bulb replacement to be successful, we need the following tools: an awl, screwdrivers and detailed instructions, which are written below
There is nothing complicated in this operation, so by doing everything in order and carefully, you can do everything quickly and with your own hands, without overpaying for such a simple procedure to the technicians at the service station
So, the step-by-step instructions look like this:
- Turn off the ignition, remove the key from the lock and open the hood;
- Having decided which side of the block we need to unscrew, we approach it and remove the protective box from it. It is bolted on both sides;
- Now you need to carefully remove the contact group from the reflector;
- Next, we find the spring clamps and carefully release them;
- We take out the lamp;
- We insert a new one into the vacant space and assemble everything in the reverse order.
Before replacing the glass flask, it is advisable to wipe it with alcohol, that is, degrease it. If this is not done, fingerprints and dust will remain on the inside. The lamp itself needs to be placed correctly; there is only one position for it.
An ordinary VAZ 2114 halogen low beam lamp, which is installed on the car from the factory, costs about 200 rubles, so if you don’t spend money on the services of a service station, then the repair is not that expensive.
Replacing the low beam lamp
I hope that you have already chosen and bought what you are going to change. Therefore, let's understand the features of replacing the low beam bulb of a VAZ 2114.
We will need:
- cotton gloves or a piece of clean cloth;
- lamp H4;
- screwdriver and pliers (just in case).
Replacing a lamp on a VAZ 2114 is quite simple. We need:
- turn off the ignition;
- open the hood and disconnect the battery terminals.
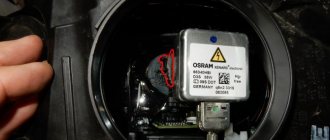
Next, the process of replacing the low/high beam lamp on Kirzhach and Bosch headlights is slightly different. If you have Bosch headlights, then:
- We examine the headlight from the back and see that it is covered with a round casing. We turn the casing counterclockwise, its fastening resembles a bayonet mount.
- Remove the terminal block from the H4 bulb.
- We compress the antennae of the locking spring and disengage the lock.
- We remove and change the lamp.
Replacing a lamp in a BOSCH VAZ 2114 headlight
Be careful not to touch the bulb of a new halogen lamp with your hands. The oil from your hands will cause it to fail, so wear gloves when working. Try not to touch the lamp and parts of the engine compartment.
The main and only difference between the Kirzhach headlight is the mounting and shape of the rear shield. It is not round, but rectangular; therefore, to remove it, you do not need to turn it counterclockwise, but unscrew the fastening screws (indicated by number 3 in the figure). This can be done by hand, and if it doesn’t work, then pliers or a screwdriver will help us.
Farah Kirzhach: rear view
After assembling the headlight and connecting the battery to the vehicle's on-board network, you can begin operating your car with new high/low beam bulbs. Changing the low beam bulb on a VAZ 2114 turned out to be as easy as shelling pears! Have a nice trip, share in the comments what lamps you use!
Which modification is better?
H4 halogen lamps installed on the VAZ-2114 are divided into:
- Standard.
- Enhanced light beam.
- Improved visual overview.
- All-weather.
- Increased power.
They are two incandescent filaments for low and high beam lighting. Lamps with a power of 60/55W are considered optimal among them.
Standard H4 lamp
Such lamps are mounted on every car of this VAZ model.
High beam lamp
High light flux lamp +30%
They are designated as +30%, 50% and so on. In addition to consuming “their” 55W and percent, they produce brighter light. But the duration of their operation is not long, although the price is more expensive.
Improved visual overview
Illuminated with white light familiar to the eye. Consuming the usual 55 W, they illuminate brighter, despite the bluish tint of the bulb.
They provide an excellent background light on snowy and dry roads. On a wet road it is better to use yellow fog lights. Doesn't blind oncoming cars. The service life of these does not differ from standard ones, despite the inflated price. Manufacturers prefer lamps with a yellow or bluish tint.
All weather
All-weather yellow lamp
The lamps are specially coated with a yellowish tint, which allows the light to achieve the contrast of the area in bad weather, especially cloudy (foggy). Yellow light has less reflection.
Increased power
They are in demand among owners who do not particularly know the “subject of the dispute.”
High-power lamps lead to consequences such as blinding an oncoming car and causing an accident.
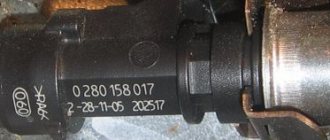
PTF Kirzhach light bulb base
Depending on the year of manufacture, different types of lamp bases were installed on the “luxury” versions of the fourteenth VAZ model. In addition to caps from foreign manufacturers, caps from PTF are often found in the PTF case.
The photo above shows the H11 format socket, which is installed in “foglights”. It makes no sense to choose bulbs for VAZ 2114 fog lights without understanding which base is used in the housing, because they are not interchangeable. Only H11 is used, while on modified versions of machines, H3 format sockets are often found.
Bulbs for VAZ 2114 fog lights of this format produce a brighter color, but H11 is more common, because do not blind oncoming cars. A car lamp for “four” is available for sale in several versions:
- Halogen (standard with a yellowish tint);
- LED (bright elements with white light). Due to low heating they are more durable;
- Xenon. Effective and bright, but require compliance with installation instructions. If used incorrectly, it blinds oncoming cars. Service life is about three years.
Also, for improper use of xenon, inspectors may issue an order to eliminate the violation.
Details about each type of lamp
When choosing lamps, it is worth remembering that safety is first and foremost. So, let's look at a brief description of each type of low beam bulbs, which will undoubtedly be suitable for the VAZ-2114. It is worth recalling that the manufacturer recommends the H4 marking for installation on a vehicle.
Xenon
A set of xenon lamps with ignition units Another set of xenon lamps Over the past 10 years, it has won the hearts of many car owners. There is quite a wide range of choices on the market. Installation can be carried out either in a car service center or independently. The disadvantages are that efficient use requires an ignition unit. The cost starts from 1200 rubles.
Halogen
This type of light bulb is quite common. Good for foggy areas of use. Quite low cost makes them accessible to every car enthusiast. The downside is that the road surface is poorly lit at night.
Incandescent lamps
Standard low beam lamp H4 Conventional low beam lamps that come from the manufacturer's factory. They are not particularly reliable and bright, but they are quite sufficient for safe operation of the car, if the speed does not exceed 90 km/h.
NewNeon - light bulbs
New generation light bulbs. They have good lighting ability if the headlights are adjusted correctly.
Since xenon also requires the installation of an additional diffuser unit. The cost is too high, so for now they are installed only on expensive foreign cars. The price starts from 35,000 rubles per set for 1 headlight.
LED – light
Another technology that burst in unexpectedly. The advantage is that the bulbs provide good light for all weather conditions. At night, the illumination of the road surface is high. This type of lamp is quite economical and consumes a small amount of power, which makes it possible to transfer it to other devices.
The only downside is the price - from 1000 rubles.
FireLED – light bulbs
In 2022, FireLED automotive lamps from Philips were introduced. These are even brighter lamps, the light beam of which can be adjusted. Like xenon headlights, it requires the installation of an additional light control unit. The lamp has not only low beam, but high beam. Of course, mass implementation is not yet possible, since the cost is too high and ranges from 40,000 for 2 lamps and a unit. Plus, there are no specialists in the CIS who could install this type of light.
Manufacturers of lamps for VAZ 2114
Since lamps with an H4 socket are used in headlights of many models from different manufacturers, all manufacturers of car lamps produce such lamps. Among them are the following companies:
- A world-famous Dutch company, known for its low prices and good quality products;
- A German company with a long history and rich technological experience;
- Narva. This is another manufacturer from Germany, known for the quality and durability of its products;
- Bosh. Another German company that does not need any special introduction;
- Company based in Hong Kong and Germany. Produces a wide range of reliable lighting equipment.
The above list can be continued for a long time. Today, a big name of a manufacturer is not a guarantee of high quality and reliability. There are a lot of fakes on the market, which are not only cheap, but also completely inconsistent with the original. Therefore, it is better to make a choice based not on the name, but on the characteristics of the light bulbs.
Main conclusions
The VAZ 2114 headlights have halogen lamps with an H4 socket by default. These are two-strand designs in which one thread is responsible for the high beam and the other for the low beam. In addition to halogen, the following can be used:
Most users prefer LEDs, but according to the rules it is necessary to use standard halogen designs. Express your thoughts about lamps for the VAZ 2114 in the comments.
- Luminous flux: 1500 / 1800 lm
- Power: 15 / 16 W
- Warranty period: 1 year
- Luminous flux: 1800 lm
- Power: 18 W
- Warranty period: 1 year
- Luminous flux: 1600 lm
- Power: 20W
- Warranty period: 1 year
- Luminous flux: 80 lm
- Power: 0.8W
- Warranty period: 1 year
- Luminous flux: 800 lm
- Power: 5W
- Warranty period: 2 years
- Luminous flux: 25 lm
- Power: 0.4W
- Warranty period: 1 year
- Luminous flux: 150 lm
- Power: 1.3W
- Warranty period: 3 years
- Luminous flux: 150 lm
- Power: 1.3W
- Warranty period: 3 years
- Luminous flux: 120 lm
- Power: 0.85W
- Warranty period: 1 year
- Luminous flux: 2000 lm
- Power: 17 W
- Warranty period: 3 years
- Luminous flux: 1100 lm
- Power: 11 W
- Warranty period: 1 year
- Luminous flux: 800 lm
- Power: 21 W
- Warranty period: 1 year
- Luminous flux: 260 lm
- Power: 4.3 W
- Warranty period: 1 year
- Luminous flux: 80 / 400 lm
- Power: 0.6 / 3.6 W
- Warranty period: 1 year
- Luminous flux: 80 / 260 lm
- Power: 1.5 / 4.3 W
- Warranty period: 1 year
- Luminous flux: 150 lm
- Power: 1.3W
- Warranty period: 3 years
Lamps used on VAZ 2114
Owners of domestic cars in most cases are faced with the problem of a lack of lighting from those bulbs in the headlights that are installed by the manufacturer. Typically, the VAZ company equips its models with Philips + 30% bulbs. These lamps are of fairly high quality and provide a clear demarcation line on the road. But if these properties are not enough for the car owner, then there are many options for replacing headlight paws.
What kind of bulbs should I put in the headlights of a VAZ?
Standard light bulbs for cars of the VAZ 2109, 2112, 2114 and 2115 brands can be with increased luminous flux brightness. For example, Philips +50%, +80%, +100% or OSRAM +50, +90%. The special composition of the gas in the bulb of these lamps makes it possible to achieve greater light brightness and work much more efficiently in comparison with the factory version. The disadvantage of this product is the relatively shorter service life of these lamps.
Install LED lamps for car headlights
Today, LED headlight bulbs have become especially popular among owners of VAZ 2109, 2112, 2114 and 2115. Installing such bulbs in the headlights of your car is very profitable and economical. Despite the fact that the cost of this product is several times higher than the usual standard options, the service life of such lamps is quite long. In addition, they consume much less electricity and are able to work efficiently at maximum air temperatures. If you install the LED light bulb correctly, it will be very resistant to vibrations and shocks. Installing an LED in a car's brake light will allow the driver of a car catching up with you to clearly see your dimensions on the road.
Halogen lamps for VAZ 2109, 2112, 2114 and 2115 cars
The chemical composition of the gas from halogen lamps in headlights allows for excellent light output during operation. Which is directly a big advantage of these lamps. High-quality illumination of a huge span of the road and a long service life make halogen lamps a popular product for car enthusiasts.
Today on sale you can find “halogen” lamps with increased brightness, all-weather models, with increased power and temperature. The secret of the popularity of this kind of lamps also lies in their cost. High quality products and affordable prices are what every car driver needs.
Xenon headlight bulbs
The beauty of the appearance of xenon headlights speaks of the prestige of the car and the good taste of its owner. But, besides the fact that xenon looks expensive, it also has a number of undeniable advantages over other models. Xenon bulbs for VAZ 2109, 2112, 2114 and 2115 provide the greatest amount of light during operation and also have an unlimited service life.
The light that these lamps provide is clean and bright, which greatly helps the driver on the road at night. The only drawback of such lighting is that it can blind the driver of an oncoming car. But this can be fixed; you need to switch the headlights in time.
In order to finally decide which bulbs to put in the VAZ headlights, you need to weigh all the advantages of each option. This will make it possible to understand which light will be most suitable for you for safe driving.
If you find an error, please select a piece of text and press Ctrl+Enter.
What and how can you change the standard lights?
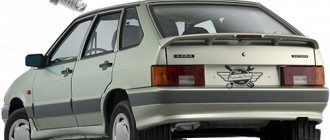
The easiest way is to change the appearance of your car - replacing the light fixtures with more original ones. The range of flashlights for the VAZ 2114, of course, is not particularly wide, but there is plenty to choose from. And the simple way is because all tuning comes down to “removing the standard ones, installing the purchased ones.” Let's wander around the shops and see what we can find for our VAZ 2114.
Osvar flashlights are the most popular option among car enthusiasts. They are relatively inexpensive and finding them is not a problem. The only thing is that the manufacturer uses ordinary light bulbs in it, but if desired, you can replace them with LED ones yourself. Although for most car owners this is not relevant.
Tail light “Osvar” on VAZ 2114
Skyline style. Also a “lamp” option, but it looks completely different.
Tail light Skyline style for VAZ 2114
ProSport RS-02020. This is already an LED option. True, the light bulbs responsible for the different signals in them are clearly not in their places, which may not please other road users, and the traffic police inspector will definitely not understand you.
Tail light ProSport RS-02020
ProSport RS-02020-T. The same “ProSport” with mixed up signals, but with tinted windows. A real gift to the traffic police!
Tail light ProSport RS-02020 with tinted glass
ProSport RS-07490. Option with light bulbs. Same manufacturer, same misunderstanding - the turn signal is located between the marker and the brake light. You can't make it up on purpose.
Tail light ProSport RS-07490
"Zigzag" 0013L. This LED miracle is offered by manufacturers from Togliatti, the birthplace of the VAZ car. Here at least the signals are more or less in place.
Tail light "Zigzag" 0013L
We'll finish our shopping trip here, although there are still many miracles there. Just watch a short video about a flashlight with red turn signals and move on to the next point.
How to remove tail lights
It's time to figure out how to remove the stock lights to install new ones. To work, you will need an 8 socket wrench with an extension and a Phillips screwdriver. We open the trunk door, use a Phillips screwdriver to dismantle part of the upholstery so that, by bending it, you can gain access to the entire rear part of the lamp.
The upholstery is attached to the body using self-tapping screws
We find 4 nuts around the perimeter of the light fixture and unscrew them with a wrench
The lamp is secured with four nuts
Carefully remove the connector by pulling it towards the central axle of the car. We don’t swing it, we just pull it, trying not to twist it!
Removing the power supply
Pull the light from the outside of the car toward you and remove it.
Now the lamp can be removed
We install the new light fixture in the reverse order.
Types of headlights
If the xenon headlight bulbs of the VAZ 2114 only lead to an installation problem, then when buying halogen ones, the car enthusiast also faces the problem of choice, because there are several types:
- Standard - in the modern configuration of the VAZ 2114 it is BOSCH with a power range of 60/55W. On previous versions of the car, the power was also in this range, but the car was equipped with domestic manufacturers, which noticeably affected the quality of the headlights.
Standard
- Amplified ones are more expensive than classic lamps and are marked +30 (50, etc.)%. Such headlights operate approximately the same percentage less, cost the same percentage more, and consume energy in the appropriate mode.
Amplified lamp
- Improved visibility – the bulb of these illuminators has a slight blue tint. While consumption and heating remain normal, the light is brighter, and visibility on dry or snowy roads is better and further. Such headlights do not blind oncoming car owners, but without high-quality fog lights they are unable to illuminate the road in rainy weather.
- All-weather - differ from standard ones by the presence of a yellow coating on the light source. In terms of technical characteristics, they are no different from them, but they help create a visual contrast in the contours of objects, especially when the weather is bad outside.
All weather lamp
Increased power - these headlights are a product of the market, which generated demand, and not an objective need
More powerful lamps are the prerogative of young people who do not take into account possible road problems associated with the consequences of such “tuning”.
When should the side lights be turned on?
The driver is required to turn on the lights whenever there is poor visibility on the road, as well as when driving through a tunnel.
Conditions for poor visibility include:
- heavy rain/snow;
- fog;
- dusk/predawn.
It is very important to turn on your side lights when driving in fog. At the slightest sign of its appearance (especially in the dark), you need to turn on the dimensions, indicating the boundaries of your own vehicle
If you are forced to stop on the side of the road in conditions of insufficient visibility, you should definitely turn on the side lights, and in the dark, also turn on the emergency lights. Such actions will protect you and help other road users not to get into a situation where a car suddenly appears out of the fog/darkness in front of them.
Video about choosing lamps
Light on the road means comfort, visibility, safety of the driver, passengers and other road users. At the same time, the very quality of the light characteristics of the car’s front lights depends on two factors of the lighting unit: the diffuser and the reflector. Therefore, the light bulbs on the VAZ 2114 must be of high quality, regardless of the year of production of your particular car.
It is also worth mentioning the aesthetics of the glow of the “eyes” of your car, because this is the first thing that people see when they meet your car for the first time at night. Let's figure out how to choose the right “mirror of the soul” of the iron horse, what nuances you should know about.
Bulbs in the headlights of a VAZ 2114
Reasons for failure of side light bulbs
There may be several reasons why a particular light bulb of the VAZ 2114 dimensions stopped lighting, namely:
What kind of lighting do you prefer?
Built-in Chandelier
- open circuit (no voltage at the headlights);
- the side light bulb has failed for some reason;
- the corresponding fuse has blown;
- the fuse box has failed;
- The lights button is broken.
Most often, the cause of failure is a malfunction of the light bulb itself. Fixing such a malfunction is quite simple; it is important to know exactly how to do it.
How to change side light bulbs on a VAZ 2114
Types of headlights
The headlight unit on a VAZ can have two design options:
- Bosch (BOSH);
- Kirzhach.
Outwardly they are very similar. Experts distinguish them by small details - the shape of the blender arches or the rotation diffuser. Kirzhach has a long, narrow reflector with a partition and no top wall. Bosch has walls on all sides, and the reflector is short. For an inexperienced person, it is easier to distinguish these designs by the shape of the plug on the back of the headlamp - Bosch products have one and are made in the form of an oval. These subtleties are not accessible to everyone, but only to experienced car enthusiasts.
There are also Chinese analogues of headlight units for the VAZ 2114. They can have any shape, since they are not subject to general standards. Purchasing such products is a big risk. You can, with equal probability, get suitable headlights, or have lighting fixtures that do not match the shape of the sockets.
Reasons for failure of dashboard lights
- VAZ 2110 engine airbags
- How to glue angel eyes to the headlights of a VAZ 2114
- VAZ 2110 headlight mount
- Disassembling the headlights of the Kirzhach VAZ 2110
- Taillights about sports for VAZ 2114
- VAZ 2110 headlight reflector fell
- Tuning headlights for VAZ 2110
- The low beam headlight of the VAZ 2110 does not light up
- VAZ 2110 headlights shine low
- How to adjust headlights on a VAZ 2110 video
- How to disassemble the headlight of a Bosch VAZ 2110
Useful tips Connection diagrams Principles of operation of devices Main concepts Meters from Energomer Precautions Incandescent lamps Video instructions for the master Testing with a multimeter
Headlight device
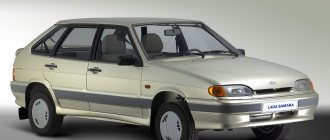
Let's start with the fact that the entire updated Lada Samara 2 family, namely VAZ 2113, 2114, 2115, has the same front optics installed. It comes in two types and different production:
These headlights have differences. This is an insignificant difference in the optical pattern on the glass and the presence of a reflector-partition in front of the lamp on Kirzhach. The Kirzhach reflector itself is wider and occupies almost the entire area of the headlight.
Because of the partition, drivers complain that Kirzhach’s headlights are blind and remove it. But to do this you need to remove the glass, and it is glued in - be careful if you are going to do this.
Differences between BOSCH and Kirzhach headlights on the VAZ 2114
The direction indicators are not a single unit with the headlight, but it is also impossible to install an orange block from Kirzhach into a Bosch without modifications, or vice versa - they are not interchangeable. They attach differently to the headlight
Please note that the pattern on the turn signal glass is different. The back side of the headlight is also different, we will talk about this below.
Diagnostics
If problems arise with the vehicle's lighting equipment, the cause of the problem should be identified as quickly as possible and eliminated. The search should begin with the simplest and at the same time the most common causes. So, if one headlight on your VAZ 2114 does not light up, then most likely the reason is that the bulb of this headlight has burned out.
The simultaneous burnout of two light bulbs in both headlights also happens, but is extremely rare. As a rule, this occurs during sudden changes in voltage in the network and is accompanied by serious damage to other electronic equipment. Checking the serviceability of the light bulbs is very simple - you just need to replace them with new ones.
When going on a trip, you should definitely have a set of spare lamps with you.
In order to check the integrity of the electrical circuit, you should “ring” the wires leading to the headlights from the fuse box with a tester. If there is a signal, then the wires are working; if not, then there is a break and the wires should be replaced with new ones.
The next step of the test (although it can be done first) will be to check the fuses located in the common block. In this case, two 7.5 ampere fuses, labeled F12 and F13, are responsible for protecting the headlights. The first of them is in the right headlight circuit, and the second is in the left one.
The failure of one of them will lead to a breakdown of the light on only one side (this feature, along with the burnout of one light bulb, may be the reason why only one headlight is on). Solving this problem is extremely simple - you just need to replace the fuses with others designed for the same current strength.
Finishing the conversation about possible malfunctions, it is worth mentioning an extremely rare but possible reason - a breakdown of the K9 relay (it is located in the common block). If a complete check of all electronic elements and replacement of the power button do not produce results, then this relay should also be replaced. Such a replacement should help correct the situation and return both headlights to operation.
Let's look at the question of why the low beam doesn't come on, but the high beam does on the VAZ 2114
The ground wire from the connecting block of each headlight unit is attached next to it to the car body. Disconnect the end of this wire (black) from the body and strip it. Also clean the mounting area.
Expert opinion
It-Technology, Electrical power and electronics specialist
Ask questions to the “Specialist for modernization of energy generation systems”
VAZ 2114: what kind of light bulbs are in the headlights and other lighting devices? The next stage of testing, although it can be performed and the very first step, will be checking the fuses located in the common block. Ask, I'm in touch!
Which light bulbs are better to choose?
By default, the VAZ 2114 is equipped with lamps that do not give the required effect in conditions of poor visibility. In this regard, car owners often replace lighting elements with better models.
The choice is made based on the personal readings of the car owner. Before purchasing, you must study the technical specifications of the part. The following models are most common among motorists:
Osram Cool Blue Boost is a high-quality lamp from a German manufacturer. Emits white light, which has a positive effect on visibility in low visibility conditions. The brightness indicators of the model are at a high level. Lighting element power 100/90 W. The service life ranges from 120 to 400 hours of continuous operation. The price of the product differs depending on the region and averages 1100-1200 Russian rubles.
Philips Blue Vision Ultra. The power of the lighting element is 60/50 W. The model is distinguished by high brightness. Cold white light allows you to see the road situation regardless of the level of illumination. The cost of two lamps in this series is 1400 - 1500 Russian rubles.
IPF Titan White are high-quality models from a Japanese manufacturer. A distinctive feature of the product is its high luminous characteristics and long service life. The lamps provide high-quality illumination of the road surface regardless of weather conditions. Power is 55 W. The cost of a product from a Japanese manufacturer averages 2,200 rubles.
Why halogen?
When it comes to replacing any parts, car enthusiasts look first at price. The cost of replaced elements began to play an even greater role, and during the crisis, expensive brands began to be in less and less demand. However, almost every manufacturer produces halogen-based models, which belong to the budget category and are much cheaper.
Energy consumption also plays an important role. And here halogen is the ideal choice. In this case, it turns out that you can save not only money, but also battery power. This reduces the risk of being left without a car in the morning if you forgot to turn off the headlights in the evening. That is why halogen light bulbs often become the choice of a sophisticated driver.
The problem with new headlights
It happens that after installing new headlights, purchased for a lot of money from a reliable, excellent manufacturer, the quality of the glow leaves much to be desired.
Inexperienced drivers attribute everything to a defect or the purchase of a fake disguised as a trusted company. But in reality everything is completely different.
Headlights shine efficiently and efficiently not only depending on the manufacturer. Settings that someone doesn’t know about or simply forgets play a big role.
Headlights that have just been removed from the factory packaging and installed in place of the old optics do not have the adjustment required specifically for your car. You can do it yourself, but this will require a perfectly flat area, a similar wall and the skills of a draftsman. In practice, this is quite difficult to implement, so the optimal solution is to entrust the adjustment to specialists from a service station.
Alas, the VAZ 2110 is not a modern, advanced car in which the headlights are automatically adjusted electronically. Here everything has to be done manually.