Many will agree that unscrewing the hub nut is an activity that can be punished in court; it is too inconvenient and difficult even for a physically strong person with all the necessary tools. However, since it is not always possible to choose the easiest one (option One, also known as the Main one!) - sending the car to a service station, where they will not only unscrew it but also carry out subsequent repairs. Then you will have to figure out the task yourself, using the easiest and most effective method possible.
Which way does the hub nut unscrew?
Yes, you may very well be one of the lucky ones who won't need any extra effort as the problem with unscrewing the hub nut may simply be a matter of going in the wrong direction.
So, we take the wrench and, when your car is far from new, try, if the nut does not lock, on the left wheel, unscrew the nut counterclockwise, and on the right wheel, unscrew it clockwise. In modern brands, it is usually necessary to unscrew the hub counterclockwise .
Before you start unscrewing the hub nut, do not forget that it comes off when the car is standing on the wheels and the stops are placed under them. On the side from which the nut will be unscrewed, a stop is securely installed.
Although if the nut is located deep and the brake disc is ventilated, then you can try to unscrew it (fixing it with a powerful screwdriver) and only after making sure that the car is securely secured. Remember about personal safety precautions: protect your eyes, do not overdo it, because in the spirit of enthusiasm you can accidentally get hurt or damage the car body.
Unfortunately, in most cases, it is not enough to use a wrench with a large lever; you have to use additional tools and special mixtures. Let's consider the other options.
Further sequence of actions
So, the hub nut was successfully unscrewed. What to do next?
- First of all, an external inspection is carried out to determine the integrity of the threaded elements. Using fine sandpaper, improvised materials, kerosene or solvent, the entire surface of the thread on the stud is thoroughly cleaned to bare metal. Order factory hub nuts in advance.
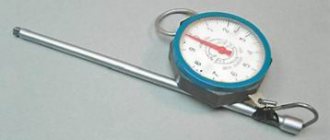
- The tightening is carried out under load control. We use a torque wrench.
- To prevent this part and contact from sticking again, we use a special deep penetration lubricant WD-40 or thick graphite lubricant.
- Don't forget to lock or install a cotter pin.
Security measures
To safely unscrew the hub nut, the following requirements must be met:
- Use proper tools and accessories;
- Firmly fix the body in its original position (handbrake, heel);
- Use special anti-slip gloves;
- If excessive force is used, do not place body parts under the car body if the wheel is jacked up;
- First we try to unscrew it using more gentle methods, trying to preserve the original locknut;
- The sequence of actions is defined in the operational map. It must be followed.
Design features of the hub nut
The hub nut is located in a unit whose operation occurs under conditions of high temperatures, mechanical and external influences. Therefore, alloy steel with anti-corrosion coating is used for manufacturing.
The part, in addition to the standard nut elements, has grooves. After reaching the required torque, a locking pin is inserted into them or mechanically fixed with a chisel. The outside of the nut is surrounded by 6 standard edges. We gain access to the locknut after removing the protective cap.
Possible problems for VAZ owners and not only
With long-term exposure to tools and repeated attempts to remove the nut, “force majeure” situations occur, which include:
- the edges are licked off;
- wear of the union head;
- does not withstand the ratchet mechanism;
- the thread on the shaft or locknut is knocked out;
- violation of adjustment, tightening torque;
- the bearing is damaged.
We buy a spare locknut and cotter pin in advance. It is also advisable to have a spare set of special keys before dismantling.
It is not recommended to unscrew
Don’t try to “discover America” again; the methods listed above will help break the locknut in 99% of cases. The following methods should not be attempted:
- Cut using argon, oxygen or electric welding;
- Strong blows with a hammer or sledgehammer on the end surface;
- Jumping on a lever;
- Impacts on the side, edges, base;
- Exposure of the part to open flame (for example, pour kerosene on it and set it on fire).
There are many ways to fix threads:
Before unscrewing the hub nut, it is advisable to read the instructions for routine maintenance of your car. It indicates the method of fixation, the direction of the thread and other nuances.
- Changing the geometry of the nut (one side is oval). Anyone who has repeatedly unscrewed such a nut has seen that the threads gradually become unusable;
- Punching after tightening. This solution is not suitable for replaceable units, since this will damage the screw part. However, many car manufacturers fix the hub nut in this way so that it does not unscrew while driving;
- Hairpin. The most reliable method of fixation. The nut does not unscrew on its own, and the thread does not deteriorate. For some reason, not all car designers use this simple method;
- The retainer is a “shoulder-groove”. A common method, more reliable than core punching, but detrimental to carvings. Longitudinal grooves (one or two) are made on the threaded connection of the axle shaft. The CV joint nut has the same number of collars, which bend into grooves after tightening. It is almost impossible to unscrew the nut without damaging the thread;
- A variety of fixing paints and adhesives. Not used on hub connections.
Since the connection is in unfavorable conditions (especially if the boot cap is lost), the nut does not unscrew the first time. An inexperienced driver panics, starts turning the nut in the wrong direction, uses attachments on the wrench in the form of a meter-long pipe, and as a result breaks the thread. The consequences are a forced replacement of a still-living CV joint.
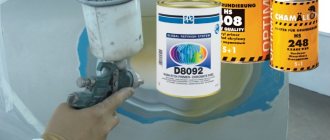
Chemical
Now we will consider methods for those who do not rely on the help of physics, but want to solve the problem with the help of chemistry. Your laboratory should have: kerosene, white spirit, acidified sulfuric acid, zinc, plasticine, hammer, water, sandpaper, wrench, chisel.
Attributes of the chemical method for unscrewing the nut
We moisten the nut and bolt with kerosene (experienced people recommend making a mixture of White Spirit and kerosene), applying a swab to them, it doesn’t matter whether it’s cotton or gauze. After some time - from an hour to a day, and with repeated attempts, you may find that the hub nut can be easily unscrewed. But even here you cannot do without force: at a minimum, you will probably have to work with sandpaper to clean the parts from rust. If even after this things don’t work, you should help with a hammer: tap it on the edges of the hub nut.
If in this case you are not successful, make a small container out of plasticine, secure the hub nut on top, pour water with sulfuric acid into it, and put zinc in the container. A chemical reaction begins that does a very good job of removing rust. Usually a day is enough for even advanced corrosion to go away from a part. Finish the job with a wrench. But this method is valid only in the case when the reason is that the nut is tightly stuck and/or rusted, and if it was simply tightened, neglecting the required tightening torque (to “be sure”), then you just need to tighten it.
What is the result..
As you can see, unscrewing the hub nut is not an easy task, but it can be solved. Please note that the first step is to try to preserve the hub nut by using penetrating fluids such as Vedeshka. Physical efforts to twist the hub should be moderate. And, of course, you should refrain from strong blows and heating with a torch, as methods that can render not only the nut, but also the bearing unusable.
The spline connection of the outer CV joint is a critical unit. It is this part that bears the torque load. It is no wonder that the grenade nut, which holds the floating axle shaft in the drive wheel hub, should not unscrew on its own.
Types of fasteners
Here are the types of fasteners needed for alloy wheels:
- Bolts are metal rods with a screw thread at the end. Used to connect detachable elements.
- Nuts are round-shaped parts designed to fasten elements by screwing a metal die onto threaded rods.
Steel, aluminum or titanium alloys are used to produce products.
Titanium bolts are distinguished by high quality indicators. Black bolts for alloy wheels are made from steel with the addition of molybdenum or steel with a chrome or nickel coating.
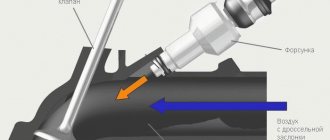
Classic methods
Essentially, standard dismantling methods involve two main methods.
You will need:
- jack to remove the wheel
- tool kit
- hydraulic jack to lift the engine, or replacing it with a “stump”
First way
In the first case, we will have to make significant physical efforts, therefore, you need to clearly focus on your own strength. We are talking about the need to put stones or special stops under the wheels that would not allow them to move during operation. The gearbox should, if possible, be set to maximum gear. The higher it is, the easier it will be for you to cope with the task. In third and lower gears, it will be almost impossible to make a turn with your hands. But everything is unscrewed by hand. To make this task easier for yourself, it is appropriate to use a lever that will reduce the necessary effort. In some cases, the length of the lever can reach one and a half meters.
Read more: Conditions for the use of firearms by police officers
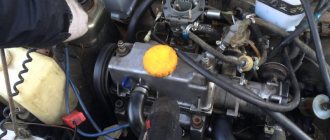
Getting to the bolt is not always easy
Second way
As for the second method, it involves placing the vehicle in neutral gear. Next, you need to install a suitable sized head on the bolt with a piece of pipe, which, in turn, rests on asphalt or concrete. Ordinary soil will not be able to hold it. But the bolt itself is already loosened by the starter.
This saves a lot of effort and makes it possible to complete the task the first time. The main thing is to take into account the reliable fixation of the pipe so that it does not jump out and damage anything around it.
Be careful not to lose the pulley key
But, in any case, the threads in this nut are correct, so you need to unscrew it counterclockwise, with some exceptions, which we will now look at.
Do-it-yourself front wheel bearing replacement: step-by-step instructions
Of all the car accessories, the most essential one is a wallet.
Today I will show you how to change the front wheel bearing on front-wheel drive cars without removing the strut and without a press.
If you have alloy wheels, first remove the center cap.
We find out what diameter is the central nut that secures the CV joint.
We take a very powerful head, in this case I have a 30 nut here, so the head is 30 accordingly.
We also take a powerful crowbar, it is desirable that the length of this crowbar is about 2 meters.
Then you will either need a helper to apply full force to the brakes, or you will need to place wheel chocks under all four wheels.
Before starting to unscrew the wheel, I turn it out a little.
This is done so that when unscrewing the crowbar does not rest against the car body.
I put in the wheel chocks and you can try to unscrew them.
Immediately loosen the nuts on the wheel and jack up the car.
We completely unscrew the central nut, unscrew the wheel and remove it.
We completely unscrew the brake caliper along with the bracket; it is secured with two bolts: one bolt on top and one bolt on the bottom.
We remove the brake caliper together with the bracket and hang it on the spring using an electrode curved with a hook. Remove the brake disc.
If it doesn't come off, you'll have to knock a little. But you need to knock not on the brake disc, but on the central tube of the hub.
At the same time, I press the brake disc using a pry bar and knock on the inner tube of the hub. This is how the brake disc can be easily and simply removed.
And in order for the brake disc to be removed well in the future, the seat must be thoroughly cleaned and treated with high-temperature caliper grease.
Next, you need to remove the hub itself; it can be removed using a reverse hammer. A tube is screwed to the studs and pulled using some kind of powerful weight.
Since I don’t have a reverse hammer, I’ll just knock it down with a hammer. This is how the hub can be removed easily and simply.
In some cases, a reverse hammer may be necessary; it also happens that the bearing race remains on the hub itself.
In such cases, the clip has to be knocked down separately or cut off with a grinder. Then you need to unscrew the lower ball joint and disconnect it from the lever.
To move the strut and pull the CV joint out of it, you need to turn the steering wheel so that the steering rod goes out as far as possible.
In this case, I turn the steering wheel to the right. If it were on the right side, then the steering wheel would have to be turned to the left.
Then I simultaneously push the CV joint out of the steering knuckle and pull it towards me. Thus, the wheel drive is removed from the steering knuckle.
Now you can start removing the wheel bearing itself. I immediately delete everything that bothers me.
There is a retaining ring in front of the bearing that needs to be removed.
This can be done using pliers, insert them into the hole in the retaining ring and squeeze. This removes the retaining ring.
To make the bearing come out easier, the rust must be cleaned off with a metal brush.
To remove the bearing without removing the strut, you will need a puller. In this case, it is a puller from a VAZ-2108, 2109 car.
It is sold in any Lada spare parts store and is quite inexpensive.
In this case, I change the bearing not on a VAZ, but on a Chevrolet Aveo. In order for this puller to fit the Chevrolet Aveo, all that was needed was to grind the washer.
I sharpened it with a grinder, I simply reduced its diameter. Also, if you work on a puller, this welded bolt from a Zhiguli car is made for convenience, since using a simple pin here is inconvenient.
With this puller, the bearing is both pressed out of the steering knuckle and pressed back. To press out the wheel bearing, take a puller and remove all the washers from it.
We turn the smallest washer with the groove inward, towards the thread, and insert the screw from the inside into the bearing. And on this side we put on two large washers.
I will hold the screw on one side with a spanner wrench, and on the puller side I will tighten the nut. Thus, the puller will squeeze out the bearing.
Be prepared for the fact that you will not be able to turn the nut and press out the bearing by hand. You will need another long pipe.
I put this pipe in the form of a lever on the key and rotate the key with the pipe. In this way, twist until it stops, then remove the pipe and unscrew the nut.
We remove two washers from the screw, the bearing has already begun to come out, and it comes out flush with the steering knuckle.
To continue pressing out, we put on the ring from the puller kit, then put on the large washer with the groove inward.
If space allows, we also put on a small washer, then screw on the nut.
After this, we continue to rotate the nut and press out the wheel bearing. That's all. The bearing is pressed out and is located inside the puller.
Here's the bearing we just removed from the steering knuckle without using presses or removing the strut.
After dismantling the bearing, protect the seat and lubricate the seat with high-temperature caliper grease.
You can install a new bearing, it does not have an orientation, you can install it this way or that way, but I always install it with the inscriptions facing out.
To press the bearing, remove the rectifier washer - this is the smallest washer. We put the largest washer on the screw.
It doesn't matter which side you wear it on. We insert the screw from the reverse side into the hub, then put a washer of medium diameter on the screw.
Please note that the washer is installed with a groove towards the bearing.
This is done for a reason: the washer must press against the outer race of the bearing with a groove.
If the screw is long enough, put on the second washer. Screw on the nut and press the new bearing into the steering knuckle.
Screw it all the way. Then unscrew the nut and remove the puller.
The easiest way to unscrew/tear off a hub nut
The easiest way can be considered the following, but it involves completely replacing the nut. Don't worry, any method does not guarantee the safety of this part. To easily unscrew or tear the hub nut out of place (an option for all brands - from VAZ to foreign cars with a groove on the shaft), you need to take:
Unscrewing the VAZ hub nut using a drill
- New nut.
- Drill or screwdriver.
- Drill up to 3 mm.
- Chisel.
- Hammer.
Process.
- You need to drill the nut along the groove to counteract it.
- Using a chisel and hammer, simply break the nut and remove it, then replace it.
- If throwing away the nut is not possible, then you will have to sweat - and in the literal sense of the word too.
But this method should be used only as a last resort; first try using more or less simple and humane methods.
see also
How to check the hub
Wheel bearing grease
- 110 4 119k
Wheel bearing
Hub
Car brake system maintenance
Many will agree that unscrewing the hub nut is an activity that can be punished in court; it is too inconvenient and difficult even for a physically strong person with all the necessary tools. However, since it is not always possible to choose the easiest one (option One, also known as the Main one!) - sending the car to a service station, where they will not only unscrew it but also carry out subsequent repairs. Then you will have to figure out the task yourself, using the easiest and most effective method possible.
Wheel nuts
Wheel nuts, like bolts, are distinguished by 4 main parameters: diameter and thread pitch, profile of the clamping part, nut height, wrench size.
Wheel nut diameter and thread pitch
The diameter and thread pitch of the nut must match the stud, i.e. car make and model. Possible wheel nut thread options for passenger cars and light commercial vehicles: 12 x 1.5, 12 x 1.25, 14 x1.5, 16 x 1.5, as well as inch threads. Determine the diameter and thread pitch of the wheel nut using the selection by car function in our online store.
Profile of the wheel nut clamping part
The profile of the clamping part of the wheel nuts can be conical, spherical, or flat. As with bolts, wheel nuts are selected solely according to the profile of the well in the wheel rim. The consequences of incorrect selection are described in detail in the previous article.
When making your own selection, you need to take into account the following facts:
- spherical nuts
- only for original Honda, Rover and several older VW models; - flat nuts
- only for original alloy wheels of Toyota, Mitsubishi, Hyundai, some global models of Peugeot and Citroen; - cone nuts
- for original wheels of those car brands that are not mentioned in the previous paragraphs; - Third party discs are designed to use flare nuts only.
Nut height, spanner size, form factor
The height of the wheel nut is not of fundamental importance. The main thing is that the nut is not lower than the original sample, otherwise there is a risk that the wheel stud will rest against the “bottom” of the nut. As a rule, for disks with deep wells, nuts are installed higher.
Wheel nuts come in open and closed types. In most cases, steel disks are fastened open because it is assumed that such a disk will be covered with a cap, and a high closed nut can prevent this. Secondly, saving money, because... open wheel nuts are significantly cheaper.
Choose wheel nuts that match the size of your original wheel wrench. This must be done for several reasons. Firstly, in the future this will eliminate confusion when selecting a nut based on the car model. Secondly, you don't have to buy a new wheel wrench.
How to unscrew a hub nut - the delicate way
What do you need:
- Tubular socket wrench - “wrench”. The tool must be made of high-strength steel.
- Powerful screwdriver.
- Iron pipe.
- WD-40.
- Wire brush.
Process.
- Clean the threads from dirt using a brush with metal bristles. Now you should soak the hub nut with penetrating lubricant. For example, WD-40.
- We impregnate the hub with the penetrating mixture. You can rest for 10-15 minutes, and then you should put the wrench head on the nut and hit it with a hammer several times, gradually increasing the force of the blow. Just don’t overdo it: the point of this action is to slightly deform the nut, which will make it easier to remove. And immediately after the impacts, you should try to unscrew the hub nut on a VAZ or a car of another brand.
If the nut is stuck to the shaft, unscrew it using chemicals
A fairly effective and efficient method is to apply chemicals to neutralize the resulting rust. Experts advise making a mixture of kerosene and white spirit. Then you need to moisten cotton or gauze material in the solution and apply it tightly to the permanent connection.
It is advisable to cover it with a bag or secure it with plasticine so that the solution does not erode. You need to wait at least an hour. If you have time, leave it overnight. Then, using the usual method, we try to unscrew the fasteners. Light tapping on the base is allowed (be careful not to break the thread).
A more effective solution for removing rust is a mixture of sulfuric acid, water and zinc.
Note:
Specialized products are also sold in auto stores. You can also use WD-40, with a long exposure (more than 4 hours), and periodic additional wetting with the same lubricant.
How to measure yourself
Measurements must be as accurate as possible, since the indicators differ in close values with a distance of a couple of millimeters, for example, 98 and 100 or 110 and 112, and they are not interchangeable. To eliminate errors, it is recommended to use a caliper or ruler.
Adjacent holes
Here's how to determine the distance between bolt holes. The dimensions of the circle on which the holes are located are taken. The diameter is determined using compatibility tables or by measuring using a ruler. The resulting distance between adjacent fasteners should be multiplied by a factor that depends on the number of holes. The circumference of a VAZ is 9.8 cm, and that of passenger cars is 139.7 millimeters.
Far holes
A simple measurement method is carried out on models with an even number of recesses - for 4, 6, 8 fasteners. Parallel Hole Distance – PCD.
And here’s how the far holes of disks with five bolts are measured: the calculation is made between non-adjacent recesses, the resulting figure should be multiplied by 1.051.
Hub window diameter
Indicative data for the central hub window are indicated in the table and in the complete bolt pattern formula. In the absence of information, readings are measured with a ruler or caliper. The diameter of the hub area on the VAZ 2110 = 58.6 mm.
The bolt pattern is carried out taking into account the relative size of the vertical axis of symmetry of the disk to the area adjacent to the hub.
Dry residue
The result is a wear-resistant thread of the same diameter with a strong fit, resistant to corrosion and temperature influences, while the load on the threads is distributed more evenly due to the design features and profile of the insert. Read a detailed overview of technologies from the manufacturer: at the bottom of the page there is all the necessary technical documentation, or just flip through the brochure (available on the manufacturer’s website), where all aspects of the inserts are discussed very compactly.
The costs of time and consumables for thread restoration are available in the “Services” section.
Restoring threads in the wheel hub
The thread in the front wheel hub broke.
Unread message by lynxear » Mon Nov 24, 2008 06:39:23 PM
Unread message by lynxear » Tue Nov 25, 2008 9:12:58 AM
Unread message by lynxear » Tue Nov 25, 2008 9:26:59 AM
Unread message VladiZlav » Tue Nov 25, 2008 12:14:17
Unread message nezznaika » Sun Apr 12, 2009 19:46:38
Unread message by DonPedro » Sun Apr 12, 2009 07:54:26 PM
Unread message nezznaika » Sun Apr 12, 2009 20:22:48
Unread message Mr_Ice » Mon Apr 13, 2009 9:30:35 AM
Unread message by VladiZlav » Mon Apr 13, 2009 10:06:55
Unread message SMSha » Mon Apr 13, 2009 14:22:44
There was PARADISE in the USSR - wherever you look, there was a DISTRICT Council, a DISTRICT executive committee, a DISTRICT committee, and so on. And in this state, wherever you spit, there is an Administration.
All current life in three sentences: On a warm and sunny May day on the high bank of the river, a team of workers was building a cowshed. They worked fervently, cheerfully, with fire and swearing. It turned out shitty.
Unread message Mr_Ice » Mon Apr 13, 2009 14:26:19
Unread message SMSha » Mon Apr 13, 2009 18:02:29
Mr_Ice I agree that you shouldn’t underextend, in fact - I wrote that I set 70 N * m - although it was possible to set 63. But on the other hand, over-tightening is also scary. When the bolt snaps, it’s in half.
balaganoff Regarding “which key to take” - I would definitely take one “with an exit” to a standard square, where you attach any head. Actually, I took one for myself. With torques from 42 to 210 N*m. And I will take a second one just like it - but with fewer moments.
There was PARADISE in the USSR - wherever you look, there was a DISTRICT Council, a DISTRICT executive committee, a DISTRICT committee, and so on. And in this state, wherever you spit, there is an Administration.
All current life in three sentences: On a warm and sunny May day on the high bank of the river, a team of workers was building a cowshed. They worked fervently, cheerfully, with fire and swearing. It turned out shitty.
What is a guitar truss rod used for?
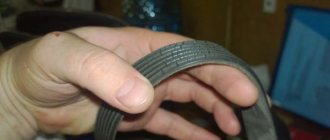
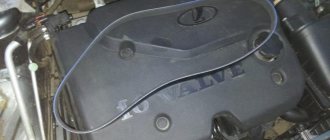
Many beginning guitarists who do not understand how the instrument works generally misunderstand its structure. The neck of the guitar is not at all horizontally straight, as many people think. Moreover, it is not so much a perfectly even beam as an arc onto which the strings are stretched, like a string on a bow. If this part of the guitar were perfectly level, then the strings would lie on it and it would be impossible to clamp them. The anchor performs two tasks at once - it takes on the enormous load that a stretched string puts on the tree, and also keeps the neck in one position for more comfortable playing.
Accordingly, if changes occur to the guitar rod, this directly affects the ease of play, as well as the ability to perform songs in general. Two very common problems are directly related to a crooked neck
- This is one of the reasons why the strings rattle - that is, they ring against the saddles, and instead of giving an even, ringing sound, they get along, and sometimes don’t play at all.
- It becomes very difficult to clamp the strings - this is especially felt at the 5th fret and above. It becomes extremely difficult to play with the barre technique - the guitarist begins to spend much more effort than is required. This situation is also directly related to the fact that the guitar truss rod is overtightened and compresses the neck much more than required.
At the same time, the instrument may stop tuning and produce a note a little higher or lower than it should be.
How to fix this? This is exactly what this article is dedicated to.
Unscrew the broken bolt
In order to remove the broken bolt with an extractor, you will need to use a drill. You also need to take drills, dies for taps, and a strong core. In the broken “culprit” it is necessary to make a hole, the diameter of which should not exceed the diameter of the thread of the broken bolt.
The extractor has a reverse thread.
An extractor is screwed into the hole. When you screw the extractor, or rather its reverse thread, into the broken bolt, you remove it along with the latter.
If the bolt breaks off and it is possible to reach it, then you need to restore the geometry of what is left of it. Use a file or coarse sandpaper. Then you need to carefully paint the surface. Otherwise, the drill will always walk along the rest of the bolt and it will not be possible to make a hole strictly in the center. It is also necessary to maintain alignment. The hole should be drilled as close to the center of the bolt as possible.
It is necessary to start drilling with a small diameter drill and clearly position the hole in the center. The centered hole can be expanded very easily. The diameter of the extractor must be taken 1 mm larger than the diameter of the hole
It is important not to drill through the hole so that the extractor has something to grab onto.
The extractor must be screwed into the recess of the bolt surface. Then the extractor must be installed in the recess and struck with a hammer, trying to hammer into the hole like a nail. After this, it should remain in the recess.
It is necessary to clamp its head with a die and rotate it in the direction of unscrewing the bolt itself. You need to rotate the die slowly and as carefully as possible. By crashing into the bolt, the extractor tightens it as much as possible and transfers its torque to the broken “culprit”. In turn, the torque will unscrew the broken bolt.
Types of Guitar Anchors
First of all, it’s worth understanding what kind of guitar rods there are, and how they generally work. This is important because each type has its own adjustment mechanism.
Contracting
The most popular type of truss rods, which is installed on almost every acoustic guitar. Its principle of operation is to compress the neck as you scroll the rod with the key. Conventionally, it consists of two parts - the first, static, which is responsible for holding part of the tool in one position, and the second, which can be twisted, and which regulates the degree to which the tree is compressed.
Precautionary measures
To prevent the process from ending in calling an ambulance, or at least applying bandages, follow these simple rules:
- use only serviceable tools;
- I remind you that the right-hand thread is unscrewed counterclockwise;
- make sure that the tool is securely fixed to the nut so that it does not break off at the most opportune moment;
- do not hesitate to use at least fabric gloves when working.
And of course, do not catch crows while working - be careful and careful.