Many people ask what does audio training mean on Grant? Audio preparation is, as a rule, a series of works already completed by the manufacturer (laying cables, installing speakers, etc.), which allow the future owner to install music in the Lada Granta without much effort. Interestingly, depending on the configuration of the car, audio preparation may be different.
Audio preparation is the basis of car audio
It is worth understanding what audio preparation is in a car. This may mean both work on installing audio equipment, and the presence of a special place for an audio system, speaker jacks, and wiring for further installation of acoustic equipment.
Such a concept as standard audio preparation is an integral part of the car’s equipment. Its level affects the final cost of the new car and the owner’s further costs for acoustics. The manufacturer can install either simply a wiring harness with the necessary plugs and connectors, or additional elements: speakers, a radio antenna and the radio itself. Expensive versions even have high-frequency beepers and audio system control keys located on the steering wheel.
Selecting a speaker system
Having assessed the audio preparation of the car, you can begin selecting equipment.
Depending on personal preferences and financial capabilities, a minimum set is determined - in fact, a radio tape recorder (or, as it is called, a head unit) and a set of speakers. A true car audio connoisseur will select equipment with increased power, as well as taking into account the possibility of installing additional devices: subwoofer, amplifier. Typically such a complete audio system requires the purchase of an auxiliary battery. When choosing acoustics, beginners should consider the following main characteristics of the equipment.
For the head unit - available media formats (CD, MP3) and output sound power. It is worth focusing on the average value of 25 W for a standard four-channel device.
For speakers:
- dimensions of standard sockets and the possibility of changing them;
- power (take into account comparability with GI);
- frequency range during playback;
- sensitivity.
Audio system installation
After purchasing the equipment, the question of installation arises. This event is not easy and requires special technical skills. In most cases, in order to avoid unnecessary headaches, car enthusiasts turn to certified service centers, where experienced specialists will perform the necessary work and provide a guarantee.
Undoubtedly, there are people for whom everything related to the car is their hobby. For them, self-installation of sound equipment will be not so much saving money as it will be a pleasant pastime with a further reason for pride. In this case, what does audio preparation mean? In a nutshell, the higher the vehicle’s equipment level, the lower the additional costs for acoustics.
Many people ask what does audio training mean on Grant? Audio preparation is, as a rule, a series of works already completed by the manufacturer (laying cables, installing speakers, etc.), which allow the future owner to install music in the Lada Granta without much effort. Interestingly, depending on the configuration of the car, audio preparation may be different.
Lada Granta standard
The car in this modification has a minimal set of options. The standard configuration has an option called “Audio preparation (cable, plug for the hole in the roof for the antenna).” This means that the car does not have a radio, but the necessary wires to connect it are there and they are hidden under the panel. But to connect the radio to the speakers you will have to lay the cable yourself.
The connection diagram is as follows:
- Rear left door: orange-blue (ground); blue-white (plus);
- Rear right door: yellow-green (plus); green-black (mass);
- Front left door: gray-red; green-red;
- Front right door: yellow-white; green-white;
Installation of an acoustic shelf
The acoustic shelf is becoming fashionable among Russian car enthusiasts. This is due to the fact that the place where it is installed is optimal for placing the rear speakers of the car audio system.
To mount a shelf, you need to acquire materials such as a sheet of plywood, glue, a jigsaw, a drill, metal scissors, vibroplast and carpet.
Wooden shelf for speakers
First, the body panel is prepared, for which purpose the expected placement of the columns of the chosen shape is marked on a sheet of plywood and the same one is cut out of metal in accordance with the dimensions of the old car shelf. Then holes for the speakers are cut out in the metal blank. Next, the acoustic shelf is covered with vibroplast.
The next step is to cut two shelves from sheets of plywood. In the top sheet, the holes for the columns are cut one and a half centimeters larger. Next, the sheets are glued together and, after preliminary fitting, the speakers of the audio system are attached to them using self-tapping screws. To more securely attach the shelf to the car body, you can treat its lower part with macroflex.
At the last stage of work, the acoustic shelf is covered with any suitable dense material. Another important point is preventing rear window fogging. For this purpose, the acoustic shelf is additionally equipped with several fans.
For those who do not want or cannot make such a design for their car themselves, an acoustic shelf is sold at any large car dealership.
Why is an acoustic shelf installed:
- the sound quality of the speakers improves;
- there is no plastic rattling or squeaking;
- the sound becomes directional;
- the ability to hide all the wires allows you to create a more attractive and neat look for the interior;
- the acoustic shelf is more durable, which allows you to install speakers of any weight;
- You can install a subwoofer.
Return to contents
SETTING UP AND RECORDING A PROJECT:
Setting up and uploading the project program to the EEPROM of the board is carried out in the SigmaStudio software package. I gave detailed instructions for installing software, drivers and activating the CY7C68013A board as a USBi interface to make changes and adjustments in real time in a project in SigmaStudio in my previous review, and I will post that information again here below under the spoiler: Software and Drivers
SigmaStudio and software for the CY7C68013A board only runs on Windows. Take the SigmaStuidio package from the following link and install it: link A little about installing the driver for the board on CY7C68013A:
When connecting for the first time, the board was identified as an unknown device:
I took the drivers for the board from the CHIPDIP video page (link) Driver for the CY7C68013A board
I fed the driver to an “unknown device” and it began to be defined as “Cypress FX2LP No EEPROM Device”, exactly as needed. I didn’t touch any jumpers on the board, I left everything as is.
Next, from the software package for the Cypress board (the archive is located at the link: CySuiteUSB), you need to run the “CyConsole” utility
In the Cypress USB Console we see our device.
Now in this program we need to feed our device the script, which is located along the path C://Program Files/Analog Devices/SigmaStudio 4.2/USB drivers/x64/ADI_USBi.spt and by clicking the “Play script” button, run the script.
Our device will disappear from the system, and a new one will appear, called “Analog Devices USBi (programmed)”
VirtualBox users: after loading the script, my original USB device disappeared, and a new one did not appear, I was looking for why until I remembered that I needed to indicate in the menu that I needed to connect a new USB device to the guest OS.
What if you install “music” in the car yourself?
Let’s say right away that you definitely won’t be able to assemble a High-End system for the same money that a car dealership will charge for standard “music.” But car acoustics are not only and not so much the “head” itself and the speakers, but sound insulation, which is practically absent in budget cars. So, high-quality sound will still require an injection of money, but now we will try to put together our response to the standard music of the same “Logan”, taken as an example.
Review of prices of audio products manufacturers
| Name / characteristics / article number | Price, rub.) |
| Comprehensive budget solution | |
| Radio tape recorder PIONEER MVH-150UBG | from 1500 – 1700 |
| Speakers Pioneer TS-1339 (13cm) | from 2000 |
| Speaker trim | from 450 – 500 |
| Additional noise/vibration insulation of doors | from 1200 |
| Consumables, bolts, screws for vinyl (wood) spacers | from 100 – 150 |
| Car radios | |
| Pioneer SPX-HUD01 | from 10000 |
| Pioneer DVH-345UB | from 12000 |
| Sony XAV-65 | From 15000 |
| Pioneer SPH-DA230DAB | —/— |
| Pioneer SPH-DA120 | from 12000 |
| Pioneer MVH-X585BT | —/— |
| Pioneer MVH-X580BT | —/— |
| Pioneer MVH-S300BT | —/— |
| Auto acoustics coaxial | |
| Two-way coaxial acoustics URAL AK-M | from 7000 |
| URAL AK-74 | —/— |
| Coaxial acoustics URAL AS-C6947 | from 5200 |
| URAL AS-C1647 | —/— |
| URAL AS-C1347 | —/— |
| Four-way acoustics German Maestro AC6511 | from 7500 |
| Focal Performance PC 130 | —/— |
| Dragster DCB 5 | —/—7 |
| Dragster DCA 943 | from 6800 |
| Dragster DC 572.2 | —/— |
| Dragster DC 502.2 | —/— |
| Auto acoustics component | |
| 2-component acoustics Dragster DSB 5 | from 4000 |
| URAL AS-C1627K | —/— |
| URAL AS-C1327k | —/— |
| URAL AK-74.C | —/— |
| URAL AK-47.C | —/— |
| Avatar CBR-6.21L | from 5000 |
| German Maestro MB 4.2 FR | —/— |
| German Maestro 2S 6512 | —/— |
| Dragster DSC 592.2 | —/— |
| Dragster DSA 582 | —/— |
| Dragster DS 532.3 | —/— |
| Alphard Machete MC-6.2A | —/— |
| Amplifiers single / multi-channel | |
| Machete MFC-650.1D | from 10000 |
| Taramps DSP 3000 | —/— |
| Taramps TS2000x4 | —/— |
| Taramps TL500 | —/— |
| Taramps TL1800 | —/— |
| Taramps TL1500 | —/— |
| Taramps DS800x4 | —/— |
| Taramps DS800x2 | —/— |
| Taramps DS440x4 | —/— |
*prices are as of September 20, 2018.
Which car is right for you
If after reading the article you still cannot compare Kalina and Granta liftback and have not decided which car is best for you, pay attention to the most basic nuances:
Car appearance
It is of no small importance, because every day it is you who drives the car, and not someone else. Price. Think carefully about what you're willing to pay for and what doesn't seem necessary.
Based on this, choose the appropriate package Technical specifications. Decide what is more important to you - power and speed, or comfort and maneuverability on difficult roads? And perhaps the size of the trunk and the space in the cabin? Do you want to show off your car’s dynamic design to your friends and fly through the city at night, or just comfortably get from point A to point B? Only by thoughtfully and truthfully answering these questions can you choose the car that will completely satisfy you in all respects and will become a real “friend on wheels” for you!
And for a more visual comparison, we present to your attention a brief table of the main 6 characteristics:
| Lada Kalina 2 (hatchback) | Lada Granta Liftback | |
| Body length | 3893 | 4260 |
| Trunk | 355 l. | 440 l |
| Transmission | Manual/automatic | Manual/automatic |
| Engine capacity | 1600 | 1600 |
| Speed indicators | 171 km/h | 176 km/h |
| Price | 375,000 rub. | RUB 344,000 |
Do-it-yourself installation
Next, we will look in detail at how to correctly install the radio on the Lada Granta manually. If you are not a fan of the standard audio preparation of the Lada Grant, pay attention to this algorithm.
As stated earlier, the power wires are initially wired, and all that remains is to understand how to properly connect them to the radio.
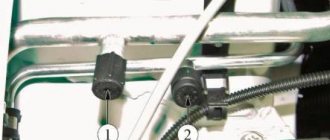
After removing the cover that covers the radio, two connectors will be visible in front of you. One connector is intended for connecting speakers in the doors, the second is for power supply.
The black and pink wires indicate ground and plus, and at the same time they are the main ones for power supply. If the connection is incorrect, the audio system will at least not work; in the worst case scenario, you will short-circuit the “–” and “+” terminals, which will result in the fuse blowing.
When connecting directly, be sure to insulate all wires, not just those used, to avoid a short circuit.
After connecting the necessary wires, we secure the speaker with self-tapping screws or screws and close the mesh.
It is recommended to install 5-inch speakers (12.5 cm) on the front doors of Lada Granta cars, but if desired, you can insert 16 cm, as a result of which the sound quality will only increase. Choose speakers so that the glove compartment can open completely. This problem often exists when owners choose larger speakers.
Some craftsmen cut out the trim on the rear doors and install pancakes (6x9), which sound even better. With this option, a teardrop-shaped mesh is purchased in the standard factory place for speakers, and speakers measuring 13 cm are installed.
After doing all this grant-audio preparation, all that remains is to turn on the speaker and wait for the radio to turn on.
Lada Granta liftback norm
The situation repeats itself, we have the option “Audio preparation (cable, external antenna)”. There are wires, and an audio system without TouchScreen is installed only in configuration 21917-710-41. All the necessary wires are already there, all that remains is to connect them.
Now you should understand what is included in Granta's audio training. If you have to connect the radio yourself, then we recommend that you read the instructions on how to install music.
Keywords: front speakers Lada Granta | rear speakers Lada Granta | cassette player Lada Granta | torpedo Lada Granta | Lada Granta doors | Lada Kalina doors
0 0 0 0 0 0
Share on social networks: