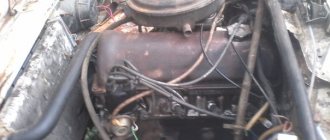
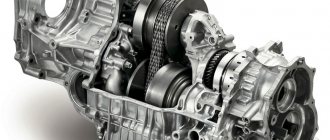
Gas distribution system VAZ-2114
It will not be a secret to anyone that over time, any part will wear out and require replacement; for some, this period is measured in hundreds, for others, tens of thousands of kilometers.
Timing mechanism diagram
As for the gas distribution mechanism system, and specifically its belt, replacement should be done at the end of its service life, or if there is visible damage to it.
However, it should be noted that when replacing an old belt with a new one, a problem may occur such as the belt sliding out of its place, which in turn can lead to eating (wear - approx.) of the edge of the belt, which in the future will only contribute to its wear, break and another replacement.
We hasten to please you
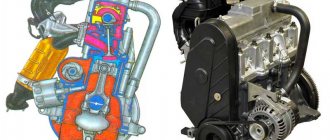
The VAZ-2114 car was equipped only with an 8-valve engine, with a volume of 1.5 and 1.6 liters, which may indicate that when the timing belt breaks, the pistons and valves do not meet and the latter do not bend , which is certainly favorable affects not only subsequent repairs, but also the car owner’s wallet.
conclusions
As you have seen for yourself, the reason for the timing belt slipping on a VAZ-2114 can only be solved by replacement, so when choosing a similar spare part in a store, it is best to pay attention to a trusted manufacturer who has proven itself only from the best side.
All car parts can become old and wear out over time. Each car owner, sooner or later, is faced with a situation when a spare part needs to be replaced. The problem of the rubber ring slipping is very common, especially among VAZ owners. Let's find out what the reasons for this are.
Where does the belt slip and why?
Note! The belt can slip either towards the engine or in the opposite direction from it.
This happens regardless of how exactly it was installed in the middle of the gear, since the reason for this is not only the belt itself, but also the elements and mechanisms accompanying its operation. In order to solve this problem, you need to use the methods described below.
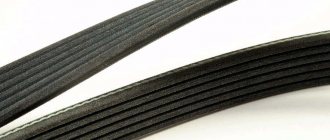
Timing belt
In modern times, in the automotive spare parts market, facts of counterfeits and low-quality products are becoming more and more common.
The top is the original timing belt and the bottom is a fake.
Specifically touching on the issue with the timing belt, we can talk about its uneven structure, increased elasticity (the ability to stretch excessively - approx.), as well as the presence of significant differences between the two edges (distortion - approx.).
The degree of straightness of the newly installed belt can only be determined on the mounted mechanism.
And, if even minor deviations are observed after starting the engine, then the reason is in the belt.
Belt is on and tight
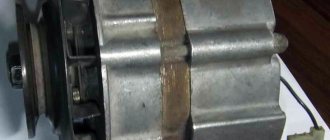
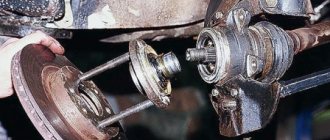
water pump
The timing belt can slip due to play in the pump (pump - approx.). It is very easy to determine its presence; you just need to grab the working surface of the gear with your hand, and if there is even the slightest play, the unit must be changed. In this case, read the material: “choosing a reliable pump for the VAZ-2114”
Leaks on the cylinder block from the timing side indicate that the pump has failed
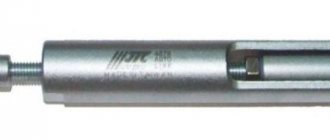
Tension roller
The next element that needs to be diagnosed when the timing belt is slipping is the tension roller.
Although it may seem like a simple part, deviation from its performance specifications can significantly affect the overall correct operation of the part. In simple terms, a curved roller will not be able to provide the belt with linear movement , wearing out and moving it to the side.
The diagram is clear and understandable.
Another reason for discussions on popular forums about the belt moving to the side is the installation of rollers of different types, because the analogue has a different, slightly modified design.
The difference between the rollers
The difference between these two spare parts is that the old side has a different shape, made of metal, while the new one is made of plastic.
Therefore, as the theory shows, a spare part made of plastic causes much less friction than its metal counterpart.
There are two types of rollers.
Troubleshooting methods
Now we list methods for eliminating these causes. Let's go in the same order.
- Belt tension . First you need to check the tension level and compare it with the one recommended by the car manufacturer (usually indicated in the technical documentation for the car, also can be found on the Internet). If this value is higher than the recommended value, then the tension must be loosened. This is done using a torque wrench. If you don’t have one, then it’s better to contact a car service. As a last resort, you can perform this procedure “by eye,” but use the indicated devices as soon as possible. You can also use a regular dynamometer and a regular wrench for this.
- Poor quality belt . If the two edges of the belt have different stiffness, then a situation will arise where the timing roller eats the belt from the softer side. You can check this by replacing its right and left sides. If after replacement the second side does not wear out, then the belt is to blame. There is only one way out, and it consists in purchasing and installing a new, higher quality part.
- Wear of pump bearings . To diagnose this problem, it is necessary to dismantle the belt and check for play on the toothed pulley. If there is play, it means the part needs to be replaced. Bearings cannot be repaired.
- The pump is installed crookedly . This situation is possible if, during the previous replacement, the adjacent surface was poorly cleaned, and small particles of the old gasket and/or pieces of dirt remained on it, but if this happens, then most likely you will understand this by the leak that appears after filling the antifreeze and starting the engine. When installing a new pump (or even an old one, if it is in good condition), be sure to thoroughly clean both surfaces (including the bolt holes), both on the pump itself and on the motor housing, and install a new gasket. In some cases, instead of a gasket, sealant is placed under the pump.
- Problems with the video . The video needs to be reviewed. It should have minimal play and a flat working surface. To check, you can use a ruler or other similar object of the required width. It also makes sense to check the presence of grease in the bearing. If its quantity is small, it should be added. If the roller is of poor quality, it must be replaced. It is almost impossible to repair the bearing, much less the roller surface.
- Damage to stud threads . To correct this situation, there are two options. The simplest is to use a saw with the appropriate diameter for turning internal threads and/or a die for turning similar threads on a stud. Another option is more labor-intensive and involves completely dismantling the block in order to restore the specified thread. This method is used if for some reason it is impossible to use the sword.
Other ways to adjust the roller
If you look at the standard and proper operation of the timing belt, then the tension roller should be located exactly in the middle of the pump and camshaft gears. However, some VAZ-2114 owners, in order to avoid the belt slipping, pull the roller to the side, closer to the camshaft, thus the belt, receiving the greatest bend in its upper part, is more firmly fixed in its place.
All tension roller components for VAZ-2114.
Not a tricky way to adjust the belt
There is another simple way that helps VAZ-2114 owners avoid the belt slipping by adjusting the position of the tension roller.
In order to fix it in this position, it is necessary to pre-make a blank in the form of a half washer made of aluminum (an aluminum can works well - approx.), which must be fixed between the spacer ring and the cylinder block.
Such a need can arise only if the spacer ring has differences in its thickness. You can take its measurements yourself, using only a caliper.
Camshaft and crankshaft
New camshaft gear
Also, judging by the numerous reviews of “our tubers”, it is possible to eliminate the occurrence of timing belt slippage after replacing the camshaft and crankshaft gears.
However, such a procedure can bring results if the car’s mileage on old spare parts is at least 100 thousand kilometers. Otherwise, such a replacement may not bring the desired result.
Rust on the crankshaft gear
Crankshaft gear rusted
This situation arises as a result of the lack of dirt protection. The gear rusts and begins to work incorrectly.
Using shims when the belt slips
You can make washers yourself, for example, from the body of aluminum beer cans, coffee tins, or use ready-made ones from the factory. The main thing is that the washers are the same size as the spacer ring installed between the block and the tension roller eccentric. There are two options. The first uses factory washers. The thickness and quantity are selected experimentally. The use of this method is ambiguous, since the washers are flat and, accordingly, the contact plane of the roller will remain parallel to the same. However, this method has helped some car enthusiasts.
1 - if the belt is sliding towards the engine, 2 - if the belt is sliding away from the engine
Another method is to make your own crescent-shaped washers. The number and width of washers are also selected experimentally. The use of such washers is more expedient, since with their help it is possible to change the angle of inclination of the pin and roller so that it forms a normal to the plane of the cylinder block body.
The washer must be installed according to the diagram shown in the figure. In particular, if the timing belt is slipping towards the engine, then the washer/washers should be installed closer to the center of the block. If the belt moves from the engine, then vice versa, closer to the edge of the block. When installing washers, it is recommended to use a heat-resistant sealant that will keep them from sliding to the side with or without load.
Finally, I would like to note that in rare cases, the cause of the belt shifting to one side or the other and its eating can be caused by not one, but several of the reasons described above. As a rule, the method of using shims is universal and can save the situation in even the most “neglected” cases. However, it makes sense to inspect the belt, roller and pump in order to identify shortcomings in their operation, and, if necessary, replace the listed components. This will save you from having other problems with these parts in the future.
After any work
After working on the timing belt, many car enthusiasts and car service technicians advise observing the condition it is in, periodically opening the hood and diagnosing its condition. But at the same time you need to remove the plastic protection!
Because in this way it is possible to notice in a timely manner emerging defects, belt slipping and other problems, which will certainly have a beneficial effect on the condition of the gas distribution system as a whole.
How to replace the timing belt of a VAZ 2110 with your own hands
There are 2 rollers under the camshaft pulleys: on the right is a support roller “9”, and on the left is a tension roller “4”. The first has a hole with which the roller is attached. It is visually noticeable that it is slightly offset from the center; this helps to regulate the tension of the timing belt by turning the roller on the axis of the mounting bolt.
Replacing the VAZ 2110 timing belt and tension pulley with your own hands
The synchronization disk “8”, attached to the pulley “7” of the intake camshaft, allows for the operation of the phase sensor. And the drive front and rear are covered with a plastic cover.
To set the valve timing, special marks are used, marked with the letters “A”, “D”, “E”. They are on:
- a cover covering the oil pump;
- pulleys (B);
- rear cover of the drive belt (marks “C” and “F”).
If the phases are adjusted correctly, mark “A” should coincide with “B”, “D” with “E”, “C” with “F”.
Signs by which you can determine the need to replace the VAZ 2110 timing belt
To replace the timing belt on time, you need to monitor the condition of the engine. The timing belt needs to be replaced if:
Replacing the VAZ 2110 timing belt and tension pulley with your own hands
- there are oil leaks on it;
- there are many cracks and signs of increased wear on its surface;
- timing belt teeth are damaged;
- the belt has delaminated, cuts, bulges or folds have appeared;
- threads appeared on the surface.
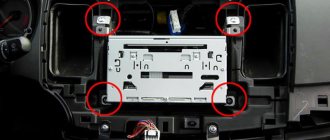
Replacing the timing belt VAZ 2110 (16 valves)
Not everyone knows how to replace the timing belt with their own hands. On a 16 valve they change differently. Remove the timing belt protection cover.
Timing belt guard
Protection mounts
- We remove the “chip” from the crankshaft sensor, unscrew the bolt and remove the sensor.
Removing the crankshaft sensor
The absence of one tooth on the pulley allows the crankshaft sensor to determine the top dead center (TDC) . It also serves to block the crankshaft when loosening and tightening the pulley mounting bolt.
One tooth is missing on the pulley
- Align the pulley with the hole for the crankshaft sensor. Insert a tube of a suitable size into the hole for the sensor. You can use another suitable item - a hexagon as in the photo. We block the pulley, unscrew it and remove it.
Block, unscrew and remove the pulley
- We loosen the tension of the timing belt by unscrewing the tensioner nut and remove the belt.
Loosen the nut on the belt tensioner pulley
- We insert a new belt (either by turning the right camshaft with a key, or by removing the tensioner roller, whichever is more convenient for you).
Insert a new belt
Let's consider replacing the timing belt of a VAZ 2110 (8 valves without power steering)
We are starting to replace
- We start by unscrewing the two front protection bolts.
Unscrew the timing belt protection bolts
- Then unscrew the nut in the center.
Unscrew the central protection nut
- Remove the timing belt protection cover.
We take out the protective casing
- Remove the right wheel and the protection behind it. We turn the generator pulley using the head by 19, turning it clockwise.
Turning the generator pulley
- Rotate the pulley until the marks on the cover and on the pulley match.
The marks on the cover and on the pulley match
- Remove the plug from the top of the gearbox.
Removing the plug