Replacing Front Shock Absorber Bushings VAZ 2107
Replacing front shock absorbers on a VAZ 2101-VAZ 2107
Car shock absorbers alone determine how the car will behave in the future on smooth and uneven roads. Over time, car shock absorbers deteriorate and therefore need to be replaced. In this article, we have written detailed instructions on how you can replace the front shock absorbers on cars of the “Classic” family.
To perform the replacement, you will need the following tools: First, be sure to stock up on a set of basic wrenches and new shock absorbers. And also, if you have one, take with you a special key for removing shock absorbers; for clarity, it is shown in the figure below:
Which shock absorbers do you prefer: “Gas-oil” shock absorbers or conventional “Hydraulic” ones? (Write your answer in the comments)
When do you need to change front shock absorbers?
They must be replaced if:
- Loss of its properties, that is, loss of efficiency in damping vibrations.
- And it must also be replaced with a new one if it starts to leak and as a result becomes oily.
To properly verify whether the shock absorbers are working or not, you can read the article entitled: “Checking shock absorbers for performance”!
How to replace front shock absorbers on a VAZ 2101-VAZ 2107?
Both shock absorbers are replaced in the same way, so we will show their replacement only using the example of one shock absorber!
1) First, drive the car into the inspection hole, or hang it up using a lift.
2) Now open the hood and pick up the special key (If you don’t have it, then use small pliers). Next, place a special wrench on the shock absorber rod, which is indicated by the number “1” in the photo, thereby reducing the likelihood of the rod turning along the axis.
Replacing the front shock absorber sales unit of VAZ 2101-07
I created this video with the help of YouTube Video Editor ()
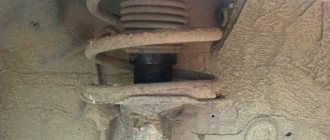
Replacing the lower silent block of the front shock absorber VAZ 2101-2107
Very briefly about the replacement
lower silent block
of
the front shock absorber VAZ
2101-2107 Very briefly about replacing the lower.
Immediately after this, use a wrench labeled “2” to unscrew and then remove the nut, after the nut, remove the spring washer, as well as the cushion washer and the upper shock absorber mounting cushion itself.
If you are working on a lift, then perform this operation with the car standing on the ground!
3) Then crawl under the car, and there, unscrew the two nuts that secure the bracket to the lever.
Unscrew the nuts carefully, because above them there are spring washers that will also need to be carefully removed. If both lower nuts are soured, then apply WD-40 grease to them, thereby ensuring they can be easily loosened!
4) When both nuts that secure the bracket to the lever are unscrewed, pull down the shock absorber and therefore remove it from the car.
5) When the shock absorber is removed, remove the lower cushion from its rod.
6) Next, holding the bolt from turning with one wrench, with the other, unscrew the nut that secures the bracket to the shock absorber and then remove the bolt, thereby removing the small washer and the bracket itself.
You can install the removed bracket on a new shock absorber if it is missing!
Installing a new car front shock absorber is carried out in the reverse order of removal.
Before installing a new shock absorber, pull out the rod all the way. After which, for convenience, you can first put a washer on the rod, then a cushion, and then screw the nut on top!
If you do all the work on a lift, then lower the car to such a state that it touches the ground, in other words, so that its suspension is loaded under the weight of the car itself!
If the shock absorber rod comes out from above but not all the way, then first put the cushion washer on it and then screw the nut on top. When the nut is screwed on, using a lever principle, use a screwdriver or wrench to pull the rod up to the top until it stops!
To make it easier for you to understand the procedure for replacing shock absorbers, then watch a video below, prepared especially for you, in which everything is described and explained in detail.
Source: https://vivauto.ru/zamena-vtulok-perednego-amortizatora-vaz-2107/
Design Features
Before you start replacing faulty VAZ 2107 shock absorbers, you should briefly familiarize yourself with their design and purpose. This part converts mechanical energy into thermal energy and acts as a damper. Zhiguli front and rear suspensions are equipped with vibration damping devices of a similar design, but of different sizes and mounting methods.
Main design details:
- working cylinder;
- tank with lug;
- compression valve;
- rod with piston;
- casing with eyelet.
The shock absorbers are located inside the springs and are secured by a rod through rubber cushions to the body, and by the eye of the body through a rubber-metal hinge to the lower arm.
Replacing the Silent Block of the Front Shock Absorber VAZ 2107 ~ VESKO-TRANS.RU
Replacing front shock absorbers VAZ 2107
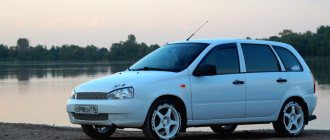
New " seven
“It grips the road tenaciously, rolls smoothly, and brakes smoothly even over uneven surfaces. One of the best VAZ models in no way rocks, chatters, or shakes its riders, but carries it as if on the palms of your hands - affectionately, evenly, carefully.
But it costs VAZ 2107 shock absorbers
wear out, the springs sag, the bushings become crushed, and the pleasure of movement comes to an end. Every bump in the road results in knocking, rumble, yaw and thrashing. The braking distance with a faulty suspension has to be spoken about in a chilling whisper - it grows so terribly.
It may seem that repairing a VAZ 2107
, which has lost reliable contact with the road, is incredibly complex and time-consuming.
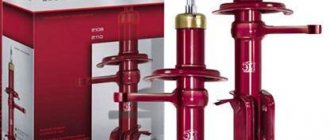
But struts on a VAZ 2107
are relatively inexpensive,
replacing shock absorber bushings
does not present a technical difficulty;
we
will now tell you the shock absorbers themselves on a VAZ 2107
with your own hands
A common stereotype for diagnosing shock absorbers 2107
(and all other models of passenger cars) using the method of repeated manual pressure on the corner of the body. The goal of the action is to achieve the frequency and amplitude of movements at which the missing performance of shock absorbers (also rubber bands and springs) will manifest itself with knocking, clanging, grinding and random rocking.
In fact, not every junk car exhibits the expected symptoms. Since only the complete destruction of the bushings causes the parts to knock, and the sounded work of the front springs
(crunching, humming, grinding, squeaking) is a sign of fatal damage to the suspension.
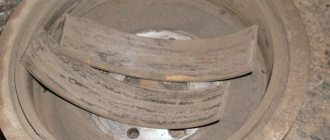
Visual inspection of suspension parts and constant monitoring of the driving properties of the car are the real tools of a competent driver. Even small oil leaks around the front shock absorber of the VAZ 2107
– a reason to replace the device; while replacing the steam room on both sides.
Any unusual sounds in the suspension of the VAZ 2107
problems that arise when driving in a straight line or when turning a corner are a signal to inspect the condition of all components and parts. Not convinced of your insight? A visit to the vibration stand at 100 will help you save money and save your life!
Removing the front shock absorber 2107
So, replacing shock absorbers on a VAZ 2107
- the issue is resolved.
There will be repairs! Few tools will be needed. To replace the front shock absorbers
, you will need a jack, stubborn pads and a safety device (see https://www.autodela.ru/main/top/diy/lada_priora_ammort) - or a lift; also a special wrench for the shock absorber rod.
Replacing the front shock absorber sales unit of VAZ 2101-07
I created this video with the help of YouTube Video Editor ()
Replacing the lower silent block of the front shock absorber VAZ 2101-2107
Very briefly about the replacement
lower silent block
of
the front shock absorber VAZ
2101-2107 Very briefly about replacing the lower ...
. or a 6-8 mm open-end wrench; and also open-end wrenches for 13 and 17 mm.
Install chocks and a jack, but do not lift the car. First you need to loosen the wheel bolts.
FakeHeader
Comments 18
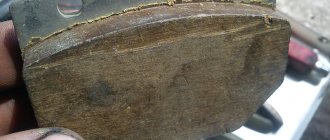
crappy oil... the shock is checked by machine, not by hand. although according to the symptoms the left one is a corpse. And then, are the shock absorbers oil or gas oil? plus, as a rule, performance is not the main criterion, the main criterion is the presence of oil in the shock absorber... there is no point in lubricating the silent parts with oil, they should not rotate at all when in place. like the metal bushing in the rubber band... looking at the rubber in general, a question arises. how did you travel? With such silents, the bridge dangles like shit from an ice hole, the car jerks from side to side when pedaling the accelerator.
How many people, so many opinions. In my opinion, the oil is good. It's not clear by car. According to the main methods of verification, it is alive, but rather harsh. Ammorts Niva oil. The car behaved stably, did not dangle anywhere, only rumbled sometimes. After the second trip I went to check and saw that my ears were hanging on the lower rubber bands. Well, I changed it right away.
We opened up a couple of engines using Lukoil oil... the bed, the head... everything was covered in an even 3-4 mm layer of soot. dirt just settles in the engine... because... many people say that nivo-shocks themselves are harsher than classic ones, although I don’t know... I haven’t used them... in any case, if they work differently, I would recommend changing them... maybe the speeds were low, since I didn’t notice...
crappy oil... the shock is checked by machine, not by hand. although according to the symptoms the left one is a corpse. And then, are the shock absorbers oil or gas oil? plus, as a rule, performance is not the main criterion, the main criterion is the presence of oil in the shock absorber... there is no point in lubricating the silent parts with oil, they should not rotate at all when in place. like the metal bushing in the rubber band... looking at the rubber in general, a question arises. how did you travel? With such silents, the bridge dangles like shit from an ice hole, the car jerks from side to side when pedaling the accelerator.
Replacing rear shock absorbers on VAZ 2101-VAZ 2107
Replacing rear shock absorbers on VAZ 2101-VAZ 2107
Welcome! A car shock absorber is a very important thing in every car, because if there were no shock absorbers, the car would simply jump up and down. To prevent this from happening, shock absorbers were invented that allow you to keep the car level on the ground, dampening all the vibrations that cause the car to sway.
Note! To replace the rear suspension shock absorbers, you only need two 19mm wrenches!
Question? Which company producing rear shock absorbers for classics do you prefer and why? (Write your answer in the comments)
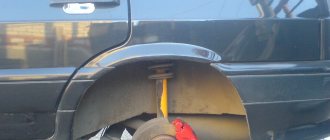
Where are the rear shock absorbers located? They are located next to the wheels and can be very easily seen by looking under the bottom of the car. The upper part of the shock absorber is attached to the bottom of the car, and the lower part is attached to the bracket. So that you can finally figure out where the rear shock absorber is located, look at the photo below, which shows the lower mount of the shock absorber to the bracket.
When do you need to change rear shock absorbers?
- They need to be changed when an oil leak appears on them, due to which they become oily.
- It is also necessary to replace them if they have ceased to perform their main job of “damping vibrations when the car is moving.”
Note!> For more information about when the rear shock absorbers will need to be replaced, read the article entitled: “Checking shock absorbers for performance”!
How to replace rear shock absorbers on a VAZ 2101-VAZ 2107?
Note! The rear shock absorbers on the right and left sides are replaced in the same way, so the entire replacement process will be shown on only one shock absorber!
Removal: 1) Before you start, be sure to read the “Important!” section. at the very bottom of the article, maybe it will be useful to you.
2) After reading, we move on to replacement. First, drive the car into the inspection hole or lift it using a lift.
Note! If you will be doing work on a lift, then it is recommended to install some kind of support under the rear axle beam, and then lower the car slightly so that it rests on it. And all this is done so that the rear suspension is slightly loaded, otherwise removing the shock absorber will be very problematic!
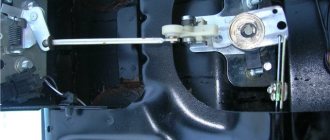
3) Next, holding the bolt with one wrench, use the second to unscrew the nut that secures the lower hinge bolt.
4) Then slightly remove the bolt from the hinge and thereby remove the spacer sleeve from it, which is indicated by the arrow.
5) Next, holding the lower part of the shock absorber with your hand, slightly move it away from the bracket and, as a result, remove the spacer sleeve from the bolt.
Note! After these operations, completely remove the bolt from the lower hinge together with the washer!
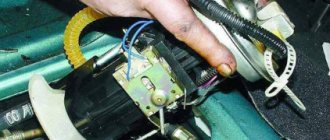
6) Now get to the top of the shock absorber, and then unscrew the nut that secures the upper hinge.
7) After unscrewing, remove the washer and the outer rubber bushing of the hinge, which is indicated by the red arrow, from the stud.
Note! If the outer sleeve is very difficult to remove, then you can not touch it at all and move on to replacement!
Next, pull the shock absorber with your hand, thereby removing its upper hinge from the stud and the outer bushing will be removed along with it.
9) Then remove the inner joint bushing from the stud.
10) Then, holding the shock absorber in your hands, remove the spacer sleeve indicated by the arrow from the lower hinge.
11) When the bushing is removed, remove in addition two rubber bushings that sit in the hinge eyes.
Note! Replace all deformed and heavily worn bushings with new ones!
Installation: 1) Install the new shock absorber in the reverse order of removal.
Note! Tighten both nuts that secure the upper and lower shock absorber joints only at the moment when the suspension is loaded with the entire weight of the car!
Important! Shock absorbers, as a rule, can be repaired, but if you do not have sufficient experience and tools, then it is best to repair shock absorbers in specialized auto repair shops - so to speak, give it to those people who have been doing this for a long time!
There is also a small nuance in replacing rear shock absorbers, and it lies in the fact that they need to be changed in pairs, that is, two at once. Why do this you ask? The thing is that the characteristics of one new shock absorber may differ significantly from the second, even if the second shock absorber is fully operational!
Additional video: To help you understand in more detail the entire process of replacing rear shock absorbers, watch the video you will find below:
Hello Damir! Gas shock absorbers are essentially rigid, so if you operate the car where there are few bumps and irregularities, then you can opt for them.
Helpful information
A short rod unscrewed from the stocking will facilitate dismantling and installation. For ease of assembly, a new rubber spacer and a metal lining are fixed to the spring with electrical tape or tape. Reinforced springs with VAZ 02 - 04 will increase the load capacity, but the car will become rougher to drive. It is easier to replace the torque rods with new ones without wasting time pressing the bushings in a vice. When experimenting with the height of the springs, you should remember the length of the shock absorber stroke. They may have to be lengthened or different ones used. During disassembly, the brake hose receives extra stress, which can lead to damage.
Follow safety precautions and replacing rear springs will not be a hassle.
Replacing rubber bushings on rear shock absorbers. VAZ Classic
4 years ago
how to replace the bushings of reaction rods (rods) using a vice and a “bullet” device, tips in the process of replacing bushings. VKontakte group for VAZ repair: https://vk.com/roman_romanov_pro_vaz_2101_2107 group in Odnoklassniki: https://www.odnoklassniki.ru/group/53320056635494 channel of the author ROMAN ROMANOV: https://www.youtube.com/channel/UC7t0qZONFV -UbWI6olSjSGA LET'S JOIN!!!
3 years ago
How to determine when to change rubber bushings and rear shock absorbers on a Niva. For all the details about replacing the rear shock absorbers and rubber bushings for the rear shock absorbers, watch this video. And also about the correct tightening of silent blocks and the choice of material - polyurethane or rubber. Checking and replacing rear shock absorbers and bushings. Polyurethane or rubber. Correct tightening of silent blocks. NIVA VAZ.
https://youtu.be/4ucwXKz7JFI
Subscribe to Andrey Lapochkin’s channel: “For Yourself.” https://www.youtube.com/user/SamiDlyaSebya1 Here you will find a lot of useful information on the maintenance and repair of the NIVA VAZ 21214, VAZ 21214m, VAZ 21213, Chevrolet Niva. Lots of tips and tricks that you won’t see on other channels.
All videos were shot in a detailed style covering the topic of repairing or finding the causes of malfunctions of the Niva car and not only Niva. There are videos for NIVOvod beginners. How to overcome obstacles and dangerous areas on NIVA. The channel has other interesting videos about travel and adventures. Holidays on the Black Sea. Fishing, travel. Underwater filming. Tourism. Jokes, funny stories.
Dollar exchange rate analytics. Search for gold, search for treasures. How to pump up your body at home and have time to prepare for the beach season with very little effort, time and money. On the channel you will find many videos on how to start shopping on AliExpress (ALIEXPRESS). Tactics for communicating with sellers on AliExpress (ALIEXPRESS). How to start working with video camera SJ4000, SJ5000.
How to make video camera settings SJ4000, SJ5000. How to shoot with video cameras. And much more on various topics.
3 weeks ago
In this video I made myself a super machine from an ordinary pipe and bicycle bushings. Assistant for shopping on Ali: https://tinyurl.com/y7tq2mnu Assistant for shopping (Android): https://tinyurl.com/ya8qcuwl I bought crowns here - https://ali.ski/VF3HY Another computer. crowns - https://ali.ski/YlUZR Large comp. crowns with a large diameter - https://ali.
ski/iIX0k My group in VK - https://vk.com/club_madmangroup My live channel - https://www.youtube.com/channel/UCNJQ_gUTQq7OS2_uN0kbFMQ You may ask, how did I get the idea to make this cutting machine? It’s simple, I saw 2 videos on foreign YouTube and decided to repeat a similar mechanism for myself.
Only I implemented it in my own way, namely, I added one extra hinge mechanism for lateral rigidity, automated the lifting and lowering mechanism and used bicycle hubs as hinges. As for the bushings, I got them at a purchase price of 1.5 dollars per bushing from a friend of mine.
I decided to use them, since the undoubted advantage of these units is the ability to adjust the backlash. To avoid unnecessary talk about the rigidity of the machine, I will say this - it is there, but it is not enough to make precise grooves for assembling furniture products.
It is clear that it is elementary to make a mistake of 1 mm, but as for introducing some zest into the manufactured part in the form of milled strips, or working with an overrunning cutter on straight planes, then this will be very useful, and milling the recesses of the groove You can also use a milling cutter very quickly and conveniently, especially on large areas when the width of the area at the router itself is not enough. In total, the machine cost about $35, if you do not take into account the manufacture of a common table that combines 3 machines in one plane. I had been planning this table for a long time, since it is inconvenient to work separately on different machines, and it’s lazy to yank them from place to place, but here everything is different and I already felt it when I was trimming the ends of the laminate when laying it. By the way, I didn’t mention the top of the table, which is made of laminate. The installation was carried out in the same way as in my work area, the tabletop of which was made according to the same principle. The laminate is glued to the main surface and secured on the reverse side with self-tapping screws. For skeptics, I can answer that after 9 months my laminate remained in the same condition, nothing swelled in the work area, so this surface fits very well into the overall appearance of the workshop and copes well with mechanical loads. Track list by Epidemic sound: 1.Yellowbase – Derail 2.Martin Hall – My Last Song (Tigerblood Jewel Remix) (Instrumental Version) 3.Wildson – I Am Better Off (Instrumental Version) 4.Sebastian Forslund – All Around (Young Community) Remix) 5.Andreas Jamsheree – Ghetto Turf 4 6.Ray – Made To Be Free (SLCT Remix) (Instrumental Version)
4 months ago
DIY reverse hammer. After replacing the rear struts, it was a pity to turn them into metal, because any piece of hardware is craft, and a very useful tool that you can make with your own hands; any piece of hardware can be used to make an excellent assistant when repairing a car.
The old vase stands have been transformed into a reverse hammer! VK page https://vk.com/id89108701987lol VK group https://vk.com/club166408536 personal channel https://www.youtube.com/channel/UCI_rNzuyiEe2NHP2dSlhE4Q?view_as=subscriber I'm on Drive2 https://www. drive2.
ru/users/vitvitmaster/#blog My Instagram https://www.instagram.com/vitvitmaster/
4 months ago
Source: https://syoutube.ru/watch/zamena-rezinovikh-vtulok-na-zadnikh-amortizatorakh-vaz-klassika/iK6Nyi8E3qo
Related works
Changing shock absorbers on a VAZ 2107 is accompanied by preventive and diagnostic work related to the suspension. They usually include a visual inspection and replacement of certain parts.
Most often, new springs are installed. In addition, many car owners change spacers along with rear dampers - this allows them to increase the vehicle's ground clearance. This procedure necessarily accompanies the installation of stiffer shock absorbers.
The procedure for installing front and rear shock absorbers on a VAZ 2107 does not require special knowledge and skills. An unprepared car owner can spend a maximum of 2–3 hours on it. After replacement, preventive and repair work is carried out to extend the life of the suspension.
VAZ 2107 rear suspension repair and maintenance
The rear suspension of cars with a classic layout is a unit that can be independently repaired even by an inexperienced owner. Moreover, it was repaired alone and in a garage without a hole (from the floor).
Suspension malfunctions may include the following.
— Wear on the shock absorbers means that after driving over a bump, the car continues to sway. You can identify this either by asking a friend to watch your car from the side. Or sharply press the trunk and release while watching the car. Or, pull the shock absorber removed from the car by hand.
We restore the suspension of a VAZ classic
Many drivers who lived through the times of the Soviet Union affectionately call it “seven”. Since then, some have switched to foreign cars or newer VAZ models, but you can be sure that all of them, despite all the troubles caused, remember their first car only with kind words.
There is also a category of car enthusiasts who are loyal to the “seven” to this day. They motivate this by the low cost of maintenance and ease of repair. They have accumulated vast experience that will be useful when restoring your car.