The control devices stopped working or they began to “confuse” the readings, the control lamps and lights do not light up - in this case the panel will have to be removed.
Preparing for work
Before starting work, you need to buy replacement light bulbs. You can choose standard ones with or without sockets, as well as LED ones. If it is necessary to replace the incandescent lighting elements responsible for the backlight, then you will need light bulbs of the AMN 12-3-1 (T3W) type. These are ordinary filament bulbs that are installed in the dashboard of VAZs from the factory. If it is necessary to replace indicator lights, then type A 12-1.2 elements are used. Are you choosing LED?
You don't need a lot of tools:
- flat screwdriver;
- Phillips screwdriver;
- pliers.
If you are going to disassemble the panel and repair it, you will additionally need:
- multimeter or probe;
- soldering iron from 40 Watt;
- solder and rosin;
- side cutters;
- small screwdrivers.
Removing the panel from the car
Using a slotted screwdriver, remove the plastic plug on which the heating sign is depicted. This plug is on the right, and under it there is a Phillips screw that needs to be unscrewed. (There are 2 screws under the plug, but only one needs to be unscrewed - the top one, which secures the right side of the dashboard).
Next to the hazard warning button, there is an odometer reset button, which is secured with a plastic nut. The nut must be unscrewed and removed with the washer located behind it. The button is recessed inside the panel.
The right side of the tidy is weakened at this stage, and it remains to perform several additional manipulations in order to completely dismantle the device. To do this, pull out the right side of the device, thereby freeing access to its rear part. Here you need to disconnect all the chips and wires to perform dismantling.
Initially, the power chips for the stove button are disconnected. Be sure to remember the location of the wires. It is recommended to take photos so as not to be confused when assembly is carried out. Next you need to disconnect the speedometer cable. It is secured with a special nut, which can be unscrewed by hand.
All chips connected to the dashboard are disconnected. It is almost impossible to confuse their locations, since they have different fastenings and differ in size.
The supply hose is removed from the economizer fitting. This cable is located on the left side of the device. After all the chips, cables and wires are disconnected from the device, you can dismantle it.
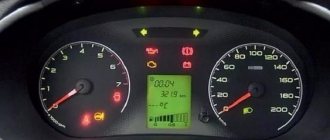
Determining what doesn't work
If the backlight of the VAZ 2107 dashboard does not light up, this may be due to the following factors:
Faulty incandescent lamps
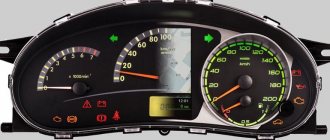
This rarely happens, however, due to the fact that from the factory the lighting of the panel is realized through the use of incandescent lamps, their burnout periodically occurs. The problem can be fixed by replacing the lighting elements, or better yet, installing LEDs. To make a replacement, you will need to dismantle the instrument panel. This is not difficult to do, but it will take a lot of time to disassemble the shield. The panel contains lighting elements, which must be replaced in order to restore the functionality of the VAZ 2107 instrument panel lighting. Before replacing, you should first check the serviceability of each lamp. The design of the shield uses 4 main lighting elements, which are responsible for lighting, as well as additional ones that act as an indication. If you had to disassemble the panel, it is recommended to immediately change them to LED ones.
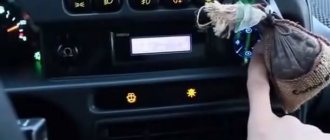
Brightness control
The malfunction may be hidden in the part that is responsible for adjusting the backlight intensity. Although this part fails extremely rarely, its malfunction cannot be ruled out, especially if it has been established that the incandescent lamps are in good working order and do not need to be replaced. The light brightness control is located directly on the right side of the steering wheel near the headlight range control. If diagnostics have shown that this particular part is the reason that the backlight does not light, then it should be replaced.
Circuit breakers
The search for the reason why there is no instrument lighting on the seven should begin directly with the fuses. These elements protect the circuit from voltage surges, and as soon as a large current flows in the circuit or a short circuit occurs, the fuse link blows. If such a malfunction occurs, replace the fuse and check the power circuit.
Absence or poor contact at the point where the chip connects to the power wire
The reason for the lack of contact may be that the chip is not tightly pressed to the terminal block of the instrument panel. Poor contact occurs when contacts become oxidized. You can fix such breakdowns yourself by cleaning the contacts from oxides.
In addition to the main faults, there are additional ones, for example, damage to the power cable. If you have a multimeter in your arsenal, then identifying such a malfunction will not be difficult. Even if you don’t have a multimeter, it’s not at all necessary to contact a car service to fix the problem; you can use a probe with a light bulb.
Tidy wiring diagram
Dashboard repair video
What are the reasons for the dashboard backlight not working on the VAZ 2107?
The situation when, when the instrument panel backlight is turned on, it does not work, is definitely unpleasant. If this happens, then it is necessary to fix the breakdown as quickly as possible, since operating a car at night is not at all uncommon, but a common occurrence. If the backlight of the VAZ 2107 dashboard does not light up, this may be due to the following factors:
- Faulty incandescent lamps. This rarely happens, however, due to the fact that from the factory the lighting of the panel is realized through the use of incandescent lamps, their burnout periodically occurs. The problem can be fixed by replacing the lighting elements, or better yet, installing LEDs. To make a replacement, you will need to dismantle the instrument panel. This is not difficult to do, but it will take a lot of time to disassemble the shield. The panel contains lighting elements, which must be replaced in order to restore the functionality of the VAZ 2107 instrument panel lighting. Before replacing, you should first check the serviceability of each lamp. The design of the shield uses 4 main lighting elements, which are responsible for lighting, as well as additional ones that act as an indication. If you had to disassemble the panel, it is recommended to immediately perform its tuning.
Tips for motorists
When the instruments and warning lights on the instrument panel stop working, the driver of any car, including the VAZ-2107, becomes uncomfortable in the cabin of his car, since he will not have enough information that the instrument panel provides, as when starting the engine , and while driving.
The first thing drivers usually do is check fuse F10 (10A) , located in the mounting block and the condition of its terminals. If the fuse has not blown, then the cause of the failure of the instrument panel will have to be looked for in it itself. Therefore, we remove the instrument panel and in the left corner we look for two double black wires that are attached to the car body. This is “ground”, we check whether there is good contact and whether the fastening nut is tightened.
VAZ 2107 instrument lighting does not work
Re: another problem. All dimensions and lights do not work
Unread message guest » Fri Jun 17, 2011 8:21:39 AM
So what, what is not called. He was a key switch and will remain so.
PS. Leaves. Green leaves. Just leaves—are they not leaves anymore? Only green leaves—leaves?
Re: another problem. All dimensions and lights do not work
Unread message by Shim » Fri Jun 17, 2011 8:31:40 AM
Re: another problem. All dimensions and lights do not work
Unread message guest » Fri Jun 17, 2011 8:45:28 AM
Re: another problem. All dimensions and lights do not work
Unread message by Zayec » Fri Jun 17, 2011 9:08:30 AM
Re: another problem. All dimensions and lights do not work
Unread message by Smoky555 » Fri Jun 17, 2011 9:24:33 AM
Zayec, not for the sake of nonsense, but for the truth.
clause 7.6. Lighting and light signaling for VAZ 2104/2105 cars. The diagram for switching on external lighting is shown in Fig. 7-34. The side lights in the front and rear lights are turned on by switch 6 of the external lighting. At the same time, the license plate lamps 10 also light up, as well as the indicator lamp 7 for the side lights in the speedometer.
The headlight switching diagram is shown in Fig. 7-35. The low and high beam headlights are switched on by the steering column switch 5 for the headlights if the switch key 8 for the external lighting is pressed.
Nuances of choice
Nowadays many modifications of dimmers are sold, designed for different types of lamps and lighting devices.
Focusing on the use of incandescent lamps, it is necessary to select regulators that are suitable for them according to the following criteria:
- According to technical and operational characteristics. Typically, dimmers with triacs are used for them. They are less capricious and simple to set up.
- Based on the total load that the dimmer can withstand. Information about this is indicated on the device, for example, 300 W means that the device can serve a chandelier with 5 lamps of 60 W. It is better to buy a dimmer with some load reserve; a 350 W dimmer is suitable for this case.
- According to the planned installation location. Depending on the installation location, you should buy a modular, monoblock or built-in type dimmer.
- By the nature of control: using keys, buttons or using a sensor. The choice of control method depends on personal wishes, versatility of the device, ease of use and cost of the controller.
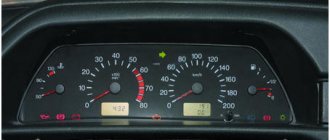
Replacing the standard clock of a VAZ 2107 with digital ones
The standard clock is not informative enough, and it looks too standard.
Therefore, many owners of the “Seven” change them to more advanced models. Usually this is an electronic watch with a voltmeter function. Such a device not only looks more modern and attractive, but also allows you to control the voltage of the on-board network. Installing an electronic clock on a VAZ 2107 is easy. On the market you can find a wide range of electronic watches for the “seven” with different display colors and functionality. A good option is a watch with alarm, calendar, voltmeter and thermometer functions. The most advanced model has two temperature sensors - internal and external, which allows you to control two temperature parameters at once.
Such clocks fit perfectly into the place of the standard ones, and connecting them does not require the installation of additional power circuits. The only thing you should take care of is to install an external temperature sensor and run a wire from it to the location where the clock is installed.
If the electronic clock does not have a function for measuring external temperature, its installation is completely similar to the installation of a standard clock and does not require additional actions.
Because You are not logged in. To come in.
Because you are not a trusted user (phone number is not verified). Enter and confirm your phone number. Read more about trusts.
Because The topic is archived.
Tuning ideas
The VAZ 2105 was little modernized, mainly in the engine. Owners of “fives”, like UAZ cars, often resort to tuning the instrument panel to give it a modern look and increase functionality.
- purchase a ready-made kit, which includes dials for sensors, instrument panels, parts for lighting, wiring and terminals for connections;
- A budget option is to illuminate devices with LEDs of different colors;
- More technically difficult is the texture and color change of the console.
With the help of LED lighting, you can change the design of the control panel, make it stylish and give it a personal look.
Dimensions and instrument lights do not light up
#1 Kyivfan
- Users
- 372 messages
- Registration 11-April 13
- Top
- Complaint
Guys, tell me where to look for the problem.
The situation is this: a VAZ 2103 car, the dashboard from 2107 installed mirrors with dimensions and turn signals. connected the whole thing. worked without problems. but today an opportunity happened:
I went to work in the morning, turned on the headlights and low beams, everything was fine for 25-30 minutes, and then suddenly the instrument lighting went off. scales and sensors work, there is no backlight, and the low beam light does not light up. The lights on the mirrors and the front lower right hand light also stopped lighting up. At the same time, the remaining dimensions are on and the low beam is on. When you turn on the high beam, it lights up and the light on the panel also lights up.
I suspect there is a short to ground somewhere. tell me where and what to look for.
There is also a problem with the heated rear window. connected according to the circuit through a relay, power is supplied to the glass heating, checked with a tester. but - in 20-25 minutes of driving, only thin strips thaw from fogging (the thickness of the heating threads themselves is slightly thicker).
thanks for the help
#2 vitaliy_kiev
- Top
- Complaint
#3 Kyivfan
Thank you. figured it out - it's a fuse))
there is still a problem with the heated glass
- Top
- Complaint
#4 vitaliy_kiev
- Top
- Complaint
#5 Kyivfan
I believed .. the contact - both negative and positive - are the same in cross-section.
and as for the dimensions - there are a hundred LEDs... I don’t think they take on much)
- Top
- Complaint
#6 vitaliy_kiev
- Top
- Complaint
#7 Kyivfan
Message modified: Kyivfan, September 21, 2013 - 21:31.
- Top
- Complaint
#8 vitaliy_kiev
- Top
- Complaint
Additional Description
Designation - 621.3710 Name - instrument scale lighting switch
— cars: VAZ-2104. 2107 and modifications, IZH.
— turning on and adjusting the lighting of the instrument scale; — number of positions: 2; — nominal voltage: 12 V; — rated load current: 1.5 A; — weight: 0.049 kg.
The main manufacturer is JSC LETZ
Information used: Avtokomplektatsiya LLC
The parts data presented on this page is for informational purposes only.
Download price lists
To download price lists, you need to log in. If this is your first time on the site, please fill out the registration form.
Price list
- Special offers
- KAMAZ spare parts
- Spare parts KAMAZ-5490
- Spare parts MAZ, YaMZ
- ZIL spare parts
- Spare parts ZMZ, for GAZ vehicles
- Spare parts for Volzhanki cars
- Spare parts for Gazelists
- Spare parts for trucks Lawns
- Spare parts for GAZ-71 caterpillar
- Spare parts UAZ, UMZ
- Spare parts KrAZ, BelAZ
- Spare parts URAL
- Spare parts BUSES
- AMAZ spare parts
- IKARUS spare parts
- KAVZ spare parts
- LAZ spare parts
- LIAZ spare parts
- NEFAZ spare parts
- PAZ spare parts
- Other buses
- Tractors, computer equipment, attachments
- Tractors and walk-behind tractors
- Municipal vehicles
- Attachments and trailed equipment
- Spare parts for TRACTORS and SPECIAL EQUIPMENT
- JCB - spare parts for special equipment
- Truck crane (KS-3577, KS-4517, etc.)
- AMZ (A-01, A-41, D-440, D-442, D-447, D-461, D-467)
- Amkodor (TO-18, TO-28, TO-30, etc.)
- ATZ (T-4A, TT-4M)
- VgTZ (DT-75)
- VMTZ (D-120, D-144, D-130, D-145T)
- VTZ (T-25, T30A-80, VTZ-2048)
- LTZ (T-40, LTZ-55, LTZ-60)
- MKSM, UNC, DETVAN
- MTZ - spare parts for tractors
- OTZ (TDT-55)
- PTZ (K-700/701/702/703/704)
- KhTZ (T-150, MT-LB)
- ChTZ (T-130, T-170, B-10, B-12, B-170, T-10M, DET-250)
- YuMZ - spare parts for tractors
- Other special equipment and tractors
- RVD - high pressure hoses and sleeves
- MMZ spare parts and engines
- Spare parts for MMZ engines
- MMZ engines: D-242, D-243, D-245, D-246, D-260
- VAZ spare parts
- Spare parts OKA VAZ 1111
- Spare parts VAZ classic 2101 - 2107
- Spare parts VAZ front wheel drive
- Spare parts VAZ Granta and Largus
- NIVA spare parts and all-wheel drive
- Spare parts Moskvich, IZH
- Spare parts for Korean trucks
- Spare parts for Starex, H-1
- Spare parts for Porter, H-100
- Spare parts for HD65,72,78, County
- Spare parts for HD120, AeroTown
- Spare parts for HD160,170, . ,700,1000
- Spare parts for HYUNDAI, KIA buses
- Spare parts for Korean passenger cars
- Spare parts DAEWOO, CHEVROLET
- FOREIGN CAR spare parts more
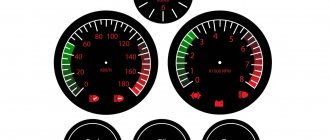
Selection of light bulbs
Wiring ringing
Today, the market offers a wide range of lamps that can be used for the dashboard of the VAZ 2114. Among the most well-proven devices, we note a few. Their name and cost are presented in the table.
| Manufacturer | Price |
| LED lamps Sho-Me SM-T5 (blue, white and red (Korea) | 80 rubles - pair |
| High Brightness SMD LED Module | 20 rubles |
| LED Sho-me SM-T5-cap-super (white) | 50 rubles |
| Osram and Philips halogen lamps | About 40-80 rubles per unit |
Assembly
When you have made sure that all the light bulbs on the VAZ 2114 are working correctly, you can begin assembling the panel. To do this, all the backlight wires are brought out onto the board and carefully attached using a soldering iron. They should also be attached to the board in a certain sequence, otherwise the backlight may not work. If the wires are too long, they should be shortened so that they do not bend and do not fall into the grooves of the latches between the dashboard and the dashboard during installation. Otherwise, the wires will easily get damaged. When connecting the pointer drive, also make sure that they are not deformed. Now, the instrument panel can be inserted back into the grooves and fixed with screws. The indicator arrows must be set with the ignition off, at the zero mark. Next, the last check: turn the ignition key, and if everything works, then the replacement procedure was completed correctly, and the new backlight will please the eye. Well, if something doesn’t work, then most likely you damaged the wires when installing the panel on the dashboard. In this case, disassemble everything again and check the integrity of the wires.