After TURNING the screw to about 10 revolutions, the spark plugs became light brown (dark yellow) in color.
When the screw is turned out, air passes from the pre-throttle space of the first chamber to the bushing - the nozzle of the idle system, located in the pre-throttle space. If the quality screw is screwed in all the way, then the mixture is formed passing the idle jets. The mixture quality screw regulates the supply of ADDITIONAL air to the outlet channel, where the already formed mixture enters.
Of course, the question of increasing the speed when unscrewing the screw is interesting. But personally, I can explain this in such a way that when the screw is opened, due to the vacuum in the throttle space, the air flow accelerates, which in turn causes a higher flow of gasoline through the idle jet. That is, more of the mixture enters the throttle space compared to a fully screwed screw, but the mixture itself is POORER. That is why turnover is growing. Andrey. PS. Why are we already on “YOU” again?
Unfortunately, as established experimentally, at 113 carbs the plant made an UNDOCUMENTED change to the mixture quality control system. At 111, twisting leads to a leaner mixture, and at 113, to a richer mixture.
Economical and stable engine operation in most cases depends on the fuel level in the carburetor float chamber and the idle speed of the crankshaft, as well as on the proper operation of the carburetor.
The carburetor is adjusted to a low crankshaft rotation speed in idle mode with the engine running, warmed up to a temperature of 80-85 degrees Celsius, with the electrical system devices in working order, the timing belt adjusted and the air damper fully open.
Messages [20]
1↑ Topic from PATRIOT 03/25/2013 14:32:03
- PATRIOT
- Patriot IMZ
- Inactive
- Name: Ilya
- From: Krasnodar region, Krasnodar
- Registered: 18-02-2011
- Messages: 3 148
- Reputation: 177
- Motorcycle: No. Next will be the K750!
Topic: Carburetor adjustment (mixture quality) for beginners!
I think once again it will be useful for beginners to read about adjusting the quality of the mixture, and even the carburetor itself. As already noted, the quality of the mixture at different crankshaft speeds is adjusted differently:
for small ones, use the “quality screw” of the idle speed system;
at medium - with a throttle needle;
at maximum - with the main fuel jet.
Before proceeding with the adjustment, it is necessary to determine the quality of the mixture in various modes by external signs of engine operation. Signs of working on a lean mixture are popping sounds in the carburetor, a drop in power (deterioration of throttle response, drop in maximum speed). Signs of running on a rich mixture are black smoke from the exhaust at maximum speed, popping noises in the muffler, and poor engine response.
In addition, the quality of the mixture can be determined by the color of the spark plug insulator:
with normal mixture quality, the color of the insulator is brown,
with a lean mixture, the color of the insulator is whitish-gray or light brown,
with a rich mixture, the color of the insulator is dark brown or black.
Carburetors are adjusted on a warm engine. If the carburetor is adjusted on a cold engine, then when the engine warms up, it will be disrupted, since the volatility of gasoline in contact with heated parts will change and the quality of the mixture will change accordingly.
The left and right carburetors are adjusted separately. To do this, place the motorcycle on a stand and start the engine (to facilitate starting on two cylinders). On the carburetor cylinder that is not being adjusted, remove the tip from the spark plug and short it to ground. If the tip of the spark plug is not connected to ground, the process of spark formation in a working cylinder will be difficult, especially with discharged batteries. In this case, the engine will operate at an increased speed and the carburetor adjustment will be inaccurate. Next, you need to make sure that there is a gap between the cable sheath and the stop on the carburetor. If there is no gap, ensure it by screwing in the stop.
Then adjust the mixture quality at idle. To do this, you need to unlock the idle quality and quantity screws. Screw the “quality screw” 22 (Fig. 5.4) all the way and use the “quantity screw” to set the minimum stable crankshaft speed. Then slowly turn out the quality screw. In this case, the over-enriched mixture begins to become leaner, but will still be rich. When the mixture composition corresponds to the norm, the rotation speed will increase.
As you further turn out the quality screw, the mixture will become leaner, the rotation speed will not increase, and if the mixture becomes too lean, popping noises will appear in the carburetor, so during the adjustment process, turn the quality screw out until the rotation speed increases. It is difficult to determine from the first time at what position of the quality screw the increase in rotation speed stops, so it is advisable to repeat the adjustment operation 2 - 3 times. Turning out the screw, notice when the increase in rotation speed stops. Having finally established the required position, lock the screw. After adjusting the quality of the mixture at idle using the quantity screw, reduce the engine crankshaft speed to the minimum stable speed. After one carburetor has been adjusted, the second one must be adjusted in the same way. Then, with the engine idling, you must alternately remove the caps from the spark plugs of the left and right cylinders and check by ear whether the crankshaft rotation speeds are the same when operating on the left and right cylinders. If the frequencies are not the same, then you need to use the quantity screw, increasing or decreasing the rotation speed, to restore the balance.
This is interesting: How to disassemble a bicycle fork with a shock absorber
After adjusting the quality of the mixture at idle, adjust the quality of the mixture at average speed. But first it is necessary to check the quality of the mixture by sharply “opening” the throttle. If at the same time popping sounds appear in the carburetor or “dips” in engine operation (flashes in the cylinder stop; at the same time, if the throttle is “opened” smoothly, the engine gradually picks up speed), then the mixture is lean. If the engine speed begins to increase slowly, the mixture is rich, if quickly, the quality of the mixture is normal.
The quality of the mixture at average speed is regulated by the throttle needle. If the mixture is lean, you need to move the needle lock to a lower groove so that the needle rises. If the mixture is rich, you need to lower the needle, move the lock to a higher groove.
Adjusting the idle speed of a car engine with a carburetor 2108, 21081, 21083 Solex
Tools needed to adjust idle speed
— Tachometer To determine the crankshaft speed.
You can use the panel built into the instrument panel (on vehicles equipped with a tachometer). You can connect a separate device (tachometer, auto tester or multimeter operating in tachometer mode). It is better to use a separately connected device since the engine crankshaft rotation speed will be more accurately determined, and therefore the idle speed adjustment will be performed more efficiently.
Adjustment by ear is also possible, but it requires some experience in car repair.
— Slotted screwdriver For rotating the “quality” screw of the fuel mixture. Blade width 3 mm.
1. Warm up the engine to operating temperature (85-90°).
2. Push in the carburetor air damper drive handle (“choke”) until it stops.
The air damper must be fully open.
The air damper of the carburetor 2108, 21081, 21083 Solex is completely open
3. With the engine turned off, connect the tachometer (multimeter, auto tester).
If there is no device, then skip this point. The positive terminal of the device is to terminal “K” of the ignition coil, minus to the “ground” of the car (body, engine, minus battery).
The procedure for connecting a tachometer (autotester) to a car’s ignition coil
Before connecting, read and follow the instructions for your device.
4. Start the engine, turn on the high beam headlights and the heater.
To create a load on the network.
Recommended idle speed for engines equipped with Solex carburetors 2108, 21081, 21083 750 - 800 rpm . We achieve stable engine operation within the specified interval. We simply rotate the “amount” screw of the fuel mixture and set the crankshaft speed to 750 - 800 rpm.
Adjusting screw for the “amount” of fuel mixture of the carburetor 2108, 21081, 21083 Solex
If it is not possible to set the required rotation speed using the “quantity” screw alone, then you will have to make adjustments by adjusting the “quality” screw of the fuel mixture. Perhaps there is still a plastic factory plug on it, it needs to be removed. We pierce it with an awl and pull it out using a metal hook or screw a self-tapping screw into it and pull it out. We carry out the adjustment in three steps; if we do not achieve the desired result, we repeat it once or twice more. Before carrying out it, it is advisable to check the correct setting of the ignition timing and the serviceability of the high-voltage wires. spark plugs, no “suction” of foreign air into the carburetor.
1. Using a slotted screwdriver, rotate the fuel mixture “quality” screw and achieve the maximum engine crankshaft speed.
We rotate both to the right and to the left until we find the desired position of the screw with the maximum frequency. We determine it by the tachometer or by ear.
Screw of the “quality” of the fuel mixture of the 2108 Solex carburetor
2. Turn the fuel mixture “amount” screw and set it to 900 rpm.
By turning the screw (clockwise), we open the throttle valve of the first chamber slightly and the speed increases; by turning the screw (counterclockwise), we close the throttle valve and the speed drops. Therefore, again, we are looking for the desired position of the “quantity” screw at which the speed will correspond to this value (900 rpm).
3. Tighten the “quality” screw and set the required 800 rpm.
If necessary, repeat the adjustment.
If another carburetor is installed instead of the old one, or the “quality” screw has been changed, or the carburetor has been disassembled and assembled due to repairs, then before adjusting, screw the “quality” screw all the way (clockwise), and then turn it out 3 - 4 turns and start adjustment.
— After completing the adjustment, press the gas pedal; the engine should increase the crankshaft speed without interruption and not stall when it is released. If there is a “failure,” adjust again or slightly enrich the mixture by turning the mixture “quality” screw. It is allowed to increase the idle speed to 900 rpm.
— When the mixture “quality” screw is rotated clockwise, the CO content in the engine exhaust decreases. In general, this adjustment on a working engine with a working ignition system allows you to achieve a CO content in the exhaust of no more than 1.5%.
— If by rotating the screws it is not possible to establish normal idle speeds and the engine is sluggish or does not respond at all to their rotation, then fuel enters the mixing chamber bypassing the idle system. This is possible due to the fact that the carburetor solenoid valve (or the plug installed in its place) is not fully screwed in and the fuel flows past the idle system fuel nozzle installed in the valve or plug. And the jet itself may have a hole larger than the required diameter. To check, remove the wire from the valve with the engine running - the engine should stall. If it doesn’t stall, check the solenoid valve. The valve is working properly, then we adjust the fuel level in the float chamber and check the needle valve. After all, we repeat the idle speed adjustment.
— In some cases, it makes sense to modify the carburetor idle system. See “Modification of the idle system of Solex and Ozone carburetors.”
Adjusting and tuning the carburetor: main steps
Most modern gasoline cars are equipped with fuel injection systems, but before they gained dominance, all cars were equipped with carburetor systems. For this system to work correctly, the carburetor settings must be performed flawlessly. High-quality carburetor adjustment will reduce fuel consumption, make the engine run smoothly at idle, reduce the emission of harmful substances into the atmosphere and increase the overall engine life.
Most domestic cars have a carburetor system, and the question of how to adjust the carburetor will not lose its relevance for a long time. Many owners of rare old foreign cars also face the problem of how to adjust the carburetor. Since the principle of operation of carburetors around the world is no different, the algorithm of work will be the same.
The carburetor is the main component of the fuel system of any carburetor car. This is where air and fuel mix to form a fuel mixture that enters the engine's combustion chambers. A properly adjusted carburetor produces a fuel mixture in the required proportions. Such a mixture will not detonate in the cylinders, which will increase the life of your engine.
Adjusting the VAZ-2105 carburetor - how is it done?
The process of adjusting the VAZ-2105 carburetor is a simple task that can be completed by any car owner who knows the structure and the sequence of necessary operations. The principle of operation of a carburetor is to create a fuel-air mixture by mixing gasoline with oxygen and then feeding it into the combustion chamber. In this article we will get acquainted with the design, features and advantages, and also take a detailed look at how to adjust this unit with your own hands.
Today in the car market, carburetor engines are in less demand than injection units. This is due to the trend created by world leaders in the field of mechanical engineering. They offer a new filling with a wider range of capabilities and improved characteristics. However, carburetors have a number of advantages that make them most effective in certain situations. Only they can ensure successful engine starting the first time in the most severe frosts. A small volume of vapor is retained in the inlet manifold, which allows you to start the engine on the first try at low temperatures. Also, on domestic VAZ-2105 cars there is a choke. With its help, the fuel system is enriched, the concentration of the combustible mixture is increased, thanks to which the engine warms up much faster.
How to adjust the carburetor and when to do it
Do-it-yourself carburetor adjustment is done after using low-quality gasoline or when engine operation is no longer stable. For prevention, the manufacturer recommends flushing the carburetor with a special compound every 6-7 thousand kilometers.
Possible malfunctions in the carburetor:
- Fuel leaks on the carburetor. In this case, you need to measure the fuel pressure. This is done using a special pressure gauge. The operating instructions will tell you what the pressure should be. Typically it ranges from 0.2 to 0.3 atmospheres. If the pressure is normal, the problem is in the float chamber and the fuel level needs to be adjusted;
- Carbon deposits on spark plugs with the smell of gasoline. This clearly indicates a problem with adjusting the carburetor floats or a burnt valve;
- Rough engine idling may not only be due to the carburetor. This often happens due to incorrect adjustment of the throttle cable. To check, you need to disconnect the cable and turn the valve manually.
Before you adjust the carburetor correctly, you need to clean it thoroughly. It is recommended to use special liquids for cleaning. The jets cannot be cleaned with toothpicks or needles. Damage to the jets will lead to calibration failure. If the holes cannot be cleaned with aerosols, you can carefully clean them with a soft wire. When cleaning, do not use rags. Threads can clog the holes, which will lead to malfunction of the carburetor. If the aerosol does not remove all contaminants the first time, you need to repeat the procedure.
Adjustment, adjustment and cleaning
It is very undesirable to make changes to the calibration of the Solex carburetor, since this is a very accurate and balanced device with well-chosen characteristics.
All adjustments are of an operational nature and rarely change, but they must be checked preventively and adjusted if necessary:
More subtle settings are available only to a qualified specialist, since changing some of them leads to disruption of others, so you can quickly bring the device to an inoperative state.
The same can be said about cleaning the carburetor. The use of a rough metal tool will lead to changes in the cross-sections of channels and jets. It is only allowed to wash the parts and channels of the housing with special aerosol carburetor cleaners after complete disassembly.
It should be remembered that in old carburetors the formation of aluminum oxides begins in the channels, which cannot be cleaned, therefore it is recommended to replace the carburetor with a new one every 5-7 years; the fuel savings will justify the costs.
Setting up the float mechanism
The level of the fuel mixture in the float chamber is directly related to its quality. At an increased level, the mixture will turn out to be lean, which will negatively affect gasoline consumption and increase toxicity. Without adjusting the floats, the question of how to adjust the carburetor cannot be solved. The process of adjusting the floats includes the following operations:
- Adjusting the floats in relation to the lid and walls of the fuel chamber. If deformation of the float fixing bracket is noticed, it should be aligned manually;
- We adjust the bracket with the needle valve closed;
- We adjust with the float retracted and the valve open; the distance between the float and the valve should in this case be set to about 15 millimeters.
Purpose and design of the carburetor
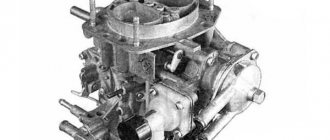
The DAAZ 2107 two-chamber carburetor is installed to the right of the engine (when viewed in the direction of travel of the car) on four studs with an M8 diameter screwed into the intake manifold flange. A round air filter box is attached to the top of the unit with 4 M6 studs. The latter is additionally connected to the carburetor by a thin crankcase ventilation tube.
The design of the DAAZ 2105 and 2107 fuel supply units completely replicates the design of the Italian Weber carburetors used on the first VAZ models. The differences are in the sizes of the diffusers and the diameters of the nozzle holes.
The purpose of the carburetor is to mix gasoline with air in the required proportions and dose the mixture depending on the operating mode of the engine - cold start, idling, driving under load and coasting. Fuel enters the cylinders through the intake manifold due to the vacuum created by the engine pistons.
The fuel unit supplies the engine with a mixture of gasoline and air under vacuum
Structurally, the unit is divided into 3 units - the upper cover, the middle part and the lower throttle block. The following parts are installed in the cover:
- membrane and flap of the starting device;
- econostat tube;
- fine fuel filter;
- float and connection fitting for the gasoline line;
- a needle valve that closes with a float petal.
The cover is screwed to the middle part with five screws with an M5 thread; a sealing cardboard gasket is provided between the planes.
Between the lid and the middle part of the unit there is a sealing gasket made of cardboard
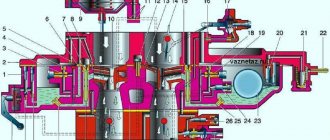
The main metering elements are located in the middle module housing:
- float chamber where the main fuel jets are installed;
- idle speed system (abbreviated as IAC) with air and fuel supply jets;
- transition system, whose structure is similar to CXX;
- main fuel dosing system, including emulsion tubes, air jets, large and small diffusers;
- accelerator pump - chamber with diaphragm, sprayer and shut-off ball valve;
- a vacuum drive bolted to the rear of the housing and opens the secondary chamber throttle at high engine speeds (more than 2500 rpm).
In the middle part of the VAZ 2107 carburetor there are elements of the dosing system - jets, diffusers, emulsion tubes
On the latest modifications of DAAZ 2107–20 carburetors, instead of the usual idle jet, there is an electric valve that operates in conjunction with an electronic control unit.
The lower part is attached to the middle module with 2 M6 screws and is a rectangular housing with two throttle valves installed in chambers with a diameter of 28 and 36 mm. Adjusting screws for the quantity and quality of the combustible mixture are built into the side of the housing; the first is larger in size. A vacuum tap for the distributor membrane is installed next to the screws.
When the driver releases the gas pedal, the throttles are automatically closed under the influence of return springs
Video: detailed review of the “classic” carburetor
Setting the fuel mixture supply
The carburetor control screws will help you figure out this setting. Before performing this procedure, you should know that the screws have a plastic factory press-on that limits the rotation of the screws (from 50 to 70 degrees). If turning in this range does not bring results, you need to break the press-on and turn the screws as much as necessary. Before setting the position of the screws, you should warm up the car engine to operating temperature.
To adjust the idle speed of the carburetor, you need to turn out the quantity screw and the mixture quality screw a few turns and, turning them, listen to the operation of the engine. When the engine starts to run smoothly, the carburetor idle adjustment is complete.
Screw for the “amount” of fuel mixture in the Ozone carburetor
On carburetors of the Ozone family, a special screw is installed with which you can adjust the volume of the fuel mixture entering the cylinders of the car engine at idle.
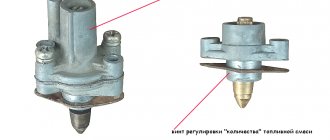
This is a screw for adjusting the “amount” of the fuel mixture. Here is complete information on its design and location on the carburetor, as well as how it works, how many turns it needs to be turned in and out when adjusting the idle speed, and what malfunctions occur if the screw fails.
Screw for the “amount” of fuel mixture in the Ozone carburetor
— Purpose of the screw for adjusting the “quantity” of the fuel mixture of the Ozone carburetor
The screw is designed to regulate the volume of air, and accordingly, the fuel mixture entering the engine cylinders at idle.
— What does the Ozone “quantity” screw look like and how does it work?
On second-generation Ozone carburetors (2105, 2107) with the ACX system, the “quantity” screw is a needle screw that locks the exit of the fuel mixture from the annular nozzle and the outlet of the ACX. The screw has two cone-shaped working surfaces - the large one forms a kind of diffuser paired with a ring atomizer, the small one regulates the clearance of the CXX outlet hole. This design ensures improved mixture formation in XX mode. The “quantity” screw has its own housing, which is inserted into a hole in the throttle valve block of the Ozone carburetor.
Ring sprayer ASXX Ozone
On carburetors Ozone 2105-1107010, 2107-1107010, which have an EPH system, the “quantity” screw is one of its elements. These carburetors have a forced idle economizer, inside which the shut-off needle of the “quantity” screw is connected to the diaphragm. In this case, the opening and closing of the propeller is influenced by the vacuum that changes when the throttle valve is opened and closed and the operation of the EPH system, which cuts off the fuel supply in forced idle mode. The adjusting screw at the end of the economizer body only regulates the degree of movement of the diaphragm of the “quantity” screw.
— Turns of the screw “amount” of the fuel mixture of the carburetor Ozone
Before adjusting the idle speed, it is necessary to set the “quantity” screw to its original position. To do this, you need to screw it all the way and turn it out two turns. This will ensure that the engine receives enough fuel mixture to operate at minimum speed. During the adjustment process, this number of revolutions will change. See “How many revolutions should I tighten and unscrew the quantity and quality screws of the Ozone carburetor.”
Notes and additions
On Ozone carburetors of early years of production with throttle mixture formation, this is a screw with which the throttle valve of the first chamber of the carburetor was slightly opened to a certain angle. The larger the gap, the more fuel gets into the cylinders, the higher the engine idle speed.
— Malfunction of the “quantity” screw
The main problem is clogging of the CXX outlet. Damage to the propeller diaphragm and its gasket can also occur.
Source
Adjusting the carburetor draft
Before you begin adjusting the rods, you should remove the air filter cover so that nothing interferes with the process. First, using a caliper, measure the distance between the rod tips. According to factory parameters, it should be 80 millimeters. To adjust the length of the rods, you need to loosen their clamps.
Checking the strainer should be carried out when there is fuel in the float chamber. This will help you see if the shutoff valve is closing completely. After examining the valve, you need to clean and dry it. Problems with loss of power and engine failures occur due to obstructed fuel supply. This is another reason to thoroughly flush the carburetor.
The tightness of the shut-off needle can be checked using a rubber bulb, while listening for air leaks. If they are present, it is time to change the needle.
Video - How to set up a VAZ 2105 carburetor
Useful tips
- Valve position . It must be pushed in so that the idle jet touches its connector (seat) in the device body. To do this, it is recommended to lubricate the rubber seal with engine oil.
- Cold pass system air damper position, with the choke handle lowered, must be in a strictly vertical plane.
- When the quality adjustment screw is screwed in all the way, the engine should stall . If this does not happen, the reason may be incorrect adjustment of the VAZ-2105 carburetor. Using the appropriate bolts, you need to change the speed up.
- Vacuum in the tube between the carburetor and the ignition distributor . When the engine is idling, there should be no vacuum in the vacuum tube. The reason for its occurrence may be a tightly tightened locking screw of the throttle valve. Adjustment of this element is carried out using a locking screw. In the correct position, the damper does not jam in the diffuser and provides sufficient tightness. When 2-3 cm 3 of fuel is poured into the chamber, it should not noticeably leak through the valve. When you press the gas pedal, it moves smoothly without jerking. An identical method is used to test and adjust the damper on the second chamber, with the exception of the tube, which is only in the first chamber.
- Solenoid valve. In carburetors designed for engines with a displacement of 1500 cm 3 or more, in place of the holder of a conventional fuel jet there may be an electromagnetic valve with an XX jet. If it is included in the design of the device in question, it is necessary to check its functionality and ensure the integrity of the electromechanical element. With the ignition on, you need to remove and put the connector on the valve. The occurrence of clicks during these operations will indicate the serviceability of the part being tested.
- For the summer season, it is recommended to reduce the idle speed to 800-900 units, and in winter to increase it to 900-1000 rpm . This setting will improve the efficiency of the power unit taking into account climatic conditions.
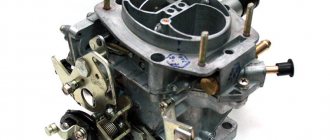
How to properly adjust a Solex carburetor
There are still many representatives of VAZ classics driving along the roads. Many of these cars have Solex carburetors under the hood. This carburetor is more economical and is capable of producing a higher quality mixture of fuel and air. For smooth operation of the engine, this carburetor must be properly tuned and adjusted. The class of carburetor masters is gradually dying out, so many people have to do the carburetor adjustments themselves.
Most modern gasoline cars are equipped with fuel injection systems, but before they gained dominance, all cars were equipped with carburetor systems. For this system to work correctly, the carburetor settings must be performed flawlessly. High-quality carburetor adjustment will reduce fuel consumption, make the engine run smoothly at idle, reduce the emission of harmful substances into the atmosphere and increase the overall engine life.
Most domestic cars have a carburetor system, and the question of how to adjust the carburetor will not lose its relevance for a long time. Many owners of rare old foreign cars also face the problem of how to adjust the carburetor. Since the principle of operation of carburetors around the world is no different, the algorithm of work will be the same.
The carburetor is the main component of the fuel system of any carburetor car. This is where air and fuel mix to form a fuel mixture that enters the engine's combustion chambers. A properly adjusted carburetor produces a fuel mixture in the required proportions. Such a mixture will not detonate in the cylinders, which will increase the life of your engine.
HOW TO ADJUST THE CARBURETOR AND WHEN IT SHOULD BE DONE
Do-it-yourself carburetor adjustment is done after using low-quality gasoline or when engine operation is no longer stable. For prevention, the manufacturer recommends flushing the carburetor with a special compound every 6-7 thousand kilometers.
VIDEO: ADJUSTING THE CARBURETOR VAZ 2106
Possible malfunctions in the carburetor:
- Fuel leaks on the carburetor. In this case, you need to measure the fuel pressure. This is done using a special pressure gauge. The operating instructions will tell you what the pressure should be. Typically it ranges from 0.2 to 0.3 atmospheres. If the pressure is normal, the problem is in the float chamber and the fuel level needs to be adjusted;
- Carbon deposits on spark plugs with the smell of gasoline. This clearly indicates a problem with adjusting the carburetor floats or a burnt valve;
- Rough engine idling may not only be due to the carburetor. This often happens due to incorrect adjustment of the throttle cable. To check, you need to disconnect the cable and turn the valve manually.
Before you adjust the carburetor correctly, you need to clean it thoroughly. It is recommended to use special liquids for cleaning. The jets cannot be cleaned with toothpicks or needles. Damage to the jets will lead to calibration failure. If the holes cannot be cleaned with aerosols, you can carefully clean them with a soft wire. When cleaning, do not use rags. Threads can clog the holes, which will lead to malfunction of the carburetor. If the aerosol does not remove all contaminants the first time, you need to repeat the procedure.
back to contents
ADJUSTING THE CARBURETOR FLOAT MECHANISM
The level of the fuel mixture in the float chamber is directly related to its quality. At an increased level, the mixture will turn out to be lean, which will negatively affect gasoline consumption and increase toxicity. Without adjusting the floats, the question of how to adjust the carburetor cannot be solved. The process of adjusting the floats includes the following operations:
- Adjusting the floats in relation to the lid and walls of the fuel chamber. If deformation of the float fixing bracket is noticed, it should be aligned manually;
- We adjust the bracket with the needle valve closed;
- We adjust with the float retracted and the valve open; the distance between the float and the valve should in this case be set to about 15 millimeters.
SETTING THE FUEL MIXTURE SUPPLY
Carburetor components
The carburetor control screws will help you figure out this setting. Before performing this procedure, you should know that the screws have a plastic factory press-on that limits the rotation of the screws (from 50 to 70 degrees). If turning in this range does not bring results, you need to break the press-on and turn the screws as much as necessary. Before setting the position of the screws, you should warm up the car engine to operating temperature.
To adjust the idle speed of the carburetor, you need to turn out the quantity screw and the mixture quality screw a few turns and, turning them, listen to the operation of the engine. When the engine starts to run smoothly, the carburetor idle adjustment is complete.
back to contents
ADJUSTING THE CARBURETOR RODS Before adjusting the rods, you should remove the air filter so that nothing interferes with the process. First, using a caliper, measure the distance between the rod tips. According to factory parameters, it should be 80 millimeters. To adjust the length of the rods, you need to loosen their clamps.
Checking the strainer should be carried out when there is fuel in the float chamber. This will help you see if the shutoff valve is closing completely. After examining the valve, you need to clean and dry it. Problems with loss of power and engine failures occur due to obstructed fuel supply. This is another reason to thoroughly flush the carburetor.
The tightness of the shut-off needle can be checked using a rubber bulb, while listening for air leaks. If they are present, it is time to change the needle.
HOW TO CORRECTLY ADJUST A SOLEX CARBURETOR
Adjusting the Solex carburetor
There are still many representatives of VAZ classics driving along the roads. Many of these cars have Solex carburetors under the hood. This carburetor is more economical and is capable of producing a higher quality mixture of fuel and air. For smooth operation of the engine, this carburetor must be properly tuned and adjusted. The class of carburetor masters is gradually dying out, so many people have to do the carburetor adjustments themselves.
To set up, you will need the usual set of tools that are found in almost every garage. To eliminate fuel overflows, you need to correctly set the float in the chamber. This operation can be done using a special template. Experts recommend not using this template, since the number and thickness of gaskets in carburetors do not always match. Fans of various improvements often replace factory gaskets with better ones. It happens that the factory settings of the template do not suit everyone. Although Solex carburetors are the same, the fuel pump can deliver gasoline differently. A lot also depends on whether the return line is plugged, so specialists use a different method.
Verification algorithm:
The mixture quality adjusting screw is tightened by hand until the end; Next, unscrew it back five turns; Turn on the engine, remove the choke and use the mixture screw to bring the engine speed to 750 rpm; By turning the quality screw, we bring the engine speed to the maximum; Using the quantity screw, reduce the speed to 800 rpm; We tighten the quality screw a little until instability appears; We unscrew the same screw back one turn; We turn the quantity screw until the idle speed reaches 800 rpm (in winter they can be raised to 900).
It is worth remembering that adjusting the carburetor not only eliminates floating engine speeds. A well-tuned carburetor will consume a minimum amount of fuel at stable idle speeds.
Disassembled carburetor
Various problems may arise with this adjustment.
It happens that when unscrewing the quantity and quality screws, the engine practically does not react. This happens when a large stream of gasoline flows from the idle hole and the screw is unable to influence it. It is possible that the valve is poorly closed or the jet is deformed. It happens that when replacing jets, they mistakenly choose a larger diameter than required. The plug may be loose. It is worth conducting a thorough inspection of all carburetor elements, this will help avoid such problems. When cleaning, the jets must not be cleaned using abrasives.
Solenoid valve adjustment
If the solenoid valve malfunctions, unscrew it and check for deformation. The mounting hole may also be deformed. If the thread of the mounting hole is torn off, you will have to replace the carburetor cap with a new one. If no defects are found, simply lubricate the O-ring before screwing in the nozzle.
You can determine whether the carburetor needs adjustment by the engine's response to pressing the gas pedal. An engine receiving a balanced fuel mixture responds to pedal pressure without hesitation, in a split second. The speed should be smooth at idle. There should be no jerks or failures. If the engine runs smoothly at idle, but when you press the accelerator it begins to act up, you need to tighten the quality screw, enriching the mixture.
The quality screw directly affects CO emissions into the atmosphere. Drivers are familiar with the situation when, before going for a scheduled inspection, they need to tighten the quality screw. The emissions become smaller and the car easily passes inspection, after which the position of the quality screw returns to its place. Some people are perplexed why their neighbor’s car consumes less fuel, although both have identical models. It's all about the settings and adjustments of the quality screw.
If the car responds to pressing the gas pedal late, the problem is in the accelerator pump. You can replace it, or change only the spout. When it comes to the spout, the fuel mixture is supplied over-enriched. The problem is solved by replacing the spout. If you decide to install a spout of a different diameter, do not forget to select the appropriate jet for it.
Setting up a carburetor is a rather complicated procedure. Don't expect everything to work out the first time. It may take a couple of weeks to complete the full cycle of eliminating all deficiencies. It is better to listen to the engine, quickly respond to the slightest interruptions in its operation and carry out regular carburetor flushing. The main thing when washing is not to use nameless Chinese-made cleaning products. And if you refuel with high-quality fuel, the carburetor will thank you for years of trouble-free operation.
back to contents
Source: https://swapmotor.ru/ustrojstvo-dvigatelya/regulirovka-karbyuratora.html
Post Views: 4,610
How to set the ideal settings yourself
To work, you will need the usual set of tools that are found in almost every garage. To eliminate fuel overflows, you need to correctly set the float in the chamber. This operation can be done using a special template. Experts recommend not using this template, since the number and thickness of gaskets in carburetors do not always match. Fans of various improvements often replace factory gaskets with better ones. It happens that the factory settings of the template do not suit everyone. Although Solex carburetors are the same, the fuel pump can deliver gasoline differently. A lot also depends on whether the return line is plugged, so specialists use a different method.
- The mixture quality adjusting screw is tightened by hand until the end;
- Next, unscrew it back five turns;
- Turn on the engine, remove the choke and use the mixture screw to bring the engine speed to 750 rpm;
- By turning the quality screw, we bring the engine speed to the maximum;
- Using the quantity screw, reduce the speed to 800 rpm;
- We tighten the quality screw a little until instability appears;
- We unscrew the same screw back one turn;
- We turn the quantity screw until the idle speed reaches 800 rpm (in winter they can be raised to 900).
It is worth remembering that adjusting the carburetor not only eliminates floating engine speeds. A well-tuned carburetor will consume a minimum amount of fuel at stable idle speeds.
Various problems may arise with this adjustment.
It happens that when unscrewing the quantity and quality screws, the engine practically does not react. This happens when a large stream of gasoline flows from the idle hole and the screw is unable to influence it. It is possible that the valve is poorly closed or the jet is deformed. It happens that when replacing jets, they mistakenly choose a larger diameter than required. The plug may be loose. It is worth conducting a thorough inspection of all carburetor elements, this will help avoid such problems. When cleaning, the jets must not be cleaned using abrasives.
If the solenoid valve malfunctions, unscrew it and check for deformation. The mounting hole may also be deformed. If the thread of the mounting hole is torn off, you will have to replace the carburetor cap with a new one. If no defects are found, simply lubricate the O-ring before screwing in the nozzle.
This is interesting: What does the potassium number of spark plugs mean?
You can determine whether the carburetor needs adjustment by the engine's response to pressing the gas pedal. An engine receiving a balanced fuel mixture responds to pedal pressure without hesitation, in a split second. The speed should be smooth at idle. There should be no jerks or failures. If the engine runs smoothly at idle, but when you press the accelerator it begins to act up, you need to tighten the quality screw, enriching the mixture.
The quality screw directly affects CO emissions into the atmosphere. Drivers are familiar with the situation when, before going for a scheduled inspection, they need to tighten the quality screw. The emissions become smaller and the car easily passes inspection, after which the position of the quality screw returns to its place. Some people are perplexed why their neighbor’s car consumes less fuel, although both have identical models. It's all about the settings and adjustments of the quality screw.
If the car responds to pressing the gas pedal late, the problem is in the accelerator pump. You can replace it, or change only the spout. When it comes to the spout, the fuel mixture is supplied over-enriched. The problem is solved by replacing the spout. If you decide to install a spout of a different diameter, do not forget to select the appropriate jet for it.
Setting up a carburetor is a rather complicated procedure. Don't expect everything to work out the first time. It may take a couple of weeks to complete the full cycle of eliminating all deficiencies. It is better to listen to the engine, quickly respond to the slightest interruptions in its operation and carry out regular carburetor flushing. The main thing when washing is not to use nameless Chinese-made cleaning products. And if you refuel with high-quality fuel, the carburetor will thank you for years of trouble-free operation.
How to adjust idle speed
Idle speed adjustment (IAC) is carried out when problems occur in the engine - if it does not start, stalls after starting and other problems. It is also recommended to perform IAC after replacing or repairing the carburetor.
For IAC you will need:
The optimal idle speed for engines with Solex is 750-800 rpm. Rotate the fuel mixture “amount” screw and set the crankshaft frequency indicated above. If you cannot set the desired speed, you will also have to adjust the “quality” screw of the fuel mixture.
On a note! There may be a plastic plug on the fuel mixture “quality” screw; before adjustment, it must be removed, pierced with an awl and pulled out with a hook or self-tapping screw.
XX adjustment is carried out three times. If there is no result, repeat it 2-3 more times. Before starting work, check whether the ignition is set correctly and the wiring is in good condition, and whether foreign air is being sucked into the carburetor.
Repeat the setup if necessary. If you are replacing an old carburetor with a new one, or you have disassembled or repaired it, then before you start adjusting, tighten the “quality” screw to the maximum, and then turn it out 3-4 turns.
Having completed the adjustment, step on the gas - the engine should increase the crankshaft rotation speed without failure, and when it is released, it should not stall. If there are “dips,” repeat the adjustment or turn the mixture “quality” screw. Increase the idle speed to 900 rpm. If you tighten the “quality” screw clockwise, the CO concentration is reduced to 1.5%.
Setting up a second camera
As a rule, the second chamber of the carburetor is not adjustable, since all the shortcomings of the factory jets are compensated for by the econostat. The fact is that at high speeds, when a vacuum occurs in the carburetor, additional gasoline is supplied through the econostat, which makes it possible to enrich the mixture.
Only the accelerator pump nozzle can be adjusted if its jet does not fall between the diffuser wall and the throttle valve.
All of the above techniques for tuning the carburetor are basic in its regulation, however, some craftsmen can additionally drill channels and throttle valves, and solder epulsion tubes.
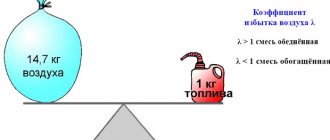
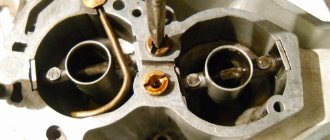
The first thing you need to start with is setting the level in the float chambers. In the manual, the level is set according to the position of the floats relative to the carburetor cover using a special template. I’ll say right away - this method can be safely sent away, just like the myth that with . The fact is that everyone has different fuel pumps, a different number of gaskets under them, some have a return line, some have it plugged, as a result - different pressure on the shut-off valve (carburetor needle), which in most cases leads to severe overflow . Therefore, the method for setting the gasoline level is as follows:
— We start the engine, let it run for 5 minutes, gently rev up the gas, because... can shoot either the carburetor or the exhaust. It is worth noting here that any Solex at any volume should start, even with terrible overflow and poor jets. My Solex for 1.8L started up immediately on the 1.5L engine, despite the fact that it was terribly overflowing. – After the engine has run, turn it off. – Remove the fuel supply hose; gasoline will carefully spray out of it. This must be done so that when removing the carburetor cover, gasoline from the hose under pressure does not flow into the chamber and affect the readings. – Unscrew the 5 screws that hold the carburetor cover and remove the choke cable. – Lift the carburetor cover strictly horizontally (!) so as not to damage the floats. – Using a caliper or ruler, measure the distance from the surface of the gasoline in the chambers to the mating surface of the carburetor cover (see photo above). It should lie within 23-25mm in both chambers, but the levels in the chambers will differ from each other because Our collector is not horizontal, so we measure the level in each chamber and take the average. If the level is more or less than the specified level, carefully bend the tongue of the floats in the desired direction, remove some of the gasoline from the chambers so that the old level does not interfere with the new measurement, and assemble everything in the reverse order. We start it and look into the carburetor chambers with a flashlight for at least 30 seconds, during which time not a single drop of gasoline should fall from the small diffusers. Dripping from diffusers indicates overflow. At the same time, under no circumstances should you use gas, otherwise the carburetor may sneeze, which can have a disastrous effect on your eyes! Next, we measure the level in the chamber again, if everything is normal, the first stage is completed. I caught the required level after removing the cover for the 3rd time. You should not set the level without starting the engine, but only by pumping it up with the handle - you will get an overflow with the engine running (more applicable to those who have the return line turned off)
Idle speed setting.
After setting the level, warm up the engine to operating temperature, turn it off and perform the following actions:
1. Using a flat screwdriver, feel for the mixture quality screw in the hole in the carburetor sole (pos. 7) 2. Turn it clockwise until it stops, but do not use force, otherwise you will break the thread! 3. From this position, turn it back 5-6 turns 4. Start the engine, remove the choke completely and use the quantity screw (item 6) to set the minimum speed so that the engine runs stably and there is minimal vacuum in the vacuum advance fitting (we try through the tube vacuum advancer on the tongue) The revolutions should be in the range of 500-1200, this indicates the serviceability of the carburetor.) 5. We begin to tighten the quality screw until the engine begins to operate unstably and turn it back 1-1.5 turns to return stable operation. The quality screw must be turned slowly. 6. Set the speed screw at XX to about 850-900. If there are problems with this and the engine starts to stall, then add a little quality screw, unscrewing it 7. We repeat steps 5-6 until we find the optimal ratio at which the engine will operate stably and have minimal vacuum in the tube.
Refinement of the carburetor, how to increase efficiency
If you want to improve the performance and efficiency of your carburetor, you should upgrade it. There are several options for this modification:
1. To stabilize the fuel level, it is necessary to install a shut-off needle, which is more reliable in operation.
2. Change the level in the float chamber by replacing the valve needle. This gives an excellent effect and ensures maximum stability of level indicators. In addition, such tuning guarantees that a balanced mixture of fuel enters the engine at various transition and speed conditions of the engine.
3. You can also remove the EPH system, which will significantly increase the reliability of the engine. In this case, the only negative point is an increase in fuel consumption by approximately five or seven percent.
4. Throttle sawing will help achieve several benefits, in particular, improving a more even and smooth distribution of the fuel mixture throughout the cylinders (this improvement is necessary for the engine to idle) and a significant reduction in carbon dioxide emissions. This modification reduces fuel consumption by up to two percent.
5. Polishing diffusers can increase flow speed and reduce aerodynamic losses. In this case, the desired effect will be achieved only by polishing to an ideal and even state.
VAZ 2106 carburetor maintenance
During the operation of the carburetor, the narrow channels of the jets become clogged. This usually happens when using low-quality fuel, untimely replacement of the air filter, etc. The composition of the fuel-air mixture is disrupted and its flow into the engine is difficult. As a result, the power unit begins to operate intermittently, and its dynamic characteristics decrease. In such cases, it is necessary to flush the contaminated jets with a special cleaning compound and then blow them with air.
If the carburetor jets become clogged, they should be washed with a special agent and blown out with air.
In addition, it is recommended to periodically adjust the composition of the fuel-air mixture to the optimum using special adjusting screws. Otherwise, the engine will run unstably.
How does the Ozone carburetor work?
Without understanding the principle of operation of the dosing device, it is impossible to carry out serious repairs and adjustments. The maximum is to adjust the fuel level in the chamber, clean the mesh and the CXX jet screwed into the outside of the housing. To eliminate deeper problems, it is worth studying the algorithm of the unit’s operation, starting with a cold start of the engine.
- The driver pulls the trigger handle all the way, the upper flap completely closes the air flow into the primary chamber. At the same time, the first throttle opens slightly.
- When the starter rotates, the pistons draw in pure gasoline without adding air - the engine starts.
- Under the influence of vacuum, the membrane slightly opens the upper damper, clearing the way for air. The air-fuel mixture begins to be supplied to the cylinders, otherwise the engine will stall due to over-enrichment.
- As the car warms up, the driver presses down the choke handle, the throttle closes and fuel begins to flow into the manifold from the idle hole (located under the throttle valve).
Immediately after starting the engine, the membrane pulls back the flap and opens the gap for air to pass.
At idle speed, the air-fuel mixture enters the manifold through the channels and CXX jets, the main chokes are tightly closed. Quality and quantity adjusting screws are built into these ducts. When the main throttles open and the main metering system comes into operation, the position of the screws does not matter - the combustible mixture is supplied to the engine directly through the chambers.
At idle speed, the fuel mixture enters the manifold through the lower hole located under the throttle
To start driving, the driver selects a gear and presses the accelerator pedal. The fuel supply pattern changes.
- The primary throttle valve opens. Due to the vacuum, air and gasoline are sucked through the main jets, mixed in the emulsion tube and sent to the diffuser, and from there to the manifold. The idle system operates in parallel.
- With a further increase in crankshaft speed, the vacuum in the receiving manifold increases. Through a separate channel, the vacuum is transmitted to a large rubber membrane, which, through traction, opens the second throttle.
- To prevent failures when the secondary damper opens, part of the fuel mixture is supplied to the chamber through a separate channel of the transition system.
- For dynamic acceleration, the driver sharply presses the gas pedal. The accelerator pump is activated - the thrust acts on the diaphragm, which pushes gasoline to the nozzle of the sprayer. It produces a powerful jet inside the primary chamber.
After opening the throttle, the fuel mixture enters the manifold through the main diffuser
When the pedal is pressed to the floor and both throttles are fully open, the engine is additionally fed with fuel through the econostat tube. It draws fuel directly from the float chamber.
Carburetor transition setting
While the engine is idling, the throttle valves are closed. A vacuum (vacuum) is formed under the dampers. Thanks to this vacuum, gasoline is sucked out through a small idle channel and nozzle, and the engine itself runs smoothly at idle. If you open the damper sharply, then the vacuum also weakens. Moreover, this vacuum is not enough for normal operation of the MDS (main dosing system) in the first chamber, and the idle system and accelerator pump are not yet capable of normalizing engine operation. In other words, when you sharply press the gas after idling, there is a delay in the response to pressing the accelerator pedal.
To minimize or completely eliminate this failure, a transition system is used in the carburetor device. This diagram is a hole-slot made above the throttle valve in the first chamber. At the moment you press the gas pedal, the slot-shaped hole appears in a zone of high vacuum, due to which intensive fuel suction occurs parallel to its supply through the idle jet.
Let's go back to the settings. After the carburetor has been installed, many cars experience a failure when starting from a stop, reactions to pressing the gas pedal are slow, and the engine may start shooting at the carburetor or stall. In such a situation, the transition system may be to blame. In order to normalize the operation of the carburetor, it is necessary to correctly select the cross-section of the “spout” of the accelerator pump and the size of the idle jet.
The fact is that it is during operation in the transition mode that fuel comes from both the accelerator pump and the transition system. As a result, the fuel-air mixture may become too rich or, conversely, lean, which does not allow the engine to operate normally and gain speed.
It is important to know that the nozzles in the first chamber do not need to be touched, and the indicated failures should not be attempted to be eliminated by replacing the nozzles of the main dosing system. To solve the problem, use the previously built carburetor to correctly select the idle jet and the accelerator pump nozzle
The selection must be made after the internal combustion engine has warmed up, the choke must be removed.
In practice it looks like this:
The level in the float chamber was previously set and the idle speed was adjusted. A warm engine idles normally without chugging. A stream of gasoline from the accelerator pump nozzle hits the manifold. Now you can sharply press the gas pedal. What is needed is the sharpness of the press, and not how hard the pedal was pressed (to the floor, half a stroke or ¼). Normally, the motor should immediately respond and spin up, that is, the speed increases without delays or failures. If the response to a sharp press on the accelerator is slow or there is a noticeable pause before the speed increases, then you should go to the settings.
To accurately determine the cause, you need to press the gas pedal again, but this time smoothly, not sharply
If in this case there is an even increase in speed (without pauses, dips or delays), then you should pay attention to the idle jet and the pump spout, since the main dosing system has nothing to do with the failure. If, when you gently press the gas, the engine spins up poorly, the unit itself begins to work jerkily, hums, vibrates strongly, etc., then the problem lies in the selection of jets for the first chamber
In other words, excessive enrichment or leanness of the mixture occurs after the carburetor switches to power mode after pressing the accelerator. An indirect sign of a too “rich” mixture during operation in transition mode is that the engine emits black smoke and the smell of gasoline comes from the exhaust system. The specified smoke and smell appear after sharp throttling.
To remove the dip, you must carefully select the idle jets to match the pump spout or vice versa. This is done until the delay disappears when you sharply press the accelerator pedal. In parallel with this, it may be necessary to re-adjust the idle speed, since replacing the XX jet will make changes to the operation of the idle system. Let us add that if the mixture remains lean and there is a dip, and the idle jet is too large and it is not possible to adjust the idle speed, then you can install a paired pump spout, after which both tubes are bent into the first float chamber.
Setting the float chamber level
First of all, you need to pay attention to the fuel level in the float chamber.
The adjustment procedure is as follows:
- It is necessary to start the engine and carefully apply gas to check the efficiency of the carburetor;
- Remove the air filter from the carburetor and the fuel hose.
- Unscrew the 5 bolts and remove the carburetor cover. Be sure to vertically so as not to damage its floats. Place this cover on a flat surface.
- When removing the carburetor cap, the fuel level should be at the red lines. The fuel depth must be measured. This figure should be about 29 mm. The procedure should be carried out immediately after removing the carburetor cap, since gasoline tends to evaporate.
- The height of the floats needs to be adjusted. We measure the distance from the cardboard gasket of the carburetor cover to the top of each float.
- The recommended figure is 34 mm. If necessary, you need to bend the levers and float tongue.
- Let's start adjusting the full stroke of the floats. The permissible lift of the lower angle of the float is 15 mm, and the full stroke of the float is 25 mm. Make sure that the edges of the floats are parallel to the sealing surface of the cover.
Setting up XX in the car
Setting the idle speed of the VAZ 2106 serves to perform the following functions:
- Adjustments to the operation of the power plant if the idle speed is lost - to stabilize the engine crankshaft speed.
- Bringing the percentage of carbon monoxide into the environment to normal levels, minimizing the CO content in exhaust gases, because operation of a vehicle with a high level of toxic emissions is prohibited.
This adjustment of the idle speed of the VAZ 2106 will allow you to get rid of excess fuel consumption. If a car enthusiast discovers that the “six” has lost idle speed, then possible malfunctions of the fuel system include the following defects:
- the carburetor idle jet is clogged;
- defective valve system of the electromagnetic idle type;
- The carburetor device was adjusted incorrectly.
The defect is determined in a situation where the VAZ 2106 stalls at idle while driving or due to a sharp press on the foot brake. The defining component in this unit of the product is considered to be the idle jet for passing a jet of fuel, which is optionally equipped with an electromagnetic type valve. There are carburetor models where a plastic plug is installed instead of this element.