A life hack from folk craftsmen - flushing the stove radiator with citric acid - is easy to do, even for an inexperienced driver.
You just need to clearly know the sequence of actions, and your stove will breathe deeply, warming the interior and passengers with the driver with renewed vigor. Why carry out such a procedure? Year after year, the stove in almost any car, especially an old one, heats up with less and less enthusiasm. And on cold winter days, when the temperature “outside” drops to -20°C, you really want warmth in the cabin. Sometimes, even when the engine reaches full operating temperatures, barely warm air blows from the grilles. And this is annoying, to say the least. In the cabin itself, steam comes out of your mouth. But if the system is properly cleaned, it will work like new!
Flushing the stove radiator with citric acid is usually carried out in several ways - by removing and without removing the unit.
As an example, let's take a “guinea pig” (more precisely, a Bear) – Mitsubishi Delica
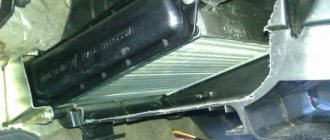
. This car has a front heater and a rear heater with radiators, respectively. Removing the rear unit is quite simple, let's go through the procedure.
Heating system
The stove and bypass valve, integrated into the cooling system of the machine, are the main heating elements. The heater radiator is heated due to the high temperature of the engine coolant, which also enters the heat exchanger.
So if the pump is in order, the thermostat is working, the heater fan is not burned out, the air ducts are not clogged, the antifreeze level is normal and there is no air lock in the cooling system, then the cause of poor heating is contamination of the heater radiator.
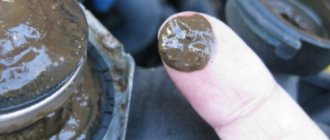
This happens because all the dirt traveling through the system ends up in the heater radiator, gradually clogging its cells. Over time, this leads to a decrease in the temperature of the air entering the vehicle interior.
There are two ways to clean the heat exchanger: flushing the stove radiator without removing it from the car, and the same procedure, completely dismantling it.
Washing without dismantling
The first and most easily accessible method is to flush the radiator without resorting to any disassembly of the system.
We make a solution of citric acid and distilled water based on the proportion of 100 grams of lemon juice for the entire volume of the cooling system of your car. Drain out the old antifreeze and fill in the solution. Then we drive it for 5-6 days. After this period, drain the liquid, along with which all dissolved dirt and scale will come out. We fill in new antifreeze and enjoy the warmth in the cabin.
The second method requires a little preparation and minor disassembly of the components of the car's heating system.
For this procedure you will need:
- Compressor or water pump.
- A pair of hoses with adapters. One end of which corresponds to the diameter of the hoses coming out of the stove.
- Clamps, container for flushing liquid, fume tape.
- A product that will be used to flush the heat exchanger.
The products that are used to clean the heater radiator are worth covering in more detail. In the selection of such substances, you need to proceed from what material the heat exchanger is made of. If the radiator is aluminum, then it is unacceptable to wash it with alkaline solutions; in this case, products with a certain percentage of acid in their composition are suitable. When flushing a copper-brass heat exchanger, everything should be exactly the opposite.
For the washing procedure, you can use professional products, such as special Mannol liquid, or improvised means.
In choosing available liquids, advice varies; for some, Xylitol or Antiscale has become a panacea for descaling household coffee makers and kettles; others advise using regular Coca-Cola or whey; others praise Krot for cleaning pipes.
But it is better to use a proven method - washing with citric acid, and if the heater is copper - with caustic soda.
Pump
{banner_content}No, you can, of course, wash it manually, using a watering can, funnel, or bucket.
But this procedure will require a lot of effort and twice as much time. Of course, this can be done better and more efficiently using an electric pump. Any one will do, even if it’s not powerful enough (for example, from an old washing machine). The main thing is that it creates circulation of the flushing liquid. Yes, and we will also need containers where the rinsing will drain and be pumped from. And – adapters for connecting the pump directly to the radiator. If the hoses available in size do not fit, then we use improvised means: “flexible wiring”, wire, tape, electrical tape, clamps, for example.
The main thing is that the supply hoses are mounted or screwed tightly onto the inlet and outlet of the radiator. Then success is guaranteed, and you won’t flood everything around with rinsing. It is also advisable to use a blowtorch to heat the solution or an electric stove.
Let's start the washing process
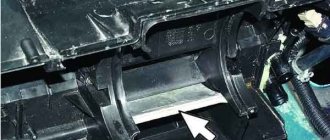
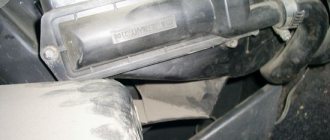
To begin with, by lifting the hood, we find two hoses that provide supply and drainage of fluid to the stove. Then:
- in the radiator fins. Having disconnected these hoses, we extend them, securing the joints with clamps and wrapping them with fum tape for tightness.
- Turning on the compressor, blow out the old antifreeze from the heat exchanger.
- Fill the radiator with diluted citric acid or another selected cleaning liquid, give it time, up to half an hour, to dissolve dirt and deposits. In more advanced cases, this time can be increased to several hours. Some people advise that before pouring, for greater effect, heat the solution to the operating temperature of the antifreeze, and in the case of using Coca-Cola, generally boil it.
- After the selected period of time, drain the liquid into a prepared container.
- This procedure must be repeated until no clear liquid comes out of the drain hose.
- By connecting the pump to one of the hoses, rinse the stove under pressure with clean water.
- By connecting the hoses back and adding antifreeze, you need to eliminate air in the system.
As an additional way to influence internal contaminants, some experts suggest connecting a pump to one of the hoses and lowering it into a bucket that serves as a container for draining liquid, driving the cleaning solution inside the stove in different directions. In order to evenly press all passages in the radiator plates.
Washing with dismantling
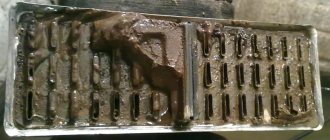
Complete dismantling of the heat exchanger is a troublesome and time-consuming task, but this method makes it possible to clean it not only from the inside, but also from the outside. This method is also better because it can be diagnosed in case of leaks, which can be eliminated by argon welding.
If you still decide to dismantle it, then to gain access to the stove you will have to unscrew the dashboard.
This disassembly is similar to what is required to remove the evaporator when cleaning the air conditioner.
After removing the torpedo you need to:
- Disconnect the pipes leading to the heating unit. In some brands of cars, the heating unit contains an evaporator of the air conditioning system, which means that in order to dismantle the stove, these pipes will also have to be disconnected.
- Carefully unscrew the heating unit and remove it from the interior.
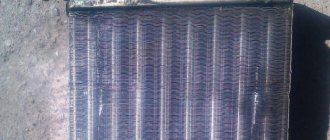
Flushing the stove radiator in this way is made several times easier, because it can be done at home, under hot running water. And even if the chemical ingredients do not help, you can solder the heat exchanger and clean it manually using a brush or similar improvised means in the form of a drill with a long drill bit.
Useful tips
After cleaning the heat exchanger, do not be lazy to replace the underwater hoses and install new clamps. After all, it will be very disappointing when, after a few days, the cabin becomes cold again, and the culprit is a small hole in the hose or a loose clamp that leads to air getting into the heater radiator.
Periodically clear the air ducts of leaves and dirt that could reduce the heating efficiency.
Use high-quality coolant to prevent re-contamination of the heater with impurities found in low-quality antifreeze.
Periodically turn on the fan at maximum speed to blow through the outer fins of the radiator.
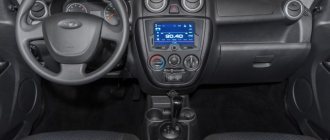
With the onset of cold weather, car owners often find that their car's interior heating system is not working efficiently. Everything seems to be fine, but the air coming from the deflectors is not warm enough. This problem may be an indication that the car’s heater core is clogged and cannot pass the required amount of heated coolant through it.
What to do in such a situation: replace the heater or try to repair it? Do not rush to resort to radical measures. If the heat exchanger does not leak, it can be repaired.
In this article we will talk about how to flush the heater radiator without removing it from the car. In addition, we will discuss which products are best suited for this procedure.
Why does the radiator clog?
In modern cars, two types of heater radiators are used: copper-brass and aluminum. Each has its own advantages and disadvantages, but they are all susceptible to oxidation and corrosion. Over time, the channels of any radiator lose their capacity due to deposits on the internal walls. This process can also be speeded up by:
- poor quality coolant;
- the use of coolants of different compositions;
- the entry of various debris or active substances, such as oil or gasoline, into the system.
How to deal with it
The easiest way to get rid of this problem is to flush the stove radiator. Its essence is to drive a special agent through it that can dissolve and wash away all the scale and dirt. There are two cleaning methods: flushing the heater radiator without removing it from the car and with removal. The first method does not involve dismantling the heater. It is enough to simply disconnect it from the cooling system. In the second case, the heat exchanger is dismantled, and the entire procedure can be successfully carried out even in the bathroom. We will focus on the first option, since flushing the stove radiator without removing it is much easier. And considering that in some cars it is not so easy to get to the heater, it is also faster.
What to wash with
The VAZ-2106 has standard and widely used radiators that do not impose special requirements on the composition or quality of the flushes used. You can use the same products that are widely used in other cars when cleaning radiators:
- two-component;
- acidic;
- alkaline;
- neutral.
Although among them, as experts note, the optimal choice would be a two-component mixture. An alternative to purchased formulations are folk solutions, which are quite simple and easy to prepare. Folk recipes are based on alkaline and acidic substances available in any home and grocery store. Namely:
- vinegar;
- soda;
- lemon acid.
In order not to harm the radiator of your VAZ-2106, be sure to use acids and alkalis alternately.
Effective stove cleaning products
Now let’s figure out how to effectively flush the radiator channels. Plain water, you will agree, is unlikely to do. Flushing the stove radiator involves pouring into it agents that can destroy the scale that has formed and deposited on the walls. These means can be:
- special liquids for flushing the cooling system (factory-made);
- household products for cleaning sewer pipes and removing scale (“Mole”, “Komet”, “Tiret”, “Kalgon”, etc.);
- acid solutions (citric, acetic acid);
- alkaline solutions (caustic or soda ash);
- drinks like Fanta or Coca-Cola;
- milk serum.
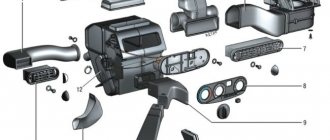
Cleaning a car heater
We assemble a sequential circuit from the following elements:
- disconnected heater radiator;
- water pump;
- car battery or charger;
- container (bucket, canister, basin, etc.) with a chemical solvent;
- homemade filter.
Cleaning scheme
Hi-Gear special agent is used as solvents
or household “chemicals” such as
Tiret Professional
or
Mole
. A cheaper, but also effective option is to use citric acid bags in a proportion of 100 g per 3-5 liters of water.
Replacing filters during cleaning
Fill the resulting system with a preheated solution and start the pump. Periodically, it is necessary to clean the filter from several layers of bandage or mesh, secured with a clamp, from clogging. The entire operation lasts for 60-90 minutes. For greater efficiency, after running in one direction, we throw the hoses over and run the liquid in the other direction.
To ensure long-term maintenance of a high temperature during the process, you can lower the boiler into a container with liquid for a while.
Do no harm
Independently flushing the heater radiator without removing it from the car or with removal is not the point; it must take into account the properties of the material from which the element being washed is made. Under no circumstances should you use alkaline solutions to clean aluminum heaters. The metal will instantly begin to oxidize, and the situation will only get worse. The same thing will happen if you pour acid into a copper radiator. Therefore, for aluminum - acidic agents, for copper - alkaline.
Universal remedies include Coca-Cola or Fanta heated to a boil, as well as whey, which has a “mild” destructive effect on scale.
If special liquids for flushing the cooling system have instructions for use, then with household powders, citric acid and soda you need to be extremely careful and know the proportions for preparing the solution.
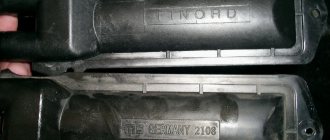
Which heater should I wash it with?
Cars use radiators made of copper-brass alloy and duralumin.
These metals react differently to acid and alkali. Remember: a duralumin radiator cannot be washed with alkaline mixtures, and copper radiators with acidic ones. If you get it wrong, you can make the situation significantly worse. Therefore, before you wash the stove on your car, you need to find out what material it is made of. Universal products can be drinks like Coca-Cola and whey. The first one acts more aggressively and is capable of dissolving anything, while the second one, on the contrary, has a mild effect on the metal, but this does not reduce its effectiveness.
How to prepare the solution
Flushing the radiator of the Krotom stove involves preparing a liquid based on it. This will require 10 liters of water and 100 g of the specified powder. The powder is poured into heated water and then mixed thoroughly. After this, it is recommended to strain the resulting liquid (you can use it through an unnecessary woman’s stocking). The same proportions are necessary for the soda solution.
In order for flushing the stove radiator with citric acid to be as effective as possible, you will need at least 300 g per 10 liters of water (30 packs of 10 g each). After dissolution, the resulting liquid must also be filtered.
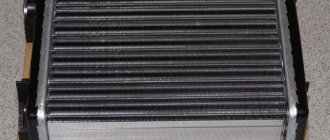
How to clean radiator honeycombs?
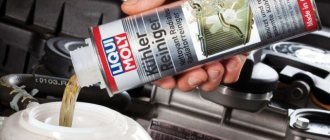
To prevent the engine from overheating and the radiator from boiling, the first thing you need to do is clean the outer surface of the radiator. The Liqui Moly product - Kuhler Aussenreiniger - will help you with this. The composition must be applied to the honeycombs of a cold radiator and allowed to act for several minutes.
Interesting materials:
How to set up parental controls on Google Play? How to configure the router automatically? How to configure a router if it has a static IP? How to configure the Tenda f 300 router? How to configure a TP Link router after a reset? How to configure a router in repeater mode? How to configure a ZyXEL Keenetic router? How to set up your steering wheel for racing? How to set up Russian language on Huawei? How to set up Russian language in Telegram on iPhone?
How to flush the heater radiator without removing it from the car: instructions
First, drain the coolant from the system after warming up the engine. Then we find the inlet and outlet pipes of the heater radiator and, loosening the clamps, disconnect the rubber hoses from them. In their place we attach pre-prepared hoses through which we will pour and drain our cleaning solution.
Before you wash the heater radiator without removing it from the car, you need to remove all the dirt that has not yet settled on the walls. This can be done with ordinary tap water. To do this, pour water (10-20 liters) into one of the hoses, allowing it to flow out from the other end.
Only after this can you begin to clean the heater radiator from scale.
We begin to pour liquid into the first hose through a watering can. Raise the end of the second hose a little, and after the solution flows from it, close it. When the stove is completely filled, close the first hose. Leave the radiator for 2-3 hours so that the scale has time to dissipate. After this, it must be rinsed again with water. If necessary, the procedure can be repeated.
After cleaning the heater radiator, attach communication hoses to it. Pour coolant (preferably new) into the system. Start the engine and check the heater operation. If the situation does not improve, then it is time to replace the radiator.
How to understand that the reason is in the radiator
It is not difficult to diagnose a heater obstruction, especially if you are convinced that the water pump is working properly and the coolant is circulating in the system as usual. Warm up the car engine to operating temperature, open the heater tap and touch the radiator inlet and outlet pipes with your hand. If the difference in their temperature is tangible, it means that the coolant does not enter the heater or does not enter in full.
Next, you need to make sure that the problem is not in the radiator tap, because it also often fails. But if the faucet does not flow and closes and opens normally, most likely it is working properly, and the problem is specifically in the heater.
When diagnosing an obstruction of the heater radiator, the easiest way is to go to a service station, tell the specialists about the failure, and they will fix everything themselves. It's much easier than washing the stove radiator
yourself, but more expensive and longer. Is it worth spending money if a similar problem can be solved without the help of others, spending 30 minutes and a few 10 rubles on it? To do this, naturally, you should know how to clean and rinse a car stove at home. But first, let's look at the causes of the malfunction.