Advantages and differences
The electronic gas pedal on the VAZ 2114 does have a number of positive aspects, but also some disadvantages, which we will discuss later. First, let's look at the shortcomings of the “cable” that forced engineers to look for new solutions:
- Very frequent over-throttle
of the engine, which led to sharp pressing of the accelerator pedal and the release of a large amount of CO2 into the atmosphere; - Fuel consumption
did not always correspond to the speed limit and speed of the power unit. During the “slippers on the floor” period, fuel was poured into the flammable chambers in excess of the norm; - The need to transition to European environmental standards Euro-4 and Euro-5;
- Over time, increased speeds negatively affected the entire crank and piston mechanisms, which led to increased wear and premature failure, which means that a major overhaul was just around the corner and was breathing in the back.
Now let’s dwell a little on “electron gas” and its advantages
:
- Uniform opening of the throttle valve;
- Preventing gas overloads, which means saving fuel;
- Despite the “dullness” in the first second of pressing the gas pedal, the acceleration dynamics are an order of magnitude better than the analogue;
- Uniform filling of all cylinders with the combustible mixture.
As we see
, at first glance, the advantages are obvious and really significantly improve the technical characteristics of the car. But there is another opinion with some disadvantages, which are discussed a little below. Perhaps the dissatisfaction is expressed by the category that wants to get much more from stock units. Which is practically impossible in theory.
↑ Carburetor adjustment
When pedal 16 is fully pressed, the throttle valve of the first chamber should be completely open and the throttle lever should not have additional travel. When the pedal is released, the throttle valve should be completely closed. If this is not the case, then the position of the pedal and the throttle valve can be coordinated by changing the length of rod 8, rolling or screwing its tip.
At the same time, check and, if necessary, adjust the length of rod 6. The center-to-center distance of its tips should be 80 mm.
The rod 3 of the air damper drive and its shell must be secured so that when the handle 1 is fully extended, the air damper is completely closed, and when the handle is recessed, it is completely open.
Sooner or later, every car enthusiast operating domestic VAZ cars is faced with a situation in which fuel consumption increases significantly. Often the process of increasing fuel consumption is accompanied by unstable engine operation. A non-original, but quite reasonable question arises: “What to do?”
There are several solutions to this problem. Some car owners prefer to eliminate the problem with the help of specialized car service personnel equipped with modern equipment: a gas analyzer, a stand, etc. However, for some it is expensive or time consuming, while for others it is simply not interesting. It is for this category of domestic car enthusiasts that this article-instruction was created on how to set up the VAZ 2106 (VAZ 2107) carburetor yourself.
Disadvantages of the electronic pedal
- A slight “thought” at first when pressing the accelerator;
- The “E-pedal” does not make it possible to carry out deep tuning, since for this it is necessary to convert to a “cable” system, and this is an additional expenditure of about 20-25 thousand rubles plus a bunch of sensors and cables. Not everyone will agree to such a hassle;
- Exclusively on the first (raw) versions with “e-gas” the pedals stuck, the engine speed fluctuated and random periodic self-pressing occurred;
- Most likely the second point is to blame, which does not allow you to upgrade the car.
But what to do if an avid driver wants to drive recklessly?! Our craftsmen found the optimal solution without removing the “e-gas” - this is re-flashing the sensors and adjusting the turbochargers.
How to remove the idle speed sensor
Replacing the idle air control valve on a VAZ is very simple
To remove the sensor, you need to put the car on the handbrake and disconnect the negative terminal from the battery. Next, you need to disconnect the wiring harness from the sensor and clean the place where the IAC connects to the throttle pipe body - so that dirt and sand do not get into the mounting hole. The sensor is secured with two screws, which must be unscrewed with a screwdriver or ratchet.
Design and principle of operation of “e-gas”
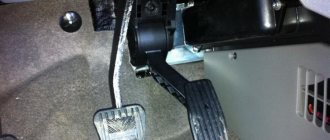
By default, an electronic pedal consists of: an electronic damper, the pedal itself, and a chip sensor on the pedal itself. The operating scheme is as follows: when you press the accelerator, the electronic sensor amplifies the signal and transmits it to the electronic control unit (ECU), which indicates to the damper the degree of opening or closing.
But sometimes these transitions can't always keep up with the software. In this regard, sensors often produce “correlation violation” errors. There are two ways to cure the problem of “dampness” in the system:
A complete replacement of the chip board with a re-flashed (unlocked) one with the ability to set modes “for yourself” and regulate emissions into the atmosphere yourself. As a rule, in such situations, drivers return to Euro-2 standards
and increase engine power by 15-20% plus;
The electronic gas pedal on the VAZ 2114 is replaced with a similar new one, but the chip remains the same - not hacked, which means it will not break again for the first time.
The electronic gas pedal has been installed on VAZ cars since 2011. Up to this point, a conventional cable gas pedal assembly with TPS and IAC sensors was installed.
The process of setting up the carburetor "VAZ 2106" ("VAZ 2107")
The vast majority of Volzhsky Automobile Plant cars of the sixth and seventh models are equipped with an Ozone emulsion carburetor.
This is a factory option, and therefore this type of carburetor will be considered in the tuning instructions below.
Attention! Before adjusting the VAZ 2107 (VAZ 2106) carburetor, be sure to make several preliminary adjustments:
adjust valve clearances;
set the ignition angle to ensure that the moment of opening the contacts of the breaker-distributor advances the start of movement of the piston of the first cylinder at TDC by 1 0 .
So, let's begin the process of setting up the carburetor, consisting of the following steps (observance of the specified sequence is mandatory!):
Adjusting the throttle valve drive.
Setting up the launcher.
Adjusting the level of the fuel mixture in the float chamber.
Adjusting the “idle” mode using the “quality” and “quantity” screws.
Disadvantages of e-gas
- A slight dullness at start - the engine's responsiveness to the gas pedal becomes slower by about half a second. (Treated by installing a spur).
- Lack of deep tuning capabilities. To get serious about tuning your car, you will have to get rid of the e-gas and switch to a regular cable. (The cost of alterations is approximately 20 thousand rubles: brains, sensors, wiring, pedal). True, they are now slowly learning to flash e-gas, configure turbo engines and compressors. The future is naturally in e-gas.
- The first models with e-gas often have problems.
Problems associated with e-gas
As mentioned above, the first models with e-gas encountered common problems:
- revolutions float;
- pedal sticks;
- The car presses on the gas itself.
Important! AvtoVAZ has issued an information letter that talks about the need to adapt the electronic gas pedal after replacing the controller or removing the battery: How to adapt e-gas?
How to replace IAC on a 1.6-liter injection engine
A feature of the maintenance of the 1.6-liter injection power unit installed under the hood of the VAZ 2114 is the somewhat difficult process of replacing the IAC.
Video about the reasons for the incorrect operation of the IAC
If on a one and a half liter engine everything is done literally in one breath - in accordance with the instructions above - then a more powerful engine requires more attention.
Replacement procedure:
- Remove the engine protective cover;
- Loosen the clamp securing the air filter pipe and disconnect the corrugation itself;
- Next, you need to unhook the throttle cable;
- By unscrewing two nuts 13, the entire throttle assembly is removed;
- To avoid getting into the engine once again, you can clean the throttle valve with carburetor cleaner;
- The wires are disconnected from the sensor, 2 screws are unscrewed;
- Installation of a new sensor and assembly are carried out in the reverse order.
How does e-gas work?
E-gas consists of 3 elements: Electronic damper, sensor on the pedal, and the pedal itself.
The sensor on the pedal takes into account the degree to which the driver presses the gas and transmits the data to the ECU. The computer, in turn, sends a signal to the electric damper, which opens the way for air to enter the engine. Also in cars with an electronic pedal, frequency-type air flow sensors are used.
Each sensor is powered separately to the computer. In case of the slightest voltage deviation from the norm, errors appear: (P2122-P2123, P2127-P2128, P2138).
Buy a new regulator or try to clean the old one - which is better?
If you are sure that the idle speed sensor is not working, you can try cleaning it. To do this, it is better to use WD-40 or carburetor cleaner. After disconnecting the wires from the sensor, simply clean the connector contacts using a cotton swab moistened with cleaner. It is also important to rinse the locking needle with an aerosol stream. This often helps, and the engine stops running at idle, and the car behaves normally at intersections and when braking for some more time.
Preparing for replacement: choosing a sensor and the necessary tools
Before you begin replacing the sensor, you need to carry out some preparatory measures. First of all, this is the purchase of a new spare part. You can find quite a lot of sensors on the market that are suitable for the VAZ-2114, but there are two of the most proven and affordable :
Idle speed sensor
- sensor from K3TA – marking: 2112-1148300-04 ;
- and a device from OMEGA - marking: 2112-114830 .
Important! When choosing, pay attention to the needle rod exit indicator; it should not exceed 23 mm.
You will need few tools for replacement. In most cases, it is enough:
- pairs of Phillips screwdrivers of different sizes;
- wrench size “13”;
- any unnecessary rag;
- lubricantsWD-40;
- and cleaner for carburetors or injectors.
Important! Use only clean tools that are in good condition. Otherwise, there is a risk of damaging the edges of the fasteners of some components that are removed during replacement.
Adjusting the VAZ 2109 clutch
Tightening the VAZ 2114 clutch
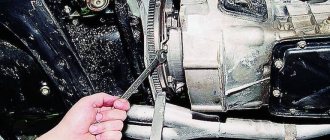
This operation is carried out in cases where there are shocks or friction when the clutch is engaged, slight slipping of the clutch when the clutch is pressed for a long time, the clutch “drives”.
To adjust the clutch, do the following:
- Place the gearshift lever in the “neutral” position.
- We dismantle the clutch housing.
- We dismantle the bearing. Repair operations should be carried out smoothly and calmly, because the bearing may be defective.
- Rotate the adjusting fastener until the pedal movement is completely adjusted.
- We test the clutch for oil leaks, otherwise the clutch mechanism may slip. To eliminate this problem, it is necessary to treat the coupling with a degreasing compound.
How much does it cost to repair an IAC at home?
Cleaning the idle speed sensor will help bring it back to life.
Despite the fact that the instruction manual for the “fourteenth” Lada does not recommend looking for an alternative to replacing the IAC, many people practice repairing the sensor with their own hands. To carry out restoration work, you need:
- remove the sensor, clean its body and pull out the 3 fixing pins (rivets);
- after this, you can carefully remove the case - so as not to disturb the solder spots of the wires;
- very often the cause of failure is a broken contact - in this case, you need to solder the wiring in place and cover the soldering area with varnish (to prevent corrosion);
- Another problem may be air leakage through the idle air sensor - to solve the problem, you can use a regular sealant, which will eliminate the gaps in the IAC housing;
- If it turns out that the needle guide drive or the guide itself is worn out, repairs will not be possible.
All repair options will require purely symbolic investments, as well as a minimum of time and experience of the performer.
